
Home>Home & Furniture>Bedroom>How to Transform a Low Ceiling Small Attic Room – DIY Ideas
Bedroom
How to Transform a Low Ceiling Small Attic Room – DIY Ideas
Published: July 9, 2024
Discover creative DIY ideas to transform your low ceiling small attic room into a functional and stylish space. Maximize every inch with our expert tips and tricks!
(Many of the links in this article redirect to a specific reviewed product. Your purchase of these products through affiliate links helps to generate commission for Twigandthistle.com, at no extra cost. Learn more)
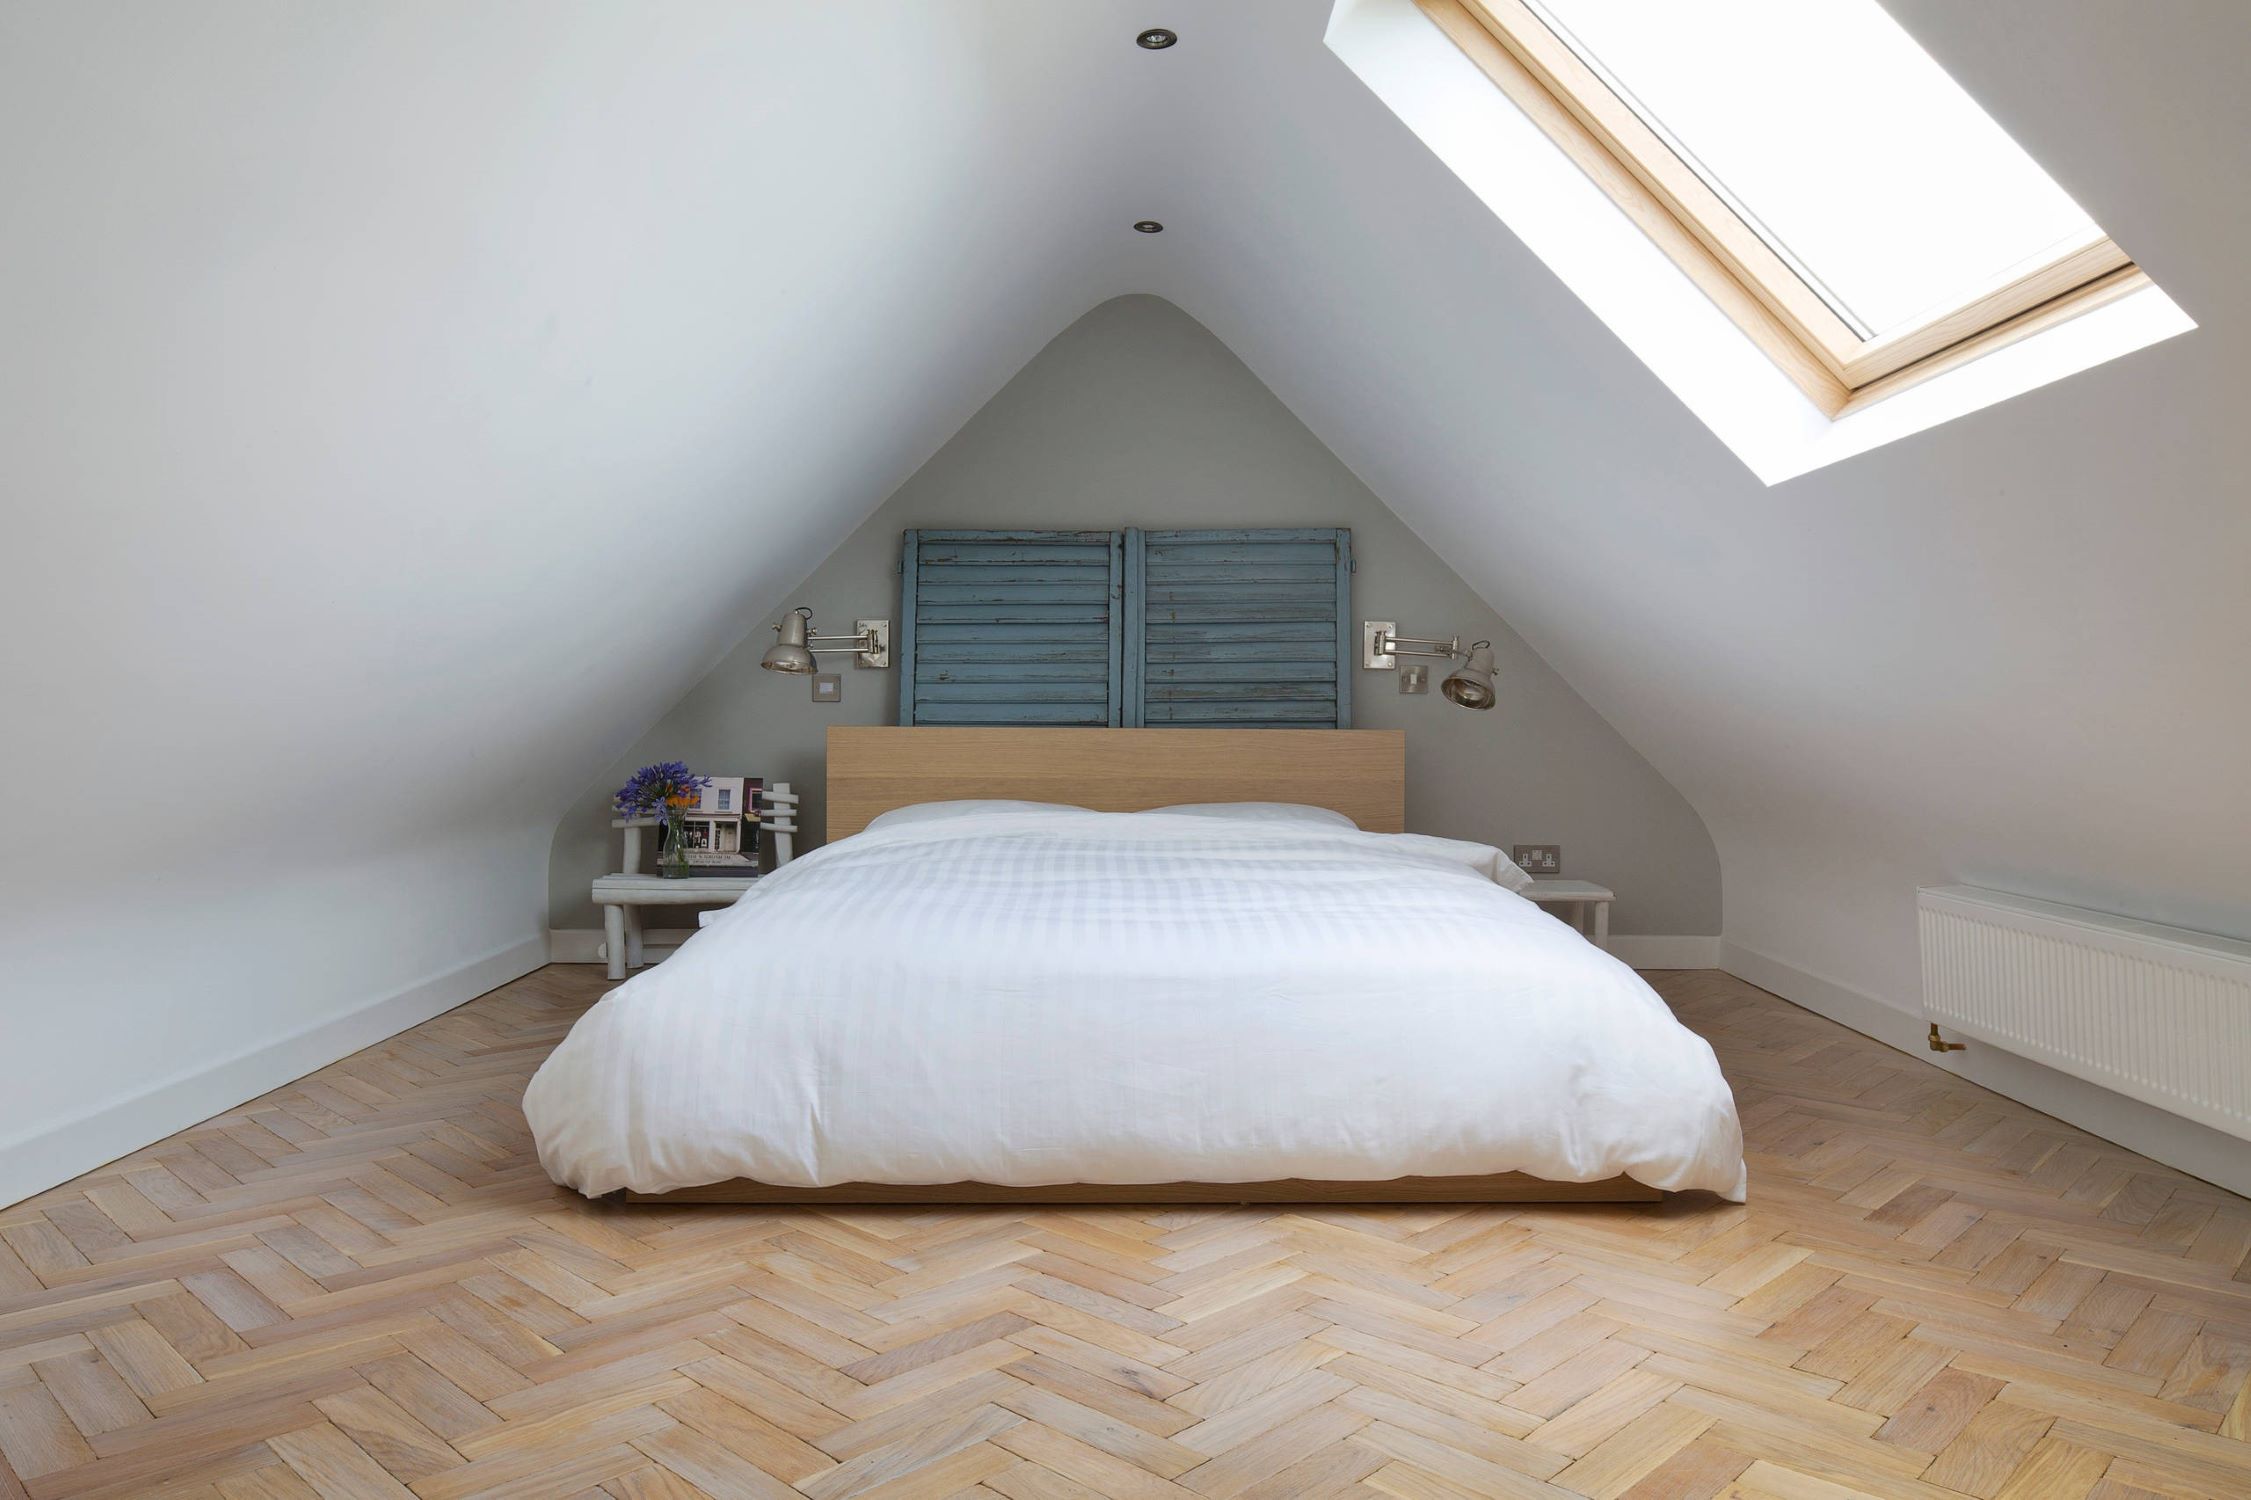
Transforming a small attic room with a low ceiling can seem challenging, yet it offers a great opportunity for creativity. Whether you want to create a cozy reading nook, a compact home office, or an extra bedroom, simple DIY ideas can maximize your space. Low ceilings don't have to limit your design choices. With the right approach, you can make even the tiniest attic room feel spacious and inviting. We'll explore clever tips and tricks that can help you turn your attic into a functional and stylish area, no matter its size or shape.
Getting Ready for Your Attic Makeover
Measure the Space: Use a tape measure to get accurate dimensions of the attic. Note the height, width, and length. This helps in planning furniture placement and any structural changes.
Clear the Area: Remove any stored items, old furniture, or debris. A clean space makes it easier to work and visualize the transformation.
Inspect for Issues: Check for leaks, mold, or pests. Fix any problems before starting the project to avoid future damage.
Plan the Layout: Sketch a rough layout of where you want furniture, storage, and any built-ins. Consider the low ceiling when planning to avoid bumping heads.
Gather Materials: Collect all necessary tools and materials. This might include paint, brushes, rollers, wood for shelving, and any decorative items.
Set Up a Workspace: Create a designated area for cutting, painting, and assembling. Ensure it’s well-ventilated and has good lighting.
Safety Gear: Wear safety goggles, gloves, and a mask if dealing with dust or chemicals. Keep a first aid kit nearby for minor injuries.
Lighting and Ventilation: Plan for adequate lighting and ventilation. Consider installing skylights or additional windows if possible.
Electrical Check: Ensure the attic has proper wiring for lights and outlets. Hire a professional if needed to avoid electrical hazards.
Floor Protection: Lay down drop cloths or old sheets to protect the floor from paint spills or scratches.
Organize Tools: Keep tools like hammers, screwdrivers, and drills within easy reach. Use a tool belt or a portable toolbox for convenience.
Test Paint Colors: Apply small patches of paint on the walls to see how they look in different lighting before committing to a color.
Plan for Storage: Think about built-in shelves or under-eave storage to maximize space. Measure twice before cutting any materials.
Ventilation: Ensure proper airflow to avoid stuffiness. Portable fans or small air conditioning units can help.
Emergency Exits: Make sure there’s a safe way to exit the attic in case of emergency. This could be a window or a retractable ladder.
Essential Tools and Materials
- Measuring Tape: Essential for measuring dimensions accurately.
- Pencil and Notepad: For jotting down measurements and ideas.
- Stud Finder: Helps locate wall studs for secure mounting.
- Level: Ensures everything is straight and even.
- Utility Knife: Useful for cutting materials like drywall or insulation.
- Drywall: Needed for creating or repairing walls.
- Drywall Screws: Secure drywall to studs.
- Screwdriver or Drill: For driving screws into place.
- Insulation: Keeps the room warm in winter and cool in summer.
- Insulation Knife: Cuts insulation to fit between studs.
- Paint and Brushes/Rollers: Adds color and personality to the room.
- Painter's Tape: Keeps paint lines clean and sharp.
- Drop Cloths: Protects floors and furniture from paint splatters.
- Lighting Fixtures: Brightens up the space; consider recessed lighting for low ceilings.
- Extension Cord: Provides power to tools and lighting.
- Ladder or Step Stool: Reaches high places safely.
- Flooring Material: Options include carpet, laminate, or hardwood.
- Flooring Adhesive or Nails: Secures flooring in place.
- Trim and Molding: Adds a finished look to walls and ceilings.
- Caulk and Caulk Gun: Seals gaps and cracks.
- Sandpaper or Sander: Smooths surfaces before painting.
- Storage Solutions: Shelves, bins, or built-in cabinets maximize space.
- Ventilation Fan: Improves air circulation and reduces humidity.
- Decorative Items: Personal touches like rugs, curtains, and artwork make the room cozy.
How Much Time and Skill You Need
Skill Level: Intermediate
Time Required: 2-3 weekends
Steps:
- Clear Out the Space: Remove any items stored in the attic. This will take about 2-4 hours.
- Insulate and Ventilate: Install insulation and ensure proper ventilation. This step could take 1-2 days.
- Install Flooring: Lay down new flooring, such as laminate or carpet. Expect this to take 1-2 days.
- Add Lighting: Install recessed lighting or wall sconces. This can be done in 4-6 hours.
- Paint Walls and Ceiling: Choose light colors to make the space feel larger. Painting will take 1-2 days.
- Furnish and Decorate: Add furniture and decor that fits the space. This final step will take 1-2 days.
Important Tips:
- Use multi-functional furniture to save space.
- Maximize storage with built-in shelves or under-bed storage.
- Keep the color palette light to make the room feel more open.
Transform Your Attic: Step-by-Step Guide
Clear Out the Space
- Remove all items from the attic.
- Clean the area thoroughly, including dusting and vacuuming.
Inspect and Repair
- Check for any leaks or damage.
- Repair any issues with the roof, insulation, or flooring.
Plan the Layout
- Measure the dimensions of the room.
- Sketch a layout considering furniture placement and storage.
Improve Lighting
- Install recessed lighting or track lighting to save space.
- Add a skylight if possible for natural light.
Insulate and Ventilate
- Add insulation to keep the room comfortable.
- Ensure proper ventilation to prevent moisture buildup.
Install Flooring
- Choose lightweight flooring like laminate or vinyl.
- Install the flooring according to manufacturer instructions.
Paint the Walls and Ceiling
- Use light colors to make the space feel larger.
- Consider painting the ceiling a lighter shade than the walls.
Add Storage Solutions
- Use built-in shelves or cabinets to maximize space.
- Utilize under-eave storage for less frequently used items.
Furnish the Room
- Select compact furniture to fit the space.
- Arrange furniture to allow for easy movement.
Decorate
- Add personal touches like artwork or plants.
- Use mirrors to create the illusion of more space.
Final Touches
- Install curtains or blinds for privacy.
- Add rugs or cushions for comfort.
Handy Tips for a Successful Project
Maximize vertical space by using tall, narrow furniture like bookshelves or wardrobes. Install built-in storage under the eaves to make use of awkward spaces. Use light colors on walls and ceilings to make the room feel larger and more open. Add mirrors to reflect light and create an illusion of more space. Opt for low-profile furniture like platform beds or floor cushions to keep the room from feeling cramped.
Common mistakes to avoid include overloading the room with furniture, which can make it feel even smaller. Avoid dark colors that can make the space feel closed in. Don't forget proper insulation; attics can get very hot or cold. Skipping this step can make the room uncomfortable.
Alternatives for materials or methods include using multi-functional furniture like a sofa bed or a desk that folds into the wall. Instead of traditional drywall, consider lightweight paneling to save on weight and installation time. For flooring, laminate or vinyl planks are easier to install and maintain than hardwood.
Budgeting for Your Attic Transformation
Insulation: $200 - $500. Use fiberglass batts for a cheaper option.
Drywall: $150 - $300. Drywall sheets cost around $10 each. You might need 10-20 sheets.
Flooring: $200 - $600. Laminate flooring is budget-friendly, costing about $1 - $3 per square foot.
Paint: $50 - $100. A gallon of paint costs around $20 - $50. You might need 2 gallons.
Lighting: $50 - $200. LED lights are energy-efficient and cost-effective.
Furniture: $200 - $800. Second-hand furniture can save money.
Tools: $100 - $300. Basic tools include a hammer, screwdriver, utility knife, and paintbrushes.
Total Cost: $950 - $2,800.
Personalize Your Attic Space
Paint Colors: Use light colors like white, cream, or pastel shades to make the space feel larger. For a cozy vibe, try warm tones like soft yellows or light browns.
Flooring: Install light-colored wood or laminate flooring to brighten the room. For a more rustic look, consider reclaimed wood. Carpet tiles can add warmth and are easy to install.
Furniture: Opt for low-profile furniture to keep the space open. Built-in storage solutions can maximize space. Use multi-functional furniture like a sofa bed or a storage ottoman.
Lighting: Install recessed lighting to avoid taking up headroom. String lights or fairy lights can add a whimsical touch. Use floor lamps with adjustable heads for targeted lighting.
Ceiling Treatments: Paint the ceiling a lighter color than the walls to create an illusion of height. Add exposed beams for a rustic look or use ceiling tiles for a textured effect.
Windows and Curtains: Use sheer curtains to let in natural light. Install skylights if possible to brighten the room. Roman shades can add a touch of elegance without overwhelming the space.
Wall Decor: Hang mirrors to reflect light and make the room appear larger. Use floating shelves for storage without taking up floor space. Consider a gallery wall with small, framed art pieces.
Textiles: Add throw pillows and blankets in various textures to make the room cozy. Use a large area rug to define the space and add warmth.
Plants: Incorporate small potted plants or hanging plants to bring life into the room. Choose low-maintenance varieties like succulents or snake plants.
Doors: Replace traditional doors with sliding barn doors or pocket doors to save space. Use glass doors to allow light to flow between rooms.
Storage: Utilize under-bed storage or built-in cabinets to keep clutter at bay. Install wall-mounted hooks for hanging items like coats or bags.
Eco-Friendly Ideas for Your Attic
Reclaimed Wood: Use reclaimed wood for flooring or wall paneling. It adds character and reduces the need for new materials.
Low-VOC Paints: Choose low-VOC (Volatile Organic Compounds) paints. These are better for indoor air quality and the environment.
Insulation: Opt for eco-friendly insulation like recycled denim or cellulose. These materials are effective and sustainable.
Natural Light: Maximize natural light with skylights or solar tubes. This reduces the need for artificial lighting during the day.
Second-Hand Furniture: Furnish the attic with second-hand or upcycled furniture. This saves money and reduces waste.
Energy-Efficient Windows: Install energy-efficient windows to keep the room warm in winter and cool in summer, reducing energy consumption.
Bamboo Flooring: Consider bamboo flooring. Bamboo grows quickly and is a renewable resource.
LED Lighting: Use LED lights. They consume less energy and last longer than traditional bulbs.
Recycled Materials: Incorporate recycled materials for decor, like glass or metal accents. This adds a unique touch while being eco-friendly.
Natural Fabrics: Choose natural fabrics like cotton or linen for curtains and upholstery. These are biodegradable and have a smaller environmental footprint.
Making the Most of Your Attic Space
Transforming a low ceiling small attic room can be a fun project. By using clever storage solutions, light colors, and multi-functional furniture, you can create a cozy, functional space. Don't forget to maximize natural light with skylights or windows. Mirrors can also help make the room feel larger. Low-profile furniture keeps the space open, while built-in shelves save floor space. Rugs and soft furnishings add warmth and comfort. Remember, the key is to keep things simple and uncluttered. With a bit of creativity and effort, your attic can become a favorite spot in your home. Happy DIY-ing!
How can I make my low ceiling attic room feel more spacious?
Use light colors on walls and ceilings to create an airy feel. Mirrors can also help reflect light and give the illusion of more space. Keep furniture low to the ground to avoid making the ceiling seem even lower.
What are some good storage solutions for a small attic room?
Built-in shelves and under-bed storage are great for maximizing space. You can also use multi-functional furniture like ottomans with storage inside or beds with drawers underneath.
How do I deal with awkward angles and sloped ceilings?
Embrace the unique shape by using custom-built furniture that fits the space. Floating shelves can work wonders on sloped walls, and bean bags or floor cushions can make cozy seating areas.
What kind of lighting works best in a low ceiling attic?
Recessed lighting or track lighting can provide ample light without taking up headroom. Wall sconces and floor lamps are also good options to keep the ceiling area clear.
How can I improve ventilation in a small attic room?
Install a ceiling fan or a small ventilation system to keep air circulating. Opening windows and using portable fans can also help keep the room fresh.
What flooring options are best for a small attic?
Light-colored wood or laminate flooring can make the room feel larger. Carpet tiles are another good option because they’re easy to install and can add warmth to the space.
How can I make the attic room cozy and inviting?
Use soft textiles like rugs, throw blankets, and cushions to add warmth. Personal touches like photos, artwork, and plants can make the space feel more homey.