
Home>Home & Furniture>Bedroom>DIY End of Bed Bench Tutorial
Bedroom
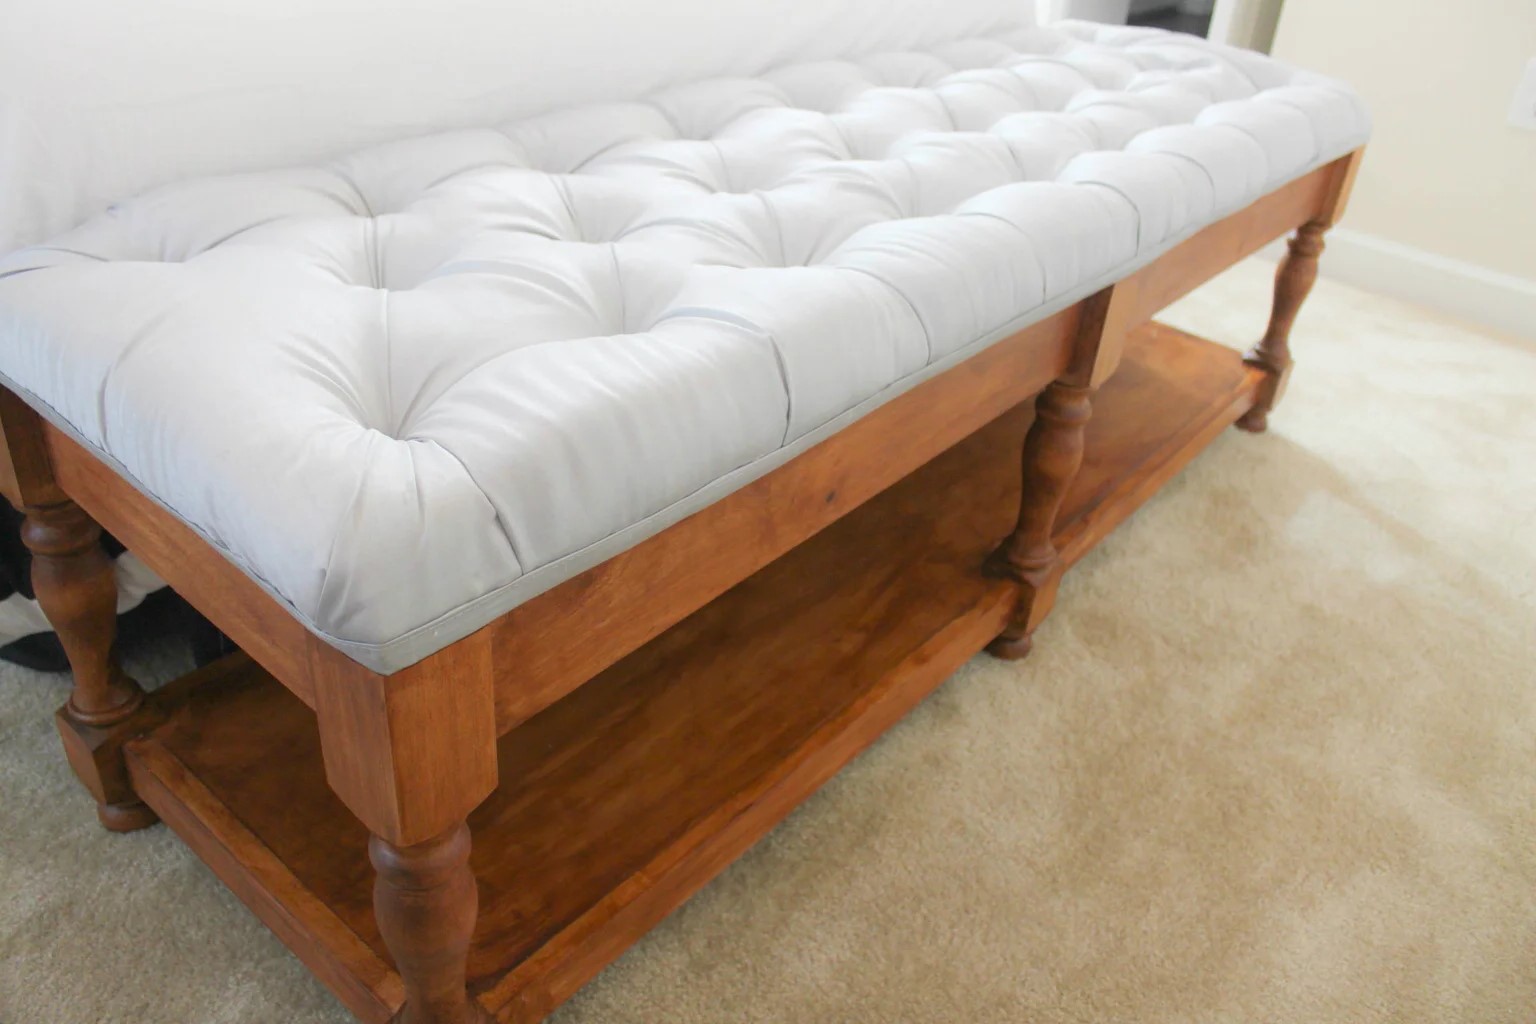
DIY End of Bed Bench Tutorial
Published: July 9, 2024
Create a stylish DIY end of bed bench with our step-by-step tutorial. Perfect for adding extra seating and storage to your bedroom. Easy, affordable, and customizable!
(Many of the links in this article redirect to a specific reviewed product. Your purchase of these products through affiliate links helps to generate commission for Twigandthistle.com, at no extra cost. Learn more)
Ever thought about adding a chic bench at the foot of your bed? Building your own end of bed bench can be a fun, rewarding project. Not only does it offer extra seating, but it can also provide additional storage or a spot to lay out clothes for the next day. With a few basic tools and some materials, you can craft a stylish, personalized bench that complements your bedroom decor. This guide will walk you through the steps to create a functional and beautiful bench, perfect for making your bedroom even cozier. Time to roll up those sleeves!
Getting Ready for the Project
Gather Materials: Get wood, screws, nails, a saw, a drill, sandpaper, paint or stain, and fabric if you plan to upholster.
Measure and Cut: Measure the space at the end of your bed. Cut wood pieces to match these dimensions.
Safety Gear: Wear safety goggles, gloves, and a dust mask to protect yourself from wood dust and sharp tools.
Clear Workspace: Ensure your workspace is clean and well-lit. Remove any clutter to avoid accidents.
Pre-Drill Holes: Pre-drill holes in the wood to prevent splitting when you screw pieces together.
Sand Wood: Sand all wood pieces to smooth out rough edges and surfaces.
Lay Out Pieces: Arrange all cut pieces on the floor to ensure they fit together correctly before assembling.
Check Tools: Make sure your drill, saw, and other tools are in good working condition.
Ventilation: If painting or staining, work in a well-ventilated area to avoid inhaling fumes.
Plan Upholstery: If adding fabric, cut it to size and have a staple gun ready for attaching it to the bench.
Materials and Tools Checklist
Materials:
- Wood Planks: Used for the bench seat and legs. Choose sturdy wood like oak or pine.
- Foam Padding: Provides comfort for the seat. Usually 2-3 inches thick.
- Fabric: Covers the foam padding. Pick a durable, stylish fabric.
- Batting: Adds extra cushioning between the foam and fabric.
- Wood Screws: Holds the wood pieces together. Ensure they are the right length for your wood thickness.
- Wood Glue: Adds extra strength to the joints.
- Sandpaper: Smooths the wood surfaces. Use medium to fine grit.
- Paint or Stain: Finishes the wood. Choose a color that matches your room decor.
- Staple Gun and Staples: Secures the fabric and batting to the wood.
Tools:
- Measuring Tape: Ensures accurate measurements for cutting wood and fabric.
- Saw: Cuts the wood planks to the desired size. A handsaw or circular saw works well.
- Drill: Makes holes for screws and helps drive them in.
- Screwdriver: Tightens screws if a drill isn't available.
- Hammer: Useful for tapping wood pieces into place.
- Clamps: Holds wood pieces together while the glue dries.
- Scissors: Cuts fabric and batting to size.
- Paintbrush or Roller: Applies paint or stain evenly on the wood.
These materials and tools will help you build a sturdy, comfortable bench for the end of your bed.
Required Skills and Time Commitment
Skill Level: Intermediate
Time Required: Approximately 4-6 hours
- Gather Materials: 30 minutes
- Cut Wood: 1 hour
- Assemble Frame: 1.5 hours
- Attach Legs: 1 hour
- Sand and Paint: 1.5 hours
Detailed Step-by-Step Guide
Gather Materials:
- Wooden boards (for the bench top and legs)
- Screws
- Wood glue
- Sandpaper
- Paint or stain
- Paintbrush
- Measuring tape
- Saw
- Drill
Measure and Cut:
- Measure the desired length and width for the bench top.
- Cut the wooden boards to size using a saw.
- Cut four legs to the same height.
Assemble the Frame:
- Attach the legs to the bench top using screws and wood glue.
- Ensure legs are evenly spaced and aligned.
Secure the Legs:
- Reinforce the legs by adding cross supports between them.
- Use screws and wood glue for added stability.
Sand the Bench:
- Smooth all surfaces with sandpaper.
- Focus on edges and corners to avoid splinters.
Paint or Stain:
- Apply paint or stain to the bench.
- Allow it to dry completely before use.
Final Touches:
- Inspect the bench for any rough spots.
- Sand and touch up paint or stain as needed.
Place the Bench:
- Position the bench at the end of your bed.
- Ensure it is stable and level.
Helpful Tips and Tricks
Measure Twice, Cut Once: Always double-check your measurements before cutting any materials. This saves time and prevents waste.
Use Quality Wood: Opt for hardwood like oak or maple. They are durable and look great when stained or painted.
Pre-Drill Holes: Prevent wood from splitting by pre-drilling holes for screws. This makes assembly smoother.
Sand Smoothly: Sand all surfaces before assembly. This ensures a polished finish and prevents splinters.
Sturdy Legs: Ensure the legs are strong and well-attached. Wobbly legs can make the bench unsafe.
Upholstery Tips: If adding a cushion, use high-density foam for comfort. Wrap it in batting before covering with fabric for a plush look.
Common Mistakes to Avoid:
- Skipping Sanding: Rough surfaces can ruin the final look and feel.
- Incorrect Measurements: Misjudging dimensions can lead to an ill-fitting bench.
- Weak Joints: Not securing joints properly can make the bench unstable.
Material Alternatives:
- Instead of hardwood, plywood can be used for a budget-friendly option.
- For upholstery, vinyl can be a durable alternative to fabric, especially in homes with kids or pets.
Budgeting for Your Bench
Materials:
- Wood (Pine or Plywood): $30-$50
- Foam Cushion: $20-$40
- Fabric (for upholstery): $10-$20
- Batting: $5-$10
- Wood Screws: $5
- Wood Glue: $5
- Sandpaper: $5
- Paint or Stain: $10-$20
Tools:
- Saw (Hand saw or Circular saw): $30-$100 (if not already owned)
- Drill: $30-$60 (if not already owned)
- Staple Gun: $10-$20
- Measuring Tape: $5
- Paintbrushes: $5-$10
Total Estimated Cost:
- With Tools: $165-$345
- Without Tools: $90-$150
Budget-Friendly Alternatives:
- Repurpose Old Wood: Free or low cost
- Use Old Cushions or Pillows: Free or low cost
- Thrift Store Fabric: $5-$10
- Borrow Tools from friends or family: Free
Creative Variations and Customizations
Materials: Instead of using wood, try metal or bamboo for a different look. Upholstery can be swapped with leather, velvet, or canvas.
Colors: Paint the bench in bold colors like navy blue, emerald green, or mustard yellow. For a more subtle look, use pastels or neutral tones like beige, gray, or white.
Styles: For a rustic feel, use distressed wood and iron accents. A modern style can be achieved with sleek lines and minimalist design. Vintage style might include ornate legs and floral fabrics.
Storage: Add storage by incorporating a hinged lid or drawers underneath the seat. This can be useful for storing blankets, shoes, or books.
Legs: Change the legs to give the bench a different character. Use hairpin legs for a mid-century modern look, turned wooden legs for a traditional style, or block legs for a contemporary feel.
Cushioning: Vary the cushion thickness for comfort. Use memory foam for a plush feel or a firmer foam for more support. Add tufting or quilting for extra detail.
Decorative Elements: Attach trim, nailhead accents, or buttons to the upholstery for added flair. Use stencils or decals to create patterns on the wood or metal surfaces.
Fabric Patterns: Choose geometric, floral, or abstract patterns for the fabric. Mix and match different patterns for a bohemian look.
Handles: Install handles on the sides for easy moving. Use leather straps, metal handles, or wooden grips.
Backrest: Add a backrest for more comfort. This can be a simple wooden plank, an upholstered cushion, or a woven design.
Eco-Friendly Project Tips
Reclaimed wood works great for the bench frame. Old pallets or barn wood can be sanded and stained for a rustic look. Eco-friendly paint or stain, free from harmful chemicals, adds color without harming the environment.
For the cushion, use organic cotton or recycled fabric. Old curtains or tablecloths can be repurposed. Natural latex foam or recycled foam makes a comfy seat.
Instead of new screws or nails, reuse hardware from old furniture. Non-toxic glue ensures safety and sustainability.
Upcycling an old coffee table or bench saves resources and gives new life to old items. Bamboo is another sustainable option for legs or accents.
Avoid plastic whenever possible. Choose metal or wood for durability and eco-friendliness.
Local thrift stores often have materials that can be repurposed. This reduces waste and supports the community.
Solar-powered tools can make the project even greener.
Compost sawdust and wood scraps or use them in the garden.
Plan carefully to minimize waste and make the most of your materials.
Your DIY Masterpiece Awaits
You've got all the tools and steps to build a fantastic end-of-bed bench. From selecting the right materials to adding those final touches, you're ready to create something both functional and stylish. Remember, the key is to take your time and enjoy the process. Mistakes might happen, but they’re just part of the learning curve. With a bit of patience and creativity, you’ll have a bench that not only looks great but also adds a personal touch to your space. So, roll up your sleeves, gather your supplies, and get started. Your bedroom will thank you for the new addition, and you'll have the satisfaction of knowing you built it yourself. Happy building!
What materials do I need to build an end-of-bed bench?
You'll need wood (like pine or oak), screws, wood glue, sandpaper, paint or stain, foam, fabric, and a staple gun. A saw, drill, and measuring tape will also come in handy.
How long will it take to complete the project?
It usually takes a weekend. Cutting and assembling the wood might take a few hours, but you'll need time for the glue to dry and the paint or stain to set.
Do I need any special skills?
Basic carpentry skills are helpful. If you can measure, cut, and drill, you should be good to go. Watching a few online tutorials can also boost your confidence.
Can I customize the bench size?
Absolutely! Measure the space at the end of your bed and adjust the dimensions accordingly. Just make sure it fits comfortably in your room.
What type of fabric should I use for the cushion?
Choose a durable fabric like canvas or upholstery fabric. These materials hold up well to daily use and come in various colors and patterns.
How do I attach the cushion to the bench?
Cut the foam to fit the bench top, wrap it in fabric, and use a staple gun to secure the fabric underneath. Make sure it's tight and smooth.
Can I add storage to the bench?
Yes, you can! Build a hollow bench with a hinged lid or add drawers underneath. This way, you get extra storage space for blankets or shoes.