
Home>Home & Furniture>Bathroom>How to Replace a Bathroom Fan
Bathroom
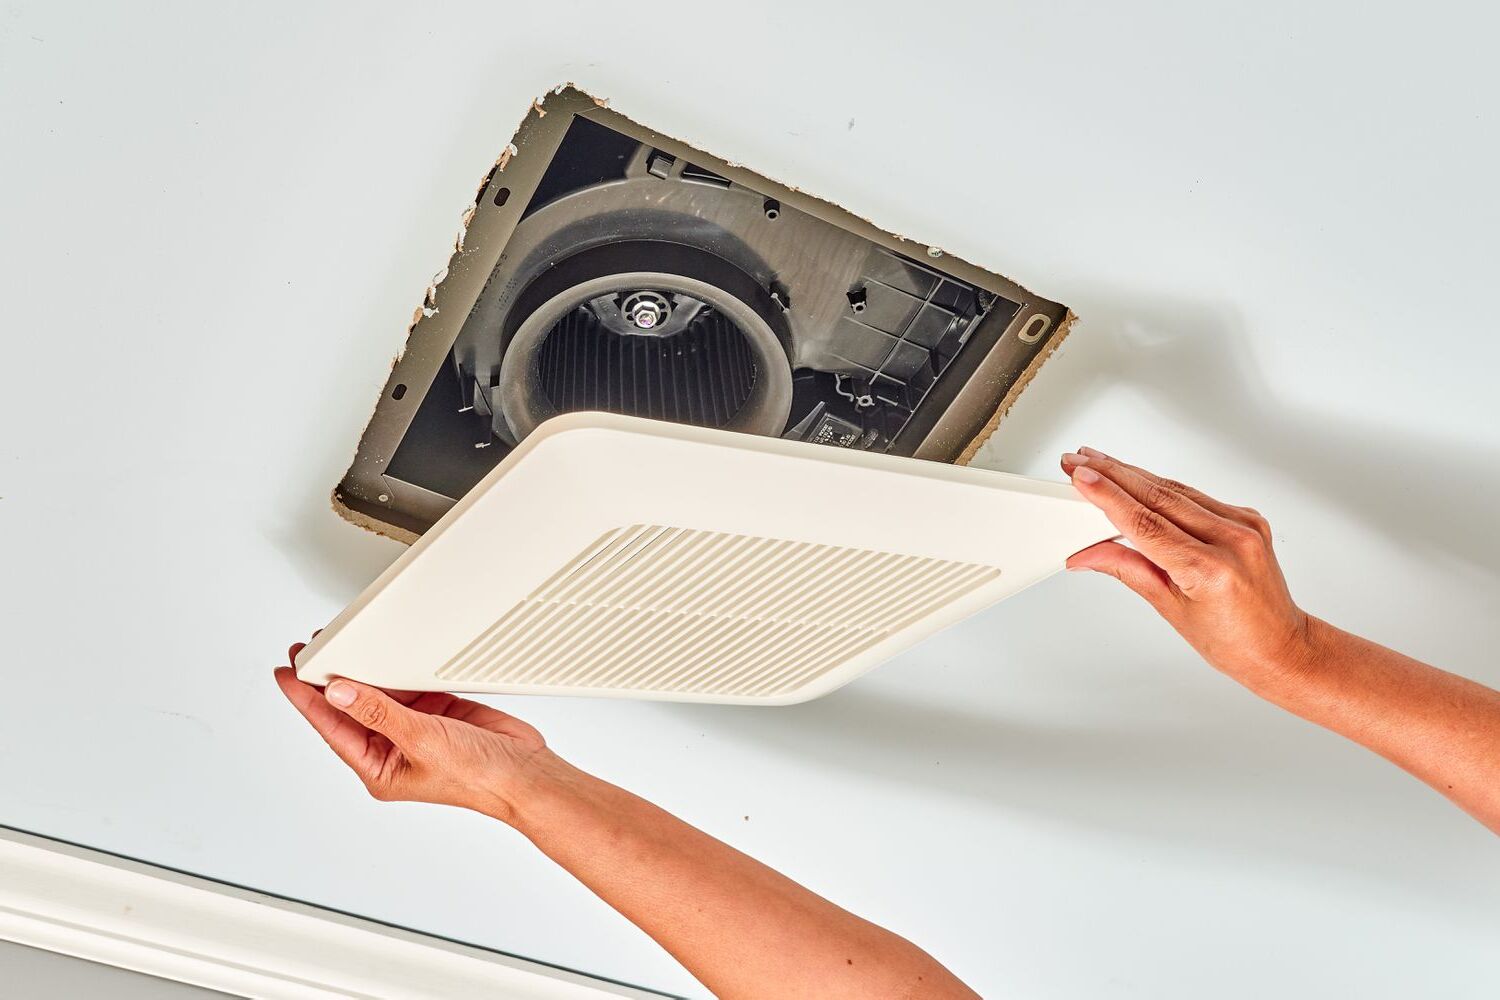
How to Replace a Bathroom Fan
Published: July 11, 2024
Learn how to replace a bathroom fan with our step-by-step guide. Improve ventilation, reduce moisture, and enhance your bathroom's air quality with these easy tips.
(Many of the links in this article redirect to a specific reviewed product. Your purchase of these products through affiliate links helps to generate commission for Twigandthistle.com, at no extra cost. Learn more)
Replacing a bathroom fan might seem tricky, but with some basic tools and a bit of patience, it's manageable. A new fan can improve air circulation, reduce moisture, and prevent mold. Plus, it can be quieter and more efficient than an older model. This guide will help you understand the steps needed to swap out that old, noisy fan for a new, efficient one. Whether you're a seasoned DIYer or just starting, you'll find this task rewarding. Ready to breathe easier and enjoy a quieter bathroom? Let's get started!
Getting Ready for the Project
- Turn off the power: Switch off the circuit breaker to avoid any electrical accidents.
- Gather tools and materials: You'll need a screwdriver, wire nuts, a voltage tester, a new fan, and possibly a utility knife.
- Prepare the workspace: Clear the area around the fan. Lay down a drop cloth to catch debris.
- Check for proper ventilation: Ensure the new fan matches the size and capacity of the old one.
- Wear safety gear: Use safety goggles and gloves to protect yourself from dust and sharp edges.
- Test for live wires: Use a voltage tester to confirm the power is off before touching any wires.
- Remove the old fan: Unscrew and disconnect the old fan carefully, noting the wiring setup.
- Inspect the ductwork: Make sure the duct is clean and free of obstructions.
- Measure the opening: Ensure the new fan fits the existing hole or be prepared to adjust it.
- Read the new fan's instructions: Familiarize yourself with the installation steps specific to your new fan model.
Gather Your Materials and Tools
- New Bathroom Fan: The main component to replace the old one.
- Screwdriver: Used to remove screws from the old fan and install the new one.
- Drill: Helps in making holes for mounting the new fan if needed.
- Wire Strippers: Essential for stripping the insulation off wires.
- Wire Nuts: Connects and secures electrical wires.
- Utility Knife: Cuts through drywall or insulation.
- Measuring Tape: Ensures accurate measurements for fitting the new fan.
- Ladder: Provides access to the ceiling.
- Pencil: Marks measurements and positions.
- Safety Glasses: Protects eyes from debris.
- Dust Mask: Prevents inhalation of dust.
- Work Gloves: Protects hands from sharp edges and debris.
- Voltage Tester: Ensures power is off before working with electrical components.
- Duct Tape: Seals any gaps in the ductwork.
- Caulk: Seals around the fan housing to prevent air leaks.
Skill Level and Time Commitment
Skill Level: Intermediate
Time Required: 2-3 hours
- Turn off power: Safety first. Switch off the circuit breaker.
- Remove old fan: Unscrew and disconnect wiring.
- Install new fan: Follow manufacturer instructions.
- Connect wiring: Match wires and secure connections.
- Test new fan: Turn power back on and check operation.
Follow These Steps
Turn Off Power: Switch off the circuit breaker for the bathroom to avoid any electrical hazards.
Remove Old Fan Cover: Use a screwdriver to take off the cover of the existing fan. Usually, it just snaps off or has a couple of screws.
Disconnect Wiring: Carefully disconnect the wires from the old fan. Note which wires connect where by taking a photo or labeling them.
Remove Old Fan: Unscrew or unclip the old fan from the ceiling. You might need to cut around the fan housing if it's sealed with paint or caulk.
Prepare New Fan: Follow the manufacturer's instructions to assemble the new fan if needed. Make sure you have all the parts ready.
Install New Fan Housing: Fit the new fan housing into the ceiling. Secure it with screws or clips as per the instructions.
Connect Wiring: Match the wires from the new fan to the existing wires in the ceiling. Typically, black to black, white to white, and green or bare wire to ground.
Attach Fan Motor: Secure the fan motor inside the housing. Ensure it's firmly in place.
Test the Fan: Turn the power back on at the circuit breaker. Switch on the fan to make sure it works properly.
Install New Cover: Attach the new fan cover. It should snap into place or be secured with screws.
Seal Edges: Use caulk to seal any gaps around the fan housing to prevent air leaks.
Clean Up: Dispose of the old fan and any debris. Clean the area around the new fan.
Helpful Tips and Tricks
Turn off the power at the circuit breaker before starting. Use a headlamp for better visibility in tight spaces. Measure the existing fan to ensure the new one fits the same opening. Have a helper hold the ladder steady while you work. Use a stud finder to locate joists if you need to cut a new hole. Seal gaps around the fan housing with caulk to prevent air leaks. Check the ductwork for any blockages or damage. Use a flexible duct if the existing one is too short or damaged. Label wires before disconnecting them to make reinstallation easier. Test the fan before securing it to ensure it works properly.
Common mistakes to avoid: Forgetting to turn off the power can lead to electric shock. Not measuring the existing fan can result in buying the wrong size. Skipping the step of sealing gaps can cause air leaks and reduce efficiency. Ignoring ductwork issues can lead to poor ventilation. Not labeling wires can make reinstallation confusing and time-consuming.
Alternatives for materials or methods: Instead of using a rigid duct, opt for a flexible duct for easier installation. If you don't have a stud finder, use a small nail to probe for joists. For sealing gaps, weatherstripping can be an alternative to caulk. If you can't find a fan that fits the existing hole, consider using a fan cover plate to hide any gaps.
Estimating the Cost
Bathroom Fan: $50-$150
Screwdriver Set: $10-$20
Wire Nuts: $2-$5
Electrical Tape: $3-$5
Drywall Saw: $10-$15
Ladder: $30-$50 (if you don't have one)
Duct Tape: $5-$10
Safety Glasses: $5-$10
Work Gloves: $5-$10
Total Cost: $120-$275
Budget-Friendly Alternatives:
Bathroom Fan: $50
Screwdriver Set: $10
Wire Nuts: $2
Electrical Tape: $3
Drywall Saw: $10
Ladder: Borrow from a friend
Duct Tape: $5
Safety Glasses: $5
Work Gloves: $5
Total Cost: $90
Different Ways to Customize
Alternative materials can make a big difference. Instead of a standard plastic fan cover, try a metal grille for a more modern look. For a quieter operation, consider a fan with insulated ducting.
Colors can also change the vibe. Choose a fan cover in white for a clean, classic look, or go with black for a sleek, contemporary feel. Some fans even come in brushed nickel or bronze finishes.
Styles vary widely. A low-profile fan blends seamlessly into the ceiling, while a decorative fan can add a touch of elegance. Some fans come with built-in lights or even Bluetooth speakers for added functionality.
For a more eco-friendly option, look for fans with energy-efficient motors. These use less electricity and can save money on utility bills.
Smart fans are another great customization. These can be controlled via a smartphone app, allowing adjustments to speed and timer settings from anywhere.
Humidity-sensing fans automatically turn on when moisture levels rise, perfect for preventing mold and mildew in bathrooms without windows.
Installation methods can also vary. If the current fan is hardwired, consider switching to a plug-in model for easier future replacements. For those who want to avoid cutting into the ceiling, a wall-mounted fan might be a better option.
Noise levels are important too. Fans are rated in sones; a lower sone rating means a quieter fan. Choose a fan with a rating of 1.5 sones or lower for a peaceful bathroom experience.
Lastly, think about airflow capacity. Measured in CFM (cubic feet per minute), a higher CFM rating means better ventilation. For larger bathrooms, a fan with at least 80 CFM is recommended.
Eco-Friendly Suggestions
Turn off the power to the bathroom fan at the circuit breaker. Remove the old fan carefully, keeping any screws or brackets that can be reused. Check if the existing ductwork and wiring are in good condition; reuse them if possible.
Choose an energy-efficient fan with a low noise level. Look for models with the Energy Star label. Consider fans made from recycled materials or those with eco-friendly certifications.
Use a recycled metal or plastic vent cover. Install the new fan using the saved screws and brackets. Seal any gaps around the fan with non-toxic caulk to prevent air leaks.
Recycle the old fan parts at a local recycling center. Dispose of any non-recyclable parts responsibly. Opt for LED bulbs if the fan includes a light fixture, as they consume less energy and last longer.
Maintain the fan regularly by cleaning the vent cover and motor to ensure it runs efficiently. This reduces the need for frequent replacements, saving resources.
Your Bathroom's New Best Friend
Replacing a bathroom fan isn't rocket science. With the right tools and a bit of patience, anyone can tackle this project. First, make sure to turn off the power. Safety first, folks! Next, remove the old fan and disconnect the wiring. Measure the new fan to ensure it fits the existing space. If it doesn't, some adjustments might be needed. Install the new fan, connect the wiring, and secure it in place. Finally, turn the power back on and test your work. A properly installed fan will keep your bathroom fresh and free from moisture. Plus, you'll have the satisfaction of knowing you did it yourself. So, grab your tools, follow these steps, and enjoy a job well done. Happy DIY-ing!
How do I know if my bathroom fan needs replacing?
If your fan makes loud noises, doesn't remove moisture, or has stopped working, it's time for a new one.
What tools will I need to replace a bathroom fan?
You'll need a screwdriver, wire stripper, utility knife, and possibly a drill. A voltage tester is also handy for safety.
Can I replace a bathroom fan myself, or do I need a professional?
You can do it yourself if you're comfortable with basic electrical work. If not, hiring an electrician is safer.
How long does it take to replace a bathroom fan?
It usually takes about 1-2 hours, depending on your experience and the fan's complexity.
Do I need to turn off the power before replacing the fan?
Yes, always turn off the power at the circuit breaker to avoid electrical shock.
What should I do if the new fan doesn't fit the existing hole?
You might need to adjust the hole size with a drywall saw or use an adapter kit.
How do I ensure the new fan is properly vented?
Make sure the ductwork is securely connected and vents outside, not into the attic or another space.