
Home>Create & Decorate>DIY & Crafts>How To Make A Paper Airplane
DIY & Crafts
How To Make A Paper Airplane
Published: February 22, 2024

Senior Editor in Create & Decorate, Kathryn combines traditional craftsmanship with contemporary trends. Her background in textile design and commitment to sustainable crafts inspire both content and community.
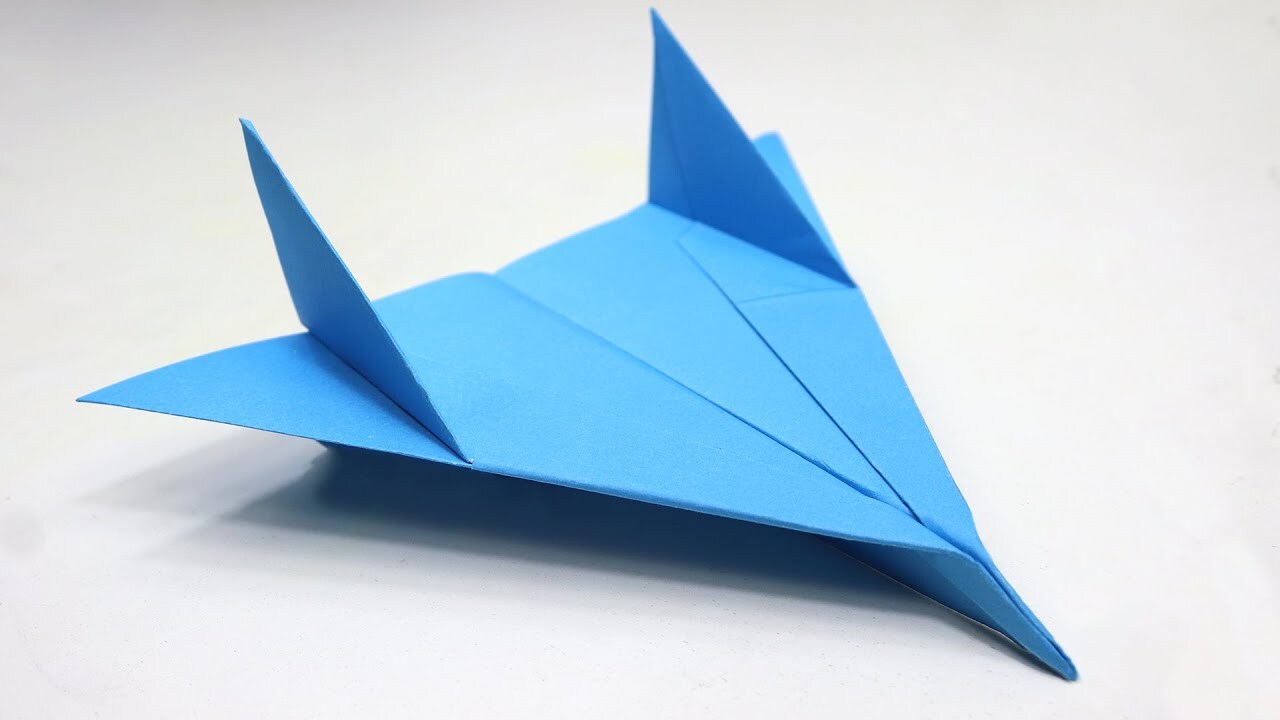
Learn how to make a paper airplane with easy step-by-step instructions. Perfect DIY & Crafts project for kids and adults.
(Many of the links in this article redirect to a specific reviewed product. Your purchase of these products through affiliate links helps to generate commission for Twigandthistle.com, at no extra cost. Learn more)
Introduction
Making a paper airplane is a timeless craft that has brought joy to countless individuals, young and old. The simple act of folding a piece of paper into a sleek flying machine has a magical quality that sparks creativity and wonder. Whether you're a novice or a seasoned paper pilot, the process of crafting a paper airplane is a delightful journey that culminates in the exhilarating moment of watching it soar through the air.
The art of creating paper airplanes is not only a fun pastime but also a fascinating blend of aerodynamics and creativity. As you embark on this DIY adventure, you'll discover the joy of transforming a humble sheet of paper into a marvel of engineering that defies gravity. With a few simple folds and strategic creases, you'll breathe life into your creation, ready to unleash its airborne prowess.
In this guide, we'll delve into the intricacies of crafting a paper airplane, exploring each step with precision and enthusiasm. From selecting the perfect paper to mastering the art of folding and shaping, you'll embark on a journey that combines artistry and engineering. By the end of this tutorial, you'll have a magnificent paper airplane ready to take flight, embodying the spirit of ingenuity and imagination.
So, gather your materials, clear a spacious area, and prepare to embark on a captivating adventure of creativity and flight. Let's dive into the world of paper airplanes and unleash the joy of crafting a simple yet extraordinary flying marvel.
Materials Needed
To embark on the exhilarating journey of crafting a paper airplane, you'll need a few essential materials to ensure a seamless and enjoyable crafting experience. Before you begin, gather the following items:
-
Paper: The foundation of your paper airplane is, of course, the paper itself. Opt for a standard sheet of letter-sized paper, commonly known as 8.5 x 11 inches. While plain white paper is a popular choice, feel free to explore colored or patterned options to add a touch of personality to your creation.
-
Scissors: While not always necessary, having a pair of scissors on hand can be helpful for trimming the paper to the desired size or making precise cuts for advanced designs. If you're working with younger crafters, adult supervision is recommended when using scissors.
-
Ruler: Although not mandatory, a ruler can be beneficial for ensuring straight and accurate folds. It can also aid in measuring specific dimensions if you're aiming for precision in your paper airplane design.
-
Markers or Colored Pencils: If you've opted for plain white paper, markers or colored pencils can be used to decorate and personalize your paper airplane. Adding designs, patterns, or even a custom logo can infuse your creation with a unique flair.
-
Clear Workspace: Before diving into the crafting process, ensure that you have a clear and spacious area to work in. A clutter-free workspace will allow you to maneuver the paper and make precise folds without any hindrances.
By gathering these materials, you'll set the stage for an engaging and rewarding paper airplane crafting session. With these essentials at your disposal, you're ready to embark on the next steps of folding, shaping, and ultimately launching your paper airplane into the boundless skies.
Step 1: Folding the Paper
The first step in crafting a paper airplane is the foundational art of folding the paper. This stage sets the groundwork for the aerodynamic structure that will ultimately take flight. As you embark on this journey of precision and creativity, follow these steps to master the art of folding your paper into a sleek and formidable flying machine.
-
Select Your Paper: Begin by choosing a standard letter-sized sheet of paper, measuring 8.5 x 11 inches. Ensure that the paper is crisp and free from any creases or tears, as a smooth surface will contribute to the aerodynamic performance of your paper airplane.
-
Orientation: Lay the paper flat on a clean, spacious surface, ensuring that it is positioned in a landscape orientation. This orientation provides ample space for the subsequent folds and creases, setting the stage for a well-balanced and stable paper airplane.
-
Fold in Half: With the paper laid horizontally, carefully fold it in half lengthwise. Ensure that the edges align perfectly, and then run your fingers along the crease to create a firm and precise fold. This initial fold forms the central axis of your paper airplane, laying the groundwork for symmetrical wings and a streamlined body.
-
Unfold and Fold the Corners: After folding the paper in half, unfold it to reveal the central crease. With the paper still in the landscape orientation, fold the top corners inward, aligning them with the central crease. This step forms the iconic triangular shape at the front of the paper airplane, essential for aerodynamic stability and lift.
-
Create the Wings: Once the corners are folded inward, refold the paper along the initial crease, effectively tucking the triangular flaps inside. This action forms the wings of your paper airplane, establishing the crucial surface area that will generate lift and keep your creation airborne.
By meticulously following these steps, you'll master the art of folding the paper, laying the groundwork for a well-crafted and aerodynamically sound paper airplane. With the foundation set, you're ready to proceed to the next stage of shaping and refining your airborne marvel.
Step 2: Creating the Wings
After folding the paper in half and forming the central crease, you are now ready to embark on the crucial stage of creating the wings of your paper airplane. This step is pivotal in determining the aerodynamic prowess and flight stability of your creation. By meticulously shaping the wings, you'll pave the way for a soaring and graceful flight experience.
To begin, ensure that the paper is still in the landscape orientation, with the central crease serving as the guiding axis for your folding endeavors. With precision and care, follow these steps to craft the wings of your paper airplane:
-
Fold the Wings: Starting from the top edge of the paper, carefully fold each side diagonally towards the central crease. The angle of the fold will influence the lift and stability of your paper airplane, so strive for symmetry and precision in this step. As you fold each side, ensure that the edges align with the central crease, creating a harmonious and balanced wing structure.
-
Refine the Fold: Once the initial diagonal folds are complete, run your fingers along the creases to secure the folds firmly in place. Smooth and well-defined creases are essential for maintaining the structural integrity of the wings, ensuring that they can withstand the forces of flight without faltering.
-
Adjust for Symmetry: Take a moment to assess the symmetry and alignment of the wings. Ensuring that both sides are equally proportioned and aligned with the central crease will contribute to the stability and balance of your paper airplane. Make any necessary adjustments to achieve a harmonious and symmetrical wing configuration.
-
Reinforce the Folds: To fortify the wings and enhance their rigidity, reinforce the folds by running your fingernail or a straight edge along the creases. This additional step will bolster the structural integrity of the wings, preparing them to withstand the dynamic forces encountered during flight.
By meticulously crafting the wings of your paper airplane, you're laying the foundation for a graceful and stable flight experience. The symmetrical and aerodynamically sound wings will harness the forces of lift and drag, propelling your creation through the air with elegance and precision.
With the wings taking shape, you're now poised to venture into the next stage of crafting the tail section, a pivotal element that contributes to the stability and trajectory of your paper airplane. As you progress through each step, you're inching closer to witnessing the triumphant flight of your meticulously crafted paper marvel.
Step 3: Making the Tail
As you venture into the intricate process of crafting a paper airplane, the creation of the tail section emerges as a pivotal step that contributes to the aerodynamic stability and flight trajectory of your airborne marvel. The tail serves as a crucial element in balancing the forces of lift and drag, ensuring that your paper airplane glides through the air with grace and precision. With meticulous attention to detail and a touch of creativity, you'll embark on the journey of shaping the tail section, infusing your creation with the finesse and aerodynamic prowess essential for a triumphant flight experience.
To commence the tail crafting process, ensure that the paper airplane is positioned with the wings facing upward, providing a clear canvas for the tail formation. With precision and care, follow these steps to master the art of shaping the tail section of your paper airplane:
-
Fold the Tail: Begin by folding the rear portion of the paper airplane upward, perpendicular to the wings. This fold should extend vertically from the rear edge of the wings, creating a distinct and upright tail section. The height of the tail can influence the stability and flight characteristics of your paper airplane, so strive for a balanced and proportionate fold.
-
Refine the Fold: After forming the initial vertical fold, run your fingers along the crease to secure it firmly in place. A well-defined and crisp fold is essential for maintaining the structural integrity of the tail, ensuring that it can withstand the aerodynamic forces encountered during flight.
-
Adjust for Balance: Take a moment to assess the balance and symmetry of the tail section in relation to the wings. The alignment and proportion of the tail play a crucial role in stabilizing the flight trajectory of your paper airplane. Make any necessary adjustments to achieve a harmonious and balanced tail configuration, ensuring that it complements the aerodynamic profile of the wings.
-
Reinforce the Fold: To fortify the tail section and enhance its rigidity, reinforce the fold by running your fingernail or a straight edge along the crease. This additional step will bolster the structural integrity of the tail, preparing it to withstand the dynamic forces encountered during flight.
By meticulously crafting the tail section of your paper airplane, you're infusing your creation with the finesse and aerodynamic stability essential for a graceful and triumphant flight experience. The harmonious interplay of the wings and tail will harness the forces of lift and drag, propelling your paper marvel through the air with elegance and precision.
With the tail section taking shape, you're now poised to venture into the final stage of making any necessary adjustments and fine-tuning your paper airplane for its imminent flight. As you progress through each step, you're inching closer to witnessing the triumphant flight of your meticulously crafted paper marvel.
Step 4: Final Adjustments
As you approach the culminating stage of crafting your paper airplane, the process of making final adjustments holds the key to refining its aerodynamic profile and ensuring a seamless flight experience. With precision and attention to detail, you'll embark on a pivotal phase that encompasses fine-tuning, balance adjustments, and meticulous craftsmanship. This stage serves as the gateway to unleashing the full potential of your paper marvel, elevating it from a static creation to a dynamic airborne entity.
To commence the final adjustments, carefully assess the overall structure of your paper airplane, paying close attention to the alignment of the wings, the symmetry of the tail section, and the overall balance of the aircraft. Here are the essential steps to guide you through this critical phase:
-
Wing Alignment: Verify that the wings are perfectly symmetrical and aligned with the central crease. Balanced wing configuration is essential for achieving stable and graceful flight characteristics. Make any necessary adjustments to ensure uniformity and precision in the wing alignment.
-
Tail Symmetry: Assess the vertical alignment and proportion of the tail section in relation to the wings. The tail plays a pivotal role in stabilizing the flight trajectory, and symmetrical tail configuration is crucial for achieving aerodynamic stability. Fine-tune the tail section to ensure harmonious integration with the overall aerodynamic profile.
-
Weight Distribution: Consider the weight distribution of your paper airplane. If necessary, make subtle adjustments to redistribute the weight by folding or unfolding specific sections. Achieving optimal weight distribution contributes to improved flight performance and stability.
-
Surface Smoothness: Run your fingers along the wings and tail section to ensure that the surfaces are smooth and free from unintended creases or irregularities. A streamlined and flawless surface profile minimizes air resistance and enhances the aerodynamic efficiency of your paper airplane.
-
Aerodynamic Folds: Verify that all folds are crisp and well-defined, contributing to the structural integrity of the aircraft. Reinforce any folds that may require additional rigidity, ensuring that your paper airplane can withstand the forces encountered during flight.
By meticulously executing these final adjustments, you're elevating your paper airplane to its optimal state, poised for a triumphant flight experience. Each subtle refinement and meticulous tweak contributes to the overall aerodynamic prowess and flight stability of your creation, setting the stage for a captivating and graceful journey through the boundless skies.
With the final adjustments complete, you're now ready to unleash the full potential of your meticulously crafted paper marvel. The culmination of your efforts and attention to detail has transformed a simple sheet of paper into a soaring embodiment of ingenuity and creativity. As you prepare to launch your paper airplane into the air, revel in the satisfaction of crafting a masterpiece that defies gravity and embodies the spirit of flight.
Conclusion
In the realm of DIY crafts, the art of crafting a paper airplane stands as a timeless and enchanting pursuit that transcends generations. As we conclude this immersive journey of paper airplane crafting, we reflect on the profound fusion of creativity, precision, and aerodynamics that has unfolded before us. From the humble beginnings of a flat sheet of paper to the meticulously crafted airborne marvel poised for flight, this endeavor has encapsulated the essence of ingenuity and imagination.
As we gaze upon the meticulously folded wings, the gracefully shaped tail, and the symmetrical profile of our paper airplane, we are reminded of the boundless joy and wonder that emanate from the act of creation. Each fold, crease, and adjustment has been a testament to the artistry and engineering prowess that converge in the realm of paper aviation. The journey of crafting a paper airplane transcends the physical act of folding paper; it embodies the spirit of exploration, experimentation, and the unyielding pursuit of flight.
With each meticulous adjustment and fine-tuning, we have imbued our paper airplane with the potential for graceful flight and airborne elegance. The culmination of our efforts has yielded a creation that defies gravity, poised to soar through the air with a sense of purpose and wonder. As we prepare to launch our paper marvel into the boundless skies, we carry with us the joy of creation and the anticipation of witnessing our creation take flight.
In the act of crafting a paper airplane, we have not only delved into the intricacies of aerodynamics and structural design but also embarked on a journey of boundless creativity and unfettered imagination. The simple act of folding a piece of paper has ignited a spark of wonder within us, reminding us of the profound beauty that resides in the convergence of art and science.
As we bid farewell to this immersive crafting experience, we carry with us the enduring spirit of exploration and the joy of creation. The journey of crafting a paper airplane serves as a poignant reminder that within the realm of DIY crafts, the possibilities are as limitless as the boundless skies that beckon our creations. With a newfound appreciation for the art of paper aviation, we embrace the enduring allure of crafting and the timeless joy of witnessing our creations take flight.