
Home>Create & Decorate>DIY & Crafts>How To Make A Farm Table
DIY & Crafts
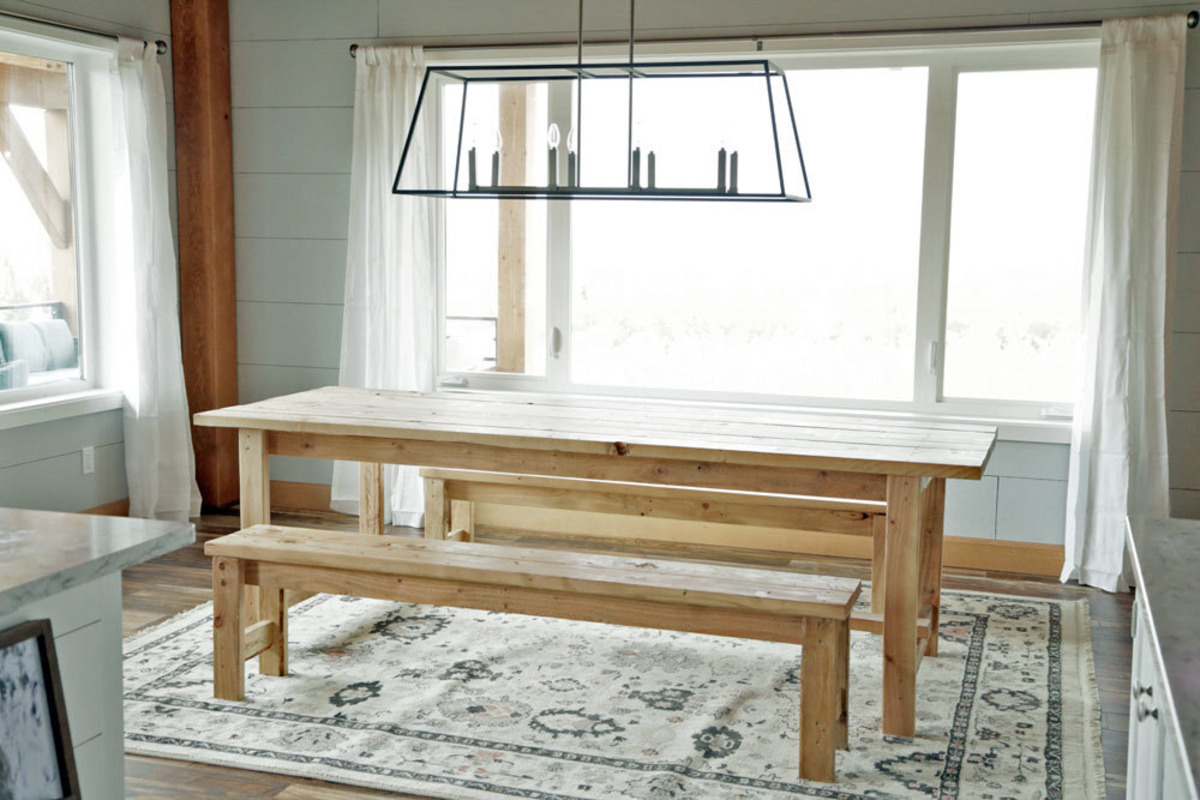
How To Make A Farm Table
Published: June 18, 2024

Senior Editor in Create & Decorate, Kathryn combines traditional craftsmanship with contemporary trends. Her background in textile design and commitment to sustainable crafts inspire both content and community.
Learn how to make a beautiful farm table with our DIY & Crafts guide. Create a stunning centerpiece for your home with our step-by-step instructions.
(Many of the links in this article redirect to a specific reviewed product. Your purchase of these products through affiliate links helps to generate commission for Twigandthistle.com, at no extra cost. Learn more)
Introduction
So, you want to learn how to make a farm table, huh? Well, you've come to the right place! Making your own farm table can be a rewarding and cost-effective project. Whether you're a seasoned DIY enthusiast or a beginner looking to dive into the world of woodworking, crafting a farm table can be a fulfilling endeavor. In this guide, we'll walk you through the step-by-step process of creating your very own farm table from scratch. From selecting the right wood to adding the finishing touches, you'll soon be on your way to enjoying meals and making memories around a table that you built with your own two hands. Let's get started!
Choosing the Right Wood
When it comes to crafting a farm table, selecting the right wood is crucial. The ideal wood for a farm table is one that is sturdy, durable, and visually appealing. Here are some popular options to consider:
1. Oak
- Oak is a classic choice for farm tables due to its strength and prominent grain patterns. It is also readily available, making it a practical option for DIY projects.
2. Pine
- If you're aiming for a more rustic look, pine can be a great choice. It's relatively affordable and has a charming, knotty appearance that adds character to the table.
3. Maple
- Known for its durability and attractive grain, maple is another excellent option for a farm table. It's a hardwood that can withstand daily use and is relatively easy to work with.
4. Reclaimed Wood
- For those looking to add a touch of history and sustainability to their farm table, reclaimed wood is a fantastic choice. It not only contributes to a unique, weathered look but also promotes environmental consciousness.
Before making a decision, consider the overall aesthetic you want to achieve and the level of maintenance you're willing to commit to. Each type of wood has its own characteristics, so choose one that aligns with your preferences and fits the style of your home.
Cutting and Preparing the Wood
Now that you've chosen the perfect wood for your farm table, it's time to roll up your sleeves and get ready to cut and prepare the wood. This step is crucial as it sets the foundation for the entire table-building process. Here's a detailed guide on how to tackle this essential phase:
-
Measure Twice, Cut Once: Before making any cuts, carefully measure the dimensions for the tabletop and table base. Use a tape measure and a carpenter's square to ensure accuracy. Remember the age-old adage: "measure twice, cut once."
-
Use the Right Tools: Equip yourself with the necessary tools for cutting the wood, such as a circular saw, table saw, or a handsaw, depending on the thickness of the wood and your comfort level with the tools. Additionally, a miter saw can be handy for making angled cuts, especially if your table design incorporates intricate details.
-
Safety First: Prioritize safety by wearing protective gear, including safety goggles and gloves. If you're using power tools, follow the manufacturer's instructions and take necessary precautions to prevent accidents.
-
Cutting the Tabletop: Start by cutting the selected wood to the desired dimensions for the tabletop. Ensure that the edges are straight and smooth. If you're creating a rectangular table, make precise 90-degree cuts at the corners. For a round or oval table, consider using a jigsaw to achieve the desired shape.
-
Preparing the Table Base: Similarly, cut the wood for the table base according to your design plans. Whether it's traditional four-legged or a more intricate trestle base, ensure that the pieces are cut accurately to maintain stability and balance.
-
Sand the Edges: Once the wood is cut, use sandpaper to smooth out any rough edges and surfaces. This step is essential for achieving a professional finish and ensuring that the tabletop and base fit together seamlessly during assembly.
By meticulously cutting and preparing the wood, you're laying the groundwork for a sturdy and visually appealing farm table. Take your time with this phase, as precision and attention to detail will contribute to the overall quality of the finished product.
Assembling the Tabletop
Assembling the tabletop is a pivotal step in the construction of your farm table. This is where individual pieces of wood come together to form a cohesive and functional surface. Follow these steps to ensure a seamless assembly process:
-
Lay Out the Wood: Begin by laying out the cut pieces of wood for the tabletop in the desired arrangement. This allows you to visualize the final look and make any necessary adjustments before securing the pieces together.
-
Glue and Clamp: Apply a thin, even layer of wood glue along the edges of each piece of wood that will be joined together. Use clamps to hold the pieces firmly in place while the glue sets. Ensure that the tabletop remains flat and level during this process.
-
Add Reinforcement: For added strength, consider adding wooden dowels or biscuits to the joints. These can help align the wood pieces and prevent shifting over time. Use a doweling jig or biscuit joiner to create precise slots for inserting the dowels or biscuits.
-
Secure with Screws or Pocket Holes: In addition to glue, you can reinforce the tabletop by driving screws through the underside of the table. Alternatively, using a pocket hole jig, create pocket holes in the apron of the table to securely attach the tabletop without visible screws on the surface.
-
Allow for Drying Time: Once the tabletop is assembled, allow sufficient time for the wood glue to dry and cure. Follow the manufacturer's recommendations for the specific type of glue used. This typically ranges from a few hours to overnight.
-
Trim and Sand: After the glue has fully dried, trim any excess wood from the edges of the tabletop to achieve a clean, uniform appearance. Use a belt sander or hand plane to level the surface and remove any imperfections. Finish by sanding the entire tabletop to achieve a smooth and even texture.
By carefully assembling the tabletop, you're creating a strong and visually appealing centerpiece for your farm table. The attention to detail during this phase will contribute to the overall quality and longevity of the finished table.
Building the Table Base
Building the table base is a critical aspect of constructing a farm table, as it provides the structural support and stability for the tabletop. Here's a detailed guide on how to build a sturdy and visually appealing table base:
-
Select the Design: Before diving into the construction process, decide on the design of the table base. Whether it's a traditional four-legged base, a trestle base, or a pedestal style, ensure that the design complements the overall aesthetic of the table and aligns with your functional requirements.
-
Cut the Base Components: Using the selected wood, cut the components for the table base according to the chosen design. Pay close attention to the measurements and angles to ensure that the pieces fit together seamlessly. If the design includes intricate details or curves, consider using a jigsaw or band saw for precision cuts.
-
Assemble the Base Structure: Begin by assembling the individual components of the base, such as the legs, stretchers, and aprons. Use wood glue and screws to securely join the pieces together. Ensure that the base structure is square and level to prevent wobbling once the tabletop is attached.
-
Reinforce the Joints: To enhance the strength and stability of the base, consider reinforcing the joints with wooden dowels or mortise and tenon joinery. These methods provide additional support and prevent the base from loosening over time, especially in high-traffic areas.
-
Attach the Tabletop Supports: Depending on the chosen design, attach the necessary supports for securing the tabletop to the base. This may involve adding cleats or brackets to the base structure to ensure a secure connection with the tabletop. Use a level to confirm that the supports are positioned evenly.
-
Test for Stability: Once the base structure is assembled, test its stability by placing it on a flat surface. Check for any wobbling or unevenness and make adjustments as needed. A stable and level base is essential for the overall functionality and longevity of the farm table.
-
Add Finishing Touches: Before proceeding to the next phase, sand the base components to achieve a smooth and uniform surface. This is also the ideal time to apply any desired finishes, such as paint, stain, or a protective sealant, to enhance the appearance and durability of the base.
By meticulously building the table base, you're laying the foundation for a durable and visually appealing farm table. The attention to detail during this phase contributes to the overall quality and stability of the finished table.
Sanding and Finishing
Sanding and finishing are crucial steps in the farm table construction process, as they contribute to the overall appearance, smoothness, and durability of the table. Here's a detailed guide on how to approach the sanding and finishing phase:
-
Prepare the Surface: Before sanding, ensure that the tabletop and base are free of any dust, debris, or irregularities. Use a tack cloth to remove any lingering particles and create a clean surface for the sanding process.
-
Choose the Right Sandpaper: Select the appropriate grit of sandpaper based on the condition of the wood. Begin with a coarser grit, such as 80 or 100, to remove any rough spots, imperfections, or mill marks. Gradually progress to finer grits, such as 150 and 220, to achieve a smooth and uniform surface.
-
Sand with the Grain: Always sand in the direction of the wood grain to avoid creating visible scratches or marks. Use long, even strokes with the sandpaper, applying consistent pressure to ensure an even finish.
-
Round the Edges: To prevent sharp edges and corners, use a sanding block or sandpaper to gently round the edges of the tabletop and base. This not only enhances the tactile comfort of the table but also adds a subtle aesthetic touch.
-
Remove Dust Between Grits: After sanding with each grit, use a clean cloth or a soft-bristled brush to remove the sanding dust before progressing to the next finer grit. This prevents the accumulation of debris and ensures a smoother finish.
-
Apply a Finish: Once the sanding process is complete, it's time to apply the desired finish to the table. Whether it's a clear varnish to showcase the natural beauty of the wood, a stain to add color and depth, or a protective sealant to enhance durability, carefully follow the manufacturer's instructions for application.
-
Even Application: Use a brush, cloth, or applicator pad to apply the finish evenly across the tabletop and base. Ensure that the finish is spread in thin, uniform coats to prevent drips, streaks, or uneven drying.
-
Allow for Drying Time: After applying the finish, allow the tabletop and base to dry completely according to the recommended drying time specified by the manufacturer. This typically ranges from a few hours to a day, depending on the type of finish used.
-
Lightly Sand Between Coats: If multiple coats of finish are required, lightly sand the surface between coats using a fine-grit sandpaper. This promotes adhesion between layers and helps achieve a smooth, professional finish.
-
Final Buffing: Once the final coat has dried, lightly buff the tabletop and base with a fine steel wool or a polishing pad to achieve a smooth, lustrous finish. This step enhances the sheen and tactile appeal of the table.
By meticulously sanding and finishing the tabletop and base, you're elevating the visual appeal and longevity of your farm table. The attention to detail during this phase contributes to the overall quality and aesthetic charm of the finished table.
Final Touches and Maintenance Tips
After completing the construction and finishing of your farm table, it's time to add those final touches that enhance its overall appeal and ensure its long-term durability. Here are some essential final touches and maintenance tips to consider:
-
Add Protective Pads: To safeguard the tabletop from scratches and dents, consider attaching felt or rubber pads to the bottom of items that will be placed on the table, such as vases, decorative pieces, and tableware. This simple addition can prevent unnecessary wear and tear.
-
Install Table Protectors: If your farm table will be subjected to heavy use, especially during meal times, consider using table protectors or heat-resistant mats to shield the surface from hot dishes, spills, and potential damage. This proactive measure can prolong the life of your table.
-
Regular Cleaning: Establish a routine for cleaning and maintaining your farm table. Use a soft, damp cloth to wipe away dust and spills, and avoid harsh cleaning agents that can damage the finish. Periodically apply a furniture polish or wax to maintain the luster of the wood.
-
Inspect for Wear: Regularly inspect the table for signs of wear, such as loose joints, scratches, or fading of the finish. Address any issues promptly to prevent them from escalating and compromising the integrity of the table.
-
Reapply Finish as Needed: Over time, the finish of the table may wear down due to regular use. When you notice signs of wear, consider reapplying the finish to protect the wood and maintain its visual appeal. Follow the manufacturer's guidelines for the specific finish used.
-
Protect from Sunlight: If your farm table is placed in an area exposed to direct sunlight, consider using window treatments or UV-protective coatings to prevent the wood from fading or drying out due to prolonged sun exposure.
-
Rotate Decorative Items: To prevent uneven aging and discoloration of the wood, periodically rotate decorative items and centerpieces placed on the table. This simple practice can help distribute any effects of light and wear more evenly.
-
Address Minor Repairs: If you notice minor scratches or dents on the table, consider using touch-up markers or wood fillers to address these imperfections. Regular maintenance can help preserve the table's appearance.
By incorporating these final touches and following maintenance tips, you can ensure that your farm table remains a beautiful and functional centerpiece in your home for years to come. With proper care and attention, your handmade farm table can continue to be a source of pride and enjoyment for your family and guests.