
Home>Create & Decorate>DIY & Crafts>How To Build A Refrigerator Cabinet
DIY & Crafts
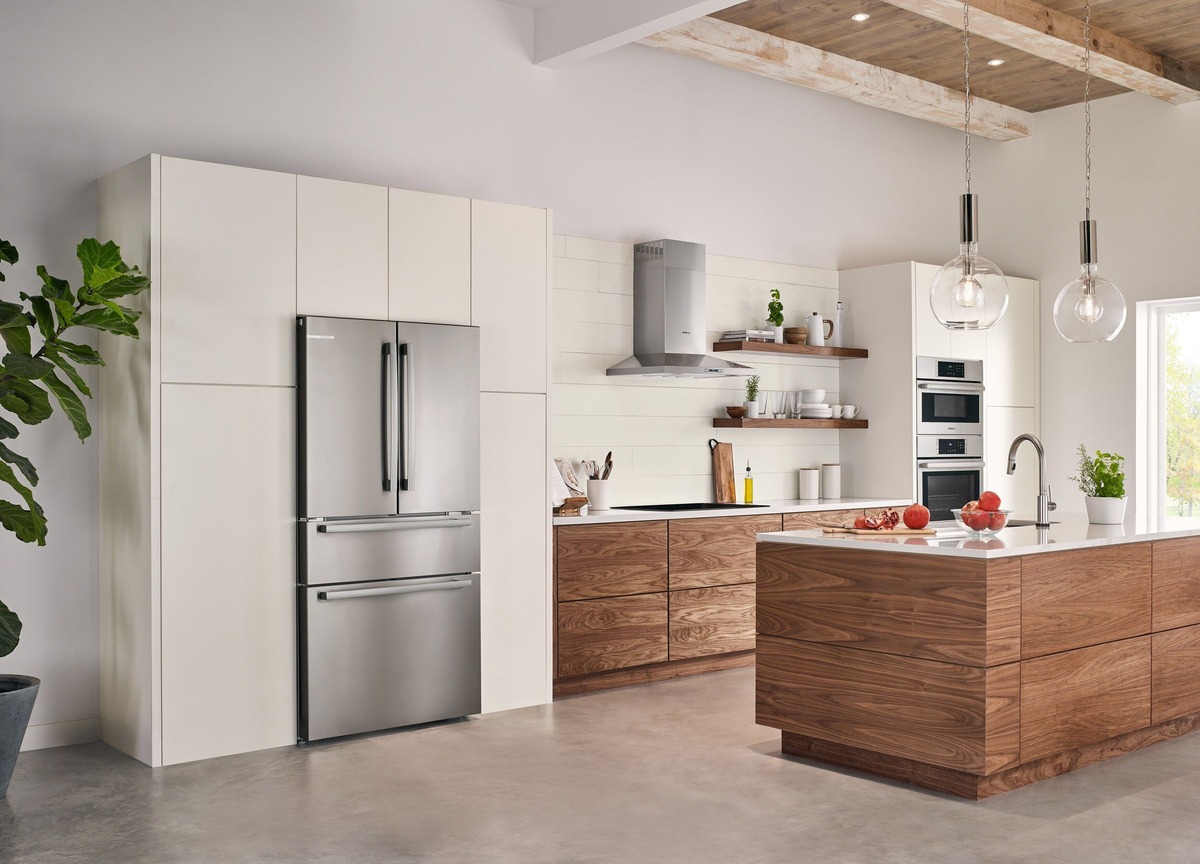
How To Build A Refrigerator Cabinet
Published: April 25, 2024

Content Creator specializing in woodworking and interior transformations. Caegan's guides motivate readers to undertake their own projects, while his custom furniture adds a personal touch.
Learn how to build a refrigerator cabinet with our easy DIY & Crafts guide. Create a custom storage solution for your kitchen and save space.
(Many of the links in this article redirect to a specific reviewed product. Your purchase of these products through affiliate links helps to generate commission for Twigandthistle.com, at no extra cost. Learn more)
Introduction
So, you've decided to take on the challenge of building a refrigerator cabinet. Congratulations! This project will not only enhance the aesthetics of your kitchen but also provide a custom storage solution for your refrigerator. Building a refrigerator cabinet can be a rewarding DIY project that adds both functionality and style to your home. In this guide, we will walk you through the step-by-step process of building a refrigerator cabinet, from planning and measuring to adding the finishing touches. Let's dive in and get started on creating a custom refrigerator cabinet that perfectly fits your space and meets your needs.
Planning and Measuring
Before you start building your refrigerator cabinet, it's crucial to plan and measure the space where the cabinet will be installed. Here's how to get started:
-
Assess the Space: Take precise measurements of the area where the refrigerator cabinet will be located. Consider the height, width, and depth of the space to ensure that the cabinet will fit perfectly.
-
Consider the Refrigerator Size: Measure the dimensions of your refrigerator to determine the exact space it will occupy within the cabinet. This will help you design a cabinet that accommodates the refrigerator without any issues.
-
Account for Ventilation: Keep in mind that refrigerators require proper ventilation to function efficiently. Plan for adequate airflow around the refrigerator by leaving enough space between the cabinet and the refrigerator's sides and back.
-
Sketch the Design: Create a rough sketch or use a design software to visualize the layout of the refrigerator cabinet. This will help you determine the overall look and functionality of the cabinet before you begin building.
-
Evaluate Access Points: Consider how the refrigerator doors open and ensure that there is enough clearance for easy access to the refrigerator's interior. Additionally, plan for any electrical outlets or water lines that may need to be accessed.
By carefully planning and taking accurate measurements, you'll set the foundation for a successful refrigerator cabinet build. This initial step is crucial for ensuring that the cabinet fits seamlessly into your kitchen space while accommodating the refrigerator's size and ventilation needs.
Choosing Materials
When it comes to building a refrigerator cabinet, selecting the right materials is essential for ensuring durability, functionality, and visual appeal. Here's a breakdown of the materials you'll need for this project:
-
Lumber: Opt for high-quality lumber that is sturdy and able to support the weight of the refrigerator. Common choices include plywood, MDF (medium-density fiberboard), or solid wood. Consider the aesthetic appeal, strength, and cost when choosing the type of lumber for your cabinet.
-
Hardware: Selecting the appropriate hardware such as hinges, handles, and drawer slides is crucial for the functionality and longevity of your refrigerator cabinet. Choose hardware that complements the overall design of your kitchen and provides smooth operation for cabinet doors and drawers.
-
Insulation: To ensure energy efficiency and proper temperature regulation, you'll need insulation material for the cabinet. Foam board insulation is a popular choice for its thermal properties and ease of installation. Make sure to select insulation that is suitable for use in enclosed spaces.
-
Finishing Materials: Consider the finishing materials for the cabinet, including paint or stain, to achieve the desired look. Choose a finish that complements your kitchen decor and provides protection for the cabinet surfaces.
-
Fasteners: Select appropriate screws, nails, and other fasteners based on the type of lumber and materials you are using. Ensure that the fasteners are suitable for securing the components of the cabinet securely.
By carefully choosing the right materials, you can ensure that your refrigerator cabinet not only looks great but also functions effectively and withstands the demands of daily use. Take the time to select materials that align with your design preferences, budget, and the specific requirements of your kitchen space.
Building the Cabinet Frame
Building the cabinet frame is a critical step in creating a sturdy and functional refrigerator cabinet. Follow these steps to construct the frame:
-
Cutting the Lumber: Begin by cutting the lumber to the appropriate dimensions based on your initial measurements and design plan. Use a saw equipped with a fine-tooth blade to ensure clean and precise cuts.
-
Assembling the Frame: Assemble the pieces of lumber to form the basic frame of the cabinet. Use a combination of wood glue and screws to secure the joints and ensure the frame is strong and stable. A pocket hole jig can also be used to create strong joints for the frame.
-
Adding Support and Bracing: To reinforce the cabinet frame, add support pieces and bracing as needed. This will provide additional stability and prevent the frame from warping over time. Pay attention to the corners and edges, ensuring that they are properly supported.
-
Checking for Squareness: Use a carpenter's square to check for squareness as you assemble the frame. Ensuring that the frame is perfectly square is essential for the proper installation of the cabinet and the refrigerator.
-
Creating Openings: If your design requires specific openings for ventilation or access to electrical outlets, carefully cut these openings in the frame before proceeding to the next steps.
By following these steps, you can construct a solid and well-built cabinet frame that serves as the foundation for the rest of the refrigerator cabinet construction. The frame should be carefully crafted to accommodate the dimensions of the refrigerator and provide the necessary structural support for the cabinet.
Installing Insulation
Installing insulation is a crucial step in ensuring that your refrigerator cabinet maintains proper temperature regulation and energy efficiency. Follow these steps to effectively install insulation in the cabinet:
-
Measure and Cut Insulation: Begin by measuring the interior dimensions of the cabinet to determine the amount of insulation needed. Use a utility knife or insulation cutting tool to cut the insulation panels to fit the walls, top, and bottom of the cabinet.
-
Fit Insulation Panels: Carefully fit the insulation panels into the interior of the cabinet, ensuring a snug and secure placement. Pay attention to any openings or irregularities in the cabinet structure, and cut the insulation accordingly to ensure complete coverage.
-
Seal Gaps and Joints: Use foam insulation sealant or tape to seal any gaps or joints between the insulation panels. This will prevent air leakage and ensure that the cabinet is properly insulated.
-
Consider Vapor Barrier: Depending on the climate and humidity levels in your area, you may need to install a vapor barrier to prevent moisture buildup within the cabinet. If necessary, apply a vapor barrier over the insulation to protect the cabinet from condensation.
-
Secure Insulation in Place: Use adhesive or fasteners to secure the insulation in place, especially on the ceiling and walls of the cabinet. This will prevent the insulation from shifting or sagging over time.
By following these steps, you can effectively install insulation in your refrigerator cabinet, creating a well-insulated environment that helps maintain the optimal temperature for your refrigerator while promoting energy efficiency. Proper insulation is essential for ensuring that your refrigerator operates efficiently and maintains consistent cooling performance.
Adding Shelves and Drawers
Adding shelves and drawers to your refrigerator cabinet enhances its functionality and provides organized storage space. Here's how to proceed with this important step:
-
Design Considerations: Before installing shelves and drawers, consider the layout and organization of the interior space. Determine the optimal placement for shelves based on the items you plan to store in the cabinet. Additionally, assess the space for drawers and their intended use.
-
Shelf Installation: Begin by installing the shelves within the cabinet. Use shelf brackets or adjustable shelf supports to create versatile storage options. Ensure that the shelves are level and securely anchored to the cabinet frame to support the weight of stored items.
-
Drawer Construction: If incorporating drawers, construct the drawer boxes using sturdy materials such as plywood or hardwood. Install drawer slides to facilitate smooth opening and closing of the drawers. Consider the depth and width of the drawers to accommodate various items.
-
Drawer Fronts and Handles: Attach drawer fronts that complement the overall design of the cabinet. Ensure that the drawer fronts align evenly and open smoothly. Install handles or knobs that are both functional and visually appealing.
-
Adjustable Features: Consider incorporating adjustable shelves or drawer dividers to customize the storage space according to your specific needs. This allows for flexibility in organizing items of different sizes.
-
Finishing Touches: Sand the edges of the shelves and drawers to ensure a smooth finish. Apply a protective finish, such as varnish or paint, to the shelves and drawers to enhance their durability and visual appeal.
By following these steps, you can effectively add shelves and drawers to your refrigerator cabinet, creating a well-organized and functional storage solution that maximizes the utility of the cabinet space. Properly installed shelves and drawers contribute to the overall efficiency and convenience of using the refrigerator cabinet.
Installing the Refrigerator
Installing the refrigerator into the newly constructed cabinet is a pivotal step in completing the project. Follow these detailed steps to ensure a seamless installation:
-
Clearing the Space: Before placing the refrigerator into the cabinet, ensure that the surrounding area is clear of any obstructions. This includes removing any temporary supports or protective coverings from the cabinet.
-
Positioning the Refrigerator: Carefully maneuver the refrigerator into the designated space within the cabinet. Enlist the help of others if needed to ensure a safe and controlled placement.
-
Adjusting for Clearance: Verify that the refrigerator has adequate clearance on all sides, especially at the back and sides, to allow for proper ventilation and easy access to any necessary connections or components.
-
Securing the Refrigerator: Once the refrigerator is positioned correctly, secure it in place by anchoring it to the cabinet frame. Use appropriate fasteners or brackets to prevent any movement or shifting.
-
Connecting Utilities: If applicable, connect the refrigerator to the electrical outlet and any water supply lines according to the manufacturer's guidelines. Take care to avoid any kinks or damage to the lines during the connection process.
-
Testing Functionality: After the installation is complete, test the refrigerator to ensure that it is operating as expected. Check for proper cooling, functionality of any ice makers or water dispensers, and overall performance.
-
Adjusting Doors and Shelves: Make any necessary adjustments to the refrigerator doors and shelves to ensure that they open and close smoothly within the cabinet space. This may involve leveling the refrigerator or adjusting the door alignment.
By following these detailed steps, you can successfully install the refrigerator into the custom cabinet, ensuring that it fits securely, functions properly, and seamlessly integrates into your kitchen space. A well-executed installation is essential for the overall functionality and visual appeal of the refrigerator cabinet.
Finishing Touches and Decoration
After completing the construction and installation of the refrigerator cabinet, it's time to focus on the finishing touches and decoration to enhance the overall look and functionality of the project. Here's how to add those final details that will make your refrigerator cabinet stand out in your kitchen:
-
Paint or Stain: Apply a coat of paint or stain to the exterior of the cabinet to achieve the desired color and finish. Choose a paint color or stain that complements the existing decor in your kitchen. Consider using a durable, easy-to-clean paint that can withstand the demands of a kitchen environment.
-
Trim and Molding: Add decorative trim and molding to the cabinet to create a polished and refined look. Crown molding, base molding, and decorative trim can be installed to conceal seams and add visual interest to the cabinet's design. Ensure that the trim is securely attached and seamlessly integrated with the cabinet structure.
-
Hardware Installation: Install cabinet hardware such as door handles, knobs, and drawer pulls to add a stylish and functional element to the cabinet. Choose hardware that complements the overall design aesthetic of your kitchen and provides ease of use when accessing the refrigerator and storage spaces.
-
Customization: Consider adding custom features such as decorative panels, glass inserts, or open shelving to personalize the cabinet to your specific preferences. Customization allows you to tailor the cabinet to match your unique style and storage needs, creating a one-of-a-kind addition to your kitchen.
-
Lighting: Incorporate lighting elements within the cabinet to illuminate the interior and showcase the contents. LED strip lights or puck lights can be installed to provide both functional lighting and a visually appealing display. Proper lighting enhances the visibility and accessibility of items stored in the cabinet.
-
Maintenance and Care: Apply a protective finish or sealant to the cabinet surfaces to safeguard against moisture, stains, and daily wear and tear. Regular maintenance, such as cleaning and polishing, will help preserve the cabinet's appearance and ensure its longevity.
By focusing on these finishing touches and decoration, you can elevate the visual appeal and functionality of your refrigerator cabinet, creating a stunning focal point in your kitchen. The attention to detail in the finishing touches will showcase the craftsmanship and care put into the construction of the custom cabinet, resulting in a truly impressive addition to your home.