
Home>Create & Decorate>DIY & Crafts>DIY Zipline: How To Build Your Own Thrilling Adventure
DIY & Crafts
DIY Zipline: How To Build Your Own Thrilling Adventure
Published: June 3, 2024

Content Creator specializing in woodworking and interior transformations. Caegan's guides motivate readers to undertake their own projects, while his custom furniture adds a personal touch.
Learn how to create your own DIY zipline for an exhilarating adventure with our step-by-step guide. Get ready to unleash your inner thrill-seeker!
(Many of the links in this article redirect to a specific reviewed product. Your purchase of these products through affiliate links helps to generate commission for Twigandthistle.com, at no extra cost. Learn more)
Introduction
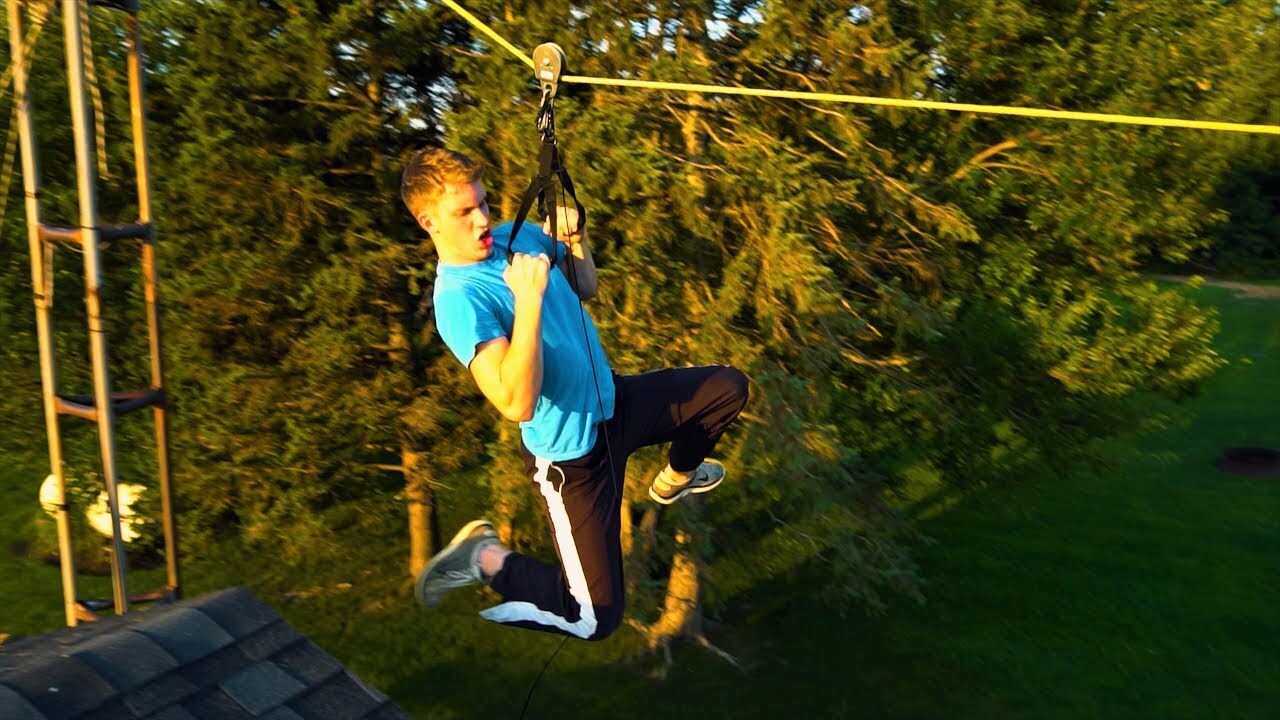
So, you're ready to take your backyard to the next level with a thrilling adventure? Building your own DIY zipline is a fantastic way to add some excitement to your outdoor space. Whether you're a thrill-seeker or just looking for a fun project, a zipline can provide hours of entertainment for both kids and adults. In this guide, we'll walk you through the steps to create your very own zipline, ensuring safety and fun for everyone involved. Let's get started on this adrenaline-pumping journey!
Safety Precautions
-
Inspect Equipment: Before starting the zipline project, carefully inspect all the equipment you plan to use. This includes the cable, harnesses, pulleys, and any other hardware. Look for any signs of wear and tear, such as fraying or rust, and replace any compromised components.
-
Use Proper Gear: When working on the zipline, it's crucial to use the appropriate safety gear. This includes helmets, gloves, and harnesses. Ensure that all gear is in good condition and fits properly before beginning the construction process.
-
Follow Instructions: Whether you're purchasing a zipline kit or individual components, be sure to follow the manufacturer's instructions carefully. Each zipline system may have specific requirements for installation and use, so it's essential to adhere to these guidelines for optimal safety.
-
Check Weight Limits: Different zipline components have weight limits that should not be exceeded. Make sure to verify the weight capacity of the cable, harnesses, and other equipment to ensure they can safely support the intended users.
-
Secure Anchor Points: The anchor points for the zipline should be structurally sound and capable of withstanding the forces exerted by the zipline. Whether attaching to trees or other supports, ensure that the anchor points are secure and can bear the weight and stress of the zipline.
-
Regular Inspections: Once the zipline is in place, conduct regular inspections to check for any signs of wear, damage, or loosening of components. This proactive approach can help prevent accidents and ensure the ongoing safety of the zipline.
By prioritizing safety precautions, you can create a thrilling zipline experience while minimizing the risks associated with its construction and use.
Choosing the Right Location
When selecting the ideal location for your DIY zipline, several factors should be taken into consideration to ensure a safe and enjoyable experience. Here are some key points to keep in mind:
-
Space: Look for an area with sufficient space to accommodate the zipline, including the launch and landing points. The space should be free of obstructions such as trees, structures, or other obstacles that could interfere with the zipline's path.
-
Terrain: The terrain of the chosen location is crucial. A gentle slope or incline can enhance the ziplining experience, providing a thrilling descent while ensuring a safe landing. Avoid areas with steep or uneven terrain that could pose challenges for installation and use.
-
Clearance: Ensure there is ample clearance along the zipline's path, both horizontally and vertically. This includes verifying that the zipline will not come into contact with branches, power lines, or any other overhead obstructions.
-
Accessibility: Consider the accessibility of the location, particularly if the zipline will be used by children. The launch and landing points should be easily reachable, and the surrounding area should be safe for zipline users to navigate.
-
Safety Zones: Identify and establish safety zones around the zipline's path. This may involve marking off areas where zipline users should not venture and ensuring that the zipline's path does not intersect with high-traffic areas or potential hazards.
-
Environmental Impact: Take into account the environmental impact of installing a zipline in the chosen location. Avoid areas with sensitive ecosystems or wildlife habitats, and be mindful of any potential disturbances to the natural surroundings.
By carefully considering these factors, you can select a location that is well-suited for your DIY zipline, providing a thrilling and safe experience for all who take the plunge.
Gathering Materials
Gathering the right materials is a crucial step in the process of building your DIY zipline. Here's a comprehensive list of the essential items you'll need to bring your zipline project to life:
-
Zipline Cable: The primary component of your zipline, the cable should be strong, durable, and capable of supporting the weight of zipline users. Opt for a high-quality steel cable with a smooth outer surface to minimize friction.
-
Trolley or Pulley: A trolley or pulley system is essential for allowing smooth movement along the zipline. Choose a trolley or pulley that is specifically designed for ziplining and can accommodate the diameter of your zipline cable.
-
Harness and Lanyard: For the safety of zipline users, harnesses and lanyards are necessary to secure individuals to the zipline. Ensure that the harnesses are adjustable and comfortable, providing a secure fit for users of varying sizes.
-
Turnbuckles and Cable Clamps: Turnbuckles are used to tension the zipline cable, while cable clamps are employed to secure the ends of the cable. These components are vital for ensuring the stability and integrity of the zipline structure.
-
Anchors and Support Structures: Depending on your chosen location, you may need anchors and support structures to secure the zipline. This could involve hardware such as eye bolts, lag screws, or specialized tree anchors for attaching the zipline to trees or other supports.
-
Tools: A variety of tools will be necessary for the installation of the zipline, including wrenches, pliers, wire cutters, and a cable cutter. Additionally, you may need a drill and appropriate drill bits for securing anchors and support structures.
-
Safety Gear: In addition to the harnesses and lanyards, safety gear such as helmets, gloves, and safety glasses are essential for the construction phase. Prioritize the safety of yourself and others involved in the zipline project.
-
Measuring Tape and Level: Accurate measurements and proper alignment are critical for the successful installation of the zipline. A measuring tape and level will aid in ensuring that the zipline cable and associated components are positioned correctly.
By gathering these materials, you'll be well-equipped to commence the construction of your DIY zipline, setting the stage for an exhilarating outdoor adventure right in your own backyard.
Building the Zipline
Now that you have all the necessary materials assembled, it's time to dive into the exciting phase of constructing your very own zipline. Follow these step-by-step instructions to bring your zipline project to life:
-
Install the Anchors: Begin by securing the anchors at the launch and landing points of the zipline. This may involve attaching eye bolts to trees or using specialized hardware to create sturdy anchor points. Ensure that the anchors are firmly in place and capable of supporting the tension and weight of the zipline.
-
String the Cable: With the anchors in position, it's time to string the zipline cable between the launch and landing points. Carefully thread the cable through the pulley or trolley, ensuring that it runs smoothly and without any kinks or twists. Use turnbuckles to tension the cable, removing any slack while maintaining the necessary flexibility for zipline users.
-
Secure the Cable: Once the cable is properly tensioned, secure the ends using cable clamps. These clamps will prevent the cable from slipping or unraveling, providing a reliable and safe connection at both the launch and landing points.
-
Test the Zipline: Before allowing anyone to use the zipline, perform a thorough test to ensure its stability and functionality. Check the tension of the cable, the smooth operation of the pulley or trolley, and the security of all connections. It's essential to verify that the zipline is safe for use before inviting adventurous riders to take a spin.
-
Add Safety Features: Install safety features such as padding around the launch and landing points, as well as clear signage indicating the zipline's path and any safety guidelines. Additionally, ensure that all zipline users are equipped with the necessary safety gear, including helmets and harnesses, before taking their exhilarating ride.
-
Final Inspections: Conduct a final inspection of the entire zipline structure, verifying that all components are secure and in good condition. Double-check the anchors, cable tension, and pulley system to guarantee that everything is ready for a thrilling ziplining experience.
By following these steps, you can successfully build your DIY zipline, creating an exciting and safe adventure for all who are ready to take the plunge. With the construction phase complete, it's time to move on to the next stage of testing and adjusting the zipline for optimal performance.
Testing and Adjusting
Once the construction of your DIY zipline is complete, it's crucial to conduct thorough testing and make any necessary adjustments to ensure the zipline's safety and functionality. Follow these steps to test and fine-tune your zipline:
-
Initial Test Run: Before inviting others to use the zipline, perform an initial test run yourself. This allows you to experience the zipline firsthand and identify any potential issues or areas for improvement.
-
Observation and Assessment: While testing the zipline, pay close attention to the user experience. Take note of any areas where the zipline may exhibit excessive swaying, unexpected stops, or other irregularities that could impact safety and enjoyment.
-
Weight Testing: Test the zipline with varying weights to ensure that it can safely accommodate users of different sizes. This includes testing the zipline with the maximum anticipated weight to verify its structural integrity.
-
Smooth Operation: Verify that the pulley or trolley moves smoothly along the zipline without any jerking or resistance. Any signs of friction or irregular movement should be addressed to ensure a seamless ziplining experience.
-
Tension Adjustment: Check the tension of the zipline cable to ensure it provides the right balance of flexibility and stability. Make adjustments to the turnbuckles as needed to achieve the optimal tension for safe and enjoyable ziplining.
-
Safety Checks: Inspect all safety features, including harnesses, helmets, and padding at the launch and landing points. Confirm that all safety gear is in good condition and that users are adequately protected during zipline rides.
-
User Feedback: If possible, gather feedback from individuals who test the zipline. Their insights can provide valuable information about the zipline's performance and any adjustments that may be necessary to enhance the overall experience.
-
Fine-Tuning: Based on the observations and assessments made during testing, make any necessary adjustments to the zipline's components, tension, or safety features. Addressing any identified issues promptly will contribute to a safer and more enjoyable ziplining experience.
By diligently testing and adjusting your DIY zipline, you can ensure that it meets the highest standards of safety and performance, setting the stage for countless thrilling adventures in your own backyard.
Enjoying Your DIY Zipline
Now that your DIY zipline is constructed, tested, and adjusted to perfection, it's time to reap the rewards of your hard work and enjoy the exhilarating experience it offers. Here's how you and your fellow adventurers can make the most of your DIY zipline:
-
Safety First: Before anyone takes their first zipline ride, ensure that all users are equipped with the necessary safety gear, including helmets and harnesses. Emphasize the importance of following safety guidelines and procedures to minimize risks and maximize enjoyment.
-
Thrilling Rides: Invite friends and family to experience the thrill of ziplining in your backyard. Whether it's a leisurely ride for the kids or an adrenaline-pumping adventure for the adults, the zipline promises excitement for all.
-
Zipline Challenges: Create fun challenges and games that incorporate the zipline. From timed races to obstacle courses, the zipline can add an extra element of excitement and competition to your outdoor activities.
-
Nighttime Adventures: Extend the ziplining fun into the evening by adding lighting around the launch and landing points. Nighttime ziplining can offer a whole new perspective and an added sense of adventure.
-
Capture the Moments: Encourage zipline riders to capture their experiences through photos and videos. Not only does this preserve the memories, but it also allows everyone to share in the excitement of ziplining.
-
Community Involvement: Consider hosting ziplining events for your local community or neighborhood. Sharing the thrill of ziplining with others can foster a sense of camaraderie and create lasting memories for everyone involved.
-
Maintenance and Care: Regularly inspect and maintain your zipline to ensure its continued safety and functionality. By staying proactive, you can prolong the lifespan of your DIY zipline and continue to enjoy its thrills for years to come.
By embracing the enjoyment and excitement of your DIY zipline, you can create unforgettable experiences and lasting memories right in your own backyard. So, gear up, take the plunge, and let the zipline adventures begin!