
Home>Create & Decorate>DIY & Crafts>DIY Solar System: How To Create Your Own Miniature Planetary Model
DIY & Crafts
DIY Solar System: How To Create Your Own Miniature Planetary Model
Published: February 23, 2024

Senior Editor in Create & Decorate, Kathryn combines traditional craftsmanship with contemporary trends. Her background in textile design and commitment to sustainable crafts inspire both content and community.
Learn how to make your own DIY solar system model with this step-by-step guide. Perfect for a fun and educational craft project!
(Many of the links in this article redirect to a specific reviewed product. Your purchase of these products through affiliate links helps to generate commission for Twigandthistle.com, at no extra cost. Learn more)
Introduction
Welcome to the fascinating world of do-it-yourself (DIY) crafts, where creativity knows no bounds! In this guide, we will embark on an exciting journey to create your very own miniature solar system model. Whether you are a space enthusiast, a science aficionado, or simply someone who enjoys hands-on projects, this DIY solar system endeavor is sure to ignite your imagination and spark a sense of wonder.
The solar system, with its celestial bodies and cosmic marvels, has captivated human curiosity for centuries. By crafting a miniature version of this awe-inspiring system, you will not only gain a deeper understanding of planetary dynamics but also unleash your artistic flair. This project offers a perfect blend of educational exploration and artistic expression, making it an ideal endeavor for both adults and children alike.
As we delve into the intricacies of constructing a miniature solar system, you will learn about the various materials needed, the step-by-step process of assembling the planetary models, and the creative techniques to bring your mini cosmos to life. From selecting the scale of your model to positioning the planets in their orbits, each step will unveil the enchanting beauty of our solar system in a tangible and visually captivating form.
Whether you plan to display your miniature solar system in a classroom, on a bookshelf, or as a centerpiece for a space-themed event, this DIY project promises to be a rewarding and enriching experience. So, gather your crafting supplies, unleash your imagination, and get ready to embark on a celestial adventure as we guide you through the process of creating your very own miniature planetary model. Let's embark on this cosmic journey together and bring the wonders of the solar system into the palm of your hand!
Materials Needed
To embark on this celestial crafting journey, you will need a selection of materials to bring your miniature solar system to life. Here's a comprehensive list of the essential items required for this DIY project:
1. Styrofoam or Foam Balls:
- These will serve as the foundational elements for crafting the planets and moons of the solar system. Opt for a variety of sizes to accurately represent the diverse dimensions of the celestial bodies.
2. Acrylic Paints:
- A vibrant assortment of acrylic paints will allow you to accurately depict the distinct colors and patterns of each planet. From the rusty red of Mars to the swirling blues and whites of Jupiter, a diverse palette of paints will be essential for creating a visually captivating solar system model.
3. Paintbrushes:
- A set of fine paintbrushes, including varying brush sizes, will enable you to add intricate details and textures to your planetary models. Ensure that the brushes are suitable for working with small-scale objects to achieve precision in your artistic endeavors.
4. Wooden Skewers or Wire:
- These will be used to create the planetary orbits and support structures for suspending the planets in your miniature solar system. The flexibility of wire or the sturdiness of wooden skewers will provide the necessary framework for positioning the celestial bodies in their orbital paths.
5. Craft Glue or Hot Glue Gun:
- A reliable adhesive is essential for securely attaching the planets, moons, and other celestial elements to the support structures. Whether opting for craft glue for a controlled application or a hot glue gun for quick and secure bonding, the choice of adhesive will play a crucial role in the stability of your miniature solar system.
6. Cardboard or Styrofoam Base:
- A sturdy base, such as a piece of cardboard or a larger styrofoam sheet, will serve as the foundation for arranging and displaying your miniature solar system. The base provides stability and a platform for showcasing the celestial marvels you create.
7. Reference Images or Solar System Model Kit:
- While not essential, having reference images or a solar system model kit can greatly aid in accurately depicting the features and characteristics of each planet. These visual references will serve as a guide for creating realistic representations of the celestial bodies.
8. Optional: Glitter, Beads, or Sequins:
- For those seeking to add a touch of sparkle and visual allure to their miniature solar system, incorporating glitter, beads, or sequins can infuse a captivating shimmer to the cosmic display.
By gathering these materials, you will be well-equipped to commence the construction of your very own miniature solar system model. With these supplies at your disposal, you are poised to embark on a creative and educational endeavor that will bring the wonders of the cosmos within your reach.
Step 1: Choosing the Scale
The first step in creating your miniature solar system model is to determine the scale at which you will represent the celestial bodies. The scale you choose will dictate the relative sizes and distances between the planets, moons, and the central star, allowing you to accurately portray the vastness of our solar system in a condensed form.
When selecting the scale for your model, consider the available space for display and the level of detail you wish to incorporate. A common approach is to opt for a scaled-down representation, where each centimeter or inch of the model corresponds to a specific distance in the actual solar system. For instance, you might decide that 1 centimeter in your model represents 1 million kilometers in reality. This approach allows for a proportional representation of the planetary sizes and orbital distances, providing a sense of realism to your miniature solar system.
Alternatively, you may choose a more artistic or compact scale that prioritizes visual appeal and practicality. In such cases, the relative sizes and distances between the celestial bodies may not align precisely with their real-world counterparts. This approach offers flexibility in crafting a visually striking model that fits within a designated display area while still capturing the essence of the solar system's grandeur.
Consider the intended purpose of your miniature solar system model. If it is primarily an educational tool, a scale that accurately reflects the relative sizes and distances of the planets and their orbits would be beneficial for conveying scientific concepts. On the other hand, if the model is intended for decorative or artistic purposes, a scale that prioritizes aesthetic harmony and visual impact may be more suitable.
As you contemplate the scale for your miniature solar system, take into account the sizes of the planetary and lunar models you plan to create. Ensure that the chosen scale allows for manageable crafting of the celestial bodies while maintaining a cohesive overall representation of the solar system. By carefully selecting the scale, you will lay the foundation for an engaging and visually captivating miniature solar system model that aligns with your creative vision and practical considerations.
Step 2: Gathering the Planetary Models
With the scale of your miniature solar system established, the next pivotal step is to gather the materials needed to craft the planetary models. Each celestial body in our solar system possesses unique characteristics, from the distinct rings of Saturn to the swirling storms of Jupiter, and capturing these features will breathe life into your miniature cosmic creation.
Begin by researching and familiarizing yourself with the physical attributes and surface details of each planet and moon. Reference images from reputable sources or solar system model kits can provide invaluable insights into the colors, textures, and prominent features of the celestial bodies. Armed with this knowledge, you can embark on the process of crafting accurate and visually captivating planetary models.
For the terrestrial planets—Mercury, Venus, Earth, and Mars—consider using styrofoam or foam balls as the foundational structures. Selecting appropriately sized balls to represent the varying diameters of these planets will lay the groundwork for shaping and painting realistic models. Acrylic paints will be your artistic arsenal, allowing you to meticulously recreate the distinctive hues and surface patterns of each terrestrial world.
When it comes to the gas giants—Jupiter, Saturn, Uranus, and Neptune—larger foam balls will serve as the basis for sculpting these colossal spheres. The vibrant and swirling atmospheres of these gas giants can be brought to life through a careful application of acrylic paints, capturing the mesmerizing bands of Jupiter and the majestic rings of Saturn with precision and artistry.
The moons of the solar system, with their diverse compositions and surface features, offer an opportunity to expand the scope of your miniature model. Research the unique characteristics of prominent moons such as Earth's Moon, Europa, Titan, and others, and consider incorporating them into your solar system display. Using smaller foam balls or crafting materials, you can fashion these moons to complement the planetary models, adding depth and complexity to your celestial tableau.
As you gather the materials for crafting the planetary models, remember to infuse your creative process with a sense of wonder and curiosity. Embrace the opportunity to delve into the captivating details of our solar system's celestial inhabitants, and let your artistic expression bring forth miniature worlds that reflect the awe-inspiring diversity of our cosmic neighborhood. With the planetary models taking shape, your miniature solar system will soon evolve into a captivating testament to the beauty and grandeur of the cosmos.
Step 3: Creating the Sun
At the heart of our solar system resides the radiant and majestic Sun, the celestial body that illuminates and sustains life on our planet. Crafting a faithful representation of the Sun for your miniature solar system model is a pivotal endeavor, as it serves as the central focal point around which the planets and moons revolve. The process of creating the Sun involves capturing its luminous essence and distinctive features, infusing your model with the awe-inspiring energy that defines our cosmic neighborhood.
To fashion the Sun for your miniature solar system, begin by selecting a large foam ball that will serve as the foundational structure for this pivotal celestial body. The size of the foam ball should be proportionate to the scale of your model, conveying the Sun's immense stature relative to the other planetary models. Opt for a size that commands attention and conveys the Sun's significance as the gravitational anchor of our solar system.
Once the foam ball is secured, the next step is to apply a vibrant and radiant color scheme that mirrors the Sun's fiery brilliance. Utilize a combination of bright yellow and orange acrylic paints to capture the incandescent glow of our star. Consider blending these hues to create a dynamic and luminous surface that evokes the Sun's captivating radiance. Adding subtle variations in color intensity can imbue the model with a sense of depth and vitality, echoing the dynamic nature of the solar surface.
Incorporating textural elements can further enhance the realism of your miniature Sun. Consider using fine brushes to create delicate solar flares or sunspots, adding intricate details that mirror the captivating phenomena observed on the solar surface. These subtle embellishments will infuse your Sun model with a sense of dynamism and visual intrigue, capturing the ever-changing nature of our radiant star.
To complete the portrayal of the Sun, consider incorporating a subtle shimmer or iridescence to emulate the star's luminous aura. This can be achieved by delicately dusting the surface of the model with a fine layer of glitter or metallic paint, creating a mesmerizing sheen that evokes the Sun's captivating brilliance.
By meticulously crafting a faithful representation of the Sun, you will infuse your miniature solar system with the captivating energy and luminosity that defines our cosmic neighborhood. As the central anchor of your celestial tableau, the Sun will radiate its awe-inspiring presence, setting the stage for the planetary models to orbit and revolve around this celestial centerpiece. With the Sun taking its rightful place at the heart of your miniature solar system, the stage is set for the next phase of this cosmic crafting odyssey.
Step 4: Positioning the Planets
With the Sun as the radiant centerpiece of your miniature solar system, the next crucial step is to meticulously position the planetary models in their respective orbits, creating a visually captivating representation of the celestial dance that defines our cosmic neighborhood. The positioning of the planets is a pivotal aspect of this DIY project, as it not only conveys the relative distances and orbital dynamics of the solar system but also sets the stage for a visually striking and scientifically accurate portrayal of our planetary ensemble.
Begin by visualizing the orbital paths of the planets, taking into account their relative distances from the Sun and the unique characteristics of their elliptical orbits. For a scaled representation, consider the varying distances of each planet from the Sun and the inclination of their orbital planes. This spatial arrangement will imbue your miniature solar system with a sense of realism and scientific accuracy, allowing viewers to appreciate the dynamic interplay of celestial bodies.
Using wooden skewers or flexible wire, carefully position each planetary model at the appropriate distance from the Sun, adhering to the chosen scale of your model. Ensure that the orbital paths are aligned with the intended scale, allowing for a proportional representation of the planetary distances while maintaining a visually harmonious arrangement. This meticulous positioning will bring forth a sense of order and precision, reflecting the structured elegance of our solar system's orbital dynamics.
As you position the planets, consider incorporating subtle inclinations and orbital tilts to mirror the unique characteristics of each celestial body's path around the Sun. For instance, the distinct tilt of Uranus's axis or the pronounced eccentricity of Mercury's orbit can be subtly reflected in the positioning of the planetary models, adding an extra layer of authenticity to your miniature solar system.
Once the planetary models are securely positioned in their orbits, take a moment to appreciate the captivating tableau that is taking shape before you. The visual harmony of the planets revolving around the radiant Sun, each following its prescribed path through the cosmic expanse, will evoke a profound sense of wonder and appreciation for the intricate dance of our solar system.
By meticulously positioning the planets in their orbits, you will bring forth a visually captivating and scientifically accurate representation of our cosmic neighborhood, infusing your miniature solar system with a sense of awe-inspiring grandeur and celestial elegance. With the planets taking their designated places in the cosmic ballet, your miniature solar system model will soon stand as a testament to the captivating beauty and structured harmony of our celestial realm.
Step 5: Adding Moons and Asteroids
As we continue to expand the scope of our miniature solar system model, the inclusion of moons and asteroids introduces a layer of complexity and richness to our cosmic tableau. Moons, with their diverse compositions and orbital dynamics, offer a captivating opportunity to augment the planetary models, while asteroids, the remnants of cosmic collisions, contribute to the dynamic narrative of our celestial neighborhood.
Begin by researching the prominent moons associated with the planets in our solar system. From the Earth's Moon to the Galilean moons of Jupiter, each satellite possesses unique characteristics and distinctive features that enrich the narrative of our miniature cosmic creation. Selecting appropriately sized foam balls or crafting materials, fashion these moons to complement the planetary models, ensuring that their sizes and positions align with the chosen scale of your model.
Incorporate the moons into the orbital paths of their respective planets, paying attention to their relative distances and inclinations. By adhering to the scale of your model, you will convey the proportional relationships between the planets and their moons, capturing the intricate dance of celestial companions that defines our solar system.
Asteroids, the rocky remnants of the early solar system, offer an additional dimension to our miniature cosmic narrative. Consider incorporating small, irregularly shaped objects to represent these cosmic wanderers, strategically positioning them within the expanse of the solar system model. Their presence serves as a reminder of the dynamic and evolving nature of our celestial realm, showcasing the enduring legacy of cosmic collisions and the formation of planetary systems.
By adding moons and asteroids to your miniature solar system, you infuse the model with a sense of depth and complexity, mirroring the rich tapestry of celestial bodies that populate our cosmic neighborhood. The inclusion of these cosmic companions elevates the narrative of our miniature solar system, offering a holistic portrayal of the dynamic interplay between planets, moons, and asteroids within the vast expanse of our celestial realm.
As the moons and asteroids find their places within the cosmic tableau, your miniature solar system model evolves into a captivating testament to the intricate and diverse nature of our celestial neighborhood, capturing the essence of our cosmic story in a tangible and visually captivating form.
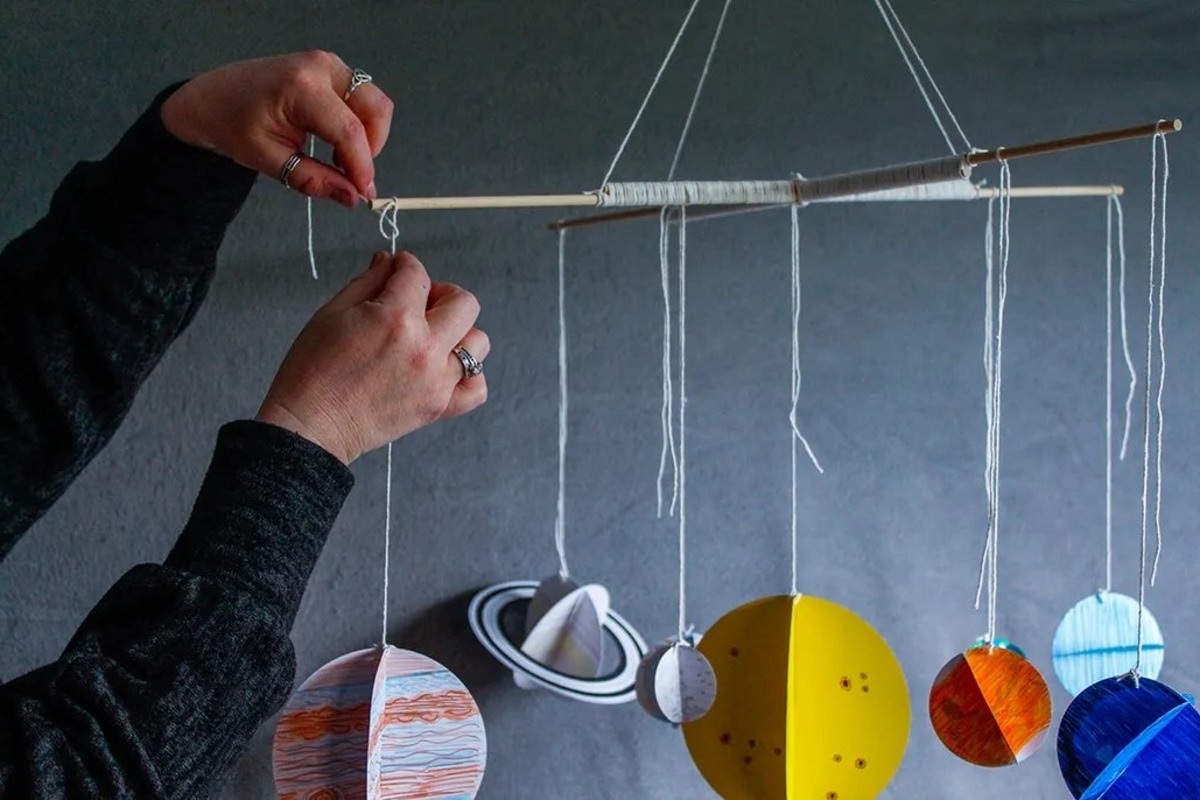
Step 6: Displaying Your Miniature Solar System
With your miniature solar system meticulously crafted and the celestial bodies positioned in their orbital splendor, the final step is to showcase your cosmic creation in a visually captivating display. The presentation of your miniature solar system serves as the culmination of your artistic and educational endeavor, inviting viewers to marvel at the wonders of our cosmic neighborhood in a tangible and immersive form.
Consider the placement of your miniature solar system model, selecting a location that allows for optimal visibility and appreciation. Whether adorning a bookshelf, gracing a classroom, or serving as a centerpiece for a space-themed event, the display area should provide a captivating backdrop for the celestial tableau you have meticulously crafted.
A sturdy base, such as a piece of cardboard or a larger styrofoam sheet, will serve as the foundation for arranging and showcasing your miniature solar system. The base provides stability and a platform for the celestial marvels you have brought to life, ensuring that the model remains secure and visually striking.
Illuminate your miniature solar system with strategic lighting to accentuate its celestial allure. Soft, ambient lighting can create a mesmerizing ambiance, allowing the vibrant colors of the planets and the radiant presence of the Sun to captivate viewers. Consider incorporating subtle spotlights or LED accents to highlight specific elements of the model, drawing attention to the intricate details and dynamic interplay of the celestial bodies.
Encourage interactive exploration by providing informational placards or educational materials that offer insights into the characteristics and significance of each celestial body. This additional layer of engagement invites viewers to delve deeper into the captivating narrative of our solar system, fostering a sense of wonder and discovery.
Embrace creativity in the presentation of your miniature solar system, infusing the display with thematic elements or artistic embellishments that enhance its visual appeal. Whether incorporating celestial backdrops, cosmic motifs, or imaginative vignettes, the presentation of your model offers an opportunity to evoke a sense of cosmic enchantment and captivate the imagination of all who behold it.
By thoughtfully curating the display of your miniature solar system, you invite viewers to embark on a cosmic journey, immersing them in the captivating beauty and structured elegance of our celestial realm. As your model takes its place as a captivating testament to the wonders of the solar system, it serves as a tangible and visually captivating celebration of our cosmic neighborhood's awe-inspiring grandeur.
Conclusion
In conclusion, the journey of creating your own miniature solar system model has been a captivating odyssey through the wonders of our cosmic neighborhood. From meticulously crafting the planetary models to positioning them in their orbital splendor, this DIY project has offered a unique blend of artistic expression and educational exploration. As we bring this cosmic endeavor to a close, it is essential to reflect on the profound significance of our miniature solar system model and the enduring impact it holds.
Through this creative undertaking, we have not only gained a deeper understanding of the celestial bodies that populate our solar system but have also unleashed our artistic flair, infusing the model with a sense of wonder and visual allure. The meticulous process of crafting the Sun, positioning the planets, and incorporating moons and asteroids has allowed us to capture the essence of our cosmic neighborhood in a tangible and visually captivating form.
Our miniature solar system model stands as a testament to the structured elegance and awe-inspiring grandeur of the celestial dance that defines our solar system. It serves as a visual narrative of the dynamic interplay between the planets, moons, and asteroids, inviting viewers to marvel at the captivating beauty and rich tapestry of our cosmic realm.
As we prepare to showcase our miniature solar system, whether as a centerpiece for a space-themed event or an educational tool in a classroom, we are poised to ignite the imagination and curiosity of all who behold it. The model not only celebrates the wonders of our solar system but also serves as a gateway to immersive learning and cosmic enchantment.
In the presentation of our miniature solar system, we have the opportunity to evoke a sense of cosmic wonder and captivate the imagination of viewers. By thoughtfully curating the display and incorporating thematic elements, we invite others to embark on a cosmic journey, immersing them in the captivating beauty and structured elegance of our celestial realm.
Ultimately, our miniature solar system model stands as a tangible and visually captivating celebration of the awe-inspiring grandeur of our cosmic neighborhood. It serves as a testament to the enduring legacy of human curiosity and creativity, encapsulating the timeless allure of the stars and planets that have captivated our imagination for generations. As we gaze upon our miniature solar system, we are reminded of the boundless wonders that await us in the cosmic expanse, inspiring a sense of awe and appreciation for the celestial marvels that grace our night skies.