
Home>Create & Decorate>DIY & Crafts>DIY Playhouse: Step-by-Step Guide To Building Your Own Childhood Dream
DIY & Crafts
DIY Playhouse: Step-by-Step Guide To Building Your Own Childhood Dream
Published: June 10, 2024

Content Creator specializing in woodworking and interior transformations. Caegan's guides motivate readers to undertake their own projects, while his custom furniture adds a personal touch.
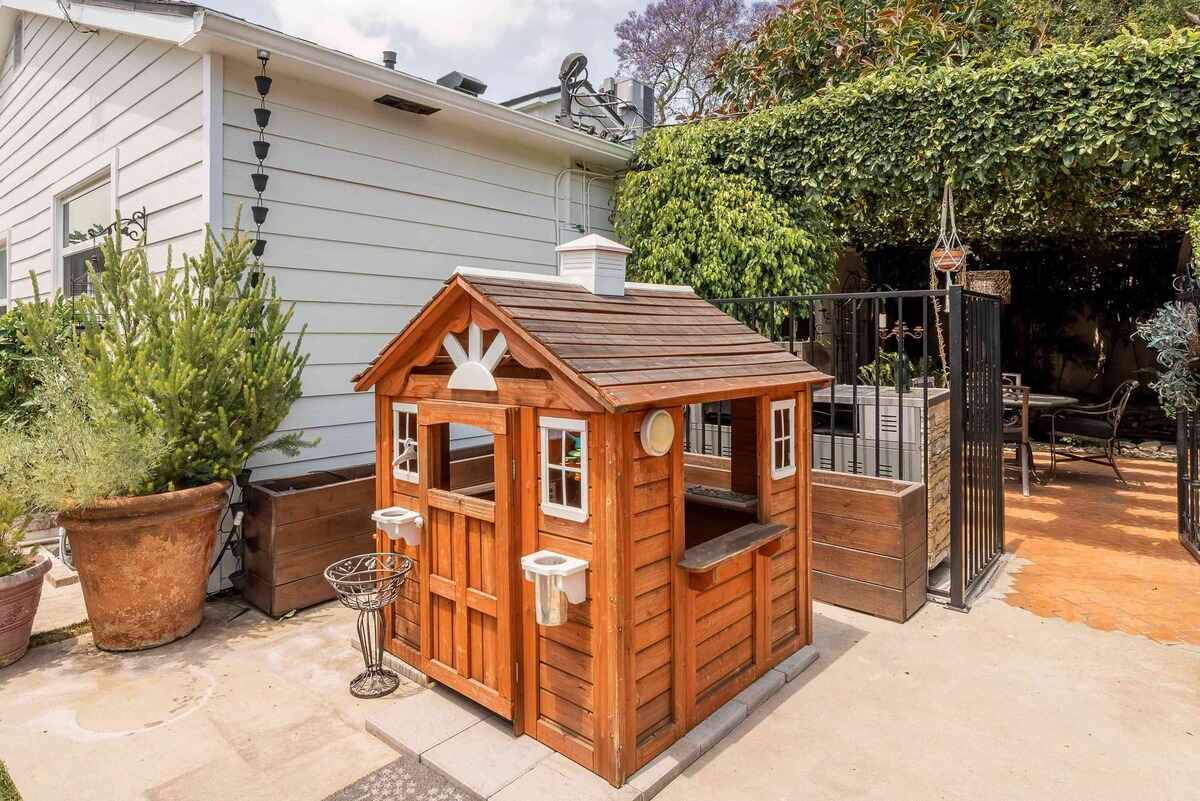
Discover how to bring your childhood dream to life with our step-by-step DIY playhouse guide. Get creative with our DIY & Crafts project and build memories that last a lifetime.
(Many of the links in this article redirect to a specific reviewed product. Your purchase of these products through affiliate links helps to generate commission for Twigandthistle.com, at no extra cost. Learn more)
Introduction
So, you've decided to embark on the exciting journey of building your very own DIY playhouse. Congratulations! Building a playhouse is not only a fun and rewarding project, but it also provides a wonderful space for children to unleash their creativity and imagination. Whether you're a seasoned DIY enthusiast or a novice looking for a new challenge, this step-by-step guide will walk you through the process of bringing your childhood dream to life. From choosing the perfect location to adding the finishing touches, get ready to dive into the world of carpentry and create a magical play space for your little ones.
Choosing the Right Location and Design
When it comes to building a DIY playhouse, the first step is to carefully select the ideal location for this magical structure. Consider the available space in your yard and choose a spot that is both safe and easily accessible. Take into account factors such as sunlight exposure, proximity to other play areas, and visibility from the house. Once you've identified the perfect location, it's time to brainstorm the design of the playhouse. Will it be a charming cottage, a whimsical castle, or a rustic cabin? Get creative and involve your kids in the decision-making process. Their input can help shape the design and ensure that the playhouse becomes a space where their imaginations can run wild.
- Assess the available space in your yard
- Choose a safe and easily accessible location
- Consider sunlight exposure and visibility from the house
- Brainstorm different design ideas with input from your kids
- Ensure the design reflects the interests and preferences of your children
By carefully considering the location and design of your DIY playhouse, you can set the stage for a project that not only enhances your outdoor space but also provides a magical retreat for your children to enjoy.
Gathering Materials and Tools
Before diving into the construction of your DIY playhouse, it's essential to gather all the necessary materials and tools. Here's a comprehensive list to ensure you have everything you need to bring your project to life:
Materials:
- Lumber: Choose high-quality, weather-resistant lumber for the frame, walls, and flooring.
- Plywood: Opt for sturdy plywood for the walls, roof, and any decorative elements.
- Fasteners: Stock up on nails, screws, and bolts of various sizes to secure the structure.
- Roofing Materials: Depending on your design, you may need shingles, metal roofing, or waterproof tarp.
- Paint and Sealant: Select non-toxic, outdoor paint and sealant to protect the playhouse from the elements.
- Windows and Doors: If your design includes windows and doors, make sure to purchase these components.
Tools:
- Measuring Tape: Accurate measurements are crucial for a precise and sturdy construction.
- Circular Saw: A versatile tool for cutting lumber and plywood to the desired dimensions.
- Hammer and Nails: Essential for securing framing and attaching various components.
- Screwdriver and Screws: Choose a variety of screw sizes for different parts of the playhouse.
- Level: Ensure that your playhouse is perfectly straight and level during construction.
- Paintbrushes and Rollers: For applying paint and sealant to protect the playhouse from the elements.
- Safety Gear: Don't forget gloves, safety goggles, and ear protection to keep yourself safe during construction.
By gathering these materials and tools, you'll be well-prepared to tackle the construction of your DIY playhouse. Having everything on hand will streamline the building process and ensure that you can focus on bringing your vision to life without unnecessary interruptions.
Building the Foundation and Frame
Building a solid foundation is crucial for the stability and longevity of your DIY playhouse. Start by clearing the chosen area of any debris and vegetation. Use a shovel to dig holes for the support posts, ensuring that they are deep enough to provide stability. Next, pour concrete into the holes and insert the support posts, making sure they are level and securely anchored. Allow the concrete to cure before proceeding to the next step.
Once the foundation is in place, it's time to construct the frame of the playhouse. Begin by measuring and cutting the lumber according to your design specifications. Use a circular saw to create precise cuts, taking care to follow the measurements accurately. Assemble the frame on top of the foundation, securing the pieces together with screws or nails. A level will be your best friend during this process, ensuring that the frame is straight and sturdy.
When building the frame, consider adding additional support beams for the walls and roof. These beams will provide extra stability and ensure that the playhouse can withstand the elements. As you work on the frame, periodically check for squareness and alignment to avoid any structural issues down the line.
By focusing on the foundation and frame, you are laying the groundwork for a durable and secure DIY playhouse. Attention to detail and precision during this phase will set the stage for the rest of the construction process, bringing you one step closer to fulfilling your childhood dream.
Adding Walls, Roof, and Windows
With the foundation and frame securely in place, it's time to move on to the next exciting phase of building your DIY playhouse. Adding walls, a roof, and windows will transform the skeletal structure into a charming and functional play space for your children.
Walls
Begin by attaching plywood panels to the frame to form the walls of the playhouse. Use a circular saw to cut the plywood to the required dimensions, ensuring precise fits for each section. Secure the panels to the frame using screws or nails, making sure to space them evenly for a professional finish. Consider adding a door frame if your design includes an entryway, and don't forget to leave openings for windows if desired.
Roof
The roof is a crucial element that provides protection from the elements and adds character to the playhouse. Depending on your design, you can opt for traditional shingles, metal roofing, or even a waterproof tarp. Carefully measure and cut the roofing materials to fit the dimensions of the playhouse, ensuring that they overlap to prevent leaks. Secure the roofing in place, paying close attention to the edges and corners to guarantee a weatherproof finish.
Windows
Adding windows to the playhouse not only allows natural light to filter in but also enhances its aesthetic appeal. Choose window frames that complement the overall design and carefully install them in the designated openings. Consider using clear, shatter-resistant acrylic or polycarbonate instead of glass for safety reasons. Once the frames are in place, attach the window panels and ensure that they open and close smoothly.
By focusing on these key elements, you'll bring your DIY playhouse one step closer to completion. The addition of walls, a roof, and windows will not only enhance the functionality of the playhouse but also infuse it with character and charm, creating a magical space for your children to enjoy.
Finishing Touches and Personalization
After completing the structural elements of your DIY playhouse, it's time to add the finishing touches that will truly make it a magical space for your children. Personalization is key to creating a playhouse that reflects your kids' interests and sparks their imagination. Here are some creative ideas to add those final flourishes:
Paint and Decor
Choose a color scheme that complements your outdoor space and reflects the theme of the playhouse. Whether it's a whimsical pastel palette, a vibrant array of colors, or a natural wood finish, the right paint can bring the playhouse to life. Consider adding decorative elements such as stenciled designs, hand-painted murals, or even a personalized nameplate to make the playhouse uniquely theirs.
Furnishings and Accessories
Transform the interior of the playhouse into a cozy retreat by adding child-sized furniture, soft cushions, and playful accessories. A small table and chairs, a mini kitchen set, or a reading nook can turn the playhouse into a versatile space for imaginative play. Consider hanging curtains, adding rugs, and incorporating storage solutions to keep the playhouse organized and inviting.
Outdoor Enhancements
Extend the magic beyond the walls of the playhouse by creating an inviting outdoor area. Plant colorful flowers, install a small garden, or add a mini pathway leading to the playhouse. Incorporate outdoor lighting, such as string lights or solar-powered lanterns, to make the playhouse a captivating destination, even after the sun sets.
Personalized Touches
Encourage your children to contribute to the personalization of their playhouse. Whether it's handprints on a wall, a DIY art project, or a collection of their favorite toys and books, involving them in the process will make the playhouse feel truly special. Consider creating a memory wall where they can display their artwork and achievements, fostering a sense of ownership and pride in their space.
By focusing on these finishing touches and personalization, you'll elevate your DIY playhouse from a simple structure to a cherished and enchanting retreat for your children. Embrace creativity, involve your kids in the process, and let your imagination run wild as you put the final stamp on this delightful project.
Safety Considerations and Maintenance Tips
Ensuring the safety of your DIY playhouse is paramount to providing a secure and enjoyable environment for your children. Here are some essential safety considerations and maintenance tips to keep in mind:
Safety Considerations
-
Sturdy Construction: Double-check the structural integrity of the playhouse, ensuring that all components are securely fastened and free from any sharp edges or protruding nails.
-
Weatherproofing: Apply a weather-resistant sealant to protect the wood from moisture, rot, and decay. Regularly inspect the playhouse for any signs of water damage and address them promptly.
-
Child-Safe Materials: Use non-toxic paints, sealants, and building materials to safeguard your children from harmful chemicals. Ensure that all finishes are lead-free and safe for prolonged exposure.
-
Window and Door Safety: Install window guards or safety bars to prevent accidental falls, and choose doors with rounded edges and secure latches to avoid pinched fingers.
-
Elevated Platforms: If your playhouse features an elevated platform or loft, install sturdy railings to prevent falls and ensure that the openings are small enough to prevent children from getting stuck.
-
Regular Inspections: Schedule routine inspections to check for loose fasteners, deteriorating materials, and any potential hazards. Address any issues immediately to maintain a safe play environment.
Maintenance Tips
-
Regular Cleaning: Keep the playhouse clean by regularly sweeping the floors, wiping down surfaces, and removing any debris or clutter. This helps prevent slips, trips, and falls.
-
Seasonal Maintenance: Inspect the playhouse at the beginning of each season, checking for any damage caused by weather or pests. Repair any issues and consider reapplying sealant or paint as needed.
-
Roof and Gutter Maintenance: Clear debris from the roof and gutters to prevent water buildup and potential leaks. Ensure that the roof remains in good condition to protect the interior of the playhouse.
-
Pest Control: Implement measures to deter pests such as ants, termites, and rodents from nesting in or around the playhouse. Consider using child-safe pest control methods to maintain a pest-free environment.
-
Educate Your Children: Teach your children about the safe use of the playhouse, including rules for climbing, playing near windows, and respecting the space. Encourage them to report any maintenance issues or safety concerns.
By prioritizing safety and implementing regular maintenance, you can ensure that your DIY playhouse remains a secure and cherished space for your children to enjoy for years to come. Regular vigilance and proactive care will help preserve the magic of the playhouse while providing peace of mind for you as a parent or caregiver.
Conclusion
In conclusion, building a DIY playhouse is a fulfilling and rewarding endeavor that not only adds value to your home but also creates a magical space for your children to explore and play. From selecting the perfect location and design to adding the finishing touches and ensuring safety, every step of the process contributes to the creation of a cherished retreat. By embracing creativity, involving your children in the decision-making process, and prioritizing safety and maintenance, you can turn a simple structure into a whimsical haven where imagination knows no bounds. As you witness the joy and wonder in your children's eyes as they step into their own little world, the effort and dedication put into building the playhouse will undoubtedly prove to be worthwhile. So, roll up your sleeves, gather your tools, and embark on this enchanting journey of bringing your childhood dream to life.