
Home>Create & Decorate>DIY & Crafts>DIY Mezzanine Building: Step-by-Step Guide
DIY & Crafts
DIY Mezzanine Building: Step-by-Step Guide
Published: June 1, 2024

Content Creator specializing in woodworking and interior transformations. Caegan's guides motivate readers to undertake their own projects, while his custom furniture adds a personal touch.
Learn how to build a DIY mezzanine with our step-by-step guide. Perfect for DIY & Crafts enthusiasts looking to create extra space in their home.
(Many of the links in this article redirect to a specific reviewed product. Your purchase of these products through affiliate links helps to generate commission for Twigandthistle.com, at no extra cost. Learn more)
Introduction
So, you've been thinking about adding some extra space to your home or workshop, but you're not quite ready to take on a full-blown renovation. Well, have you considered building a DIY mezzanine? A mezzanine is a fantastic way to create additional usable space without the need for major construction. Whether you want to add a cozy loft area to your living room or a functional storage space in your garage, a DIY mezzanine might just be the perfect solution for you. In this step-by-step guide, we'll walk you through the process of building your own mezzanine, from planning and designing to adding the finishing touches. Let's get started!
Planning and Designing Your Mezzanine
Before you start swinging hammers and sawing wood, it's crucial to put some thought into the planning and design of your mezzanine. Here's how to get started:
-
Determine the Purpose: First things first, figure out what you want to use the mezzanine for. Is it going to be a cozy reading nook, a home office, or extra storage space? Understanding the purpose will help you make design decisions later on.
-
Measure the Space: Take precise measurements of the area where you plan to build the mezzanine. You'll need to know the exact dimensions to create an accurate design and ensure a proper fit.
-
Consider Building Codes: Check with your local building department to find out about any regulations or building codes that may apply to mezzanine construction. This step is crucial to ensure that your project complies with safety standards and legal requirements.
-
Create a Design: Now it's time to get creative! Sketch out a rough design of your mezzanine, considering the layout, access points, and any additional features you want to include. Don't worry about making it perfect at this stage; you can refine the design as you go.
-
Think About Materials: Consider the materials you'll use for the mezzanine structure and flooring. Will you opt for wood, metal, or a combination of both? Each material has its pros and cons, so weigh your options carefully.
By taking the time to plan and design your mezzanine thoroughly, you'll set the stage for a successful DIY project that meets your needs and fits seamlessly into your space.
Obtaining Necessary Permits and Approvals
Before you start building your mezzanine, it's crucial to ensure that you have all the necessary permits and approvals in place. Here's what you need to do:
-
Research Local Regulations: Start by researching the specific regulations and requirements for mezzanine construction in your local area. Building codes and permit requirements can vary from one jurisdiction to another, so it's essential to be well-informed.
-
Contact the Building Department: Reach out to your local building department to inquire about the permits and approvals needed for your mezzanine project. They can provide you with detailed information on the application process and any specific documentation required.
-
Submit Permit Applications: Once you have a clear understanding of the permit requirements, it's time to submit your permit applications. This may involve filling out forms, providing detailed plans and designs, and paying any associated fees.
-
Wait for Approval: After submitting your applications, you'll need to wait for the building department to review and approve your plans. This process can take some time, so it's essential to factor in potential delays when planning your project timeline.
-
Address Feedback or Modifications: In some cases, the building department may request modifications to your plans before granting approval. Be prepared to make any necessary adjustments and resubmit your plans for review.
-
Obtain Final Approvals: Once your plans have been approved, you'll receive the necessary permits to proceed with your mezzanine construction. It's crucial to keep these permits on-site throughout the construction process and ensure that you comply with the approved plans.
By obtaining the required permits and approvals before starting your mezzanine project, you'll avoid potential legal issues and ensure that your construction meets all relevant safety and building standards.
Gathering Materials and Tools
Now that you have your plans in place and the necessary permits secured, it's time to gather the materials and tools you'll need for your mezzanine construction. Here's a comprehensive list to ensure you have everything on hand before you start building:
Materials
- Lumber: Depending on your design, you'll need various sizes of lumber for the frame, joists, and supports. Consider the load-bearing capacity and durability of the wood for your specific application.
- Fasteners: Stock up on screws, nails, and bolts of different sizes to secure the structural components together. Make sure to choose fasteners suitable for the materials you're working with.
- Flooring: Select the type of flooring that best suits your needs, whether it's plywood, oriented strand board (OSB), or another suitable material. Ensure that it provides the necessary support and stability for the mezzanine.
- Railings: If your design includes railings for safety, gather the necessary materials such as balusters, handrails, and connectors. Consider both safety and aesthetics when choosing railing components.
- Finishing Materials: Depending on your preferences, you may need paint, stain, or sealant to finish the wood and protect it from wear and tear.
Tools
- Power Tools: A circular saw, drill/driver, and impact driver will be essential for cutting lumber and driving screws efficiently.
- Measuring and Marking Tools: Ensure you have a tape measure, carpenter's square, and chalk line to make accurate measurements and layout lines.
- Level and Plumb Bob: Keeping everything straight and level is crucial, so have a reliable level and plumb bob on hand.
- Safety Gear: Don't forget safety glasses, work gloves, and a dust mask to protect yourself during construction.
- Ladder or Scaffolding: Depending on the height of your mezzanine, you'll need a safe and stable way to access the construction area.
By gathering all the necessary materials and tools beforehand, you'll streamline the construction process and minimize delays. It's always a good idea to double-check your materials list against your plans to ensure you have everything you need to bring your DIY mezzanine to life.
Preparing the Space for Construction
Before diving into the actual construction of your mezzanine, it's essential to prepare the space where the structure will be built. This preparation phase sets the foundation for a smooth and efficient construction process. Here's a detailed breakdown of the steps involved in preparing the space for your DIY mezzanine project:
-
Clearing the Area: Start by clearing the designated area of any obstructions, furniture, or items that may impede the construction process. This includes removing any existing flooring or carpeting in the designated mezzanine space.
-
Inspecting the Subfloor: Once the area is clear, inspect the subfloor to ensure it is structurally sound and capable of supporting the additional weight of the mezzanine. Look for signs of water damage, rot, or structural issues that may need to be addressed before proceeding.
-
Marking the Layout: Use chalk lines or painter's tape to mark the exact layout and dimensions of the mezzanine on the subfloor. This visual guide will help you stay on track during the construction process and ensure accurate placement of the structural components.
-
Addressing Electrical and HVAC Considerations: If the mezzanine will impact existing electrical wiring, outlets, or HVAC systems, it's crucial to address these considerations before construction begins. Consult with a qualified electrician or HVAC professional to make any necessary adjustments or installations.
-
Securing Perimeter Support: Depending on your mezzanine design, you may need to install perimeter support beams or columns to provide additional structural stability. Ensure that these supports are securely anchored to the floor and ceiling as per your design specifications.
-
Creating a Construction Zone: Establish a designated construction zone around the mezzanine area to ensure safety and organization. This may involve setting up barriers or signage to prevent unauthorized access and protect individuals from potential hazards.
-
Organizing Materials and Tools: Set up a dedicated area for storing materials and tools near the construction site. This will streamline the construction process and minimize the need to transport items back and forth during the build.
By thoroughly preparing the space for mezzanine construction, you'll create a solid foundation for the subsequent phases of the project. Taking the time to address structural considerations, clear the area, and organize materials will contribute to a successful and efficient DIY mezzanine build.
Building the Mezzanine Frame
Building the mezzanine frame is a critical phase of the construction process, as it forms the structural backbone of the entire mezzanine. Here's a detailed breakdown of the steps involved in building the mezzanine frame:
-
Cutting the Lumber: Begin by cutting the lumber according to the precise measurements outlined in your mezzanine design. Use a circular saw to make accurate cuts, ensuring that the pieces fit together seamlessly during assembly.
-
Assembling the Frame Components: With the lumber cut to size, assemble the frame components on the ground or a flat surface. This typically involves constructing the perimeter frame and adding internal joists or supports as per your design specifications.
-
Securing the Frame: Once the frame components are assembled, use fasteners such as screws or nails to secure the joints and connections. It's crucial to ensure that the frame is sturdy and level before proceeding to the next steps.
-
Lifting the Frame into Position: Depending on the size and height of the mezzanine, you may need assistance to lift the assembled frame into its designated position. Use caution and proper lifting techniques to avoid injury and ensure the frame is placed accurately.
-
Attaching the Frame to the Structure: Secure the mezzanine frame to the existing structure, such as the walls or columns, using appropriate fasteners and anchoring methods. This step is essential for ensuring the stability and safety of the mezzanine.
-
Checking for Level and Square: Once the frame is in place, use a level and carpenter's square to verify that it is perfectly level and square. Making any necessary adjustments at this stage will prevent issues during the subsequent construction phases.
-
Adding Diagonal Bracing (if needed): Depending on the size and design of the mezzanine, you may need to add diagonal bracing to enhance the structural integrity of the frame. This bracing helps distribute the load and prevent lateral movement.
-
Consulting Structural Engineer (if necessary): If you have any concerns about the structural stability of the frame, it's advisable to consult a structural engineer to review the construction and provide guidance on reinforcing the frame if needed.
By following these steps and paying close attention to detail, you'll ensure that the mezzanine frame is robust, secure, and capable of supporting the intended load. The frame serves as the foundation for the subsequent construction phases, making it a crucial aspect of the DIY mezzanine building process.
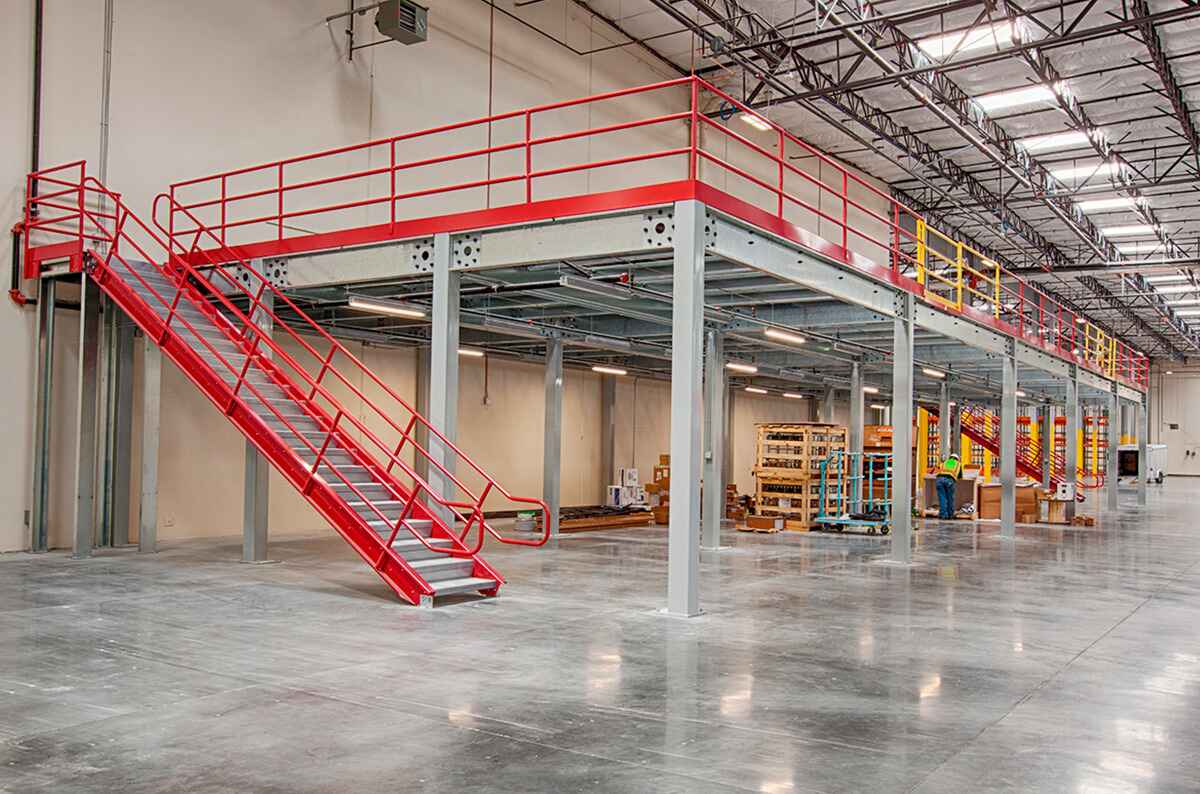
Installing the Flooring and Railings
With the mezzanine frame securely in place, the next crucial step is to install the flooring and railings to create a safe and functional elevated space. Here's a detailed guide on how to proceed with this phase of the DIY mezzanine construction:
Flooring Installation
-
Measuring and Cutting: Begin by measuring the dimensions of the mezzanine floor area and cutting the flooring material, whether it's plywood, OSB, or another suitable option, to fit the space accurately. Use a circular saw to achieve clean and precise cuts.
-
Securing the Flooring: Once the flooring panels are cut to size, secure them to the mezzanine frame using appropriate fasteners, such as screws or nails. Ensure that the panels are evenly spaced and securely attached to provide a stable and level surface.
-
Finishing Touches: Depending on your design preferences, you may choose to apply a protective finish to the flooring to enhance its durability and aesthetics. This could involve staining, painting, or sealing the wood to safeguard it from wear and tear.
Railing Installation
-
Selecting Railing Components: Choose the railing components based on your design and safety requirements. This may include balusters, handrails, and connectors that comply with local building codes and safety standards.
-
Positioning the Railings: Determine the layout and positioning of the railings around the perimeter of the mezzanine. Ensure that the spacing between balusters meets safety regulations and provides adequate protection against falls.
-
Securing the Railings: Once the railing layout is established, secure the railing components to the mezzanine frame using appropriate fasteners. It's crucial to ensure that the railings are firmly anchored and capable of withstanding the required loads.
-
Checking Compliance: Verify that the installed railings comply with relevant safety standards and regulations. This may involve measuring railing heights, inspecting baluster spacing, and ensuring that the overall design meets safety requirements.
-
Adding Finishing Details: Consider adding finishing touches to the railings, such as decorative caps or trim, to enhance the visual appeal of the mezzanine while maintaining safety and functionality.
By following these steps, you'll successfully install the flooring and railings, transforming the mezzanine frame into a fully functional and secure elevated space. The flooring provides a stable surface for various activities, while the railings ensure safety and peace of mind for anyone using the mezzanine.
Adding Access to the Mezzanine
Creating a safe and convenient access point to the mezzanine is essential for its usability and functionality. Here's a detailed guide on how to add access to the mezzanine in your DIY construction project:
-
Selecting Access Options: Consider the available space and your design preferences when choosing the type of access to the mezzanine. Common options include ladders, stairs, or even a combination of both, depending on the intended use of the elevated space.
-
Designing the Access Structure: Based on your chosen access option, design the structure that will provide safe and secure passage to the mezzanine. This may involve creating a staircase with proper riser and tread dimensions or selecting a ladder with the appropriate angle and rung spacing.
-
Ensuring Compliance: Verify that the chosen access structure complies with relevant building codes and safety standards. This includes considering factors such as minimum and maximum stair dimensions, headroom clearance, and railing requirements for stairs.
-
Building the Access Structure: If you opt for a staircase, construct the steps, risers, and stringers according to your design specifications. Ensure that the stairs are securely anchored to the floor and mezzanine structure to prevent movement or instability. For ladders, ensure that they are properly anchored and provide a stable means of access.
-
Installing Handrails and Guardrails: If your design calls for handrails or guardrails along the access structure, install these components to enhance safety. Handrails provide support and stability, while guardrails prevent falls from the access point.
-
Testing and Adjusting: Once the access structure is in place, test its stability and usability. Ascend and descend the stairs or ladder to ensure that they are comfortable and safe to use. Make any necessary adjustments to improve the functionality and safety of the access point.
-
Considering Aesthetics: Depending on your preferences, consider adding aesthetic elements to the access structure to integrate it seamlessly with the overall design of the mezzanine. This could involve painting, staining, or adding decorative elements to enhance the visual appeal.
By following these steps, you'll successfully integrate a safe and functional access point to the mezzanine, ensuring that the elevated space is easily accessible and meets all safety requirements.
Finishing Touches and Safety Considerations
As you near the completion of your DIY mezzanine project, it's time to focus on the finishing touches and ensure that all safety considerations are addressed. Here's a comprehensive guide to adding those final details and prioritizing safety in your mezzanine construction:
Finishing Touches
-
Trim and Molding: Consider adding trim and molding to the edges of the mezzanine to create a polished and cohesive look. This finishing detail can enhance the aesthetics of the elevated space and seamlessly integrate it with the surrounding area.
-
Paint or Stain: Apply a fresh coat of paint or stain to the mezzanine structure and flooring to protect the wood and enhance its visual appeal. Choose a finish that complements the overall design of the space and aligns with your personal style.
-
Lighting: Install appropriate lighting fixtures to illuminate the mezzanine area. Whether it's recessed lighting, pendant lights, or wall sconces, adequate lighting enhances the functionality and ambiance of the elevated space.
-
Furniture and Decor: If the mezzanine will serve as a living space or office, consider adding furniture, decor, and personal touches to make it a comfortable and inviting area. This could include seating, shelving, and decorative elements that reflect your style.
Safety Considerations
-
Railing Stability: Double-check the stability and integrity of the installed railings to ensure that they provide reliable protection against falls. Verify that all connections are secure and that the railings meet the required height and spacing standards.
-
Slip-Resistant Flooring: If the mezzanine will be used for walking or working, consider applying a slip-resistant coating to the flooring to minimize the risk of slips and falls, especially in areas prone to moisture or spills.
-
Fire Safety: Ensure that the mezzanine area is equipped with smoke detectors and fire extinguishers, especially if it will be used as a living or working space. Safety should always be a top priority in any elevated area.
-
Clear Pathways and Exits: Keep the mezzanine area free of clutter and ensure that there are clear pathways and unobstructed exits in case of an emergency. Safety should never be compromised for the sake of aesthetics or functionality.
-
Regular Inspections: Schedule regular inspections of the mezzanine structure and components to identify any signs of wear, damage, or potential safety hazards. Address any issues promptly to maintain a safe and secure elevated space.
By focusing on these finishing touches and safety considerations, you'll not only enhance the visual appeal and functionality of your DIY mezzanine but also prioritize the well-being and safety of anyone who uses the elevated space.
Conclusion
Congratulations on completing your DIY mezzanine project! By following this step-by-step guide, you've successfully transformed your space with the addition of a functional and versatile elevated area. From the initial planning and design stages to the finishing touches and safety considerations, you've demonstrated creativity, skill, and a commitment to creating a space that meets your specific needs.
As you enjoy your newly constructed mezzanine, take pride in the fact that you've not only expanded your usable space but also gained valuable experience in DIY construction. The skills and knowledge you've acquired throughout this project can be applied to future endeavors, empowering you to take on even more ambitious home improvement projects with confidence.
Remember, safety should always be a top priority when working on DIY construction projects. Regularly inspect your mezzanine for any signs of wear or potential hazards, and address them promptly to maintain a secure and enjoyable elevated space.
Whether you've created a cozy reading nook, a practical storage area, or a stylish home office, your DIY mezzanine is a testament to your ingenuity and determination. Enjoy the fruits of your labor and take pride in the transformation you've brought to your living or working space. Cheers to your successful DIY mezzanine project!