
Home>Create & Decorate>DIY & Crafts>DIY Kayak Rack: How To Build Your Own Storage Solution
DIY & Crafts
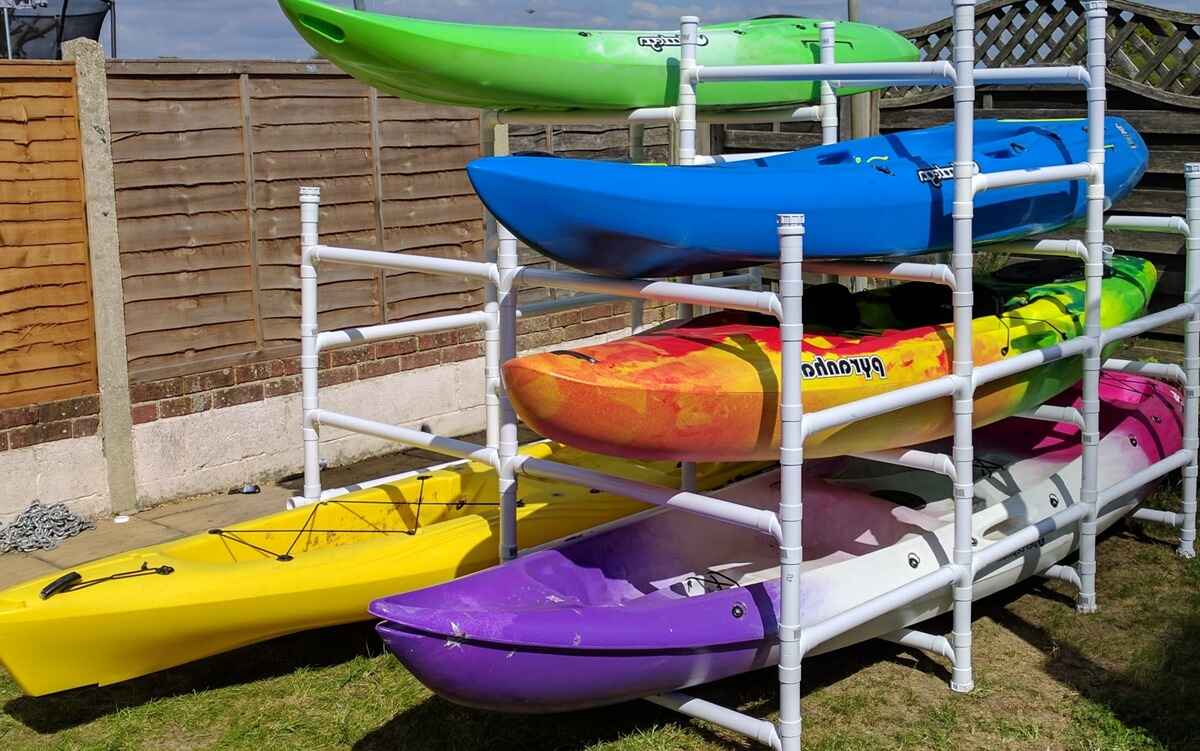
DIY Kayak Rack: How To Build Your Own Storage Solution
Published: June 7, 2024

Senior Editor in Create & Decorate, Kathryn combines traditional craftsmanship with contemporary trends. Her background in textile design and commitment to sustainable crafts inspire both content and community.
Learn how to build your own DIY kayak rack for convenient storage with this step-by-step guide. Perfect for DIY & Crafts enthusiasts!
(Many of the links in this article redirect to a specific reviewed product. Your purchase of these products through affiliate links helps to generate commission for Twigandthistle.com, at no extra cost. Learn more)
Introduction
Are you tired of tripping over your kayak every time you step into your garage? Or perhaps you're looking for a way to keep your kayak safe and secure when it's not out on the water? Building your own DIY kayak rack can be a practical and rewarding solution. Not only will it help you keep your kayak organized and out of the way, but it can also be a fun project to tackle. In this article, we'll guide you through the process of building your own kayak storage solution, so you can enjoy a clutter-free garage and peace of mind knowing your kayak is stored safely. Let's dive in!
Materials Needed
To get started on your DIY kayak rack project, you'll need the following materials:
-
Pressure-treated lumber: This will serve as the main frame of your kayak rack. Make sure to choose a sturdy and durable wood that can withstand the weight of your kayak.
-
Screws and nails: You'll need these to secure the pieces of wood together. Opt for rust-resistant screws and nails to ensure the longevity of your kayak rack, especially if it will be stored in a damp environment.
-
Hooks or J-hooks: These will be used to hang your kayak on the rack. Make sure to choose hooks that are large and strong enough to support the weight of your kayak.
-
Measuring tape and pencil: Essential for accurately measuring and marking the wood before cutting.
-
Saw: A saw will be necessary for cutting the lumber to the appropriate lengths.
-
Drill: You'll need a drill to create pilot holes for the screws and to attach the hooks to the rack.
-
Level: This will help ensure that your kayak rack is straight and even when assembled.
-
Sandpaper: Use sandpaper to smooth out any rough edges on the wood and give your kayak rack a polished finish.
-
Protective finish: Consider applying a protective finish to the wood to safeguard it from moisture and prolong its lifespan.
Gathering these materials before you begin will ensure a smooth and efficient building process.
Step 1: Measuring and Planning
Before diving into the construction of your DIY kayak rack, it's crucial to start with precise measurements and a well-thought-out plan. Here's how to get started:
-
Measure the Space: Begin by measuring the available space in your garage or storage area where you intend to place the kayak rack. Consider the height, width, and depth to ensure that the rack will fit comfortably without obstructing other items or activities in the space.
-
Determine the Number of Kayaks: If you have multiple kayaks to store, take into account the number of kayaks the rack needs to accommodate. This will influence the dimensions and design of the rack.
-
Sketch the Design: With the measurements in hand, sketch out a rough design for your kayak rack. Consider the layout, including the number of levels or bays needed to store the kayaks. This will help you visualize the final product and make any necessary adjustments before cutting the wood.
-
Plan the Placement of Hooks: Decide on the placement of the hooks or J-hooks on the rack. Ensure that they are spaced appropriately to support the kayaks securely and allow for easy loading and unloading.
-
Double-Check the Measurements: Once you have a preliminary plan and design, double-check all the measurements to avoid any errors before moving on to the next step.
Taking the time to measure and plan meticulously will set the foundation for a well-constructed and functional kayak rack. This initial step is crucial for ensuring that the rack fits the space, meets your storage needs, and provides a safe and secure storage solution for your kayaks.
Step 2: Cutting and Preparing the Wood
Once you have your measurements and plan in place, it's time to move on to the next crucial step: cutting and preparing the wood for your DIY kayak rack. Follow these detailed steps to ensure that your materials are ready for assembly:
-
Mark the Wood: Using a measuring tape and pencil, carefully mark the pressure-treated lumber according to your previously determined measurements. Double-check the markings to ensure accuracy before cutting.
-
Cut the Lumber: With the marked measurements as your guide, use a saw to cut the lumber into the appropriate lengths. Take your time and use steady, even strokes to achieve clean and precise cuts. If you have multiple pieces to cut to the same length, consider creating a template to ensure uniformity.
-
Smooth the Edges: After cutting the wood, use sandpaper to smooth out any rough or uneven edges. This will not only improve the overall appearance of the rack but also prevent any splinters or snags when handling the wood during assembly and use.
-
Create Pilot Holes: For the areas where screws will be used to join the wood pieces together, use a drill to create pilot holes. This will prevent the wood from splitting when the screws are inserted and ensure a secure and sturdy assembly.
-
Apply Protective Finish (Optional): Depending on the type of wood you're using and the environment where the kayak rack will be placed, consider applying a protective finish to the wood. This can help safeguard the wood from moisture, UV exposure, and general wear and tear, extending the lifespan of your DIY creation.
By carefully cutting and preparing the wood according to your plan, you'll set the stage for a smooth and efficient assembly process. Taking the time to ensure that each piece is accurately cut and prepared will contribute to the overall stability and durability of your DIY kayak rack.
Step 3: Assembling the Frame
With the wood pieces cut and prepared, it's time to bring your DIY kayak rack to life by assembling the frame. Follow these steps to ensure a sturdy and well-constructed frame for your kayak storage solution:
-
Lay Out the Pieces: Begin by laying out the cut pieces of lumber according to your design plan. Take a moment to visualize how the pieces will come together and ensure that everything is within reach as you begin the assembly process.
-
Start with the Base: If your design includes a base or foundation for the kayak rack, start by assembling this first. Use screws and nails to secure the base pieces together, ensuring that the corners are square and the structure is stable.
-
Build Upward: Once the base is in place, begin adding the vertical supports and cross beams to create the framework for the kayak storage bays. Use a level to ensure that each piece is straight and plumb as you attach them to the base.
-
Secure the Joints: As you join the pieces together, use screws and nails to secure the joints. Consider using wood glue in addition to the hardware for added strength and stability, especially if your kayak rack will be supporting multiple kayaks.
-
Double-Check Measurements: Periodically double-check the measurements and alignment of the frame as you progress to ensure that everything is coming together according to your initial plan. Making adjustments at this stage will prevent issues later in the assembly process.
-
Test the Stability: Once the frame is fully assembled, give it a gentle shake and ensure that it feels stable and secure. If there is any wobbling or instability, identify the source and reinforce the connections as needed.
By following these steps, you'll be well on your way to creating a robust and reliable frame for your DIY kayak rack. Taking the time to assemble the frame with precision and attention to detail will ensure that your kayak storage solution is not only functional but also built to last.
Step 4: Attaching the Hooks
Once the frame of your DIY kayak rack is securely assembled, the next step is to attach the hooks or J-hooks that will support and hold your kayak in place. Follow these detailed steps to ensure that the hooks are properly installed for a safe and reliable storage solution:
-
Determine Hook Placement: Decide on the placement of the hooks on the frame, taking into consideration the size and shape of your kayak. Ensure that the hooks are spaced appropriately to support the kayak's weight and are positioned to allow for easy loading and unloading.
-
Mark the Hook Locations: Use a pencil to mark the locations where the hooks will be attached to the frame. Double-check the measurements and alignment to ensure that the hooks will be positioned accurately.
-
Pre-Drill Pilot Holes: Before attaching the hooks, use a drill to create pilot holes at the marked locations. This will prevent the wood from splitting when the screws are inserted and ensure a secure attachment for the hooks.
-
Attach the Hooks: Using screws and a drill, securely attach the hooks to the frame of the kayak rack. Ensure that the hooks are fastened tightly and are positioned level and parallel to the ground to provide stable support for the kayak.
-
Test the Stability: Once the hooks are attached, gently test the stability by applying pressure to the hooks as if you were placing the kayak on the rack. Ensure that the hooks hold the weight of the kayak without any signs of instability or strain.
-
Make Adjustments if Necessary: If the hooks do not feel secure or if there is any wobbling or misalignment, make the necessary adjustments by reinforcing the attachment points or repositioning the hooks as needed.
By following these steps, you'll ensure that the hooks are securely attached to the frame of your DIY kayak rack, providing a reliable and safe storage solution for your kayak. Properly installed hooks are essential for maintaining the integrity of the rack and ensuring that your kayak is stored securely when not in use.
Step 5: Adding Finishing Touches
After assembling the frame and attaching the hooks, it's time to add the finishing touches to your DIY kayak rack. These final steps will not only enhance the appearance of the rack but also contribute to its overall durability and functionality.
-
Sand and Smooth: Use sandpaper to smooth out any rough edges or surfaces on the kayak rack. This step is essential for preventing any splinters or snags when handling the rack and ensuring a polished and professional finish.
-
Apply Protective Finish: Consider applying a protective finish to the wood to safeguard it from moisture, UV exposure, and general wear and tear. A protective finish can prolong the lifespan of the wood and maintain the structural integrity of the kayak rack, especially if it will be exposed to outdoor elements.
-
Inspect for Stability: Once the finishing touches are applied, take a moment to inspect the entire kayak rack for stability and sturdiness. Ensure that all connections are secure, and there are no signs of wobbling or instability. Making any necessary adjustments at this stage will ensure that the rack is ready for use.
-
Personalize (Optional): If desired, consider adding personal touches to the kayak rack, such as decorative elements or a coat of paint. Personalizing the rack can add a unique touch and make it a standout feature in your garage or storage area.
-
Organize the Space: Once the kayak rack is complete, take the opportunity to organize the surrounding space. Clear any clutter and ensure that the area is clean and accessible for storing and accessing your kayak with ease.
By adding these finishing touches, you'll not only enhance the visual appeal of your DIY kayak rack but also ensure that it is well-protected and ready to serve as a reliable storage solution for your kayak. Taking the time to complete these final steps will result in a well-crafted and functional addition to your home or garage.
Conclusion
Congratulations! You've successfully built your own DIY kayak rack, providing a practical and efficient storage solution for your kayak. By following the step-by-step process outlined in this guide, you've not only organized your space but also created a customized and reliable rack to keep your kayak safe and secure when it's not out on the water.
Remember, the key to a successful DIY project is careful planning, precise measurements, and attention to detail during each step of the construction process. With the right materials and a bit of creativity, you've transformed basic lumber and hardware into a functional and visually appealing kayak rack.
Now that your DIY kayak rack is complete, take a moment to admire your handiwork and enjoy the satisfaction of a job well done. With your kayak neatly stored and easily accessible, you can look forward to more enjoyable and hassle-free adventures on the water.
Whether you're a seasoned DIY enthusiast or a first-time builder, this project has not only provided a practical storage solution but also a sense of accomplishment. Embrace the possibilities of future projects and continue to explore the world of DIY and home improvement with confidence and creativity. Happy paddling!