
Home>Create & Decorate>DIY & Crafts>DIY Hunting Blind: Step-by-Step Guide To Building Your Own
DIY & Crafts
DIY Hunting Blind: Step-by-Step Guide To Building Your Own
Published: June 7, 2024

Content Creator specializing in woodworking and interior transformations. Caegan's guides motivate readers to undertake their own projects, while his custom furniture adds a personal touch.
Learn how to build your own DIY hunting blind with our step-by-step guide. Perfect for outdoor enthusiasts and crafty individuals. Discover the best tips and tricks for creating your custom hunting blind.
(Many of the links in this article redirect to a specific reviewed product. Your purchase of these products through affiliate links helps to generate commission for Twigandthistle.com, at no extra cost. Learn more)
Introduction
So, you're a hunting enthusiast looking to elevate your hunting game by building your very own DIY hunting blind. Well, you've come to the right place! In this step-by-step guide, we'll walk you through the process of constructing a hunting blind from scratch. Whether you're a seasoned DIYer or a novice looking to take on a new project, building your own hunting blind can be a rewarding and cost-effective endeavor. Let's dive in and get started on creating the perfect hunting spot for your next outdoor adventure!
Choosing the Right Location
When it comes to building your DIY hunting blind, selecting the right location is crucial for your hunting success. Here's how to choose the perfect spot:
-
Scout the Area: Before settling on a location, spend time scouting the area to identify the patterns of wildlife movement and behavior. Look for signs of animal activity such as tracks, droppings, and feeding areas.
-
Consider Wind Direction: Take into account the prevailing wind direction in the area. Position your hunting blind downwind from where you expect the game to approach. This will help minimize the chances of your scent being detected by the animals.
-
Evaluate Sunlight: Pay attention to the path of the sun throughout the day. You'll want to position your hunting blind in a way that minimizes glare and shadows, providing you with optimal visibility and concealment.
-
Accessibility: Choose a location that is easily accessible, allowing you to approach and exit the hunting blind quietly and without disturbing the surrounding wildlife.
-
Legal Considerations: Ensure that you are allowed to build a hunting blind in your chosen location. Check local hunting regulations and obtain any necessary permits before proceeding with construction.
By carefully considering these factors, you can select a prime location for your DIY hunting blind that maximizes your chances of a successful hunt.
Gathering Materials and Tools
Before you roll up your sleeves and dive into the construction process, it's essential to gather all the necessary materials and tools for building your DIY hunting blind. Here's a comprehensive list to get you started:
Materials:
- Lumber: Purchase quality lumber for the frame, walls, and roof of your hunting blind. Pressure-treated wood is ideal for outdoor structures as it offers durability and resistance to the elements.
- Siding or Panels: Choose suitable siding or panels to enclose the walls of the hunting blind. Options include plywood, weather-resistant panels, or camouflage fabric for a more natural look.
- Fasteners: Stock up on screws, nails, and other fasteners to secure the various components of the hunting blind together.
- Windows and Doors: If you plan to include windows and doors in your hunting blind, acquire these components along with any necessary hardware for installation.
- Roofing Material: Select roofing material such as shingles, metal sheets, or tarp to provide weather protection for your hunting blind.
- Camouflage Material: For added concealment, consider purchasing camouflage fabric or burlap to blend the hunting blind with its surroundings.
Tools:
- Measuring Tape and Level: Accurate measurements and level surfaces are crucial for a sturdy and well-built hunting blind.
- Circular Saw or Miter Saw: A saw will be essential for cutting lumber to the required dimensions.
- Drill and Bits: A drill, along with a selection of drill bits, will be needed for creating pilot holes and driving screws.
- Hammer and Nails: For traditional fastening, a hammer and nails will come in handy for securing certain components.
- Screwdriver Set: Ensure you have a variety of screwdrivers for assembling different types of fasteners.
- Staple Gun: If using camouflage fabric, a staple gun will be useful for securing the material to the hunting blind frame.
- Safety Gear: Don't forget essential safety equipment such as gloves, safety glasses, and ear protection to ensure a safe construction process.
By gathering these materials and tools, you'll be well-prepared to commence the construction of your DIY hunting blind. Remember to double-check your materials list and ensure all necessary tools are on hand before starting the project.
Building the Frame
Building the frame is a critical step in constructing your DIY hunting blind. The frame provides the structural support for the entire blind, so it's essential to ensure its stability and durability. Here's a detailed guide to help you build the frame for your hunting blind:
-
Cutting the Lumber: Begin by cutting the lumber to the required dimensions based on your chosen design and size of the hunting blind. Use a circular saw or miter saw to make precise cuts, ensuring that the pieces fit together seamlessly.
-
Assembling the Base: Construct the base of the frame by connecting the bottom pieces of lumber to form a sturdy foundation. Use screws or nails to secure the joints, ensuring that the base is level and stable.
-
Building the Walls: Once the base is in place, erect the vertical supports to form the walls of the hunting blind. Space the supports evenly to accommodate the size of the blind and provide ample support for the roof.
-
Adding Cross Braces: To reinforce the structure, add cross braces between the vertical supports. This will help distribute the weight of the roof and walls evenly, enhancing the stability of the frame.
-
Creating the Roof Structure: Depending on your design, construct the roof structure using additional lumber. This may involve creating a peaked roof, a sloped roof, or a flat roof, depending on your preference and the environmental conditions in your hunting area.
-
Securing the Joints: As you assemble the frame, ensure that all joints are securely fastened with screws or nails. Use a level to check for plumb and alignment, making any necessary adjustments to maintain the structural integrity of the frame.
-
Weatherproofing: Consider applying a weatherproof sealant or paint to the frame to protect the wood from moisture, rot, and insect damage. This step will help prolong the lifespan of your hunting blind and ensure it withstands the elements.
By following these steps, you can build a robust and reliable frame for your DIY hunting blind. The frame serves as the foundation for the rest of the construction process, setting the stage for the addition of walls, roof, and other essential components. Once the frame is in place, you'll be well on your way to creating a functional and effective hunting blind for your outdoor pursuits.
Adding the Walls and Roof
After successfully constructing the frame, the next crucial step in building your DIY hunting blind is adding the walls and roof. This phase transforms the frame into a fully enclosed and weather-resistant structure, providing you with the necessary concealment and protection during your hunting expeditions. Here's a detailed guide to adding the walls and roof to your hunting blind:
Installing the Walls
- Cutting the Wall Panels: Begin by cutting the siding or panels to the appropriate dimensions for each wall of the hunting blind. Ensure precise measurements to achieve a snug and secure fit during installation.
- Attaching the Wall Panels: Secure the wall panels to the frame using screws or nails, starting from the bottom and working your way up. Ensure that the panels are aligned and level, creating a seamless and uniform appearance for the walls.
- Creating Openings: If your design includes windows or a door, carefully measure and cut openings in the wall panels to accommodate these features. Install window frames and a door frame as per the manufacturer's instructions, ensuring a proper fit and weatherproofing.
Constructing the Roof
- Selecting Roofing Material: Choose the appropriate roofing material based on your design preferences and environmental considerations. Options include shingles, metal sheets, or tarp, each offering different levels of durability and weather resistance.
- Applying Roofing Material: Install the selected roofing material onto the roof structure, ensuring that it provides adequate coverage and protection from the elements. Secure the material using roofing nails or screws, paying attention to proper overlap and drainage to prevent water infiltration.
- Weatherproofing the Seams: Seal the seams and edges of the roof with a weatherproof sealant to prevent water leakage and reinforce the overall weather resistance of the hunting blind.
Enhancing Concealment
- Applying Camouflage: To further blend the hunting blind with its surroundings, consider applying camouflage fabric or burlap to the exterior walls and roof. Secure the camouflage material using a staple gun, ensuring a tight and uniform application for effective concealment.
- Natural Coverings: Incorporate natural coverings such as branches, leaves, or brush onto the exterior of the hunting blind to provide additional camouflage and mimic the surrounding environment.
By following these steps, you can effectively add the walls and roof to your DIY hunting blind, transforming it into a fully functional and concealed structure ready for your hunting endeavors. The walls and roof not only provide shelter and protection but also contribute to your success as a hunter by minimizing your visibility and scent, increasing your chances of a fruitful hunting experience.
Installing Windows and Doors
Installing windows and doors in your DIY hunting blind is a crucial step that enhances functionality, visibility, and accessibility. Here's a detailed guide to help you seamlessly integrate windows and doors into your hunting blind:
Windows
-
Selecting Window Type: Choose windows that provide adequate visibility while allowing for stealthy observation of your hunting area. Consider sliding or hinged windows with quiet operation to minimize disturbance.
-
Measuring and Marking: Measure and mark the precise locations for the windows on the wall panels. Ensure accurate placement to optimize your field of view and shooting opportunities.
-
Cutting Openings: Use a saw to carefully cut out the marked openings for the windows, following the measurements and guidelines provided by the window manufacturer.
-
Installing Window Frames: Place the window frames into the openings, ensuring a snug fit. Secure the frames to the wall panels using screws or fasteners provided with the window kit.
-
Sealing and Weatherproofing: Apply a bead of weatherproof sealant around the edges of the window frames to prevent water infiltration and enhance the overall weather resistance of the hunting blind.
-
Adding Window Coverings: Consider adding window coverings such as blinds or curtains to control light exposure and further conceal your presence within the hunting blind.
Doors
-
Choosing the Right Door: Select a door that provides easy access while maintaining stealth and security. Consider a hinged or sliding door with a quiet closing mechanism.
-
Measuring and Framing: Measure and mark the location for the door on the wall panel, ensuring sufficient clearance for the door to swing open and close without obstruction.
-
Cutting the Door Opening: Use a saw to carefully cut out the door opening, following the precise measurements and guidelines provided by the door manufacturer.
-
Installing the Door Frame: Position the door frame within the opening, ensuring proper alignment and clearance. Secure the frame to the wall panel using screws or fasteners provided with the door kit.
-
Securing the Door: Attach the door to the frame, ensuring smooth operation and a secure closure. Test the door to ensure it opens and closes quietly and effectively.
-
Weatherproofing and Security: Apply weather-stripping around the door frame to create a tight seal and prevent drafts. Consider adding a locking mechanism for added security when the hunting blind is not in use.
By following these steps, you can effectively install windows and doors in your DIY hunting blind, creating a functional and accessible space for your hunting activities. The addition of windows and doors enhances your ability to observe and engage with your surroundings while maintaining the concealment and comfort necessary for a successful hunting experience.
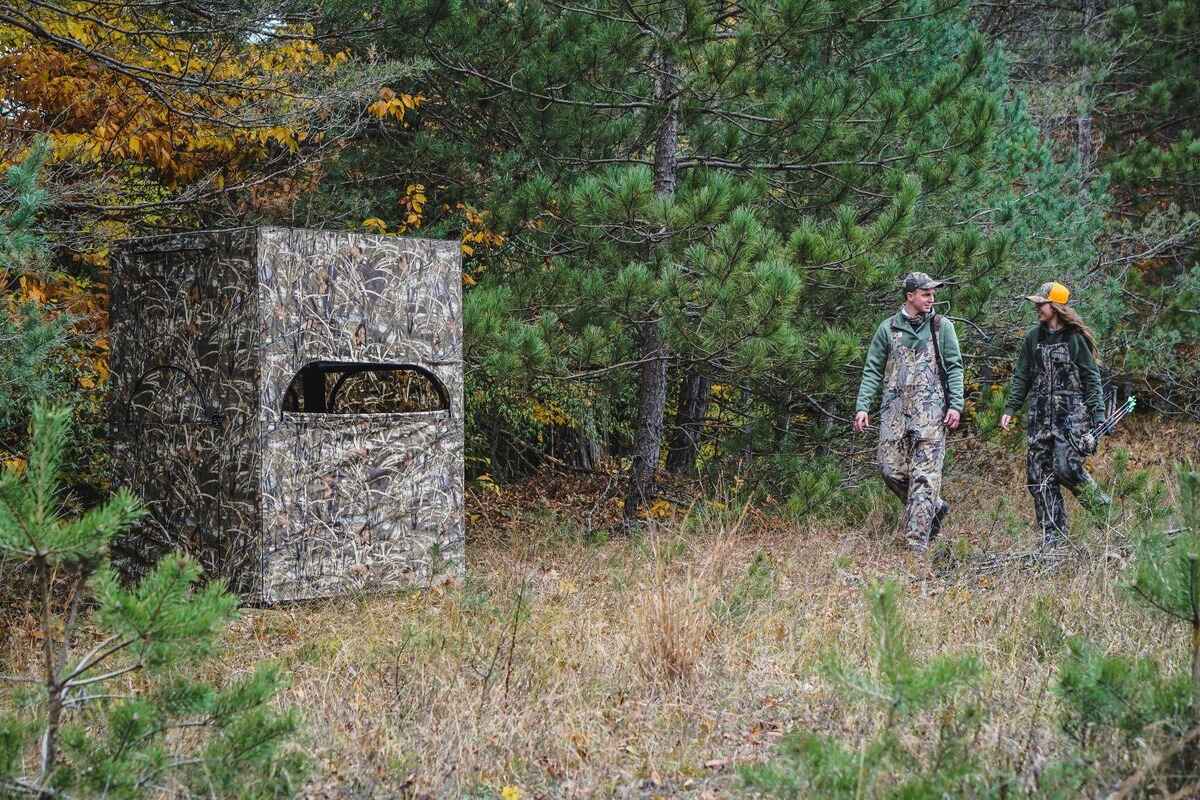
Adding Camouflage and Concealment
When it comes to creating an effective hunting blind, camouflage and concealment play a pivotal role in ensuring that you remain undetected by your quarry. Here's a detailed guide on how to effectively incorporate camouflage and concealment into your DIY hunting blind:
Exterior Camouflage
-
Selecting Camouflage Material: Choose camouflage fabric or burlap that matches the natural surroundings of your hunting area. Opt for patterns that blend seamlessly with the vegetation, terrain, and lighting conditions in your specific location.
-
Applying Camouflage Material: Carefully drape or attach the camouflage material to the exterior walls and roof of the hunting blind. Ensure a tight and uniform application, covering the entire surface to minimize any visual irregularities that could give away your position.
-
Securing the Camouflage: Use a staple gun or fasteners to secure the camouflage material to the hunting blind frame. Pay attention to detail, ensuring that the material is taut and free from any flapping or movement that could catch the eye of passing wildlife.
Natural Coverings
-
Incorporating Natural Elements: Gather branches, leaves, and brush from the surrounding area to further enhance the camouflage of your hunting blind. Strategically attach these natural coverings to the exterior of the blind, creating a three-dimensional and natural appearance.
-
Blending with Surroundings: Arrange the natural coverings in a manner that mimics the surrounding environment, such as attaching branches with similar foliage to the hunting blind's exterior. This technique helps the blind seamlessly blend into the natural landscape, making it virtually indistinguishable from the surrounding vegetation.
Concealment Accessories
-
Adding Concealment Netting: Consider incorporating concealment netting or mesh around the hunting blind to break up its outline and provide additional visual concealment. This netting can be draped over the exterior or strategically positioned to disrupt the blind's silhouette.
-
Concealment Screens: Install concealment screens or panels around the base of the hunting blind to further obscure its profile. These screens can be made from natural materials or synthetic fabrics, effectively concealing the lower portion of the blind from the view of approaching game.
By meticulously applying camouflage materials, incorporating natural coverings, and utilizing concealment accessories, you can effectively conceal your DIY hunting blind within its natural environment. This level of camouflage and concealment not only enhances your hunting success but also provides a sense of immersion in the natural world, creating a truly authentic hunting experience.
Final Touches and Safety Considerations
After completing the construction of your DIY hunting blind, it's essential to address final touches and safety considerations to ensure that your hunting blind is not only functional but also safe and secure for your hunting activities.
Interior Comfort
- Seating and Storage: Consider adding comfortable seating inside the hunting blind, such as a foldable chair or cushioned bench, to provide a comfortable and stable vantage point for extended periods of observation and waiting. Additionally, incorporate storage solutions for hunting gear and supplies to keep the interior organized and clutter-free.
Shooting Rests and Mounts
- Shooting Rests: Install shooting rests or mounts within the hunting blind to provide a stable platform for your firearm or bow. This enhances accuracy and minimizes movement, increasing your chances of a successful shot when the opportunity arises.
Safety Considerations
- Firearm Safety: Adhere to strict firearm safety protocols within the hunting blind, ensuring that firearms are always pointed in a safe direction and that the muzzle remains clear of obstructions and unintended targets.
- Adequate Ventilation: Ensure that the hunting blind is adequately ventilated to prevent the buildup of carbon monoxide or other harmful gases. Consider incorporating adjustable vents or windows that can be opened for fresh air circulation.
- Secure Entry and Exit: Implement a secure and quiet entry and exit strategy to minimize disturbance to the surrounding wildlife. Consider adding a small porch or entryway to provide a buffer zone for noise and movement when entering or exiting the hunting blind.
Weatherproofing and Maintenance
- Inspecting Seals and Joints: Regularly inspect the seals, joints, and weatherproofing elements of the hunting blind to ensure that they remain intact and effective. Address any signs of wear or damage promptly to maintain the structural integrity and weather resistance of the blind.
- Cleaning and Maintenance: Establish a routine for cleaning and maintaining the hunting blind, including removing debris, checking for pest infestations, and addressing any structural issues that may arise over time.
Safety Gear and First Aid
- Emergency Supplies: Keep a basic first aid kit and emergency supplies within the hunting blind in case of unexpected injuries or medical emergencies. Include essentials such as bandages, antiseptic ointment, a whistle, and emergency contact information.
By attending to these final touches and safety considerations, you can ensure that your DIY hunting blind provides a comfortable, secure, and safe environment for your hunting pursuits. Prioritizing safety and comfort within the hunting blind contributes to a positive and responsible hunting experience while enhancing your overall enjoyment of the outdoors.
Conclusion
Congratulations on completing the construction of your very own DIY hunting blind! By following this step-by-step guide, you've not only gained valuable insights into the process of building a hunting blind but also acquired the skills and knowledge to create a functional and effective hunting structure. Your dedication to this project reflects your commitment to enhancing your hunting experience and immersing yourself in the natural world.
As you prepare to put your DIY hunting blind to use, remember the importance of selecting the right location, gathering the necessary materials and tools, and paying attention to details such as camouflage, concealment, and safety. Your hunting blind is more than just a structure; it's a gateway to unforgettable outdoor adventures and the pursuit of your passion for hunting.
With your newly constructed hunting blind, you're now equipped to elevate your hunting game, observe wildlife in their natural habitat, and create lasting memories in the great outdoors. Whether you're a seasoned hunter or embarking on your first hunting expedition, your DIY hunting blind stands as a testament to your resourcefulness and dedication to the pursuit of your outdoor passions.
As you venture into the wilderness with your DIY hunting blind, may it serve as a symbol of your connection to nature and your commitment to responsible and ethical hunting practices. Embrace the opportunities it provides, respect the wildlife around you, and savor every moment spent in the tranquility of your outdoor sanctuary.
Now, it's time to put your DIY hunting blind to the test and embark on unforgettable hunting experiences. Enjoy the thrill of the hunt, the beauty of the natural world, and the sense of accomplishment that comes with building your very own hunting haven. Happy hunting!