
Home>Create & Decorate>DIY & Crafts>DIY Infrared Sauna: How To Build Your Own Relaxation Oasis
DIY & Crafts
DIY Infrared Sauna: How To Build Your Own Relaxation Oasis
Published: May 28, 2024

Senior Editor in Create & Decorate, Kathryn combines traditional craftsmanship with contemporary trends. Her background in textile design and commitment to sustainable crafts inspire both content and community.
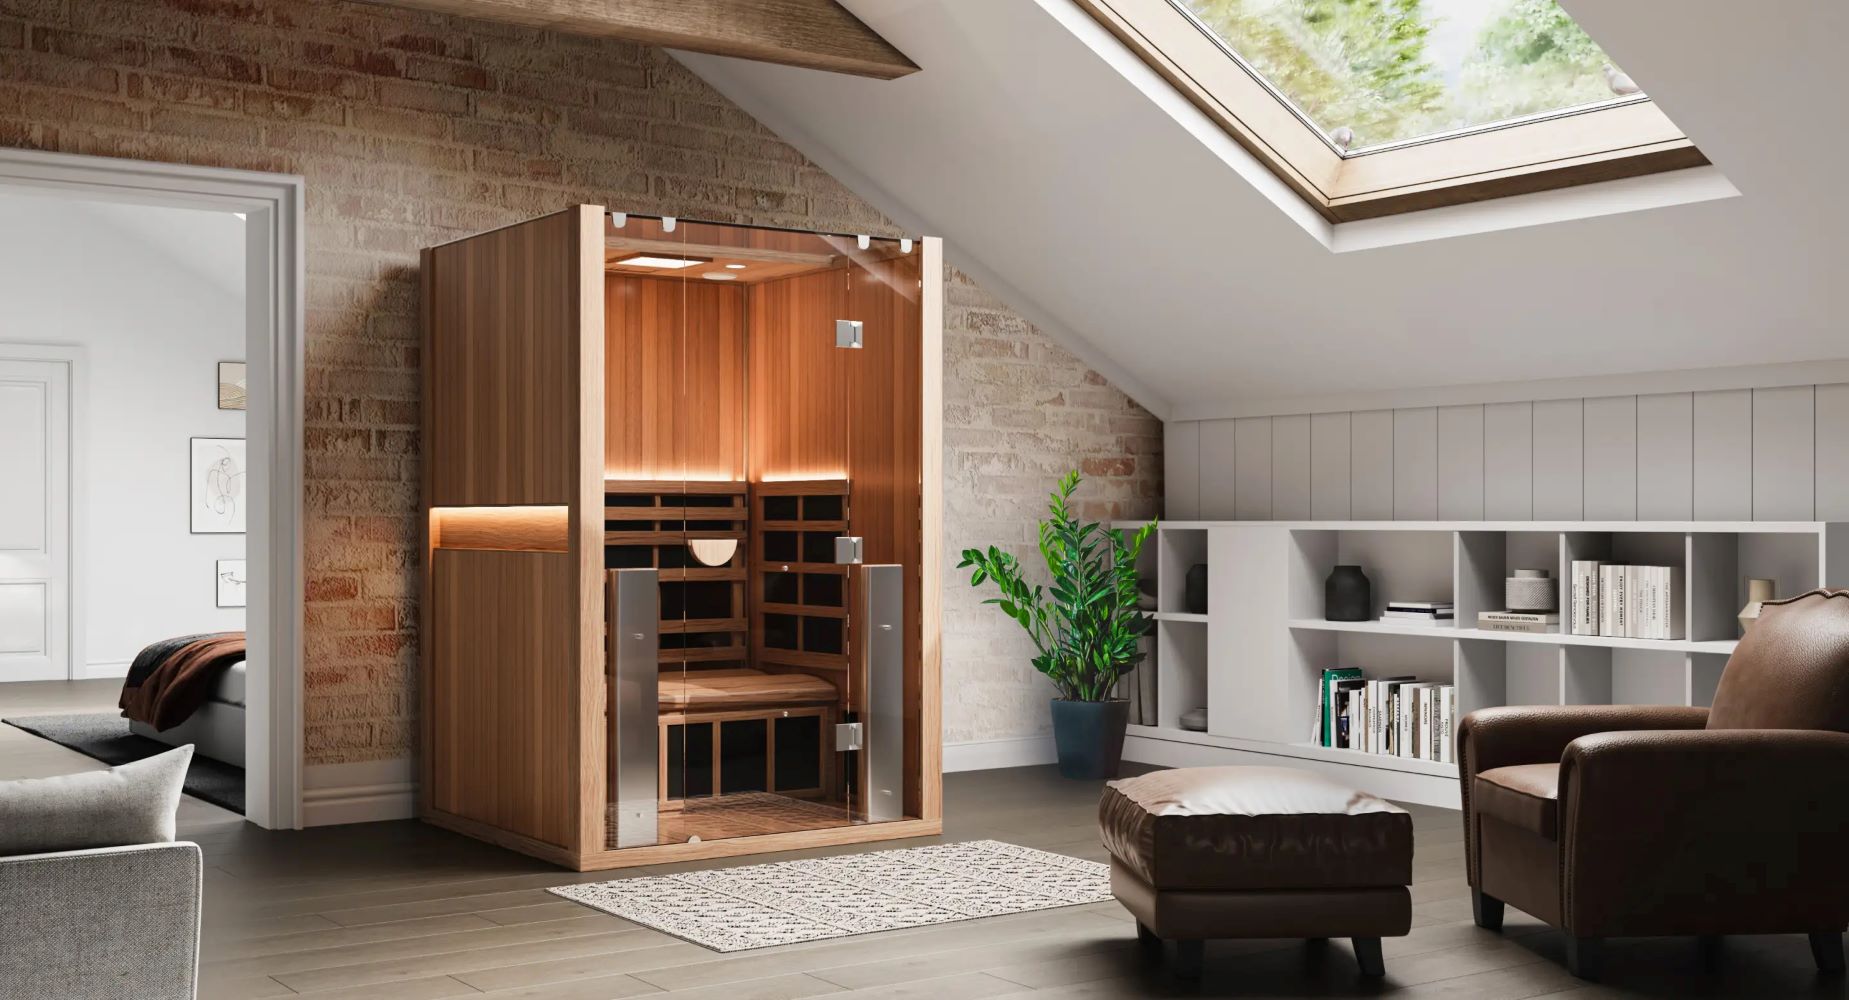
Discover how to create your own DIY infrared sauna for ultimate relaxation at home with our step-by-step guide. Transform your space into a serene oasis with our DIY & Crafts project.
(Many of the links in this article redirect to a specific reviewed product. Your purchase of these products through affiliate links helps to generate commission for Twigandthistle.com, at no extra cost. Learn more)
Introduction
Are you looking to create a tranquil space in your home where you can relax and rejuvenate? Building your own infrared sauna might just be the perfect project for you. In this article, we will guide you through the process of creating your own personal relaxation oasis right in the comfort of your own home. Whether you're a seasoned DIY enthusiast or just starting out, building an infrared sauna can be a rewarding and fulfilling project that brings both relaxation and health benefits. So, let's dive in and explore how you can bring the spa experience to your home with a DIY infrared sauna.
Benefits of Infrared Saunas
-
Detoxification: Infrared saunas help in detoxifying the body by promoting sweating, which aids in flushing out toxins and impurities from the skin.
-
Pain Relief: The heat generated by infrared saunas can help alleviate muscle and joint pain, providing relief for individuals dealing with conditions such as arthritis or muscle soreness.
-
Improved Circulation: The infrared heat can stimulate blood flow, which may lead to improved circulation and cardiovascular health.
-
Relaxation and Stress Reduction: Using an infrared sauna can promote relaxation and help reduce stress, providing a calming and tranquil environment to unwind.
-
Skin Purification: The sweating induced by infrared saunas can help cleanse the skin, leading to a clearer complexion and improved skin tone.
-
Weight Loss: While not a replacement for a healthy diet and exercise, regular use of an infrared sauna can aid in weight loss through the burning of calories and increased heart rate.
-
Enhanced Immune System: Some studies suggest that regular use of infrared saunas may help strengthen the immune system, potentially reducing the frequency of colds and illnesses.
Incorporating an infrared sauna into your home can offer a multitude of health benefits, making it a valuable addition to your wellness routine.
Choosing the Right Location
When it comes to setting up your DIY infrared sauna, selecting the right location within your home is crucial. Here are some key considerations to keep in mind:
-
Space Requirements: Ensure that you have adequate space to accommodate the sauna. Measure the dimensions of the area where you plan to install the sauna to ensure it fits comfortably.
-
Ventilation: Choose a location with proper ventilation to allow for air circulation. This is essential for maintaining a comfortable and safe environment within the sauna.
-
Electrical Accessibility: Consider the proximity to electrical outlets. Since infrared saunas require electricity to power the heating panels, it's important to choose a location where electrical access is convenient.
-
Privacy and Comfort: Select a location that offers privacy and comfort. Whether it's a spare room, basement, or dedicated space, ensure that the location provides a peaceful and relaxing atmosphere for your sauna sessions.
-
Flooring and Moisture Resistance: Opt for a location with flooring that can withstand moisture and heat. Since saunas produce heat and humidity, it's important to choose a location with flooring that is resistant to these elements.
By carefully considering these factors, you can choose the optimal location for your DIY infrared sauna, creating a serene and functional space for relaxation and wellness within your home.
Gathering Materials and Tools
Before diving into the construction of your DIY infrared sauna, it's essential to gather all the necessary materials and tools. Here's a comprehensive list to help you get started:
Materials
- Infrared Panels: Purchase high-quality infrared panels designed for use in saunas. These panels emit the infrared heat necessary for the sauna experience.
- Lumber: Select durable and heat-resistant lumber for constructing the frame of the sauna. Cedar is a popular choice due to its natural resistance to moisture and decay.
- Insulation: Choose insulation materials to help retain heat within the sauna and improve energy efficiency.
- Vapor Barrier: A vapor barrier will help prevent moisture from penetrating the walls of the sauna, contributing to its longevity.
- Seating: Depending on the size of your sauna, you may need to purchase pre-made sauna benches or materials to construct custom seating.
- Flooring: Select sauna-grade flooring that can withstand heat and moisture. Ceramic tiles or vinyl flooring are suitable options.
- Fasteners and Hardware: Stock up on screws, nails, and other hardware required for assembling the sauna frame and securing components.
- Lighting: Choose sauna-safe lighting fixtures that can withstand the heat and humidity present in the sauna environment.
- Trim and Finishings: Consider the trim and finishings to complete the aesthetic appeal of your sauna.
Tools
- Circular Saw: A circular saw will be essential for cutting lumber and panels to the required dimensions.
- Drill and Bits: A power drill with a selection of drill bits will be necessary for assembling the sauna frame and installing components.
- Level: Ensure the sauna is constructed evenly and straight with the help of a reliable level.
- Staple Gun: A staple gun will be useful for securing insulation and vapor barrier materials in place.
- Measuring Tape: Accurate measurements are crucial in the construction process, making a measuring tape an indispensable tool.
- Screwdriver Set: Have a variety of screwdrivers on hand for assembling components and fastening hardware.
- Pencil and Marking Tools: Marking tools will aid in accurately laying out cuts and positioning components during assembly.
- Safety Gear: Prioritize safety by wearing protective gear such as goggles, gloves, and a dust mask during construction.
By gathering these materials and tools, you'll be well-prepared to embark on the construction of your DIY infrared sauna, ensuring a smooth and efficient building process.
Building the Frame
Building the frame of your DIY infrared sauna is a critical step in the construction process. The frame provides the structural support for the sauna and serves as the foundation for installing the infrared panels and other components. Here's a detailed guide to help you construct the frame of your infrared sauna:
1. Design and Layout
Begin by designing the layout of your sauna frame. Consider the dimensions of the space and the number of occupants the sauna will accommodate. Plan the placement of the benches, door, and any additional features within the sauna space. Use these considerations to create a detailed blueprint or layout for the frame construction.
2. Selecting Lumber
Choose high-quality, heat-resistant lumber for constructing the frame. Cedar is a popular choice due to its natural resistance to moisture and decay, making it well-suited for the sauna environment. Ensure that the lumber is straight, free from defects, and suitable for the dimensions of your sauna design.
3. Cutting and Assembly
Using a circular saw, carefully cut the lumber to the required dimensions based on your sauna layout. Assemble the frame components, including the walls, ceiling, and bench supports, according to the blueprint. Use a level to ensure that the frame is constructed evenly and straight, making any necessary adjustments as you progress.
4. Securing the Frame
Secure the frame components together using screws and appropriate fasteners. Ensure that the frame is sturdy and well-anchored to the floor and walls, providing a stable structure for the sauna. Pay attention to the connections and joints, reinforcing them as needed to enhance the overall strength of the frame.
5. Insulation and Vapor Barrier
Once the frame is assembled, consider adding insulation between the frame studs to help retain heat within the sauna. Install a vapor barrier over the insulation to prevent moisture from penetrating the walls. Proper insulation and a vapor barrier contribute to the energy efficiency and longevity of the sauna.
6. Door Installation
If your sauna design includes a door, carefully install it within the frame, ensuring a snug and secure fit. The door should provide a tight seal to maintain the heat and humidity levels within the sauna while allowing for easy access.
By following these steps, you can successfully construct the frame of your DIY infrared sauna, laying the groundwork for the installation of the infrared panels and the completion of your personal relaxation oasis.
Installing Infrared Panels
-
Panel Placement: Begin by determining the optimal placement for the infrared panels within your sauna. Consider the dimensions of the space, the heat distribution capabilities of the panels, and the desired coverage area. Position the panels strategically to ensure even heat distribution throughout the sauna.
-
Mounting the Panels: Secure the infrared panels to the interior walls of the sauna using the appropriate mounting hardware. Follow the manufacturer's guidelines for the recommended mounting height and spacing between the panels. Ensure that the panels are securely fastened and aligned to provide consistent heat dispersion.
-
Electrical Connections: Connect the infrared panels to the power source according to the manufacturer's specifications. Follow all electrical wiring guidelines and safety protocols to ensure a secure and reliable connection. If you are not experienced with electrical work, consider consulting a professional to handle the wiring and connections.
-
Testing and Calibration: Once the panels are installed and connected, test the functionality of each panel to ensure that they are generating the expected level of infrared heat. Use a thermometer to measure the temperature across different areas of the sauna, making adjustments as needed to achieve uniform heat distribution.
-
Additional Considerations: Depending on the design of your sauna, you may choose to incorporate additional features such as control panels or timers to regulate the operation of the infrared panels. Ensure that these components are installed and configured according to the manufacturer's instructions for optimal performance.
By following these steps, you can effectively install the infrared panels in your DIY infrared sauna, creating a soothing and rejuvenating environment for relaxation and wellness.
Adding Seating and Flooring
When it comes to creating a comfortable and inviting environment within your DIY infrared sauna, the addition of suitable seating and flooring is essential. Here's a detailed guide to help you incorporate these elements into your personal relaxation oasis:
Seating Options
-
Pre-Made Benches: If you prefer a convenient option, consider purchasing pre-made sauna benches designed to withstand the heat and humidity of the sauna environment. These benches are available in various sizes and configurations, allowing you to select the most suitable option for your sauna space.
-
Custom Bench Construction: For a personalized touch, you can opt to construct custom benches using heat-resistant lumber that complements the overall design of your sauna. Ensure that the benches are securely anchored to the frame and positioned to maximize comfort and relaxation during sauna sessions.
-
Backrests and Cushions: Enhance the comfort of the seating by adding backrests and cushions to the benches. Select materials that are resistant to moisture and heat, providing a cozy and supportive seating experience within the sauna.
Flooring Considerations
-
Heat-Resistant Materials: Choose flooring materials that can withstand the heat and moisture present in the sauna environment. Ceramic tiles, vinyl flooring, or heat-resistant wood options are suitable choices for sauna flooring, offering durability and ease of maintenance.
-
Non-Slip Surfaces: Prioritize safety by selecting flooring with a non-slip surface to prevent accidents and ensure stability when moving within the sauna. The flooring should provide a secure footing, especially when the sauna is heated and humidity levels are elevated.
-
Proper Installation: Install the flooring with meticulous attention to detail, ensuring that it is securely affixed to the sauna floor. Proper installation is crucial for maintaining the integrity of the flooring and preventing any issues related to heat exposure and moisture.
-
Aesthetic Appeal: Consider the aesthetic appeal of the flooring and its compatibility with the overall design of the sauna. Choose flooring options that complement the visual aesthetic of the space while meeting the functional requirements of a sauna environment.
By carefully selecting and installing suitable seating and flooring options, you can create a welcoming and comfortable atmosphere within your DIY infrared sauna, enhancing the overall relaxation and rejuvenation experience for you and your guests.
Wiring and Electrical Considerations
When it comes to the installation of an infrared sauna, proper wiring and electrical considerations are paramount for ensuring safety and functionality. Here's a detailed guide to help you navigate the wiring and electrical aspects of your DIY infrared sauna:
-
Electrical Requirements: Before proceeding with the wiring, familiarize yourself with the electrical requirements of the infrared sauna. Determine the power specifications for the infrared panels and any additional electrical components that will be incorporated into the sauna design. Ensure that your home's electrical system can accommodate the power needs of the sauna without overloading the circuit.
-
Professional Consultation: If you are not experienced in electrical work, consider consulting a licensed electrician to assess the electrical requirements and handle the wiring installation. An electrician can ensure that the wiring is compliant with local building codes and safety standards, minimizing the risk of electrical hazards.
-
Dedicated Circuit: To power the infrared panels and other electrical components within the sauna, it is advisable to have a dedicated circuit installed. A dedicated circuit ensures that the sauna's electrical load is isolated from other household appliances and devices, reducing the likelihood of circuit overloads and electrical issues.
-
GFCI Protection: Install Ground Fault Circuit Interrupter (GFCI) protection for the electrical outlets within the sauna space. GFCI outlets are designed to quickly shut off power in the event of a ground fault or electrical leakage, providing an added layer of safety in a humid environment such as a sauna.
-
Heat-Resistant Wiring: Use heat-resistant wiring rated for high-temperature environments when connecting the infrared panels and other electrical components. Heat-resistant wiring is designed to withstand the elevated temperatures present in the sauna, ensuring reliable and safe operation.
-
Control Panel Installation: If your sauna design includes a control panel for regulating the operation of the infrared panels, ensure that it is installed according to the manufacturer's guidelines. The control panel should be positioned in a convenient and accessible location within the sauna, allowing for easy adjustment of temperature and settings.
-
Safety Precautions: Prioritize safety by following all recommended safety precautions during the wiring and electrical installation. Use insulated tools, adhere to proper wiring techniques, and ensure that all connections are secure and well-insulated to prevent electrical hazards.
By addressing these wiring and electrical considerations with diligence and attention to detail, you can ensure that your DIY infrared sauna is equipped with a reliable and safe electrical system, providing a tranquil and rejuvenating environment for your home wellness experience.
Finishing Touches and Safety Precautions
As you near the completion of your DIY infrared sauna project, it's essential to focus on the finishing touches and incorporate safety precautions to ensure a functional and secure sauna environment.
Aesthetic Enhancements
- Trim and Molding: Add trim and molding to the interior of the sauna to create a polished and cohesive look. Select heat-resistant materials that complement the overall design of the space.
- Interior Finishes: Consider applying a protective finish to the interior surfaces of the sauna to enhance durability and resistance to moisture. Natural wood finishes can add warmth and character to the sauna space.
Safety Precautions
- Ventilation: Install a ventilation system to promote air circulation within the sauna and prevent the buildup of excess heat and humidity. Proper ventilation is crucial for maintaining a comfortable and safe environment.
- Temperature Regulation: Incorporate a reliable thermometer or temperature gauge within the sauna to monitor and regulate the heat levels. Ensure that the sauna operates within a safe temperature range to prevent overheating.
- Emergency Exit: If your sauna design does not include a door that opens outward, ensure that there is a clear and accessible emergency exit route in case of any unforeseen incidents.
- Carbon Monoxide Detector: Install a carbon monoxide detector within close proximity to the sauna to provide an additional layer of safety. Carbon monoxide detectors can alert you to any potential gas leaks or ventilation issues.
- Slip-Resistant Surfaces: Apply a non-slip coating to the flooring to prevent accidental slips and falls, especially when the sauna is heated and humidity levels are elevated.
Lighting and Ambiance
- Sauna-Safe Lighting: Install sauna-safe lighting fixtures that can withstand the heat and humidity of the sauna environment. Consider dimmable lighting options to create a relaxing ambiance during sauna sessions.
- Aromatherapy and Accessories: Enhance the sensory experience within the sauna by incorporating aromatherapy diffusers or essential oil holders. Select accessories that contribute to a tranquil and rejuvenating atmosphere.
Maintenance and Cleaning
- Cleaning Supplies: Stock up on cleaning supplies specifically designed for sauna maintenance. Regularly clean and sanitize the interior surfaces to prevent the buildup of bacteria and mold.
- Air Quality: Consider incorporating an air purifier or ionizer to maintain optimal air quality within the sauna. These devices can help eliminate impurities and allergens from the air, promoting a healthier sauna environment.
By attending to these finishing touches and implementing safety precautions, you can ensure that your DIY infrared sauna not only provides a luxurious and relaxing experience but also prioritizes the well-being and safety of its users.
Enjoying Your DIY Infrared Sauna
Now that you've successfully built your DIY infrared sauna, it's time to reap the rewards of your hard work and dedication. Here's how you can fully enjoy and make the most of your personal relaxation oasis:
Relaxation and Meditation
Take advantage of the tranquil environment within your sauna to unwind and de-stress. Whether it's after a long day at work or as part of your wellness routine, the soothing heat and peaceful ambiance of the sauna provide an ideal setting for relaxation and meditation.
Personal Spa Experience
Transform your sauna sessions into a luxurious spa experience by incorporating aromatherapy and essential oils. Infuse the air with calming scents such as lavender or eucalyptus to enhance the sensory experience and promote a deeper sense of relaxation.
Wellness and Detoxification
Embrace the detoxifying benefits of the infrared sauna by engaging in regular sweat sessions. Sweating in the sauna can help eliminate toxins from the body, promote healthy skin, and contribute to overall wellness.
Socializing and Bonding
Invite friends or family members to join you in the sauna for a shared wellness experience. The sauna provides a unique space for socializing and bonding while reaping the benefits of heat therapy and relaxation.
Post-Sauna Self-Care
After each sauna session, prioritize post-sauna self-care by hydrating with plenty of water and nourishing your body with healthy snacks or light meals. Taking care of your body after a sauna session is essential for replenishing lost fluids and nutrients.
Regular Maintenance
Maintain the cleanliness and functionality of your sauna by adhering to a regular maintenance schedule. Clean the interior surfaces, check the electrical components, and ensure that the sauna remains in optimal condition for continued enjoyment.
Mindful Sauna Practices
Practice mindfulness and self-awareness during your sauna sessions. Use this time for introspection, deep breathing, and mental relaxation, allowing the sauna to become a space for holistic wellness and self-care.
By embracing these practices and fully immersing yourself in the experience of your DIY infrared sauna, you can create a rejuvenating and revitalizing sanctuary within your home, promoting both physical and mental well-being.