Home>Create & Decorate>DIY & Crafts>DIY Bluebird House: Create A Cozy Home For Your Feathered Friends

DIY & Crafts
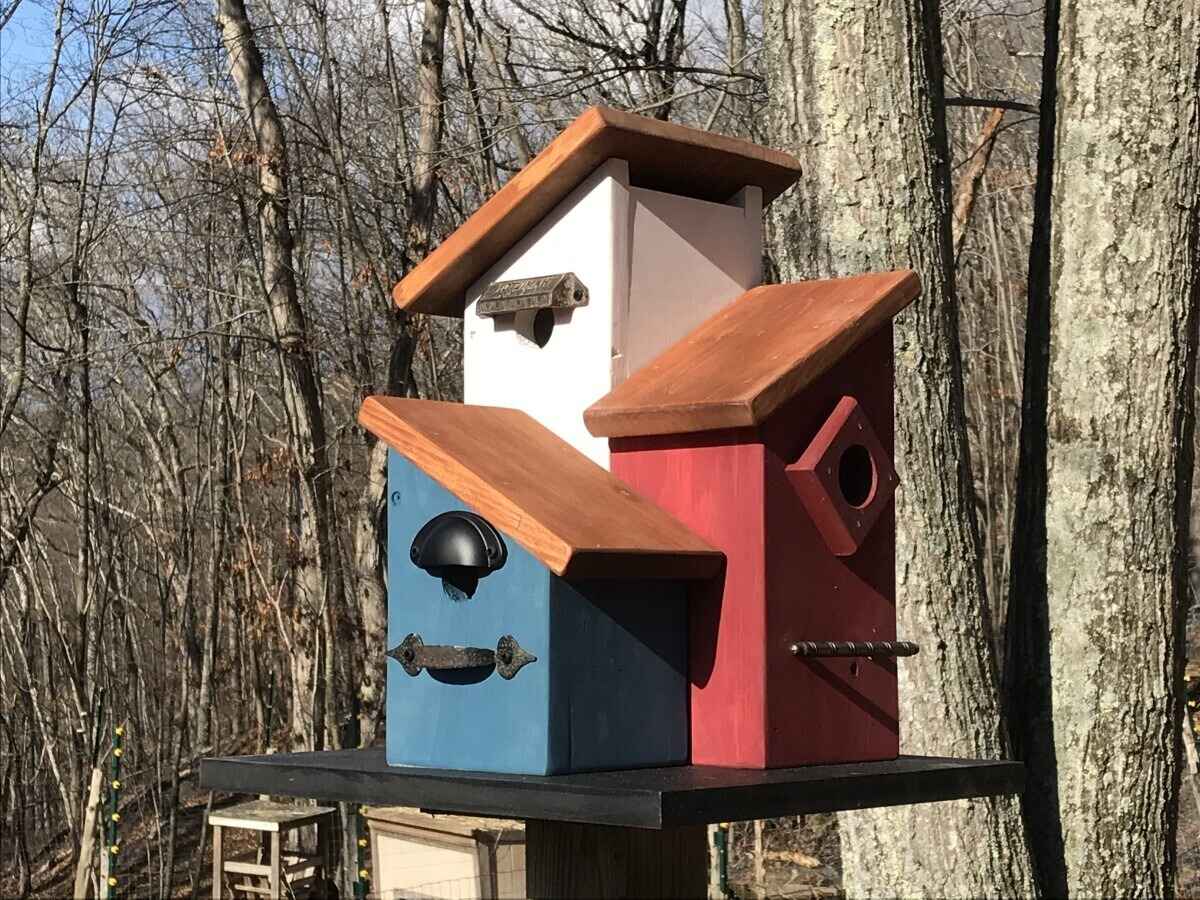
DIY Bluebird House: Create A Cozy Home For Your Feathered Friends
Published: June 5, 2024

Content Creator specializing in woodworking and interior transformations. Caegan's guides motivate readers to undertake their own projects, while his custom furniture adds a personal touch.
Create a cozy DIY bluebird house for your feathered friends with our easy-to-follow instructions and craft ideas. Perfect for DIY & Crafts enthusiasts.
(Many of the links in this article redirect to a specific reviewed product. Your purchase of these products through affiliate links helps to generate commission for Twigandthistle.com, at no extra cost. Learn more)
Introduction
Are you a bird lover looking to attract bluebirds to your yard? Building a DIY bluebird house is a fantastic way to provide a cozy and safe home for these beautiful creatures. Not only does it give you the satisfaction of creating something with your own hands, but it also offers a wonderful opportunity to observe the fascinating behavior of bluebirds up close. In this article, we will guide you through the process of constructing a bluebird house, from the materials needed to the step-by-step instructions. So, roll up your sleeves and get ready to embark on a fulfilling DIY project that will benefit both you and your feathered friends!
Benefits of Providing a Bluebird House
-
Attracting Bluebirds: By installing a bluebird house in your yard, you create an inviting habitat for these stunning birds. Bluebirds are known for their vibrant blue plumage and sweet, melodious songs. Providing them with a safe and comfortable nesting place can encourage them to frequent your outdoor space, allowing you to enjoy their beauty and cheerful tunes.
-
Natural Pest Control: Bluebirds are voracious insect-eaters, and by attracting them to your yard, you can benefit from their natural pest control abilities. These birds consume a variety of insects, including caterpillars, beetles, and grasshoppers, helping to keep the population of garden pests in check without the need for harmful chemicals.
-
Educational Opportunity: Building and maintaining a bluebird house can be an excellent educational experience for both children and adults. Observing the nesting habits, feeding behaviors, and interactions of bluebirds can provide valuable insights into the natural world, fostering a deeper appreciation for wildlife and the environment.
-
Conservation Efforts: Providing nesting sites for bluebirds can contribute to conservation efforts aimed at supporting these species. Due to habitat loss and competition from non-native bird species, bluebirds often struggle to find suitable places to build their nests. By offering them a safe haven, you play a part in preserving these beloved birds for future generations to enjoy.
-
Aesthetic Enhancement: In addition to the practical benefits, a bluebird house can also enhance the aesthetic appeal of your outdoor space. The sight of bluebirds flitting to and from their nest can add a touch of natural beauty to your yard, creating a peaceful and harmonious atmosphere.
By understanding the benefits of providing a bluebird house, you can appreciate the positive impact it can have on your local ecosystem while enjoying the delightful presence of these charming birds.
Materials Needed for DIY Bluebird House
When embarking on the construction of a DIY bluebird house, it's essential to gather the necessary materials to ensure a successful and durable outcome. Here's a list of items you'll need to get started:
-
Untreated Cedar or Pine Boards: Select high-quality, untreated cedar or pine boards for the construction of the bluebird house. These materials are durable, weather-resistant, and safe for the birds.
-
Saw: A saw will be required to cut the boards to the appropriate dimensions for assembling the bluebird house.
-
Drill and Drill Bits: You'll need a drill and suitable drill bits for creating entrance holes, ventilation holes, and assembling the house.
-
Wood Screws: Choose corrosion-resistant wood screws to securely fasten the components of the bluebird house.
-
Wood Glue: Opt for weatherproof wood glue to reinforce the joints and enhance the overall sturdiness of the structure.
-
Measuring Tape and Pencil: Accurate measurements are crucial in ensuring the proper dimensions of the bluebird house. A measuring tape and pencil will be indispensable for marking and cutting the boards.
-
Sandpaper: Smooth any rough edges and surfaces of the boards using sandpaper to create a safe and comfortable environment for the bluebirds.
-
Hinges and Latch: If you plan to include a hinged roof for easy cleaning and monitoring, hinges and a latch will be necessary for this feature.
-
Roofing Material: Consider using metal or asphalt shingles to provide protection from the elements and enhance the durability of the bluebird house.
-
Non-toxic Wood Stain or Paint (Optional): If you choose to add a decorative touch to the bluebird house, select a non-toxic wood stain or paint to apply a protective and visually appealing finish.
By gathering these materials, you'll be well-equipped to commence the construction of a welcoming and secure abode for the bluebirds in your area.
Step-by-Step Instructions for Building a Bluebird House
-
Prepare the Materials: Begin by gathering all the necessary materials and tools for the project, ensuring that the wood is untreated and of high quality. Use the measuring tape and pencil to mark the dimensions on the boards, including the front, back, sides, and roof pieces.
-
Cut the Boards: Carefully use the saw to cut the boards according to the marked dimensions. It's crucial to maintain precision to ensure that the pieces fit together seamlessly.
-
Create the Entrance Hole: Select the appropriate drill bit size for the entrance hole, typically 1.5 inches in diameter for Eastern Bluebirds. Drill the entrance hole on the front piece of the bluebird house, positioning it approximately 6-7 inches from the floor to deter predators.
-
Assemble the Bluebird House: Begin assembling the bluebird house by attaching the sides to the back piece using wood glue and screws. Ensure that the pieces are aligned correctly and securely fastened. Then, attach the front piece with the entrance hole, leaving enough space for the birds to enter and exit comfortably.
-
Add the Roof: Secure the roof piece to the top of the bluebird house, ensuring that it overhangs the structure to provide protection from the elements. If you opt for a hinged roof, attach the hinges and latch at this stage for easy access during cleaning and monitoring.
-
Drill Ventilation Holes: To provide adequate airflow within the bluebird house, drill small ventilation holes near the top of the sides. These holes help regulate the temperature and humidity inside the nesting cavity.
-
Sand and Finish: Use sandpaper to smooth any rough edges and surfaces of the bluebird house, creating a safe and comfortable environment for the birds. If desired, apply a non-toxic wood stain or paint to enhance the visual appeal and protect the wood from weathering.
-
Mount the Bluebird House: Select a suitable location for mounting the bluebird house, ensuring that it is at the recommended height of 4-6 feet above the ground and facing away from prevailing winds. Securely attach the house to a pole or tree using appropriate hardware.
-
Monitor and Maintain: Once the bluebird house is in place, regularly monitor its occupants and perform routine maintenance, such as cleaning out old nesting materials after each brood has fledged.
By following these step-by-step instructions, you can create a welcoming and secure home for bluebirds, providing them with a safe environment to raise their young and enriching your outdoor space with their presence.
Tips for Placing and Maintaining Your Bluebird House
Placing the Bluebird House
- Location, Location, Location: When selecting a spot for your bluebird house, choose an open area with minimal human activity. Bluebirds prefer open spaces with short grass, so avoid densely wooded areas or locations with tall vegetation that may obstruct their flight paths.
- Height Matters: Mount the bluebird house at a height of 4-6 feet above the ground. This elevation helps protect the nest from ground predators while providing a clear view for the adult bluebirds as they approach the house.
- Orientation: Position the entrance hole of the bluebird house facing away from prevailing winds, typically towards the east or southeast. This orientation shields the opening from strong winds and ensures the nest remains sheltered.
Monitoring and Maintenance
- Regular Inspections: Periodically check the bluebird house for signs of wear, damage, or unwanted visitors. Ensure that the house remains secure and free from obstructions that could impede the bluebirds' access.
- Cleaning Schedule: After each brood has fledged, remove the old nesting materials from the bluebird house to prepare it for the next occupants. Cleaning out the nest box helps prevent the buildup of parasites and diseases that could harm the birds.
- Predator Protection: Safeguard the bluebird house from potential predators by installing a predator guard, such as a metal baffle or a cone-shaped shield, to prevent climbing animals from reaching the entrance hole.
Additional Considerations
- Avoiding Invasive Species: Be mindful of invasive bird species, such as House Sparrows and European Starlings, which may compete with bluebirds for nesting sites. Take measures to discourage these species from occupying the bluebird house, as they can pose a threat to native bird populations.
- Provide Water and Food: Create a bird-friendly environment by offering a clean water source and bird feeders in the vicinity of the bluebird house. This supplementary food and water can attract a variety of birds while supporting the overall ecosystem.
By implementing these tips for placing and maintaining your bluebird house, you can create an optimal environment for bluebirds to thrive while ensuring the longevity and functionality of the nesting site.
Conclusion
Building a DIY bluebird house is not only a rewarding endeavor for bird enthusiasts but also a meaningful contribution to the conservation of these beloved avian species. By providing a safe and comfortable nesting site, you can attract bluebirds to your yard, benefit from their natural pest control abilities, and gain valuable insights into their fascinating behaviors. The step-by-step process of constructing a bluebird house, from gathering the materials to mounting the finished product, offers a hands-on opportunity to connect with nature and create a welcoming habitat for these beautiful birds.
As you embark on this DIY project, remember the importance of proper placement and regular maintenance to ensure the well-being of the bluebirds and the longevity of the nesting site. By following the tips for placing and maintaining the bluebird house, you can maximize its appeal to bluebirds while deterring potential threats and providing a conducive environment for successful nesting.
Ultimately, the DIY bluebird house serves as a symbol of our commitment to wildlife conservation and the preservation of natural habitats. As you witness the arrival of bluebirds to their new home and observe their activities throughout the nesting season, you'll experience the joy of knowing that your efforts have made a positive impact on the local ecosystem. So, roll up your sleeves, gather your materials, and embark on this fulfilling journey of creating a cozy home for your feathered friends.

