
Home>Create & Decorate>DIY & Crafts>DIY Accent Wall: Transform Your Space With This Creative Craft Project
DIY & Crafts
DIY Accent Wall: Transform Your Space With This Creative Craft Project
Published: June 5, 2024

Senior Editor in Create & Decorate, Kathryn combines traditional craftsmanship with contemporary trends. Her background in textile design and commitment to sustainable crafts inspire both content and community.
Transform your space with this creative DIY accent wall project. Get inspired with our DIY & Crafts ideas and create a unique look for your home. Discover how to make a statement with this fun and easy craft project.
(Many of the links in this article redirect to a specific reviewed product. Your purchase of these products through affiliate links helps to generate commission for Twigandthistle.com, at no extra cost. Learn more)
Introduction
Are you looking to add a touch of personality and style to your living space? A DIY accent wall might just be the perfect project for you! Whether you're a seasoned DIY enthusiast or a beginner looking for a fun and creative way to spruce up your home, creating an accent wall can be a rewarding and enjoyable endeavor. In this article, we'll guide you through the process of transforming a plain wall into a stunning focal point that will breathe new life into your room. So, roll up your sleeves and get ready to unleash your inner artist as we delve into the world of DIY accent walls!
Choosing the Right Wall for Your Accent
When it comes to selecting the perfect wall for your accent, there are a few key factors to consider.
-
Focus on the Focal Point: Choose a wall that naturally draws the eye or serves as a focal point in the room. This could be the wall behind your bed, the wall with a fireplace, or the wall that your couch is against.
-
Consider the Size: If you're new to accent walls, start with a smaller wall to get a feel for the process. As you gain confidence, you can move on to larger walls or even multiple accent walls in a room.
-
Evaluate the Lighting: Take into account the natural and artificial lighting in the room. A well-lit wall will showcase your accent design, while a poorly lit wall might not do it justice.
-
Think About Balance: Consider the overall balance of the room. If one side of the room feels visually heavier than the other, an accent wall can help to create equilibrium.
By carefully considering these factors, you can ensure that you choose the right wall to serve as the canvas for your creative accent wall project.
Selecting the Perfect Color Scheme
Selecting the perfect color scheme for your DIY accent wall is a crucial step in the process. The colors you choose will set the tone for the entire room and can significantly impact the overall ambiance. Here are some tips to help you nail the perfect color scheme:
-
Consider the Room's Purpose: Think about the function of the room. For a tranquil bedroom, soothing and calming colors like soft blues or gentle greens may be ideal. In a lively living room, bold and vibrant colors can inject energy and personality.
-
Take Inspiration from Existing Decor: Look at the existing colors and patterns in your room. Pulling a shade from a piece of furniture, artwork, or rug can help create a cohesive and harmonious look.
-
Understand the Psychology of Color: Different colors evoke different emotions. For example, warm tones like reds, oranges, and yellows can create a cozy and inviting atmosphere, while cooler tones like blues and greens can promote a sense of calm and relaxation.
-
Experiment with Patterns and Textures: Don't be afraid to mix and match different patterns and textures within your color scheme. Consider incorporating a mix of solid colors, geometric patterns, or even a bold wallpaper to add depth and visual interest to your accent wall.
-
Test Before Committing: Before diving in, test your chosen colors in the room. Paint or wallpaper small sections of the wall to see how the colors look in different lighting throughout the day. This will help you make any necessary adjustments before fully committing to the color scheme.
By carefully considering these factors and taking the time to explore different color options, you can ensure that your DIY accent wall will be a stunning and harmonious addition to your space.
Gathering the Necessary Materials
Before diving into your DIY accent wall project, it's essential to gather all the necessary materials to ensure a smooth and efficient process. Here's a comprehensive list of the materials you'll need to bring your accent wall vision to life:
Paint or Wallpaper
- Paint: Choose high-quality paint in the desired color or colors for your accent wall. Consider the finish as well, whether you prefer a matte, eggshell, satin, or glossy finish.
- Wallpaper: If you opt for wallpaper, select a pattern or design that complements your room's aesthetic. Ensure you have enough rolls to cover the entire accent wall.
Painting Supplies
- Paintbrushes and Rollers: Invest in a variety of brushes and rollers suitable for the type of paint you've chosen. Different brush sizes and roller nap lengths will help you achieve different textures and coverage.
- Painter's Tape: Use painter's tape to protect trim, ceilings, and adjacent walls from accidental paint splatter.
- Drop Cloths: Cover the floor and any furniture near the accent wall to prevent paint spills and splatters.
Wallpaper Tools
- Wallpaper Smoother: A smoother will help eliminate air bubbles and creases when applying wallpaper.
- Wallpaper Adhesive: If your wallpaper doesn't have adhesive backing, you'll need to purchase wallpaper adhesive to secure it to the wall.
Surface Preparation
- Spackle or Wood Filler: Fill any holes or imperfections in the wall surface before painting or applying wallpaper.
- Sandpaper: Smooth out spackled areas and ensure the wall surface is even and ready for paint or wallpaper.
Additional Tools and Equipment
- Ladder or Step Stool: Depending on the height of your accent wall, a ladder or step stool will help you reach high areas comfortably.
- Measuring Tape and Level: Accurate measurements and straight lines are crucial for a professional-looking accent wall.
- Utility Knife: Use a sharp utility knife for precise trimming of wallpaper edges and excess material.
- Paint Trays and Liners: Pour your paint into trays for easy access and cleanup.
By ensuring you have all these materials on hand, you'll be well-prepared to tackle your DIY accent wall project with confidence and efficiency. Gathering the right materials is the first step toward creating a stunning focal point in your home.
Preparing the Wall Surface
Before diving into the creative aspect of your DIY accent wall, it's crucial to prepare the wall surface properly. This step sets the foundation for a smooth and professional-looking finish. Here's a detailed guide on how to prepare the wall surface for your accent wall project:
-
Clear the Wall: Begin by removing any wall decorations, such as frames, mirrors, or shelves. Clear the wall of any obstructions to give yourself ample space to work.
-
Clean the Surface: Use a mild detergent solution and a sponge to clean the wall surface. Remove any dust, dirt, or grease that may have accumulated over time. A clean surface ensures better adhesion for paint or wallpaper.
-
Repair Imperfections: Inspect the wall for any cracks, holes, or dents. Use spackle or wood filler to fill in these imperfections. Once the filler is dry, use fine-grit sandpaper to smooth out the patched areas.
-
Remove Outlet Covers and Switch Plates: Unscrew and remove any outlet covers and switch plates on the wall. This will allow you to paint or wallpaper seamlessly around these fixtures.
-
Protect Adjacent Surfaces: Use painter's tape to protect the edges of trim, ceilings, and adjacent walls. This will prevent accidental paint or wallpaper smudges on areas you don't intend to cover.
-
Prime the Wall (Optional): Depending on the condition of the wall and the type of paint or wallpaper you're using, applying a primer may be beneficial. A primer can help create a uniform surface, improve paint adhesion, and prevent the wall color from bleeding through the new paint or wallpaper.
-
Ensure a Smooth Surface: Run your hand across the wall to check for any remaining rough patches or imperfections. Sand down any uneven areas and wipe the wall with a damp cloth to remove any dust created during the sanding process.
By meticulously preparing the wall surface, you'll create an ideal canvas for your accent wall project. Taking the time to clean, repair, and prime the wall will ensure that your final result is visually appealing and long-lasting.
Creating Your Accent Wall Design
Now comes the exciting part – creating the design for your accent wall! This is where your creativity can truly shine as you envision and bring to life a unique and eye-catching focal point for your room. Here's a step-by-step guide to help you craft a stunning accent wall design:
-
Brainstorm Ideas: Begin by brainstorming design ideas for your accent wall. Consider the overall theme and aesthetic of your room. Whether you opt for a geometric pattern, a bold stripe, a mural, or a combination of colors, let your imagination run wild.
-
Use Painter's Tape for Visualization: If you're planning a pattern or geometric design, use painter's tape to map out your design directly on the wall. This allows you to visualize the layout and make any necessary adjustments before committing to the final design.
-
Explore Stencil Options: Stencils are a fantastic way to create intricate designs with precision. There is a wide variety of stencil patterns available, ranging from classic motifs to modern geometric shapes. Select a stencil that complements your room's style and start experimenting with different layouts.
-
Consider a Mural or Wall Decals: If you're artistically inclined, consider painting a mural directly onto the wall. Alternatively, explore the option of removable wall decals or stickers for a design that can be easily changed in the future.
-
Incorporate Textures and Materials: Think beyond traditional paint and wallpaper. Experiment with textured finishes, such as faux brick, wood paneling, or even fabric. These materials can add depth and tactile interest to your accent wall.
-
Play with Color Blocking: Color blocking involves using contrasting or complementary colors to create bold, graphic designs. Whether you opt for a two-tone design or multiple intersecting colors, color blocking can make a striking statement on your accent wall.
-
Seek Inspiration from Nature or Art: Draw inspiration from nature, art, or architectural elements. Whether it's a serene nature scene, an abstract composition, or a modern interpretation of a classic motif, let external influences guide your design choices.
-
Create a Focal Point: Consider incorporating a focal point within your design, such as a large-scale artwork, a decorative mirror, or a gallery of framed photos. Your accent wall can serve as a backdrop to highlight and enhance the chosen focal point.
By following these steps and allowing your creativity to flow, you can craft a captivating accent wall design that reflects your personal style and transforms your space into a visually stunning environment.
Applying the Paint or Wallpaper
Once you've meticulously prepared the wall surface and finalized your accent wall design, it's time to bring your vision to life by applying the paint or wallpaper. Whether you've chosen to paint a bold color or adorn the wall with a captivating wallpaper pattern, the application process requires attention to detail and precision. Here's a comprehensive guide to help you navigate the process of applying paint or wallpaper to your accent wall:
Applying Paint
-
Prepare the Paint: If you're using paint, ensure that it is thoroughly mixed to achieve a consistent color and texture. Pour the paint into a tray for easy access during the application process.
-
Cut In the Edges: Use a high-quality angled brush to "cut in" the edges of the accent wall. This involves carefully painting along the corners, ceiling, and trim to create clean and precise lines.
-
Roll on the Paint: Once the edges are painted, use a roller to apply the paint to the main surface of the accent wall. Work in small sections, using a "W" or "M" pattern to ensure even coverage and avoid visible roller marks.
-
Apply Multiple Coats: Depending on the color and type of paint, you may need to apply multiple coats for full coverage. Allow each coat to dry completely before applying the next one.
-
Blend the Edges: To ensure a seamless finish, lightly feather the edges of the painted area with a dry brush or roller. This technique helps blend the newly painted section with the previously painted areas.
-
Touch Up as Needed: Once the paint is dry, inspect the wall for any missed spots or uneven areas. Touch up any imperfections with a small brush or roller to achieve a flawless result.
Applying Wallpaper
-
Measure and Cut the Wallpaper: Measure the height of your wall and add a few inches to allow for trimming. Cut the wallpaper into manageable strips, ensuring that the pattern aligns correctly from one strip to the next.
-
Apply the Adhesive: If your wallpaper requires adhesive, follow the manufacturer's instructions for mixing and applying the adhesive to the back of the wallpaper. Alternatively, if the wallpaper is pre-pasted, activate the adhesive according to the provided guidelines.
-
Position the First Strip: Carefully position the first strip of wallpaper against the wall, ensuring that it is plumb and aligned with the edges. Use a wallpaper smoother to remove air bubbles and creases as you press the wallpaper onto the wall.
-
Continue with Additional Strips: Working methodically, apply the subsequent strips of wallpaper, matching the patterns and edges as you go. Smooth out each strip to eliminate any air pockets and ensure a uniform appearance.
-
Trim Excess Wallpaper: Once all the strips are in place, use a sharp utility knife to trim the excess wallpaper along the ceiling, baseboards, and corners. Take care to make precise cuts for a polished finish.
-
Seal the Edges: Run a wallpaper seam roller along the edges of the wallpaper to secure them firmly to the wall and create a seamless look.
By following these detailed steps for applying paint or wallpaper, you can achieve a professional and visually striking accent wall that enhances the aesthetic appeal of your room. Whether you opt for a vibrant coat of paint or an intricate wallpaper design, the application process is a pivotal stage in bringing your DIY accent wall project to fruition.
Adding Finishing Touches
After applying the paint or wallpaper, adding the finishing touches will elevate the visual impact of your DIY accent wall. These final details can enhance the overall cohesiveness of the room and ensure that your accent wall becomes a captivating focal point. Here's a comprehensive guide to adding the perfect finishing touches to your accent wall:
Frame a Gallery Wall
If your accent wall serves as a backdrop for artwork or photographs, consider creating a gallery wall. Arrange a collection of framed art pieces or photographs in varying sizes and shapes to add visual interest. Ensure that the frames complement the color scheme and style of your accent wall for a harmonious display.
Install Decorative Molding
Incorporating decorative molding can add architectural detail and sophistication to your accent wall. Consider installing crown molding, chair rail molding, or picture frame molding to create a polished and refined look. Paint the molding in a contrasting color to make it stand out against the accent wall.
Introduce Wall Sconces or Lighting Fixtures
Strategically placed wall sconces or lighting fixtures can accentuate the texture and color of your accent wall. Whether you opt for modern sconces, vintage-inspired fixtures, or minimalist designs, the right lighting can enhance the ambiance of the room and draw attention to your accent wall.
Create a Statement Shelf or Mantel
If your accent wall lacks architectural features, consider adding a statement shelf or mantel. This provides an opportunity to display decorative items, plants, or personal mementos that complement the theme of the room. A well-styled shelf or mantel can add depth and character to your accent wall.
Incorporate Decorative Mirrors
Strategically placing decorative mirrors on your accent wall can create the illusion of space and reflect light, making the room feel more open and airy. Choose mirrors with unique frames or shapes to add a touch of elegance and visual intrigue to the wall.
Consider Textile Wall Hangings
Textile wall hangings, such as tapestries or woven art pieces, can introduce texture and warmth to your accent wall. These versatile decor items can soften the look of the wall and infuse a cozy, bohemian vibe into the room. Select textiles that complement the color palette and style of your space.
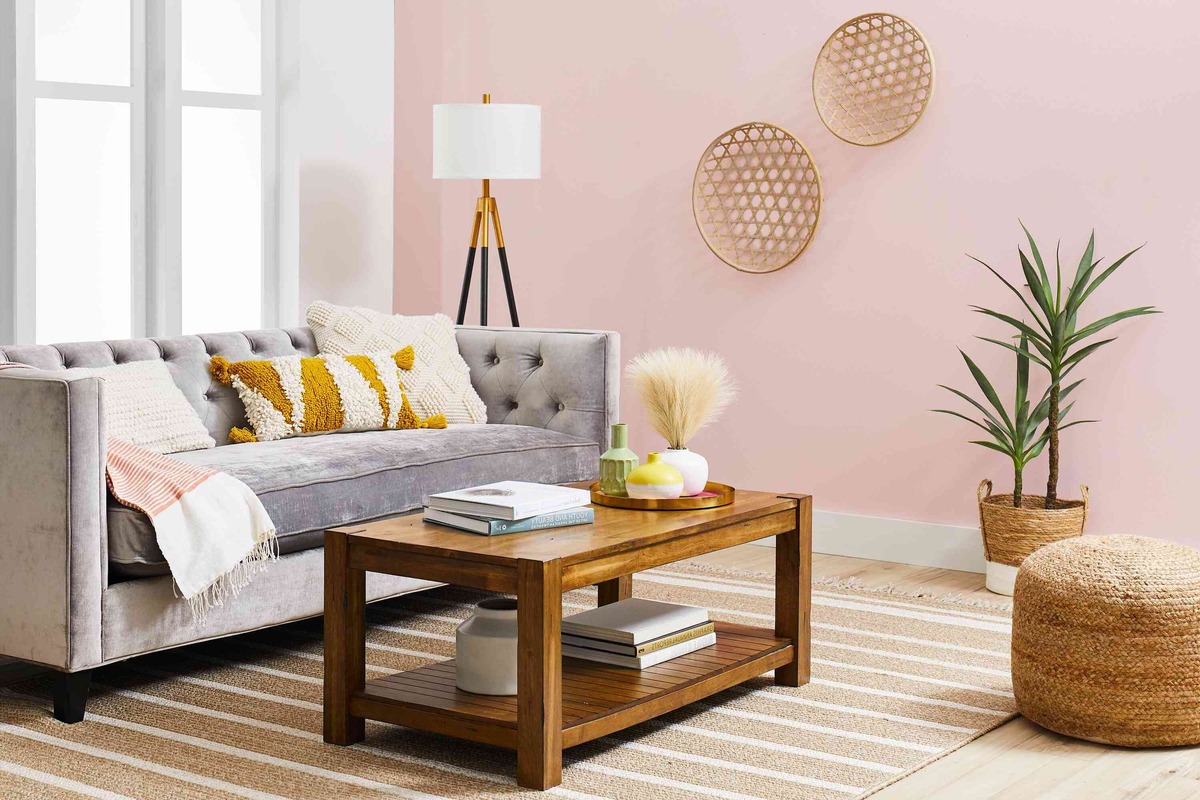
Highlight with Accent Furniture
Positioning accent furniture, such as a stylish console table, a sleek bench, or a decorative cabinet, against your accent wall can create a compelling visual composition. The furniture piece should complement the design and color scheme of the wall while serving as a functional and aesthetic addition to the room.
By incorporating these finishing touches, you can transform your DIY accent wall into a captivating and cohesive element of your interior design. Each detail contributes to the overall aesthetic and ensures that your accent wall becomes a standout feature that elevates the entire room.
Conclusion
In conclusion, embarking on a DIY accent wall project is a fantastic way to infuse your living space with creativity, personality, and visual allure. By carefully selecting the right wall, choosing a harmonious color scheme, gathering the necessary materials, preparing the wall surface, crafting a captivating design, and applying the paint or wallpaper with precision, you can achieve a stunning accent wall that transforms the ambiance of your room. The addition of finishing touches, such as gallery displays, decorative molding, lighting fixtures, and accent furniture, further enhances the impact of your accent wall, creating a cohesive and visually captivating environment. Whether you opt for a bold and vibrant statement wall or a subtle and textured focal point, the process of creating a DIY accent wall is a rewarding journey that allows you to express your individual style and elevate the aesthetic appeal of your home. So, roll up your sleeves, unleash your creativity, and watch as your DIY accent wall becomes the centerpiece of admiration in your living space.