
Home>Create & Decorate>DIY & Crafts>Deck Planter Box DIY: How To Build Your Own
DIY & Crafts
Deck Planter Box DIY: How To Build Your Own
Published: February 23, 2024

Content Creator specializing in woodworking and interior transformations. Caegan's guides motivate readers to undertake their own projects, while his custom furniture adds a personal touch.
Learn how to build your own deck planter box with our easy DIY guide. Perfect for DIY & Crafts enthusiasts looking to add a touch of greenery to their outdoor space.
(Many of the links in this article redirect to a specific reviewed product. Your purchase of these products through affiliate links helps to generate commission for Twigandthistle.com, at no extra cost. Learn more)
Introduction
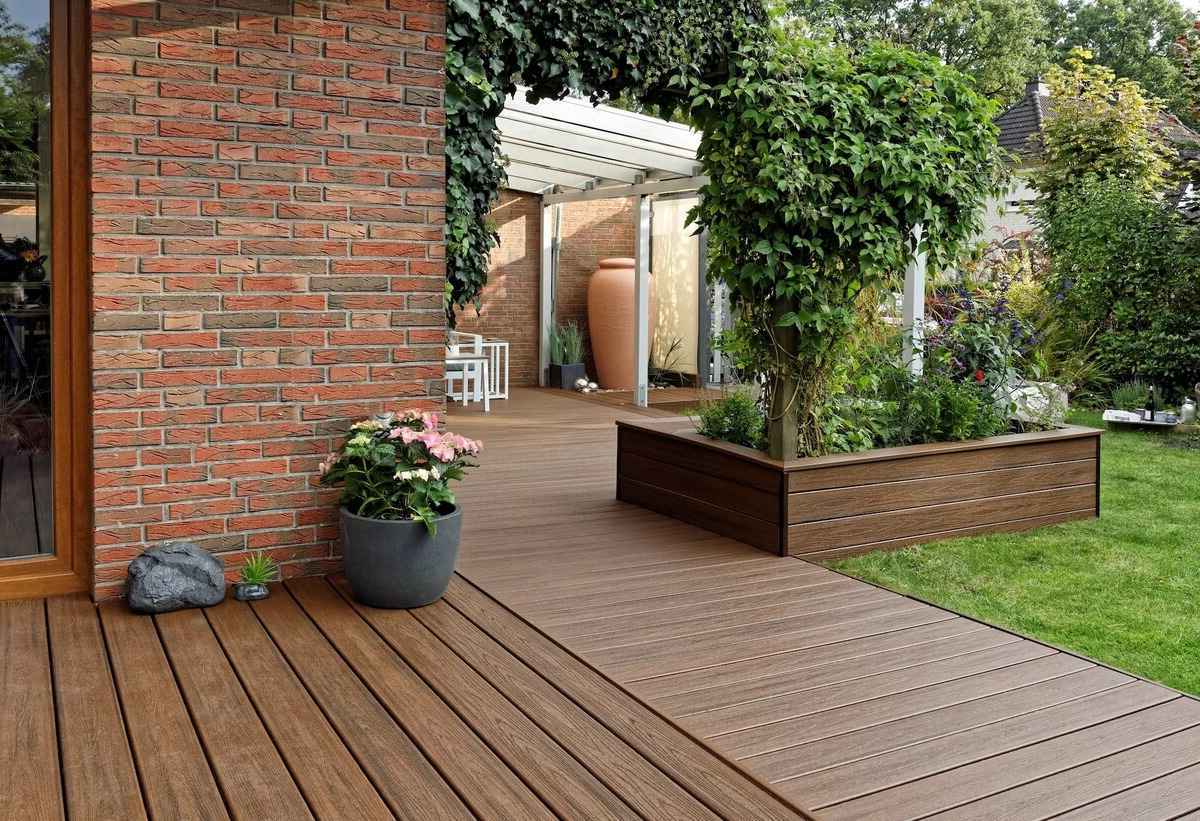
Are you looking to add a touch of greenery to your outdoor living space? Building a deck planter box can be a rewarding and practical DIY project that allows you to showcase your gardening skills while enhancing the aesthetic appeal of your deck or patio. Whether you're a seasoned DIY enthusiast or a beginner looking for a fulfilling project, constructing your own planter box can be a gratifying experience.
By creating a custom deck planter box, you have the freedom to tailor its design and size to perfectly complement your outdoor area. This project not only adds a charming and personalized touch to your space but also provides a dedicated spot for growing your favorite flowers, herbs, or vegetables. Additionally, a well-crafted planter box can serve as a natural divider, delineating different areas of your deck or patio with style and functionality.
Building your own deck planter box allows you to exercise your creativity and woodworking skills, resulting in a unique and practical addition to your outdoor decor. Whether you have a spacious deck or a cozy balcony, a custom planter box can be tailored to fit your available space, making it a versatile and adaptable solution for bringing nature closer to your home.
In this comprehensive guide, we will walk you through the step-by-step process of constructing a deck planter box, from gathering the necessary materials and tools to cutting the wood, assembling the box, adding the bottom, and putting on the finishing touches. By following these instructions, you can embark on a fulfilling DIY journey that culminates in the creation of a beautiful and functional deck planter box that reflects your personal style and enhances your outdoor living space. Let's roll up our sleeves and get ready to bring your gardening aspirations to life with this engaging and rewarding project.
Materials Needed
To embark on the exciting journey of building your own deck planter box, you will need a selection of materials that are essential for creating a sturdy and visually appealing structure. Here's a comprehensive list of the materials required for this DIY project:
-
Wood: Select high-quality, weather-resistant wood for the construction of the planter box. Cedar, redwood, or pressure-treated lumber are popular choices due to their durability and ability to withstand outdoor conditions.
-
Screws or Nails: Choose corrosion-resistant screws or nails to ensure the longevity of your planter box. Stainless steel or galvanized fasteners are ideal for outdoor applications.
-
Wood Glue: Opt for a reliable outdoor wood glue to reinforce the joints and enhance the structural integrity of the planter box.
-
Landscape Fabric: This breathable fabric is essential for lining the interior of the planter box, preventing soil erosion while allowing excess water to drain freely.
-
Plastic Liner (Optional): If you prefer an additional layer of protection for the wood, a plastic liner can be used to shield the interior of the planter box from moisture.
-
Wood Stain or Paint: Enhance the visual appeal of your planter box by choosing a high-quality wood stain or outdoor paint in a color that complements your deck or patio decor.
-
Potting Mix: Select a premium potting mix suitable for the specific plants you intend to grow in the planter box. Consider the drainage and nutrient requirements of your chosen plants when selecting the potting mix.
-
Plants: Whether you're planning to cultivate vibrant flowers, aromatic herbs, or fresh vegetables, carefully select the plants that will thrive in the environment provided by your deck planter box.
-
Sandpaper: Prepare the wood surfaces for assembly by having a few sheets of sandpaper on hand to smooth out any rough edges and ensure a professional finish.
-
Protective Gear: Prioritize safety by wearing protective gear such as gloves and safety goggles when handling wood, screws, and other construction materials.
Gathering these materials will set the stage for a successful and enjoyable DIY project, allowing you to create a custom deck planter box that harmonizes with your outdoor space and fulfills your gardening aspirations. With these essential materials at your disposal, you're ready to move on to the next phase of this rewarding endeavor.
Tools Needed
When embarking on the fulfilling journey of building your own deck planter box, having the right tools at your disposal is crucial for ensuring a smooth and efficient construction process. From measuring and cutting the wood to assembling the components and adding the finishing touches, the following tools are indispensable for bringing your DIY project to life:
-
Measuring Tape: A reliable measuring tape is essential for accurately determining the dimensions of the planter box components, ensuring precision in the cutting and assembly stages.
-
Circular Saw or Hand Saw: Whether you opt for a power tool like a circular saw or a traditional hand saw, having a means to cut the wood to the desired lengths is fundamental to the construction process.
-
Drill and Bits: A power drill equipped with appropriate drill bits is necessary for creating pilot holes and driving screws or nails, facilitating secure and durable connections between the wooden components.
-
Screwdriver or Screw Gun: Depending on the type of fasteners used, a screwdriver or screw gun is essential for tightening screws securely, contributing to the structural integrity of the planter box.
-
Clamps: Utilizing clamps during assembly can help hold the wooden pieces in place, ensuring alignment and stability while you fasten them together.
-
Level: A level is indispensable for confirming that the planter box components are assembled on a flat and even plane, preventing any tilting or instability once the box is in place.
-
Sandpaper or Sander: Smooth out rough edges and refine the surfaces of the wood components using sandpaper or a sander, ensuring a professional and polished finish.
-
Paintbrushes or Stain Applicators: If you choose to enhance the visual appeal of your planter box with wood stain or paint, having high-quality paintbrushes or stain applicators is essential for achieving a smooth and even application.
-
Utility Knife: A utility knife is useful for cutting landscape fabric and plastic liners to the appropriate size, facilitating the lining of the planter box interior.
-
Safety Gear: Prioritize safety by wearing protective gear such as gloves and safety goggles when handling tools and construction materials, ensuring a secure and comfortable working environment.
By ensuring that these essential tools are readily available, you can approach the construction of your deck planter box with confidence and efficiency, setting the stage for a successful and enjoyable DIY endeavor. With the right tools at your disposal, you're well-equipped to bring your vision to life and create a custom planter box that adds charm and functionality to your outdoor living space.
Step 1: Cutting the Wood
The initial step in constructing a deck planter box involves cutting the wood to the appropriate dimensions, laying the foundation for the assembly of the box structure. To begin, carefully measure and mark the wood according to the desired lengths and widths for the planter box components. Utilizing a measuring tape and a pencil, accurately mark the cut lines on the wood, ensuring precision in the cutting process.
Once the wood is marked, proceed to cut the pieces to the specified dimensions using a circular saw or a hand saw, depending on your preference and the availability of tools. It's essential to exercise caution and maintain a steady hand while cutting the wood to achieve clean and accurate edges. If you're cutting multiple pieces of the same length, consider using a stop block to ensure uniformity and consistency across the components.
When cutting the wood, prioritize safety by wearing protective gear such as safety goggles and gloves to safeguard against potential splinters and debris. Additionally, ensure that the work area is well-ventilated and free from obstructions to facilitate a smooth and safe cutting process.
After cutting the wood components to the required dimensions, use sandpaper or a sander to smooth out any rough edges and refine the surfaces, creating a professional finish that enhances the visual appeal of the planter box. This step not only contributes to the overall aesthetics of the project but also ensures that the wood is safe to handle and free from any sharp edges.
By meticulously cutting the wood to the specified dimensions and refining the edges, you set the stage for the seamless assembly of the planter box, laying the groundwork for a sturdy and visually appealing structure. With the wood components prepared and refined, you're ready to move on to the next phase of the construction process, bringing you one step closer to the completion of your custom deck planter box.
Step 2: Assembling the Box
With the wood components cut to the precise dimensions and refined to perfection, the next pivotal phase in constructing your deck planter box is the assembly process. This step involves bringing together the individual pieces of the planter box to form a cohesive and sturdy structure that will serve as a charming home for your favorite plants. Here's a detailed guide on how to expertly assemble the box:
1. Lay Out the Components
Begin by laying out the cut wood components in an organized manner, ensuring that you have all the necessary pieces at your disposal. Take a moment to review the dimensions and orientation of each piece, confirming that they align with the intended design of the planter box. This preparatory step sets the stage for a smooth and efficient assembly process, minimizing the likelihood of errors or oversights during construction.
2. Position the Side Panels
Start assembling the box by positioning the side panels upright, forming the perimeter of the planter box. Depending on the design, you may opt for a classic rectangular shape or explore more intricate designs such as tiered or angled configurations. Ensure that the panels are aligned at perfect right angles, using a square or a right-angle clamp to maintain precision and symmetry in the assembly.
3. Secure the Corners
Once the side panels are positioned, proceed to secure the corners by fastening them together using corrosion-resistant screws or nails. Pre-drill pilot holes to prevent the wood from splitting, then drive the fasteners through the panels, creating robust and durable connections. Consider applying a high-quality outdoor wood glue to reinforce the joints, enhancing the structural integrity of the box for long-term stability.
4. Add the End Panels
After securing the corners of the planter box, add the end panels to complete the enclosure. Align the end panels with the side panels, ensuring a seamless fit that forms a cohesive and visually appealing structure. Similar to the side panels, fasten the end panels securely using appropriate fasteners and wood glue, creating a unified box that is ready to accommodate the vibrant greenery and blooms that will grace your outdoor space.
5. Verify Alignment and Stability
Once the box is fully assembled, take a moment to verify the alignment and stability of the structure. Use a level to confirm that the planter box is sitting evenly on a flat surface, preventing any tilting or instability. Making any necessary adjustments at this stage will ensure that your planter box is not only visually appealing but also functional and reliable in its role as a home for your cherished plants.
By expertly assembling the box with precision and care, you bring your vision to life, creating a custom deck planter box that harmonizes with your outdoor space and fulfills your gardening aspirations. With the box assembled, you're ready to move on to the next phase of this fulfilling DIY project, adding the bottom to complete the construction of your charming and practical planter box.
Step 3: Adding the Bottom
As you progress in the construction of your deck planter box, the addition of the bottom serves as a crucial step in completing the structure and preparing it to house your chosen plants. The bottom not only provides a secure base for the soil and plants but also contributes to the overall stability and functionality of the planter box. Here's a detailed guide on how to expertly add the bottom to your custom planter box:
-
Measure and Cut the Bottom Panel:
Begin by measuring the interior dimensions of the assembled planter box to determine the precise size of the bottom panel. Using a measuring tape, carefully record the length and width required for the bottom panel, ensuring accuracy in your measurements. Once the dimensions are determined, mark the corresponding cut lines on a suitable piece of wood, such as plywood or solid lumber, that will serve as the bottom panel. -
Prepare the Bottom Panel:
After marking the cut lines, proceed to cut the wood to the specified dimensions using a circular saw or a hand saw, ensuring clean and precise edges. Once the bottom panel is cut to size, use sandpaper to smooth out any rough edges and refine the surface, creating a professional finish that complements the overall craftsmanship of the planter box. -
Position and Secure the Bottom Panel:
With the bottom panel prepared, carefully place it within the interior of the planter box, ensuring a snug and even fit. Secure the bottom panel in place by fastening it to the lower edges of the side and end panels using corrosion-resistant screws or nails. Pre-drill pilot holes to prevent the wood from splitting, then drive the fasteners through the bottom panel, creating a secure and stable attachment that withstands the weight of the soil and plants. -
Enhance Drainage and Protection:
To promote proper drainage and protect the wood from moisture, consider lining the interior bottom of the planter box with landscape fabric before adding the bottom panel. This breathable fabric prevents soil erosion while allowing excess water to drain freely, contributing to the overall health of your plants and the longevity of the planter box.
By meticulously adding the bottom to your deck planter box, you complete the construction of a sturdy and functional structure that is ready to accommodate your chosen plants and elevate the visual appeal of your outdoor space. With the bottom securely in place, you're one step closer to enjoying the beauty and vitality that your custom planter box will bring to your deck or patio.
Step 4: Finishing Touches
As you near the completion of your deck planter box construction, the application of finishing touches adds a touch of refinement and personalization to the project. These final details not only enhance the visual appeal of the planter box but also contribute to its longevity and resilience in outdoor conditions. Here's a comprehensive guide on how to expertly apply the finishing touches to your custom planter box:
-
Sand and Smooth: Prior to applying any finishes, take the time to thoroughly sand the exterior surfaces of the planter box. Using fine-grit sandpaper or a sander, smooth out any imperfections, rough spots, or sharp edges, ensuring a polished and professional appearance. Pay special attention to the corners and edges, creating a smooth and inviting texture that complements the natural beauty of the wood.
-
Apply Wood Stain or Paint: Enhance the aesthetic appeal of your planter box by applying a high-quality wood stain or outdoor paint in a color that harmonizes with your outdoor decor. Whether you prefer the natural warmth of wood stain or the vibrant allure of paint, ensure that the chosen finish is suitable for outdoor use and provides protection against the elements. Apply the stain or paint evenly using a paintbrush or a stain applicator, allowing each coat to dry thoroughly before applying additional layers for a flawless and enduring finish.
-
Protective Sealant: To safeguard the wood from moisture, UV rays, and other environmental factors, consider applying a protective sealant after staining or painting the planter box. A clear outdoor sealant or wood preservative can provide an additional layer of defense, prolonging the life of the wood and maintaining the luster of the finish. Follow the manufacturer's instructions for proper application and drying times, ensuring comprehensive protection for your custom planter box.
-
Drainage and Ventilation: Prior to adding soil and plants to the planter box, ensure that adequate drainage and ventilation are in place to promote the health and vitality of your greenery. If the planter box does not feature built-in drainage holes, carefully drill small holes in the bottom panel to facilitate proper water drainage, preventing waterlogging and promoting root health. Additionally, consider adding small spacers or blocks beneath the planter box to elevate it slightly, allowing air to circulate and preventing moisture buildup on the underside.
-
Personal Touches: Infuse your planter box with personal touches that reflect your unique style and creativity. Consider adding decorative elements such as brass corner brackets, ornamental handles, or custom wood carvings to elevate the visual appeal of the box and make it a distinctive focal point of your outdoor space. Embrace your creativity and individuality by incorporating personalized details that transform your planter box into a captivating and meaningful addition to your deck or patio.
By meticulously attending to these finishing touches, you elevate the craftsmanship and allure of your custom deck planter box, creating a stunning and resilient structure that enriches your outdoor living space. With the finishing touches expertly applied, your planter box is ready to be filled with vibrant greenery, adding a touch of natural beauty and charm to your deck or patio.
Conclusion
As we conclude this comprehensive guide to building your own deck planter box, it's evident that this DIY project offers a fulfilling and rewarding experience for both seasoned enthusiasts and beginners alike. By embarking on the journey of constructing a custom planter box, you have the opportunity to infuse your outdoor living space with natural beauty, personalized charm, and functional versatility. From the initial stages of gathering materials and tools to the meticulous process of cutting, assembling, and adding finishing touches, each step contributes to the creation of a unique and enduring structure that reflects your individual style and gardening aspirations.
The deck planter box serves as more than a mere container for plants; it becomes a focal point of creativity and craftsmanship, seamlessly integrating with your deck or patio while providing a dedicated space for nurturing your favorite greenery. The versatility of this DIY project allows you to tailor the design, size, and finishing details to perfectly complement your outdoor environment, resulting in a one-of-a-kind addition that enhances the visual appeal and functionality of your space.
By meticulously following the steps outlined in this guide, you have acquired the knowledge and skills necessary to embark on a fulfilling DIY journey, culminating in the creation of a beautiful and practical deck planter box. From selecting high-quality materials and utilizing essential tools to expertly assembling the box, adding the bottom, and applying finishing touches, you have demonstrated a commitment to craftsmanship and creativity that is sure to yield a remarkable outcome.
As you admire the completed deck planter box, adorned with vibrant greenery and reflecting your personal touch, take pride in the accomplishment of bringing this vision to life. Your custom planter box stands as a testament to your dedication to creating a welcoming and harmonious outdoor space, where the beauty of nature intertwines with your unique style and craftsmanship.
With the deck planter box in place, you are poised to enjoy the delightful sight of flourishing plants, the soothing ambiance of natural beauty, and the satisfaction of having crafted a functional and visually captivating structure with your own hands. Whether you're cultivating colorful flowers, aromatic herbs, or fresh vegetables, your custom planter box serves as a nurturing home for your chosen greenery, enriching your outdoor living experience and inviting moments of tranquility and joy.
As you embrace the beauty and vitality that your deck planter box brings to your outdoor space, may this DIY project inspire you to continue exploring the boundless possibilities of creativity, craftsmanship, and the seamless integration of nature into your home environment. With your newfound expertise and the enduring charm of your custom planter box, you have unlocked the potential for countless moments of natural splendor and gratifying gardening experiences in the comfort of your own outdoor sanctuary.