
Home>Organize & Storage>Closet Organization>How to Build a DIY Home Network Closet
Closet Organization
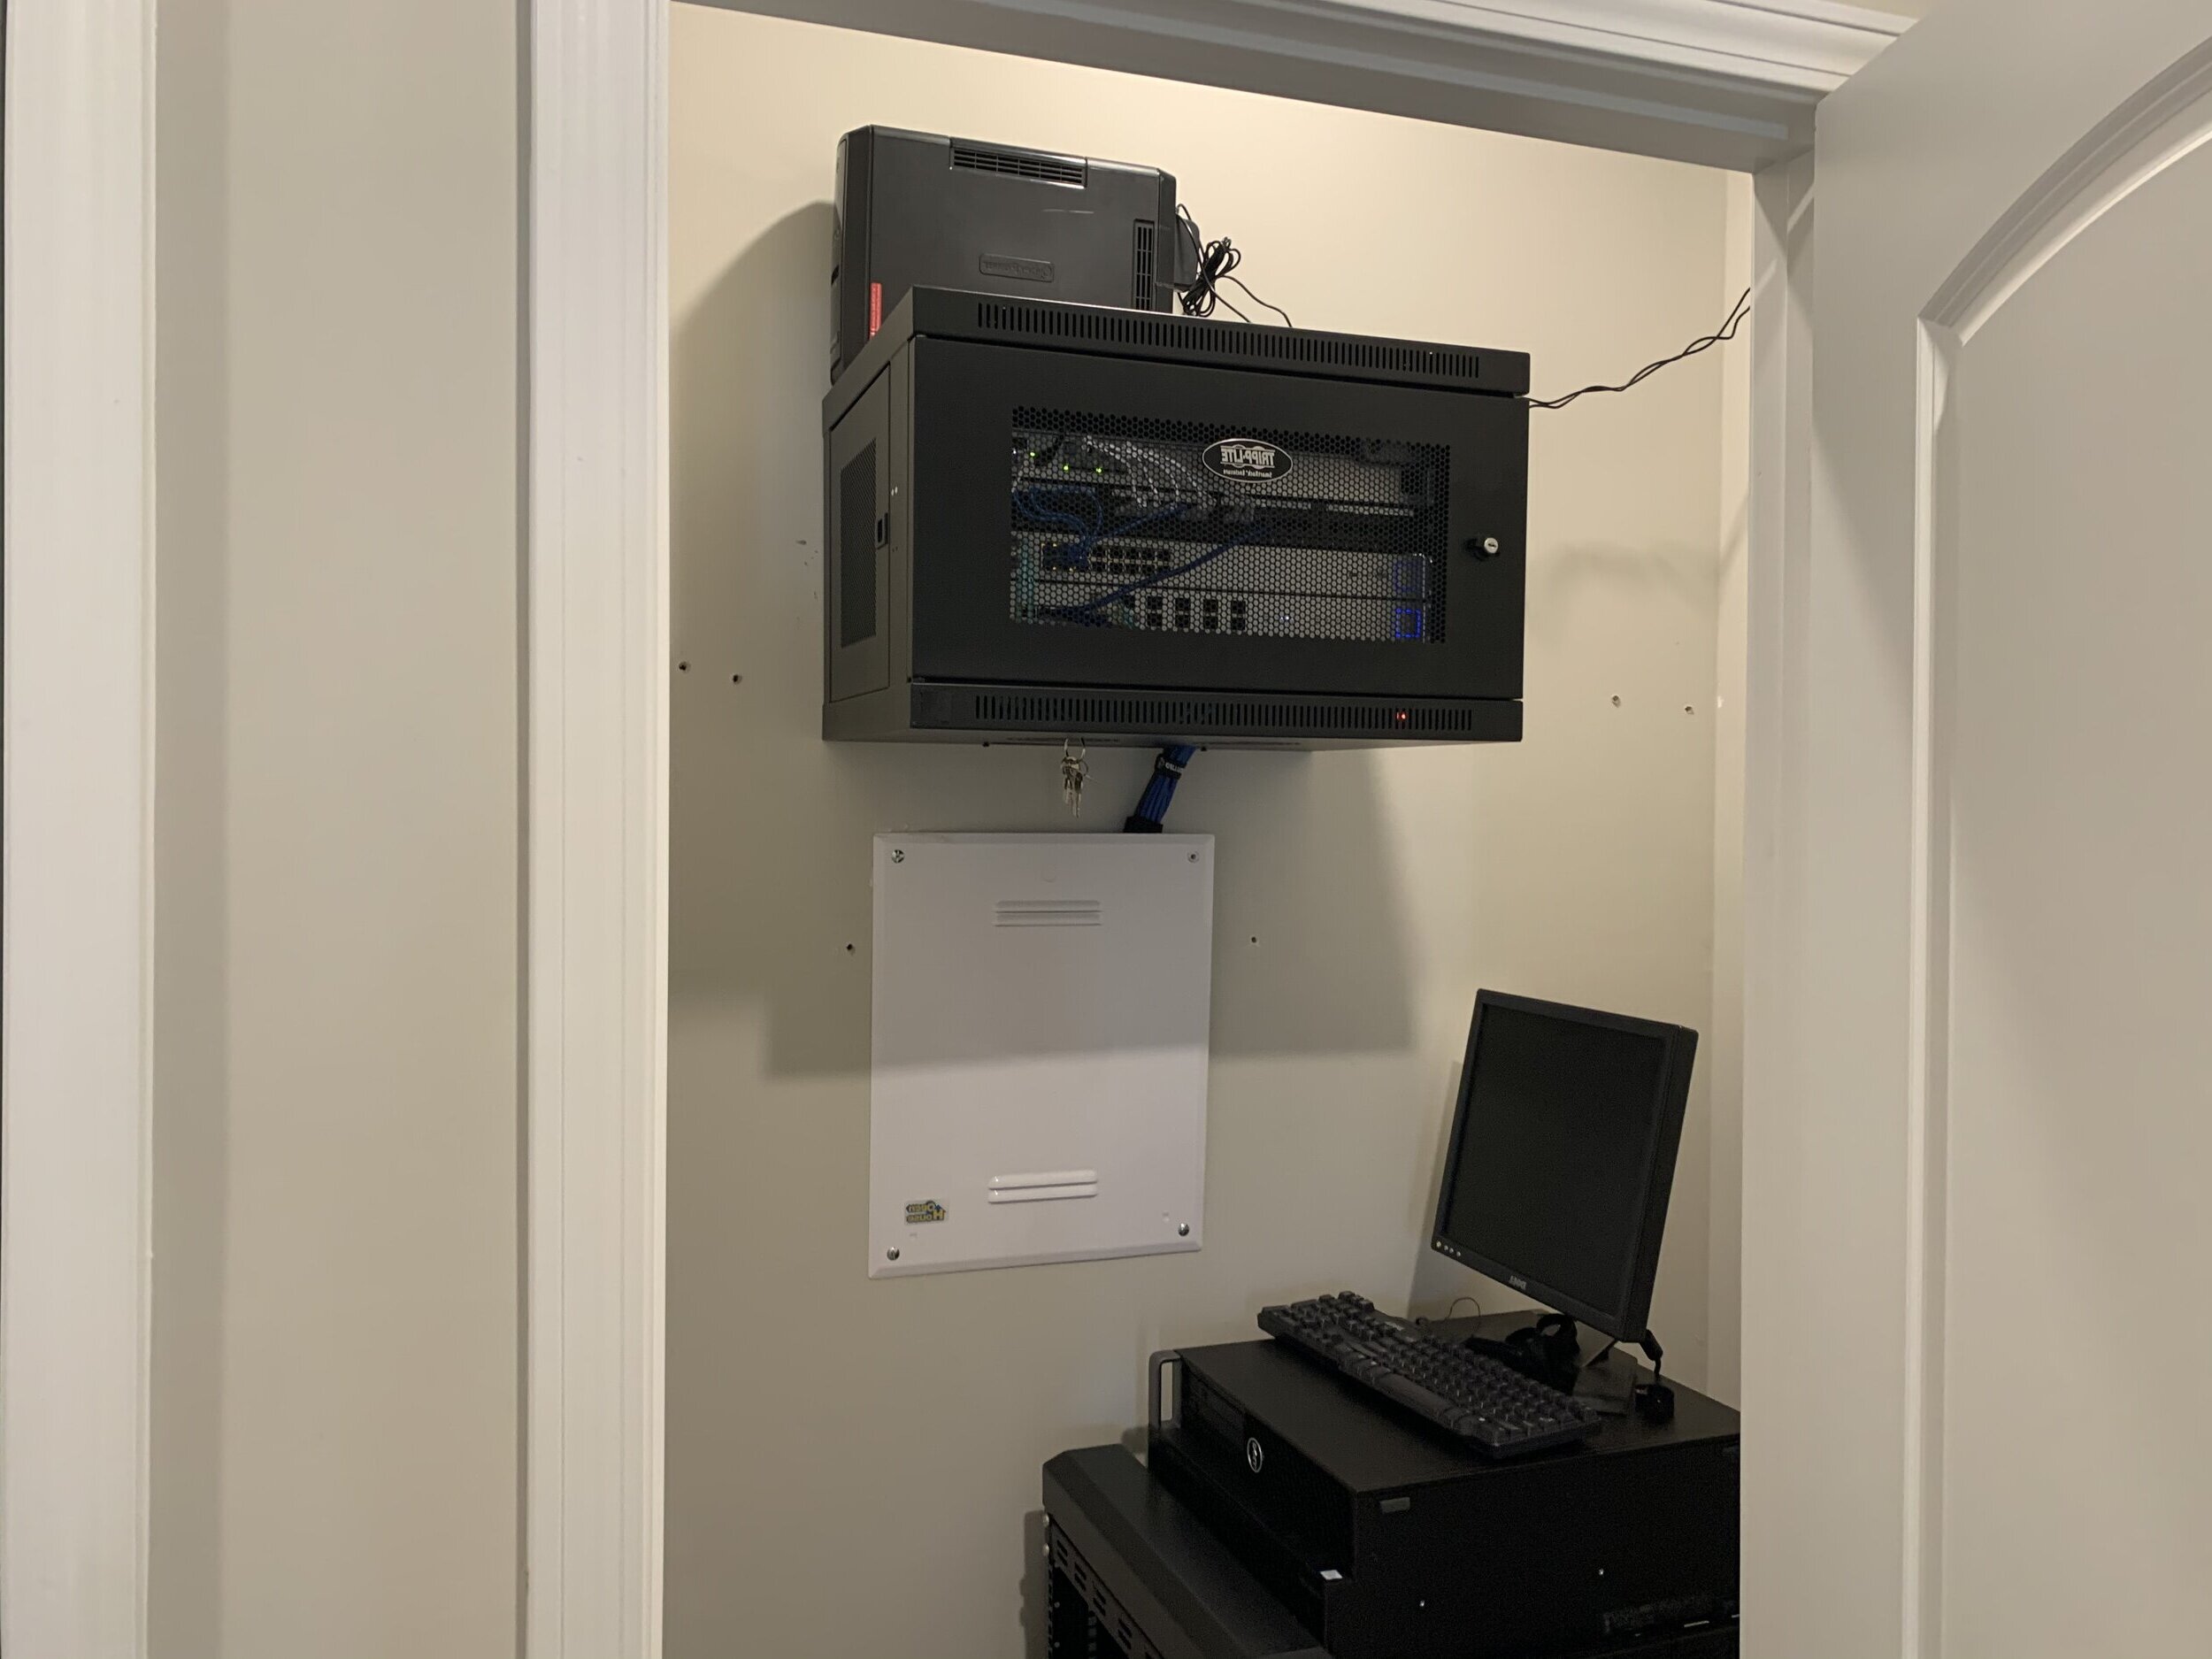
How to Build a DIY Home Network Closet
Published: September 4, 2024
Learn how to build a DIY home network closet with our step-by-step guide. Optimize your space, improve connectivity, and keep your tech organized and secure.
(Many of the links in this article redirect to a specific reviewed product. Your purchase of these products through affiliate links helps to generate commission for Twigandthistle.com, at no extra cost. Learn more)
Setting up a home network closet might seem tricky, but it's a great way to keep your cables, routers, and modems organized. Having a dedicated space for your network gear reduces clutter and makes troubleshooting easier. You'll need some basic tools and materials, but nothing too fancy. Plus, creating this space can boost your home's internet performance by keeping all essential devices in one central location. Whether you're a tech enthusiast or just someone who wants a tidier setup, building a DIY network closet is a practical and rewarding project. Let's get started on creating your organized network hub!
Getting Ready for Your Project
Plan Your Layout: Measure the space where you want to build the network closet. Sketch a layout including shelves, racks, and cable management.
Gather Materials: Collect necessary items like shelves, racks, cables, screws, drill, screwdriver, and cable ties.
Safety Gear: Wear safety goggles and gloves to protect your eyes and hands. Ensure you have a first aid kit nearby.
Clear the Area: Remove any clutter from the workspace. Ensure the floor is clean to avoid tripping hazards.
Check Electrical Outlets: Ensure there are enough power outlets for your equipment. Consider installing additional outlets if needed.
Ventilation: Plan for proper ventilation to prevent overheating. Install a small fan or vent if necessary.
Label Cables: Use labels to mark each cable. This will help in identifying connections later.
Test Equipment: Before mounting, test all network equipment like routers, switches, and modems to ensure they work properly.
Secure Tools: Keep all tools within reach but organized. Use a toolbox or pegboard to keep them tidy.
Read Instructions: Go through the manuals of your network equipment. Understand the installation process to avoid mistakes.
Gathering Materials and Tools
Materials Needed:
- Network Switch: Connects multiple devices within the network.
- Patch Panel: Organizes and connects incoming and outgoing network cables.
- Ethernet Cables: Transmits data between devices.
- Cable Management: Keeps cables organized and tidy.
- Network Rack: Houses all network equipment.
- Power Strip: Provides multiple power outlets for devices.
- Cooling Fan: Prevents overheating of network equipment.
- Label Maker: Labels cables and ports for easy identification.
- Wall Mount Brackets: Secures equipment to the wall.
Tools Needed:
- Screwdriver Set: Tightens screws and mounts equipment.
- Drill: Makes holes for mounting brackets and racks.
- Cable Tester: Ensures cables are working correctly.
- Crimping Tool: Attaches connectors to Ethernet cables.
- Wire Stripper: Removes insulation from cables.
- Measuring Tape: Measures space for equipment placement.
- Level: Ensures equipment is mounted straight.
- Utility Knife: Cuts cables and trims excess material.
- Pliers: Grips and bends wires as needed.
Skill Level and Time Commitment
Skill Level: Intermediate
Time Required: Approximately 8-10 hours
- Planning and Designing: 1-2 hours
- Gathering Materials: 1 hour
- Installing Shelves and Racks: 2-3 hours
- Wiring and Cable Management: 2-3 hours
- Testing and Final Adjustments: 1 hour
Detailed Step-by-Step Guide
Choose a Location
- Find a central spot in your home.
- Ensure it has enough space for your equipment.
Gather Materials
- Network rack or shelf
- Ethernet cables
- Patch panel
- Network switch
- Router
- Cable management tools
- Power strip
Install the Network Rack or Shelf
- Mount the rack or shelf securely to the wall.
- Make sure it can support the weight of your equipment.
Set Up the Router
- Place the router on the rack or shelf.
- Connect it to your internet source (modem).
Install the Network Switch
- Place the switch on the rack or shelf.
- Connect it to the router using an Ethernet cable.
Mount the Patch Panel
- Attach the patch panel to the rack.
- Label each port for easy identification.
Run Ethernet Cables
- Measure and cut cables to the desired lengths.
- Run cables from each room to the network closet.
- Terminate cables with RJ45 connectors.
Connect Cables to Patch Panel
- Plug each Ethernet cable into the corresponding port on the patch panel.
- Use cable ties to keep everything organized.
Connect Patch Panel to Network Switch
- Use short Ethernet cables (patch cables) to connect the patch panel ports to the switch.
Power Everything Up
- Plug all devices into the power strip.
- Turn on the router, switch, and other equipment.
Test the Network
- Check each connection to ensure everything is working.
- Troubleshoot any issues that arise.
Organize and Label
- Use cable management tools to tidy up cables.
- Label each cable and port for easy maintenance.
Secure the Closet
- Ensure the closet has proper ventilation.
- Lock the closet if necessary to prevent unauthorized access.
Helpful Tips and Tricks
Plan the Layout: Measure the space. Sketch a layout to know where each device will go. Keep enough room for airflow to prevent overheating.
Use a Rack: Install a network rack. It keeps devices organized and makes future changes easier. Wall-mounted racks save floor space.
Label Everything: Label cables and ports. This saves time when troubleshooting or adding new devices.
Cable Management: Use cable ties and Velcro straps. Keep cables neat and avoid tangling. Run cables along walls or behind furniture.
Power Supply: Use a surge protector. Protect your devices from power surges. Consider a UPS (Uninterruptible Power Supply) for backup power.
Ventilation: Ensure good airflow. Use fans if needed. Overheating can damage equipment.
Security: Lock the closet. Protect your network from unauthorized access. Use a lockable rack if possible.
Common Mistakes to Avoid:
- Overloading Power Strips: Spread out power usage. Too many devices on one strip can cause issues.
- Ignoring Heat: Don't block vents. Overheating can cause failures.
- Skipping Labels: Unlabeled cables make troubleshooting hard.
- Poor Planning: Measure and plan before buying equipment. Avoid buying items that don't fit.
Alternatives:
- Wall Shelves: If a rack is too expensive, use sturdy wall shelves.
- Plastic Cable Trays: Use these for cable management if Velcro straps aren't available.
- DIY Ventilation: Use small desk fans if built-in fans are too costly.
Keep these tips in mind to build a functional, organized home network closet.
Budgeting Your DIY Network Closet
Network Rack: $100 - $200. Look for used ones online for cheaper options.
Patch Panel: $30 - $50. Budget-friendly brands work fine.
Ethernet Cables: $50 - $100. Buy in bulk to save money.
Cable Management: $20 - $40. Velcro ties and plastic clips are affordable.
Switch: $50 - $150. Used or refurbished switches can cut costs.
Router: $50 - $200. Basic models are cheaper and often sufficient.
Power Strip: $10 - $20. Any standard power strip will do.
Tools: $30 - $60. Basic tools like screwdrivers, pliers, and a cable tester.
Cooling Fan: $20 - $40. Necessary if the closet gets warm.
Shelving: $20 - $50. Simple metal or plastic shelves work well.
Total estimated cost: $380 - $910.
Personalizing Your Network Closet
Shelving: Use metal racks for a modern look or wooden shelves for a rustic feel. Adjustable shelves offer flexibility for future changes.
Cabinet Doors: Install glass doors to easily see equipment or solid wood doors for a cleaner appearance. Sliding doors save space in tight areas.
Ventilation: Add ventilation fans to keep equipment cool. Use mesh panels on doors for better airflow.
Cable Management: Use cable trays or hooks to keep wires organized. Velcro straps can bundle cables neatly.
Lighting: Install LED strip lights for a sleek, modern look. Motion sensor lights can turn on automatically when you open the door.
Paint and Finish: Paint the closet interior a light color to make it easier to see. Use chalkboard paint on one wall to jot down network notes.
Power Supply: Install a dedicated power strip with surge protection. Consider a battery backup for critical equipment.
Labeling: Use color-coded labels for different types of cables. Label makers can create professional-looking tags.
Security: Add a lockable door to keep equipment secure. Use security cameras to monitor the closet.
Soundproofing: Use acoustic panels to reduce noise from equipment. Weather stripping around the door can also help.
Flooring: Use rubber mats to protect equipment from static electricity. Carpet tiles can add a touch of comfort.
Style: Choose a minimalist design for a clean look or a tech-inspired theme with metallic accents and futuristic elements.
Eco-Friendly Building Tips
Repurpose an old cabinet or bookshelf for your network closet. This reduces waste and saves money. Use reclaimed wood for any additional shelving or supports. It's sturdy and eco-friendly. Opt for low-VOC paint if you need to paint anything. This reduces harmful emissions. Install energy-efficient LED lights inside the closet. They use less power and last longer. Choose recycled plastic or metal for cable management. This helps keep things organized without adding to plastic waste. Ventilation can be improved with a small, energy-efficient fan. This keeps equipment cool without using much power. Reuse old computer fans if you have them. They work well for small spaces. Label cables with reusable tags instead of single-use plastic ones. This makes future changes easier and reduces waste. Consider second-hand equipment for your network setup. Often, used routers and switches work just as well as new ones. Recycle any packaging from new equipment properly. This keeps plastic and cardboard out of landfills.
Your Network Closet Awaits
Building a DIY home network closet isn't just about organizing cables. It's about creating a reliable, efficient space for all your tech needs. Start with a solid plan, gather your tools and materials, and follow each step carefully. Remember, ventilation is key to keeping your equipment cool. Label everything to make future troubleshooting easier. Don't forget to test your connections before closing up the closet. A well-organized network closet can save you time and headaches down the road. Plus, it gives your home a professional touch. So, roll up your sleeves, get to work, and enjoy the benefits of a well-structured network. Happy building!
What materials do I need to build a DIY home network closet?
You'll need plywood, screws, a drill, shelves, cable management tools, and network equipment like a router, switches, and modem.
How much space do I need for a network closet?
A small corner or closet will do. Aim for at least 3x3 feet to fit your gear and allow for airflow.
How do I keep my network closet cool?
Use ventilation fans or an AC unit. Make sure there's enough space around devices for air circulation.
How should I organize the cables?
Use cable ties, Velcro straps, and cable management panels. Label each cable to know what connects to what.
Can I use a regular power strip for my network equipment?
It's better to use a surge protector or UPS (Uninterruptible Power Supply) to protect against power surges and outages.
How do I secure my network closet?
Install a lock on the door and consider a security camera. Keep the area clean and organized to avoid tripping hazards.