
Home>Organize & Storage>Closet Organization>DIY Hidden Gun Safe for Closet
Closet Organization
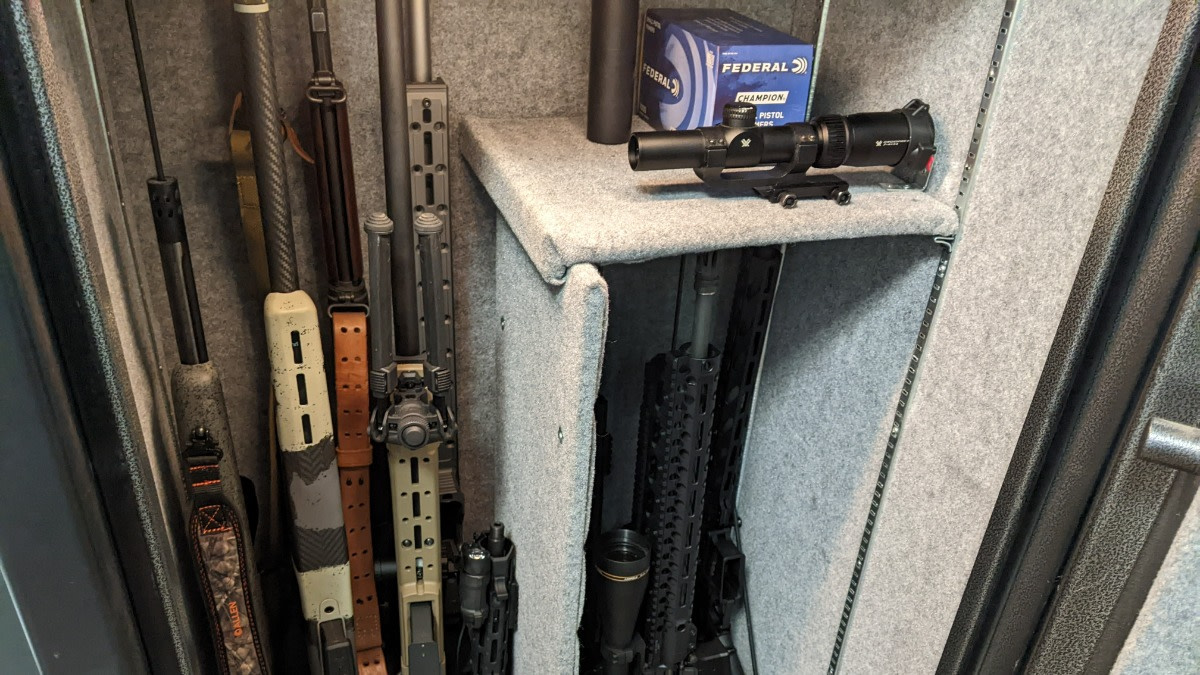
DIY Hidden Gun Safe for Closet
Published: September 2, 2024
Learn how to create a DIY hidden gun safe for your closet with our step-by-step guide. Keep your firearms secure and out of sight with these expert tips and tricks.
(Many of the links in this article redirect to a specific reviewed product. Your purchase of these products through affiliate links helps to generate commission for Twigandthistle.com, at no extra cost. Learn more)
Creating a hidden gun safe for your closet is a smart way to keep firearms secure yet accessible. With some basic tools and materials, you can build a concealed storage solution that blends seamlessly into your existing closet setup. This project not only enhances safety by keeping guns out of sight but also adds a layer of security against theft. Whether you're handy with DIY projects or looking to try your first one, making a hidden gun safe can be a rewarding task. Let's explore the steps to create a discreet and functional gun safe for your closet.
Preparation Steps
Measure the Space: Use a tape measure to get the dimensions of your closet. Make sure the safe will fit without taking up too much room.
Choose Materials: Gather wood, screws, hinges, and a lock. Ensure the wood is sturdy enough to hold the weight of the guns.
Safety Gear: Wear safety goggles, gloves, and a dust mask to protect yourself while cutting and assembling materials.
Clear the Area: Remove any items from the closet. This will give you space to work and prevent damage to your belongings.
Mark the Wall: Use a pencil to mark where you will install the safe. Double-check measurements to ensure accuracy.
Cut the Wood: Use a saw to cut the wood to the required dimensions. Sand the edges to avoid splinters.
Assemble the Safe: Use screws and hinges to put the pieces together. Make sure the structure is solid and secure.
Install the Lock: Attach the lock to the door of the safe. Test it to ensure it works properly.
Mount the Safe: Secure the safe to the wall using heavy-duty screws. Make sure it is level and firmly attached.
Organize the Inside: Place gun racks or holders inside the safe to keep firearms organized and easily accessible.
Test the Setup: Open and close the safe a few times to ensure everything works smoothly. Make any necessary adjustments.
Clean Up: Remove any debris or tools from the area. Put your safety gear away and enjoy your new hidden gun safe.
Gather Your Materials and Tools
- Plywood: Strong and durable, plywood forms the main structure of the safe. Choose a thickness of at least 3/4 inch for sturdiness.
- Hinges: These allow the door of the safe to open and close smoothly. Heavy-duty hinges are best for security.
- Screws: Essential for assembling the plywood pieces and attaching hinges. Use wood screws for a secure hold.
- Drill: Needed for making holes for screws and hinges. A cordless drill is convenient for mobility.
- Screwdriver: Useful for tightening screws. A multi-bit screwdriver can handle various screw types.
- Measuring Tape: Ensures accurate measurements for cutting plywood and placing hinges.
- Saw: Required for cutting plywood to the desired dimensions. A circular saw or jigsaw works well.
- Sandpaper: Smooths rough edges of the plywood. Use medium-grit sandpaper for best results.
- Paint or Stain: Adds a finished look to the safe. Choose a color that matches your closet.
- Paintbrushes: Needed for applying paint or stain. Use different sizes for detailed work.
- Locking Mechanism: Provides security for the safe. A combination lock or key lock works well.
- Level: Ensures the safe is installed straight. A small bubble level is easy to use.
- Pencil: Marks measurements and cutting lines on the plywood.
- Safety Gear: Includes gloves and safety glasses to protect while cutting and assembling.
Required Skills and Time
Skill Level: Intermediate
Estimated Time Required: 4-6 hours
- Planning and Measuring: 1 hour
- Gathering Materials: 30 minutes
- Building the Frame: 1.5 hours
- Installing the Safe: 1 hour
- Finishing Touches: 1 hour
Detailed Instructions
Gather Materials:
- Wooden Box (size depends on your needs)
- Hinges
- Screws
- Drill
- Screwdriver
- Locking Mechanism (combination lock or key lock)
- Paint or Stain (optional)
- Carpet or Foam Padding (optional)
Choose Location:
- Select a spot in your closet where the safe will be hidden.
- Ensure it’s easily accessible but not obvious.
Prepare the Wooden Box:
- Measure the dimensions of your chosen location.
- Cut the wooden box to fit if necessary.
- Sand the edges to avoid splinters.
Install Hinges:
- Attach hinges to one side of the box.
- Secure the other side of the hinges to the closet wall or floor.
Add Locking Mechanism:
- Drill holes for the lock.
- Install the lock according to the manufacturer’s instructions.
- Test the lock to ensure it works properly.
Secure the Box:
- Use screws to attach the box firmly to the closet wall or floor.
- Ensure it’s stable and doesn’t move.
Optional Finishing Touches:
- Paint or stain the box to match your closet.
- Add carpet or foam padding inside to protect your firearms.
Test the Safe:
- Place your firearms inside.
- Lock the safe and check for stability.
- Make sure the safe is well-hidden and secure.
Maintain Regularly:
- Check the lock periodically.
- Ensure the box remains secure and hidden.
Helpful Tips
Measure Twice, Cut Once: Always double-check measurements before cutting any materials. This ensures everything fits perfectly.
Use Stud Finders: When attaching your safe to the wall, find the studs. This provides a stronger, more secure hold.
Magnetic Locks: Consider using magnetic locks for easy access and added security. They are discreet and effective.
False Panels: Create a false panel or wall in your closet. This hides the safe and makes it less obvious.
Lighting: Install small LED lights inside the safe. This helps you see contents clearly, especially in low light.
Ventilation: Ensure proper ventilation to prevent moisture buildup, which can damage firearms.
Organize: Use foam inserts or racks to keep guns organized and prevent them from shifting.
Common Mistakes to Avoid
Skipping Instructions: Always follow the manufacturer's instructions for any locks or safes you purchase.
Ignoring Weight Limits: Be mindful of the weight your closet shelves can support. Overloading can cause damage.
Poor Placement: Avoid placing the safe in obvious locations. Get creative with hiding spots.
Alternatives for Materials or Methods
Pre-Made Safes: If building from scratch seems daunting, consider pre-made safes designed for closets.
Hidden Compartments: Use furniture with hidden compartments as an alternative to a traditional safe.
Digital Locks: Opt for digital locks instead of traditional key locks for quicker access.
Repurposed Furniture: Convert old furniture into a hidden safe. This adds a unique touch and saves money.
Estimating the Cost
Materials:
- Plywood: $30-$50
- 2x4 Lumber: $20-$30
- Hinges: $10-$15
- Magnetic Locks: $15-$25
- Paint or Stain: $10-$20
- Foam Padding: $10-$15
- Screws and Nails: $5-$10
Tools:
- Circular Saw: $50-$100 (or borrow)
- Drill: $30-$60 (or borrow)
- Measuring Tape: $5-$10
- Level: $10-$15
- Screwdriver Set: $10-$20
- Paintbrushes: $5-$10
Total Cost: $210-$380
Budget-Friendly Alternatives:
- Reclaimed Wood: Free or low cost
- Basic Hinges: $5-$10
- Regular Locks: $5-$10
- Leftover Paint: Free if available
- Borrow Tools: Free if possible
Total Cost with Alternatives: $100-$150
Different Customization Ideas
Materials: Instead of wood, use metal for a more secure safe. Plywood can be swapped with MDF for a smoother finish.
Colors: Paint the safe to match your closet's interior. Use neutral colors like beige or gray for a subtle look. For a bold statement, try deep blue or forest green.
Styles: Add molding or trim to the exterior for a classic look. For a modern touch, go with sleek, clean lines.
Locks: Use a biometric lock for high-tech security. A combination lock offers a traditional feel.
Shelving: Install adjustable shelves inside for flexibility. Add foam inserts to protect firearms.
Lighting: Incorporate LED strip lights for visibility. Motion-sensor lights can add convenience.
Hidden Compartments: Create a false bottom for extra storage. Use magnetic panels for easy access.
Decor: Attach a mirror to the door for dual functionality. Use fabric panels to blend with closet walls.
Ventilation: Add small vents for air circulation. Use discreet fans to prevent moisture buildup.
Accessibility: Install soft-close hinges for quiet operation. Use pull-out drawers for easy access.
Eco-Friendly Tips
Reclaimed wood can be used to build the frame and door of your hidden gun safe. This not only gives a rustic look but also reduces waste. Recycled metal can be used for the locking mechanism and hinges. Look for old metal parts from discarded furniture or appliances.
For insulation, use recycled denim or cotton instead of synthetic materials. These natural fibers provide good insulation and are eco-friendly. Non-toxic paint or stain can be used to finish the wood, ensuring no harmful chemicals are released into your home.
Consider using solar-powered lights inside the safe. These lights are energy-efficient and reduce electricity usage. Old furniture pieces like drawers or cabinets can be repurposed to create compartments within the safe, providing organized storage without buying new materials.
When securing the safe, use eco-friendly adhesives and fasteners. These options are less harmful to the environment and provide strong bonds. Finally, ensure proper ventilation using recycled mesh or grilles to maintain air quality inside the safe.
Your DIY Hidden Gun Safe Awaits
Building a DIY hidden gun safe for your closet is a smart move. It keeps your firearms secure and out of sight. Using basic tools and materials, you can create a safe that blends seamlessly with your closet. Remember to measure carefully, choose sturdy materials, and follow safety guidelines. This project not only enhances your home security but also gives you a sense of accomplishment. Plus, it’s a great way to use your DIY skills. So, gather your tools, plan your design, and get started. Your hidden gun safe will be a valuable addition to your home.
How do I choose the right spot in my closet for a hidden gun safe?
Pick a spot that's inconspicuous and hard to reach. Behind clothes or on a high shelf works well. Make sure it's not easily visible.
What tools will I need to install a hidden gun safe?
You'll need a drill, screws, a level, and possibly a stud finder. Basic hand tools like a screwdriver and measuring tape are also handy.
How can I make sure my hidden gun safe is secure?
Secure it to the wall studs using heavy-duty screws. This prevents anyone from easily removing the safe. Also, choose a safe with a strong lock.
Can I install a hidden gun safe by myself?
Absolutely! With the right tools and a bit of patience, you can install it yourself. Just follow the instructions carefully and take your time.
What size should my hidden gun safe be?
It depends on how many guns you need to store. Measure your guns and choose a safe that fits them comfortably. Don't forget to account for any accessories.
How do I hide the safe effectively?
Use clothing, boxes, or even a false wall to conceal the safe. The goal is to make it blend in with the rest of your closet.
Are there any legal considerations for installing a hidden gun safe?
Yes, always check local laws regarding gun storage. Some places have specific requirements for how guns must be stored, especially if you have children in the house.