
Home>Knowledge & Skills>Automotive & Repair>How To Build A Motorcycle
Automotive & Repair
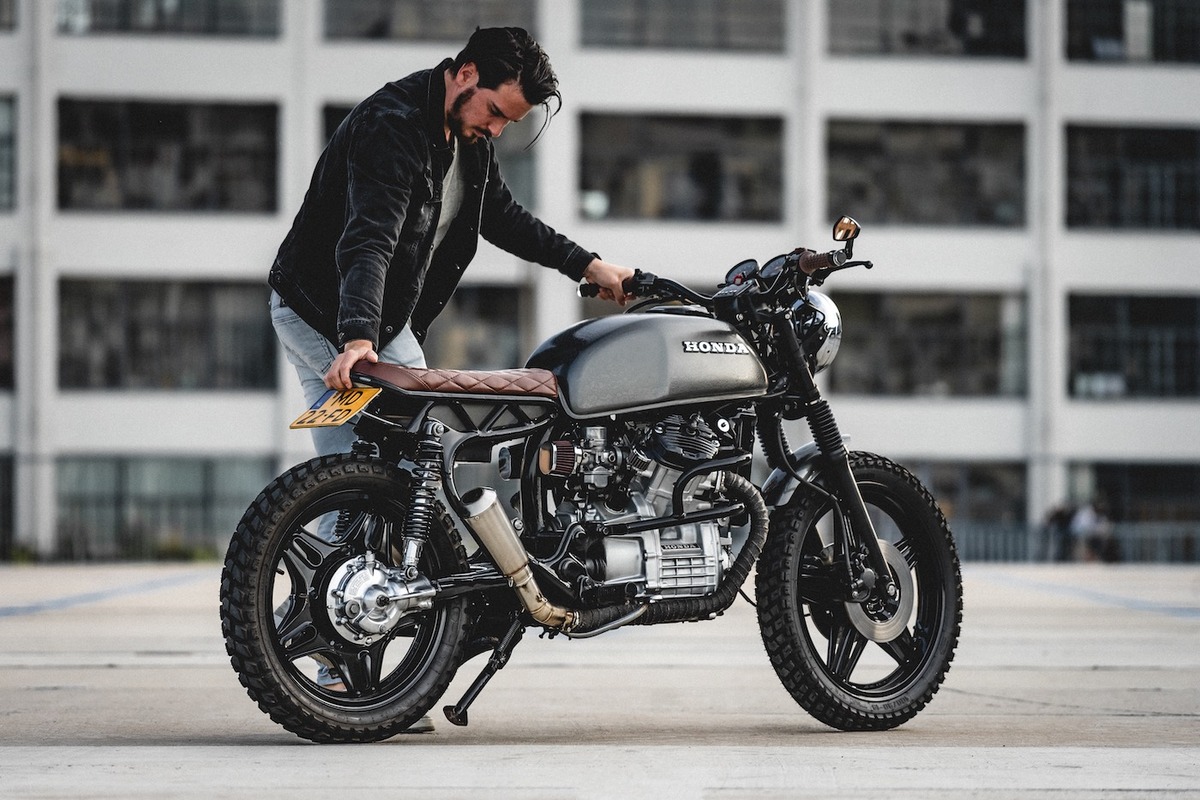
How To Build A Motorcycle
Published: June 14, 2024

Our Editor-in-Chief brings a fresh perspective with his expertise in modern home technologies and eco-friendly solutions. Philip bridges tradition with innovation across a wide range of DIY topics.
Learn how to build a motorcycle with our comprehensive automotive and repair guide. Get expert tips and step-by-step instructions for creating your own custom bike.
(Many of the links in this article redirect to a specific reviewed product. Your purchase of these products through affiliate links helps to generate commission for Twigandthistle.com, at no extra cost. Learn more)
Introduction
So, you've got the itch to build your own motorcycle, huh? Well, you've come to the right place! Building a motorcycle from scratch can be an incredibly rewarding and fulfilling experience. Not only will you gain a deeper understanding of how motorcycles work, but you'll also have the satisfaction of riding a machine that you built with your own two hands. Whether you're a seasoned DIY enthusiast or a complete novice, this guide will walk you through the step-by-step process of building your very own motorcycle. So, roll up your sleeves, grab your tools, and let's get started on this exciting journey!
Choosing the Right Frame
When it comes to building a motorcycle, choosing the right frame is crucial. The frame not only provides the structural foundation for your bike but also determines its overall look and feel. Here are some key factors to consider when selecting a frame for your motorcycle:
-
Frame Type: Decide whether you want a rigid frame, which offers a classic and minimalist look, or a softail frame, which provides a smoother ride with its rear suspension.
-
Material: Frames are commonly made of steel, aluminum, or even carbon fiber. Each material has its own advantages in terms of strength, weight, and cost.
-
Style and Design: Consider the style and design of the frame that best suits your vision for the motorcycle. Whether it's a traditional cruiser, a sleek sportbike, or a vintage bobber, the frame should complement the overall aesthetic.
-
Compatibility: Ensure that the frame is compatible with the engine and other major components you plan to use. This will save you from potential headaches during the assembly process.
-
Customization: If you're feeling adventurous, you can even opt for a custom-made frame to truly make your motorcycle one-of-a-kind.
By carefully considering these factors, you can choose a frame that not only meets your functional needs but also aligns with your creative vision for the motorcycle.
Selecting the Engine
Selecting the right engine is a pivotal decision in the motorcycle building process. The engine is the heart of the bike, dictating its performance, power, and character. Here are the key considerations when choosing an engine for your custom motorcycle:
-
Engine Type: Decide whether you want a traditional V-twin, a high-revving inline-four, a torquey single-cylinder, or perhaps an unconventional rotary engine. Each type offers a distinct riding experience and sound.
-
Displacement: Consider the engine displacement that aligns with your riding style and performance expectations. Whether it's a small displacement engine for urban commuting or a larger displacement for highway cruising, the choice will impact the bike's power delivery.
-
Power Output: Assess the horsepower and torque figures of the engine. This will determine the bike's acceleration, top speed, and overall performance characteristics.
-
Compatibility: Ensure that the chosen engine is compatible with the frame, transmission, and other components. Consider factors such as mounting points, clearance, and necessary modifications.
-
Aftermarket Support: Check the availability of aftermarket parts and accessories for the engine. This can significantly ease the customization process and allow you to fine-tune the engine to your preferences.
-
Aesthetics: Some builders also consider the visual appeal of the engine. Whether it's the classic look of an air-cooled engine or the modern aesthetic of a liquid-cooled powerplant, the engine's appearance can contribute to the overall design of the motorcycle.
By carefully evaluating these factors, you can select an engine that not only meets your performance requirements but also aligns with the aesthetic and character of the custom motorcycle you envision.
Assembling the Transmission
Assembling the transmission is a critical step in building a motorcycle, as it directly impacts the bike's performance and rideability. The transmission, also known as the gearbox, is responsible for transmitting power from the engine to the rear wheel, allowing the rider to shift gears and control the speed of the motorcycle. Here's a detailed guide on how to assemble the transmission for your custom bike:
-
Gather the Components: Before diving into the assembly process, ensure that you have all the necessary transmission components, including the gears, shafts, shift drum, and bearings. Lay out the parts in an organized manner to facilitate the assembly.
-
Inspect and Clean: Thoroughly inspect each transmission component for any signs of wear, damage, or debris. Clean the parts using a suitable solvent to remove any contaminants and ensure smooth operation.
-
Lubrication: Apply a thin layer of high-quality transmission oil or assembly lube to the gears, shafts, and bearings. Proper lubrication is essential to reduce friction and prevent premature wear of the transmission components.
-
Gear Engagement: Carefully install the gears onto the transmission shafts, ensuring that they mesh smoothly and engage properly. Check the gear clearances and endplay to guarantee precise gear alignment.
-
Shift Mechanism: Install the shift drum and shift forks, ensuring that they are correctly positioned and synchronized with the gear engagement. Test the shifting action to verify smooth and precise gear changes.
-
Bearing Installation: Press the transmission bearings into their respective housing locations, ensuring a secure and proper fit. Proper bearing installation is crucial for maintaining the integrity of the transmission assembly.
-
Sealing and Gaskets: Install new seals and gaskets to prevent oil leaks and ensure a tight seal within the transmission housing. Proper sealing is essential for maintaining the integrity of the transmission system.
-
Final Inspection: Once the transmission components are assembled, perform a final inspection to verify the correct alignment, gear engagement, and overall functionality of the transmission. Address any issues or discrepancies before proceeding.
By following these steps and paying close attention to detail, you can effectively assemble the transmission for your custom motorcycle, ensuring optimal performance and reliability on the road.
Installing the Wheels and Suspension
When it comes to installing the wheels and suspension on your custom motorcycle, precision and attention to detail are paramount. The wheels and suspension not only affect the bike's handling and ride comfort but also contribute to its overall aesthetic appeal. Here's a comprehensive guide on how to properly install the wheels and suspension for your custom-built motorcycle:
-
Wheel Selection: Begin by selecting the appropriate wheels for your motorcycle. Consider factors such as wheel size, design, and material. Whether you opt for classic spoke wheels for a vintage look or modern alloy wheels for a sleek appearance, ensure that the wheels are compatible with the bike's frame and braking system.
-
Tire Mounting: Mount the tires onto the wheels using a suitable tire mounting machine. Ensure that the tires are properly seated and balanced to prevent vibration and uneven wear. Pay attention to the tire's directional rotation and match it with the wheel's rotation.
-
Wheel Alignment: Install the wheels onto the motorcycle's frame, ensuring proper alignment and fitment. Use the appropriate axle and spacers to secure the wheels in place. Verify that the wheels rotate freely without any binding or wobbling.
-
Suspension Components: Install the front forks and rear shock absorbers onto the motorcycle's frame. Ensure that the suspension components are aligned and securely fastened. Adjust the suspension settings according to the manufacturer's recommendations or your desired ride characteristics.
-
Spring Preload and Damping: Adjust the spring preload and damping settings to optimize the suspension's performance. This involves setting the correct amount of static sag and fine-tuning the damping to suit your riding style and road conditions.
-
Wheel Bearings and Axle Nuts: Properly install and torque the wheel bearings and axle nuts to the manufacturer's specifications. This ensures the wheels rotate smoothly and securely without any play or excessive friction.
-
Brake System Integration: Integrate the brake rotors, calipers, and master cylinders with the wheels. Ensure that the brake components are aligned and function correctly. Bleed the brake system to remove any air and ensure optimal braking performance.
-
Test and Adjustment: Once the wheels and suspension are installed, perform a thorough test of the bike's handling, suspension action, and braking performance. Make any necessary adjustments to the suspension settings and wheel alignment to achieve the desired ride quality and stability.
By following these steps with precision and care, you can effectively install the wheels and suspension on your custom motorcycle, ensuring a balanced and responsive ride on the open road.
Wiring and Electrical Components
When it comes to wiring and electrical components, attention to detail and precision are crucial for ensuring the proper functioning of your custom-built motorcycle. The electrical system is responsible for powering essential components such as the lights, ignition, instrumentation, and various accessories. Here's a detailed guide on how to effectively handle the wiring and electrical components for your custom motorcycle:
-
Electrical Layout: Begin by planning the electrical layout of the motorcycle. Identify the placement of the battery, fuse box, and key electrical components. Consider factors such as accessibility, wire routing, and protection from elements.
-
Wire Selection: Choose high-quality, automotive-grade wiring for your motorcycle. Select wires of the appropriate gauge and insulation to handle the electrical loads and ensure durability. Use color-coded wiring to facilitate identification and troubleshooting.
-
Wire Routing: Carefully route the wiring harness throughout the motorcycle, ensuring that the wires are neatly organized and secured away from moving parts, heat sources, and sharp edges. Use cable ties and protective loom to bundle and protect the wires.
-
Connection and Termination: Properly crimp and solder wire connections to ensure secure and reliable electrical connections. Use heat-shrink tubing to insulate and protect the connections from moisture and abrasion. Avoid loose or poorly terminated connections that can lead to electrical issues.
-
Fuse and Relay Installation: Install an appropriate fuse box and relays to protect the electrical system from overloads and short circuits. Ensure that each circuit is properly fused and that relays are used to control high-current devices such as the starter motor and headlights.
-
Switches and Controls: Install handlebar switches, ignition switch, and other control components in ergonomic and accessible locations. Ensure that the wiring for these controls is properly routed and secured to prevent interference with steering and other moving parts.
-
Lighting and Accessories: Integrate the wiring for the motorcycle's lighting, including the headlight, taillight, turn signals, and auxiliary lights. Additionally, wire any accessories such as a horn, USB charger, or GPS unit, ensuring that each component receives the necessary power supply.
-
Battery Connection: Connect the battery to the electrical system, ensuring proper polarity and secure connections. Install a main fuse near the battery to protect the entire electrical system from catastrophic failures.
-
Grounding: Establish a solid and clean grounding point for the electrical system. Ensure that all electrical components have a reliable path to ground to prevent electrical issues such as voltage drops and erratic behavior.
-
Testing and Troubleshooting: Once the wiring is complete, thoroughly test the electrical system for proper functionality. Check all lighting, controls, and accessories for correct operation. Troubleshoot any issues such as non-functioning components or electrical shorts.
By following these steps and paying close attention to the details of the wiring and electrical components, you can ensure a reliable and well-functioning electrical system for your custom motorcycle. Proper wiring and electrical work are essential for the safety and performance of your bike, so take your time and double-check your work to avoid potential electrical gremlins down the road.
Painting and Finishing Touches
When it comes to building a custom motorcycle, the painting and finishing touches are the proverbial cherry on top, adding the final layer of personality and flair to your creation. Here's a comprehensive guide on how to approach the painting and finishing process for your custom-built motorcycle:
-
Surface Preparation: Before diving into the painting process, meticulous surface preparation is essential. Begin by thoroughly cleaning the motorcycle's bodywork to remove any dirt, grease, or contaminants. Sand the surfaces to create a smooth and uniform substrate for the paint to adhere to. Use a high-quality primer to seal the surface and promote paint adhesion.
-
Color Selection: Choose a paint color that resonates with your vision for the motorcycle. Whether it's a classic single-tone finish, a striking two-tone scheme, or a custom graphic design, the color selection sets the tone for the bike's overall aesthetic. Consider factors such as the bike's style, design elements, and personal preferences.
-
Paint Application: Apply the chosen paint using professional-grade spray equipment or traditional methods such as brush and roller, depending on the desired finish. Ensure even coverage and consistent application to achieve a flawless paint job. Consider multiple coats to achieve the desired depth and richness of the color.
-
Clear Coat Protection: Once the base color is applied and dried, protect the finish with a clear coat. The clear coat not only adds a glossy sheen to the paint but also provides essential protection against UV rays, weathering, and abrasion. Apply multiple layers of clear coat to achieve a smooth and durable finish.
-
Custom Graphics and Detailing: If you're aiming for a truly unique look, consider incorporating custom graphics, pinstriping, or airbrushed artwork onto the motorcycle's bodywork. These intricate details can elevate the bike's visual appeal and make it stand out from the crowd. Whether it's subtle accents or bold designs, custom graphics add a personal touch to the paint job.
-
Polishing and Buffing: Once the paint and clear coat are fully cured, polish the surfaces to remove any imperfections and achieve a mirror-like finish. Use a high-quality polishing compound and buffing equipment to bring out the luster of the paint. This step is crucial for achieving a professional-grade finish.
-
Chrome and Metal Finishing: Pay attention to the finishing of metal components such as the exhaust, handlebars, and fork tubes. Consider chrome plating, powder coating, or ceramic coating to enhance the durability and visual appeal of these parts. A well-finished metalwork complements the overall paint job.
-
Protective Film and Coatings: Consider applying protective films or coatings to high-impact areas such as the front fairing, tank, and fenders. These protective measures guard the paint against stone chips, scratches, and other forms of damage, preserving the pristine appearance of the motorcycle.
-
Detailing and Final Touches: Pay attention to the finer details such as emblems, badges, and trim pieces. Ensure that these elements are properly aligned and secured. Additionally, consider adding custom touches such as specialty fasteners, accent lighting, or personalized accessories to further enhance the bike's visual impact.
By meticulously approaching the painting and finishing touches, you can transform your custom-built motorcycle into a true work of art. The paint and finishing details not only reflect your creativity and craftsmanship but also define the bike's identity on the road. Take your time, exercise patience, and revel in the process of bringing your vision to life through the transformative power of paint and finishing touches.
Conclusion
Congratulations! You've now completed the exhilarating journey of building your very own motorcycle. From selecting the perfect frame to adding the finishing touches, every step has been a testament to your dedication and craftsmanship. As you stand back and admire the fruits of your labor, remember that this custom motorcycle is not just a machine; it's a reflection of your passion and creativity. Whether you're hitting the open road or showcasing your creation at a local bike show, your custom-built motorcycle is a testament to the artistry and ingenuity of the DIY spirit. So, rev up that engine, feel the wind in your face, and take pride in the fact that you've brought a unique vision to life on two wheels. Keep the rubber side down and enjoy the ride!