
Home>Home & Furniture>Roof>How to Install Metal Roofing
Roof
How to Install Metal Roofing
Published: August 19, 2024
Learn how to install metal roofing with our step-by-step guide. Discover essential tools, materials, and expert tips for a durable and efficient roof installation.
(Many of the links in this article redirect to a specific reviewed product. Your purchase of these products through affiliate links helps to generate commission for Twigandthistle.com, at no extra cost. Learn more)
Installing a metal roof might sound tricky, but with the right tools and a bit of patience, it can be a rewarding DIY project. Metal roofs are durable, energy-efficient, and can give a house a sleek, modern look. Whether you're replacing an old roof or starting from scratch, knowing the basics can make a big difference. This guide will walk you through the process, from gathering materials to the final touches. With some preparation and careful work, you'll have a stunning roof that stands up to the elements for years to come. Ready to get started? Let's dive in!
Getting Ready for the Project
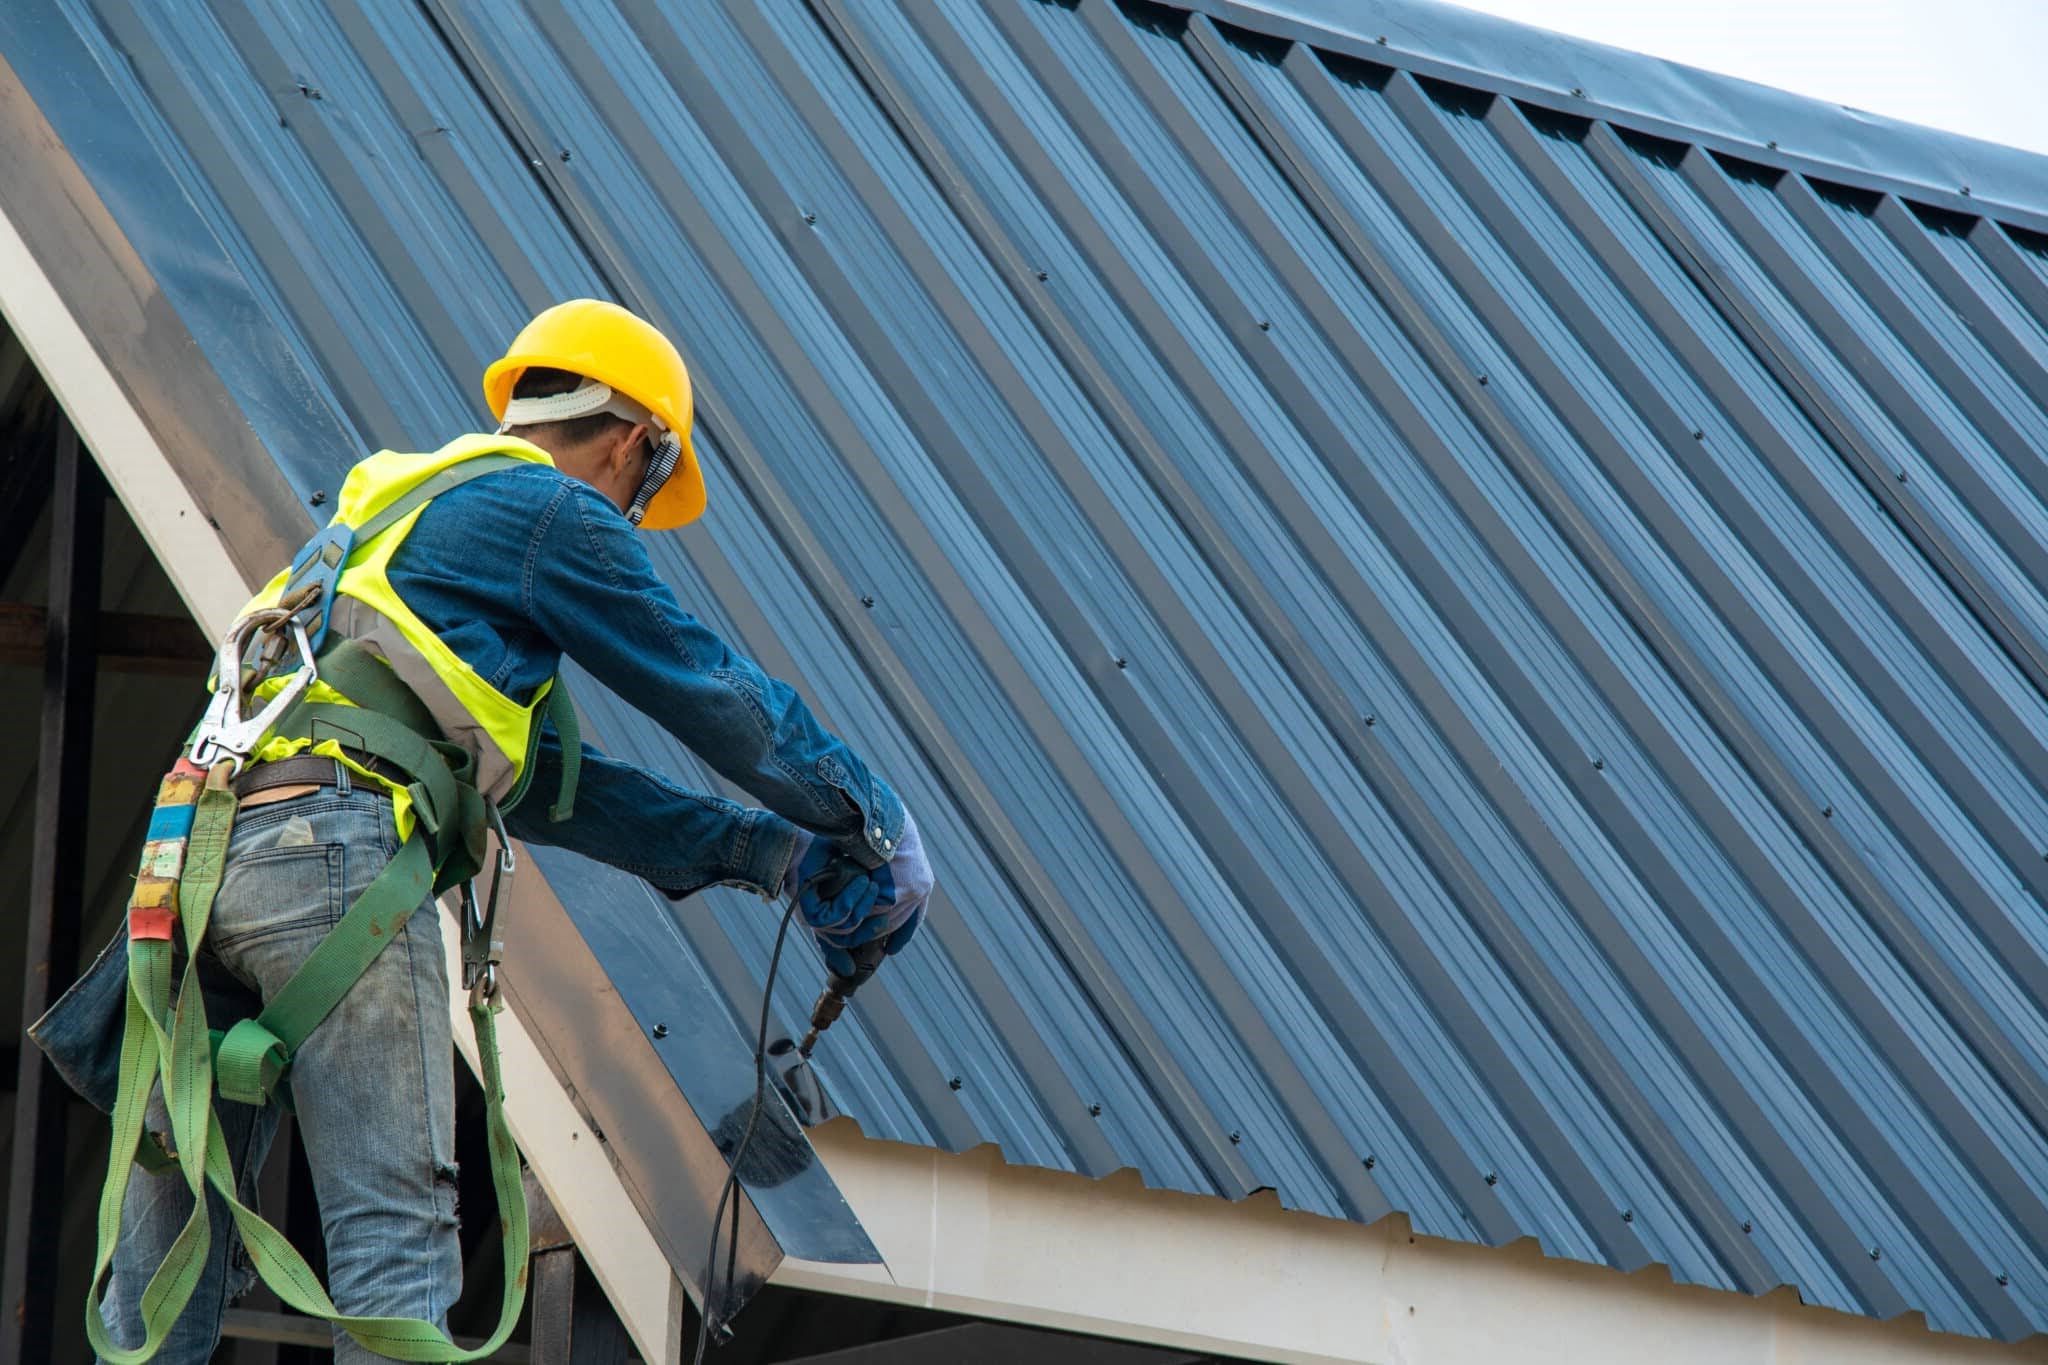
Safety Gear: Wear gloves, safety glasses, and non-slip shoes. Use a harness if working on a steep roof.
Weather Check: Ensure the weather forecast is clear. Avoid working in rain or high winds.
Workspace Setup: Clear the area around the house. Set up a ladder on stable ground. Have a tool belt for easy access to tools.
Materials and Tools: Gather metal panels, screws, drill, measuring tape, chalk line, and snips. Double-check you have everything before starting.
Roof Inspection: Check the roof for any damage or weak spots. Repair any issues before installing the metal roofing.
Remove Old Roofing: Strip off old shingles or roofing material. Clean the surface thoroughly.
Install Underlayment: Lay down a waterproof underlayment to protect against moisture. Secure it with roofing nails.
Measure and Cut: Measure the roof dimensions. Cut metal panels to fit, leaving a slight overhang.
Mark Guidelines: Use a chalk line to mark straight lines for panel placement. This ensures even installation.
Pre-drill Holes: Pre-drill holes in the metal panels to make screwing easier and prevent metal from splitting.
Safety Checks: Double-check all safety gear and tools. Ensure the ladder is secure and the workspace is clear.
Materials and Tools Needed
Metal Roofing Panels: These are the main materials for your roof. Choose the type and color that suits your home.
Roofing Nails or Screws: Used to secure the metal panels to the roof. Screws are often preferred for their holding power.
Metal Flashing: Installed around edges, chimneys, and vents to prevent water leaks.
Roofing Felt or Underlayment: A protective layer placed under the metal panels to provide extra waterproofing.
Drip Edge: Metal strips installed along the edges of the roof to direct water away from the fascia and into the gutters.
Closure Strips: Foam or rubber strips that seal the gaps between the metal panels and the roof to prevent water and pests from entering.
Sealant or Caulk: Used to seal joints and seams to prevent water leaks.
Measuring Tape: Essential for measuring the roof and metal panels accurately.
Chalk Line: Helps mark straight lines on the roof for panel placement.
Tin Snips or Metal Shears: Used to cut metal panels to the required size.
Cordless Drill: Needed for driving screws into the metal panels and roof structure.
Hammer: Useful for nailing down underlayment and other materials.
Ladder: Required to safely access the roof.
Safety Gear: Includes gloves, safety glasses, and a harness to protect yourself while working on the roof.
Utility Knife: Handy for cutting underlayment and other materials.
Pry Bar: Useful for removing old roofing materials and nails.
Roofing Square: Helps ensure that your panels are aligned correctly.
Roofing Boots: Provide better grip and stability while walking on the roof.
Skill Level and Time Required
Skill Level: Advanced
Time Required: 2-3 days
- Preparation and Planning: 4-6 hours
- Removing Old Roofing: 6-8 hours
- Installing Underlayment: 3-4 hours
- Laying Metal Panels: 8-10 hours
- Finishing Touches: 2-3 hours
Step-by-Step Instructions
Gather Materials and Tools
- Metal roofing panels
- Screws
- Drill
- Measuring tape
- Ladder
- Safety gear (gloves, goggles)
- Metal snips
Prepare the Roof
- Remove old roofing materials.
- Inspect for damage; repair if needed.
- Install underlayment for extra protection.
Measure and Cut Panels
- Measure roof dimensions.
- Cut metal panels to fit using metal snips.
Install the Panels
- Start at the bottom edge.
- Lay the first panel, ensuring it overhangs the edge slightly.
- Secure with screws, placing them every 12 inches.
Overlap Panels
- Lay the next panel, overlapping the first by one ridge.
- Secure with screws.
- Repeat until the roof is covered.
Install Ridge Cap
- Place the ridge cap at the roof peak.
- Secure with screws, ensuring it covers the top edges of the panels.
Seal Edges and Joints
- Apply sealant to all edges and joints.
- Ensure no gaps remain for water to seep through.
Inspect and Clean Up
- Check for any loose screws or panels.
- Clean up debris and tools.
Tips and Tricks
Measure twice, cut once. Always double-check measurements before cutting panels. This saves time and materials.
Use proper safety gear. Wear gloves, safety glasses, and non-slip shoes. Metal edges can be sharp.
Start square. Ensure the first panel is square to the roof edge. This keeps the rest of the panels aligned.
Overlap correctly. Panels should overlap by at least one ridge. This prevents leaks.
Use the right screws. Use screws with rubber washers. Place screws in the flat part of the panel, not the ridges.
Seal seams and edges. Apply a bead of silicone sealant along seams and edges. This adds extra protection against water.
Work in good weather. Avoid installing in rain or high winds. Wet surfaces are slippery and dangerous.
Common mistakes to avoid:
Skipping the underlayment. Always use an underlayment. It provides an extra layer of protection against moisture.
Incorrect screw placement. Screws too close to the edge can cause panels to warp. Place screws in the middle of the flat sections.
Not accounting for expansion. Metal expands and contracts with temperature changes. Leave small gaps for this movement.
Alternatives for materials or methods:
Corrugated metal vs. standing seam. Corrugated metal is cheaper and easier to install. Standing seam offers better durability and a sleeker look.
Synthetic underlayment vs. felt. Synthetic underlayment is more durable and resistant to tearing. Felt is cheaper but less durable.
Self-tapping screws vs. standard screws. Self-tapping screws make installation faster. Standard screws require pre-drilling holes.
Cost Estimation
Metal roofing panels: $100-$200 per square (100 sq. ft.)
Underlayment: $30-$50 per roll (covers about 400 sq. ft.)
Fasteners: $50-$100 per box (depends on roof size)
Ridge caps: $20-$50 each
Flashing: $10-$20 per piece
Sealant: $5-$10 per tube
Safety gear: $50-$100 (gloves, goggles, harness)
Tools:
- Metal snips: $15-$30
- Drill: $50-$100
- Measuring tape: $10-$20
- Chalk line: $5-$10
- Hammer: $10-$20
Total estimated cost: $340-$710 (excluding any additional costs for larger roofs or specific needs)
Budget-friendly alternatives:
- Recycled metal panels: Often cheaper, check local suppliers
- Basic underlayment: $20 per roll
- Borrow tools: From friends or family to save money
- Discount stores: For safety gear and smaller tools
Variations and Customizations
Materials: Instead of traditional steel, consider aluminum for a lightweight option or copper for a unique look that develops a patina over time. Zinc is another alternative, known for its durability and self-healing properties.
Colors: Metal roofing comes in a variety of colors. Choose matte black for a modern look, forest green to blend with natural surroundings, or terra cotta for a Mediterranean feel. Custom colors can also be ordered to match specific design needs.
Styles: Different styles can change the appearance of metal roofing. Standing seam offers a sleek, contemporary look with raised seams. Corrugated panels provide a more industrial or rustic appearance. Metal shingles mimic traditional shingle roofing but with the benefits of metal.
Finishes: Consider different finishes for added customization. Galvanized finishes offer a classic, shiny look. Powder-coated finishes provide a durable, colored surface. Textured finishes can mimic the look of wood or stone.
Insulation: Adding insulation beneath the metal roofing can improve energy efficiency and reduce noise. Rigid foam or spray foam are popular choices.
Accessories: Customize with accessories like snow guards to prevent snow buildup, ridge vents for better ventilation, or skylights to bring in natural light.
Installation Patterns: Experiment with different installation patterns. Vertical alignment is the most common, but horizontal or diagonal patterns can add visual interest.
Gutters and Downspouts: Match or contrast the roofing with custom gutters and downspouts. Copper gutters can add a touch of elegance, while painted aluminum can blend seamlessly.
Underlayment: Choose different types of underlayment for added protection. Synthetic underlayment offers superior water resistance, while felt underlayment is a more traditional, cost-effective option.
Edge Treatments: Customize the edges with drip edges or fascia trim in matching or contrasting colors. This not only enhances appearance but also provides additional protection against water damage.
Sustainability Tips
Choose recycled metal for your roofing. Many metal roofs are made from recycled materials, reducing waste. Use eco-friendly insulation like wool or cellulose. These materials are better for the environment and provide excellent insulation.
Install a reflective coating on the metal roof. This helps reflect sunlight, keeping your home cooler and reducing energy use. Opt for a standing seam design. This type of metal roofing has fewer seams, reducing the chance of leaks and increasing durability.
Reuse old roofing materials if possible. For example, old metal sheets can be repurposed for other projects. Recycle any leftover materials. Many metal roofing companies offer recycling programs for scraps and old roofs.
Use energy-efficient tools during installation. Battery-powered tools or those with energy-saving features can reduce your carbon footprint. Consider solar panels. Metal roofs are ideal for mounting solar panels, which can further reduce your home's energy consumption.
Seal gaps and edges with eco-friendly sealants. These products are less harmful to the environment and provide a strong seal. Choose a light color for your metal roof. Lighter colors reflect more sunlight, keeping your home cooler and reducing the need for air conditioning.
Your Roof, Your Rules
Installing metal roofing isn't just a cost-effective choice; it's a durable one too. With the right tools and a bit of patience, you can transform your home's look and boost its value. Remember to measure twice, cut once, and always follow safety guidelines. Don't rush the process; take your time to ensure everything's secure. If you hit a snag, don't hesitate to ask for help or consult a professional. Your roof will thank you for the extra care. Happy roofing!
What tools will I need to install metal roofing?
You'll need safety gear like gloves and goggles, a measuring tape, chalk line, drill, screws, metal snips, and a ladder. A screw gun and roofing hammer will also come in handy.
How do I measure my roof for metal roofing?
Measure the length and width of each roof section. Multiply these numbers to get the square footage. Add 10% to account for waste and overlaps.
Can I install metal roofing over existing shingles?
Yes, you can install metal roofing over one layer of shingles. Make sure the shingles are in good condition and the roof structure can support the extra weight.
How do I cut metal roofing panels?
Use metal snips for small cuts or a circular saw with a metal-cutting blade for larger cuts. Always wear safety goggles and gloves to protect yourself from sharp edges.
How do I secure the metal panels to the roof?
Start at the bottom edge and work your way up. Use screws with rubber washers to secure the panels. Place screws every 12 to 18 inches along the panel's ridges.
What should I do about roof vents and chimneys?
Cut the metal panels to fit around vents and chimneys. Use flashing to seal the gaps and prevent leaks. Make sure the flashing overlaps the metal panels.
How do I handle the edges and corners?
Use trim pieces to cover the edges and corners. Secure them with screws and make sure they overlap the metal panels to keep water out.