
Home>Home & Furniture>Roof>How to Build a DIY Roof Ladder
Roof
How to Build a DIY Roof Ladder
Published: August 17, 2024
Learn how to build a DIY roof ladder with our step-by-step guide. Ensure safety and efficiency for your roofing projects with this comprehensive tutorial.
(Many of the links in this article redirect to a specific reviewed product. Your purchase of these products through affiliate links helps to generate commission for Twigandthistle.com, at no extra cost. Learn more)
Tackling roof projects can be tricky without the right tools, and a good roof ladder is essential. Store-bought ladders can be expensive, but building your own can save money and offer a sense of accomplishment. Crafting a DIY roof ladder allows customization to fit specific needs and ensures safety while working at heights. This guide will walk through the basics of constructing a sturdy ladder using common materials found at home improvement stores. Whether fixing a few shingles or installing solar panels, having a reliable ladder makes any rooftop task easier and safer. Ready to get started?
Getting Ready for Your Project
Gather Materials: Collect wood, screws, nails, a saw, a drill, and measuring tape. Ensure everything is in good condition.
Safety Gear: Wear gloves, safety goggles, and a helmet. Have a first aid kit nearby.
Workspace Setup: Clear a flat area to work. Ensure good lighting and ventilation.
Measure and Cut: Measure the length needed for the ladder. Cut wood to size using a saw.
Pre-Drill Holes: Pre-drill holes in the wood to prevent splitting when attaching rungs.
Assemble Ladder: Attach rungs to the side rails using screws or nails. Ensure they are evenly spaced.
Check Stability: Test the ladder on the ground to ensure it is stable and secure.
Inspect Roof: Check the roof for any hazards or weak spots before using the ladder.
Secure Ladder: When placing the ladder on the roof, ensure it is securely anchored to prevent slipping.
Gathering Materials and Tools
- Lumber: Strong wood like pine or oak for the ladder's frame and rungs.
- Screws: Durable screws to secure the rungs to the frame.
- Drill: A power drill for making holes and driving screws.
- Saw: A hand saw or circular saw to cut the lumber to size.
- Measuring Tape: To measure the wood pieces accurately.
- Pencil: For marking measurements on the wood.
- Sandpaper: To smooth out rough edges on the wood.
- Safety Gear: Gloves, safety glasses, and a dust mask to protect yourself while working.
- Clamps: To hold the wood pieces in place while you work.
- Level: Ensures the ladder is straight and even.
- Wood Glue: Provides extra strength to the joints.
- Paint or Sealant: Protects the wood from weather damage.
Skill Level and Time Commitment
Skill Level: Intermediate
Time Required: 4-6 hours
- Materials Gathering: 30 minutes
- Cutting Wood: 1 hour
- Assembling Ladder: 2 hours
- Securing Rungs: 1 hour
- Final Adjustments: 30 minutes
Detailed Step-by-Step Guide
Gather Materials:
- Two long wooden boards (2x4s)
- Several shorter wooden boards (2x4s)
- Screws
- Drill
- Measuring tape
- Saw
- Sandpaper
Measure and Cut:
- Measure the length of the roof.
- Cut the long boards to match this length.
- Cut the shorter boards into equal lengths for rungs (about 18 inches each).
Sand the Wood:
- Sand all cut edges to remove splinters.
Mark Rung Positions:
- On the long boards, mark where each rung will go. Space them about 12 inches apart.
Attach Rungs:
- Place a short board (rung) between the two long boards at each marked spot.
- Drill screws through the long boards into each end of the rungs.
Check Stability:
- Ensure all rungs are securely attached.
- Test the ladder on the ground for stability.
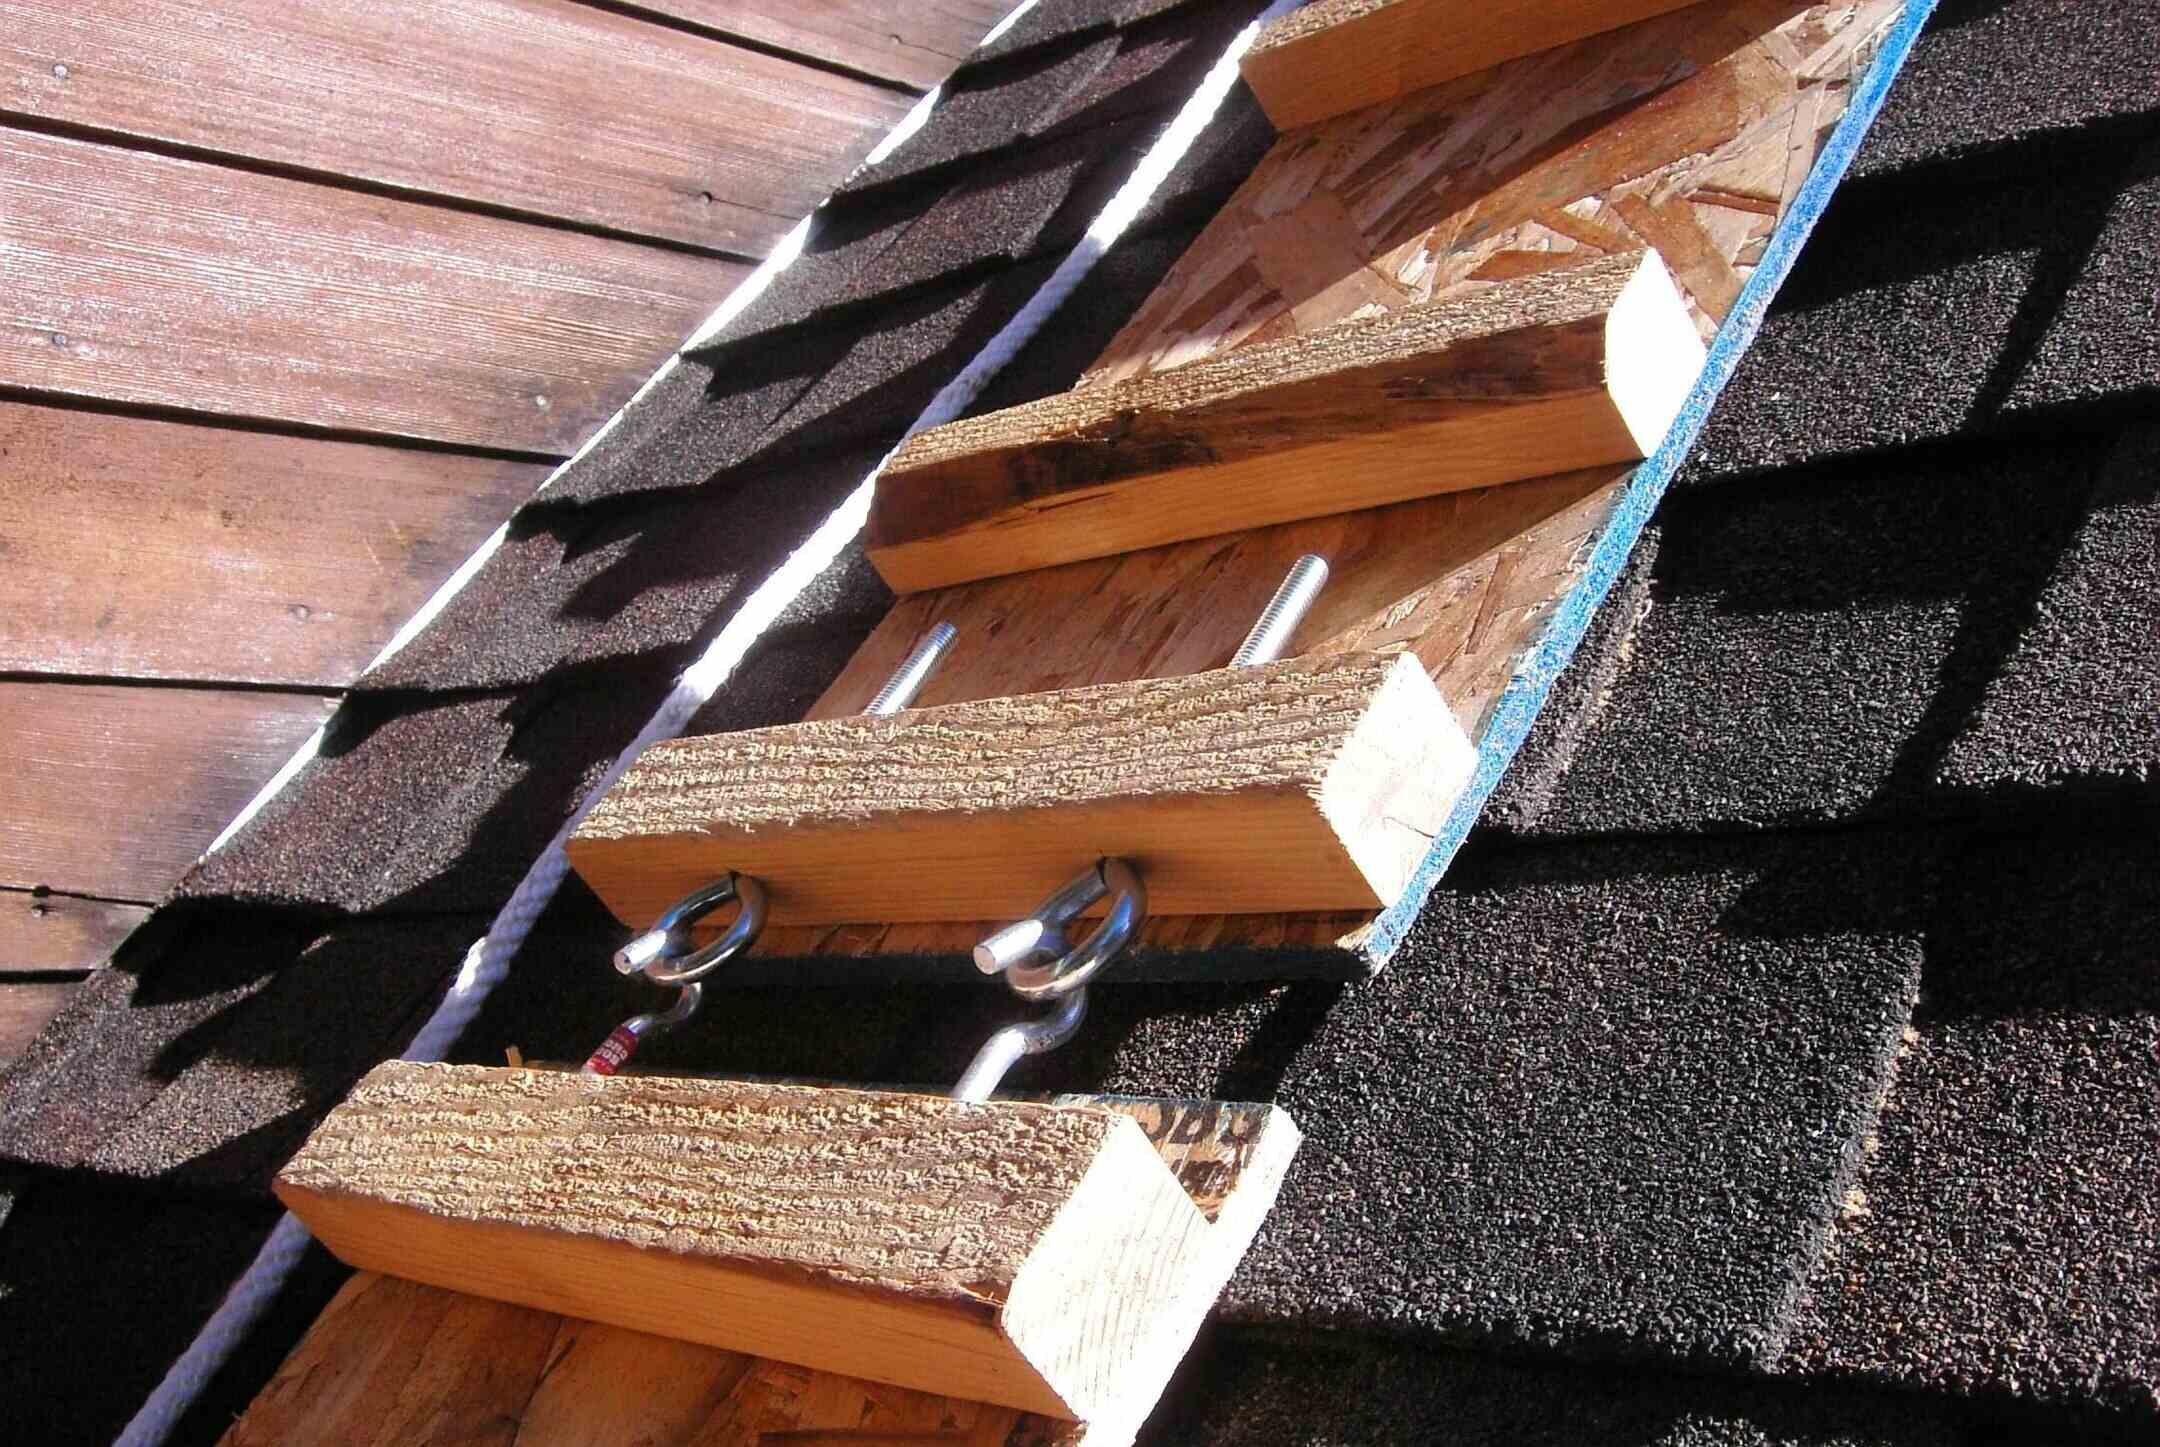
Add Hooks (Optional):
- Attach hooks to the top of the ladder if you want it to latch onto the roof edge.
Position Ladder:
- Place the ladder on the roof, ensuring it is secure before climbing.
Safety Check:
- Double-check all screws and stability before use.
Helpful Tips and Tricks
Measure your roof's slope and height before starting. This ensures the ladder fits perfectly. Use pressure-treated wood for durability. Pre-drill holes to prevent wood from splitting. Sand the edges to avoid splinters.
Common mistakes include using untreated wood, which can rot quickly. Avoid nails; they can loosen over time. Screws provide better stability. Don't skip measuring; an ill-fitting ladder can be dangerous.
For materials, consider aluminum if wood isn't available. It's lightweight and rust-resistant. Instead of wood rungs, PVC pipes can be used for a lighter ladder.
Estimating the Cost
Materials:
- Lumber: $50-$70 (for 2x4s or 2x6s)
- Plywood: $20-$30 (for a stable platform)
- Screws/Nails: $10-$15
- Metal Brackets: $10-$20 (for added stability)
- Rubber Feet: $5-$10 (for grip)
Tools:
- Saw: $30-$50 (hand saw or circular saw)
- Drill: $40-$60 (cordless or corded)
- Measuring Tape: $5-$10
- Level: $10-$15
- Screwdriver: $5-$10
Total Cost: $185-$290
Budget-Friendly Alternatives:
- Borrow Tools: Ask friends or family to lend tools.
- Second-Hand Tools: Check thrift stores or online marketplaces.
- Basic Lumber: Use reclaimed wood or cheaper lumber options.
- Skip Metal Brackets: Use extra wood pieces for reinforcement.
Personalizing Your Roof Ladder
Materials: Instead of using wood, consider aluminum for a lighter ladder. Steel can provide extra strength but will be heavier. For a more eco-friendly option, recycled plastic might work.
Colors: Paint the ladder to match your house or roof. Use weather-resistant paint in colors like gray, brown, or green. For a more vibrant look, try bright colors like red or blue.
Styles: Add rubber grips on the steps for better traction. Attach wheels to the bottom for easier movement. Install hooks or brackets to secure the ladder to the roof.
Safety Features: Add non-slip tape to the steps. Install a safety rail on one side. Use reflective tape for better visibility in low light.
Size: Customize the length to fit your roof height. Make it foldable for easy storage. Build a wider base for more stability.
Accessories: Attach a tool holder or bucket hook for convenience. Add a platform at the top for a stable working area. Install a pulley system to lift tools or materials.
Eco-Friendly Building Tips
Reclaimed wood can be a great choice for building a roof ladder. Look for old pallets or leftover lumber from other projects. Bamboo is another eco-friendly option; it's strong and grows quickly, making it a sustainable resource.
Use natural rope instead of synthetic materials. Hemp or jute ropes are durable and biodegradable. For the rungs, consider using recycled plastic or metal pipes. These materials are often available at salvage yards or recycling centers.
When assembling, opt for non-toxic adhesives and finishes. Water-based paints and sealants are safer for the environment and your health. If you need screws or nails, try to find recycled metal fasteners.
Finally, ensure your ladder is built to last. A well-made ladder reduces waste by not needing frequent replacements.
Your Roof Ladder is Ready
Building a DIY roof ladder isn't as tough as it seems. With some basic tools and a bit of patience, you've crafted a sturdy, reliable ladder. Remember, safety is key. Always double-check your measurements and connections. If something feels off, don't hesitate to revisit and adjust. Your new ladder will make those roof tasks much easier. Plus, there's a certain satisfaction in knowing you built it yourself. Keep this project in mind for future DIY endeavors. Who knows? Maybe next time you'll tackle a bigger project. Enjoy your new ladder and the confidence that comes with it. Happy climbing!
What materials do I need to build a DIY roof ladder?
You’ll need wooden planks, screws, metal brackets, a saw, a drill, and some sandpaper. Make sure the wood is sturdy enough to support your weight.
How long does it take to build a roof ladder?
It usually takes about 2-3 hours if you have all the materials ready and follow the steps carefully. If you’re new to DIY projects, it might take a bit longer.
Is it safe to use a DIY roof ladder?
Yes, as long as you use quality materials and follow the instructions properly. Always test the ladder on the ground before using it on the roof.
Can I customize the ladder to fit my roof?
Absolutely! You can adjust the length and width of the ladder to fit your specific roof. Just make sure to keep the proportions balanced for safety.
What tools do I need for this project?
You’ll need a saw, drill, screwdriver, measuring tape, and sandpaper. A level can also help ensure everything is straight.
How do I secure the ladder to the roof?
Use metal brackets and screws to attach the ladder securely. Make sure the brackets are firmly anchored to the roof structure.
Can I paint or stain the ladder?
Sure thing! Painting or staining can help protect the wood from the elements and make the ladder look nicer. Just make sure the paint or stain is suitable for outdoor use.