
Home>Home & Furniture>Roof>DIY Roof Repair Guide
Roof
DIY Roof Repair Guide
Published: August 17, 2024
Discover essential tips and step-by-step instructions in our DIY Roof Repair Guide. Learn how to fix common roof issues and maintain your roof like a pro!
(Many of the links in this article redirect to a specific reviewed product. Your purchase of these products through affiliate links helps to generate commission for Twigandthistle.com, at no extra cost. Learn more)
Fixing your roof yourself can save money and give a sense of accomplishment. However, roof repair requires careful planning and safety measures. This guide will help you understand basic roof repair steps, necessary tools, and common issues you might face. Whether dealing with leaks, missing shingles, or minor damage, taking the time to learn proper techniques can make a big difference. Keep in mind that some repairs might be too risky or complex, so knowing when to call a professional is just as important. Get ready to take control of your home maintenance with confidence!
Getting Ready for the Project
Inspect the Roof: Check for damaged shingles, leaks, or any other issues. Take notes or photos to remember problem areas.
Gather Materials: Collect shingles, nails, roofing cement, and a hammer. Make sure everything is within reach before starting.
Check the Weather: Ensure a clear day for repairs. Rain or strong winds can make the job dangerous.
Set Up Safety Gear: Wear non-slip shoes, gloves, and a safety harness. Use a sturdy ladder and secure it properly.
Clear the Workspace: Remove any debris or loose items from the roof. This prevents tripping and keeps the area safe.
Plan Your Steps: Know exactly what needs fixing and the order of tasks. This helps avoid mistakes and saves time.
Inform Someone: Let a friend or family member know you’re working on the roof. In case of an emergency, they can assist or call for help.
Essential Materials and Tools
- Ladder: Essential for reaching the roof safely. Ensure it’s sturdy and tall enough.
- Safety Harness: Prevents falls. Attach it securely to a stable part of the roof.
- Roofing Nails: Used to secure shingles or other roofing materials. Choose the right size for your roof type.
- Hammer: For driving nails into the roofing material. A claw hammer works best for removing old nails.
- Roofing Shingles: Replace damaged or missing shingles. Match the type and color with your existing roof.
- Roofing Cement: Seals leaks and secures loose shingles. Comes in a tube for easy application.
- Utility Knife: Cuts shingles and roofing felt. Ensure it’s sharp for clean cuts.
- Tape Measure: Measures areas needing repair. Accurate measurements ensure proper fitting of materials.
- Chalk Line: Marks straight lines on the roof. Helps in aligning shingles correctly.
- Pry Bar: Removes old shingles and nails. A flat pry bar works best for this task.
- Caulking Gun: Applies roofing cement or sealant. Ensures even application.
- Roofing Felt: Provides an extra layer of protection under shingles. Helps prevent leaks.
- Gloves: Protects hands from sharp edges and rough materials. Choose durable, comfortable gloves.
- Goggles: Shields eyes from debris and dust. Essential for safety.
- Bucket: Carries tools and materials. Keeps everything organized and within reach.
These tools and materials will help you complete your roof repair safely and effectively.
Required Skills and Time Commitment
Skill Level: Advanced
Time Required: 1-2 days
Important Keywords:
- Safety Gear
- Ladder
- Roofing Nails
- Shingles
- Roofing Cement
Steps:
- Inspect Roof: Check for damaged shingles or leaks.
- Gather Tools: Safety gear, ladder, roofing nails, shingles, roofing cement.
- Remove Damaged Shingles: Carefully lift and remove old shingles.
- Install New Shingles: Align and nail down new shingles.
- Seal: Apply roofing cement to secure shingles and prevent leaks.
Tips:
- Work with a partner for safety.
- Check weather forecast to avoid rain.
- Take breaks to avoid fatigue.
Detailed Steps to Follow
Inspect the Roof
- Use binoculars to check for damaged shingles, cracks, or leaks.
- Look for debris like leaves or branches that may cause damage.
Gather Materials
- Ladder
- Hammer
- Roofing nails
- Replacement shingles
- Roofing cement
- Utility knife
- Gloves
- Safety harness
Set Up Safety Measures
- Place the ladder on a stable surface.
- Wear a safety harness if the roof is steep.
- Ensure someone is nearby for assistance.
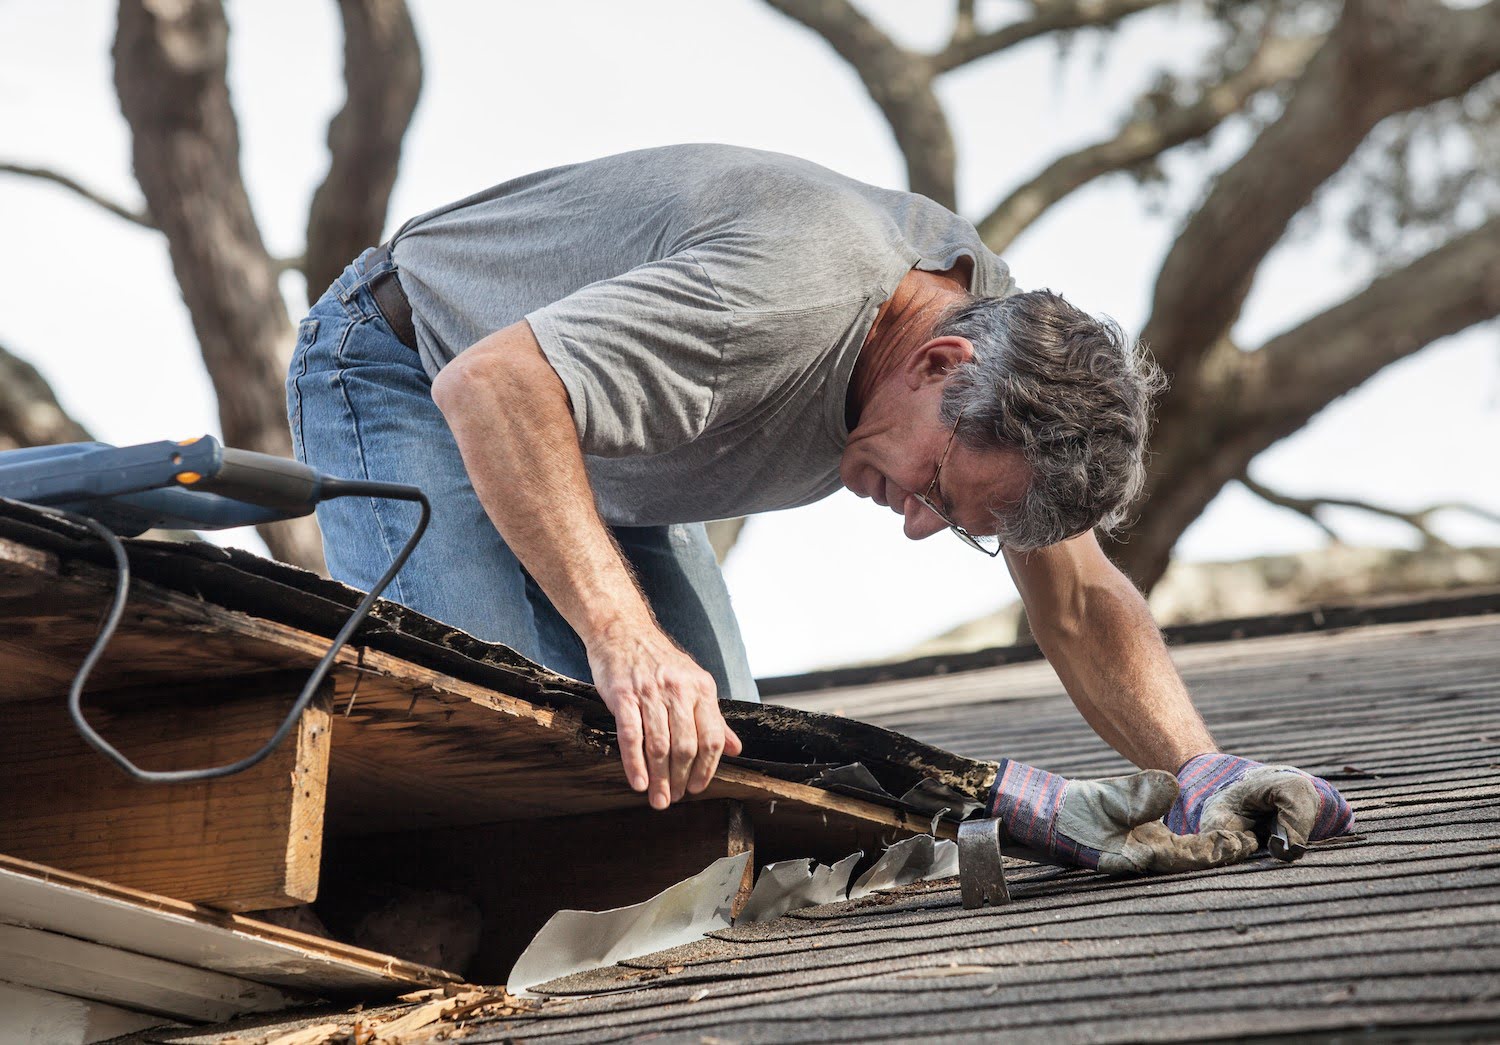
Remove Damaged Shingles
- Use the hammer to lift nails from the damaged shingles.
- Carefully slide out the damaged shingles.
Prepare the Area
- Clean the area where the shingles were removed.
- Apply a layer of roofing cement to the exposed area.
Install New Shingles
- Cut the new shingles to fit if necessary using a utility knife.
- Slide the new shingles into place.
- Nail the new shingles down using roofing nails.
- Apply roofing cement over the nails to seal them.
Check for Leaks
- After installation, check for any gaps or holes.
- Apply additional roofing cement if needed to seal any leaks.
Clean Up
- Remove all debris from the roof.
- Ensure all tools are collected and stored properly.
Final Inspection
- Do a final check to ensure all shingles are secure.
- Verify that there are no remaining leaks or damaged areas.
Helpful Tips and Tricks
Inspect Regularly: Check your roof twice a year, especially after storms. Look for missing shingles, cracks, or any signs of wear.
Safety First: Always use a sturdy ladder and wear non-slip shoes. Consider a safety harness if your roof is steep.
Patch Small Leaks: Use roofing cement or a patch kit for minor leaks. Apply it generously around the damaged area.
Replace Shingles: If a shingle is damaged, lift the surrounding ones, remove nails, and slide the new shingle into place. Secure it with roofing nails.
Clean Gutters: Clogged gutters can cause water to back up and damage your roof. Clean them regularly to ensure proper drainage.
Use Roofing Tape: For small cracks or holes, roofing tape can provide a quick fix. Make sure the area is clean and dry before applying.
Seal Flashing: Flashing around chimneys, vents, and skylights can deteriorate. Use a sealant to fix any gaps or cracks.
Avoid Walking on the Roof: Walking on the roof can cause damage. If you must, walk on the strongest parts, like the ridge.
Check for Mold: Mold can indicate water damage. Clean it with a mixture of water and bleach, but ensure you address the underlying issue.
Plan for Weather: Choose a dry, calm day for repairs. Wind and rain can make the job dangerous and less effective.
Common Mistakes to Avoid:
Ignoring Small Problems: Small issues can become big problems if left unchecked.
Using the Wrong Materials: Always use materials that match your existing roof. Mismatched materials can cause leaks.
Overloading the Roof: Too much weight from tools or materials can damage the roof structure.
Not Securing Shingles Properly: Loose shingles can be blown away by wind. Ensure they are nailed down securely.
Alternatives for Materials or Methods:
Rubber Roofing: For flat roofs, rubber roofing can be a durable alternative to traditional materials.
Metal Roofing: Metal panels can be a long-lasting option, though they may require professional installation.
Roof Coatings: Reflective roof coatings can extend the life of your roof and improve energy efficiency.
Synthetic Shingles: These can mimic the look of traditional shingles but offer better durability and weather resistance.
Estimating the Costs
Shingles: $30-$50 per bundle (3 bundles cover 100 sq. ft.)
Roofing nails: $10 per 2 lb. box
Roofing felt: $20-$40 per roll (covers 400 sq. ft.)
Roofing cement: $10-$20 per gallon
Roofing sealant: $5-$10 per tube
Hammer: $10-$20
Utility knife: $5-$10
Ladder: $100-$200 (if you don't have one)
Safety harness: $50-$100
Gloves: $5-$15
Total cost: $245-$515 (without ladder), $345-$715 (with ladder)
Budget-friendly alternatives:
Recycled shingles: $20-$30 per bundle
Basic roofing nails: $5 per 2 lb. box
Plastic roofing cement: $5-$10 per gallon
Basic hammer: $5-$10
Used ladder: $50-$100
Total cost with alternatives: $170-$355 (without ladder), $220-$455 (with ladder)
Different Approaches and Customizations
Shingles come in various materials like asphalt, wood, metal, or slate. Asphalt shingles are common and affordable, while wood shingles give a rustic look. Metal shingles last longer and resist fire. Slate shingles are durable but heavy and expensive.
Colors can change the look of your roof. Asphalt shingles come in many shades like black, gray, brown, red, or green. Metal shingles can be painted any color.
Styles of shingles include three-tab, architectural, or tile. Three-tab shingles are flat and uniform. Architectural shingles have a textured look. Tile shingles mimic the look of clay or concrete tiles.
Underlayment options include felt paper or synthetic materials. Felt paper is traditional but can tear. Synthetic underlayment is stronger and more water-resistant.
Flashing can be made from aluminum, copper, or steel. Aluminum is lightweight and easy to work with. Copper is durable and looks good but costs more. Steel is strong and resists rust.
Sealants come in different types like silicone, polyurethane, or asphalt-based. Silicone sealants are flexible and last long. Polyurethane sealants are strong and paintable. Asphalt-based sealants are good for patching.
Gutters can be customized with vinyl, aluminum, or copper. Vinyl gutters are cheap and easy to install. Aluminum gutters resist rust and come in many colors. Copper gutters are durable and add a classic look.
Roof vents can be ridge, soffit, or gable vents. Ridge vents run along the roof peak. Soffit vents are under the eaves. Gable vents are on the side walls.
Insulation options include fiberglass, foam board, or spray foam. Fiberglass is common and affordable. Foam board provides high insulation value. Spray foam seals gaps well.
Tools needed might include a hammer, nail gun, utility knife, chalk line, or roofing shovel. A hammer is basic but effective. A nail gun speeds up the job. A utility knife cuts shingles. A chalk line helps mark straight lines. A roofing shovel removes old shingles.
Eco-Friendly Tips
Eco-friendly materials can make a big difference. Reclaimed wood shingles are a great option. They come from old barns or buildings. This reduces waste and gives your roof a rustic look. Metal roofing is another sustainable choice. It lasts a long time and can be recycled when replaced. Clay tiles are durable and made from natural materials. They also help keep your home cool.
Reusing materials is another way to be eco-friendly. If you have leftover shingles from a previous project, use them. You can also check local salvage yards for materials. This saves money and reduces waste.
Solar panels can be added to your roof. They generate electricity and reduce your carbon footprint. Green roofs are another option. They involve planting vegetation on your roof. This helps insulate your home and reduces stormwater runoff.
Eco-friendly methods include using low-VOC sealants. These sealants release fewer harmful chemicals into the air. Energy-efficient insulation can also be added. This reduces the need for heating and cooling, saving energy.
Regular maintenance is key. Fix small issues before they become big problems. This extends the life of your roof and reduces the need for new materials.
Your Roof's New Look
You've got the basics down for DIY roof repair. With the right tools, a bit of patience, and some elbow grease, you can tackle those pesky leaks and shingles. Remember, safety first. Always use a sturdy ladder and wear non-slip shoes. If things get too tricky, don't hesitate to call a professional. Your roof is a big deal, protecting your home from the elements. Keeping it in good shape means fewer headaches down the road. So, next time you spot a problem, you'll know just what to do. Happy fixing!
How do I know if my roof needs repair?
Look for missing shingles, leaks, or water stains on your ceiling. If you see any of these, it's time to fix your roof.
What tools do I need for roof repair?
You'll need a hammer, nails, shingles, roofing cement, and a ladder. Safety gear like gloves and goggles is also important.
Can I repair my roof myself?
Yes, you can! Just make sure to follow safety guidelines and instructions. If the damage is extensive, though, you might want to call a professional.
How long does a roof repair take?
Small repairs might take a few hours, while larger ones could take a day or two. It depends on the extent of the damage.
What should I do if I find a leak?
First, locate the source of the leak. Then, use roofing cement or patching material to seal it. Don't forget to replace any damaged shingles.
How often should I inspect my roof?
Check your roof twice a year, in the spring and fall. Also, inspect it after major storms to catch any damage early.
What are the common causes of roof damage?
Weather (like wind and hail), age, and poor maintenance are common culprits. Keeping your roof in good shape can help prevent these issues.