
Home>Home & Furniture>Roof>DIY Playhouse Roof Installation Guide
Roof
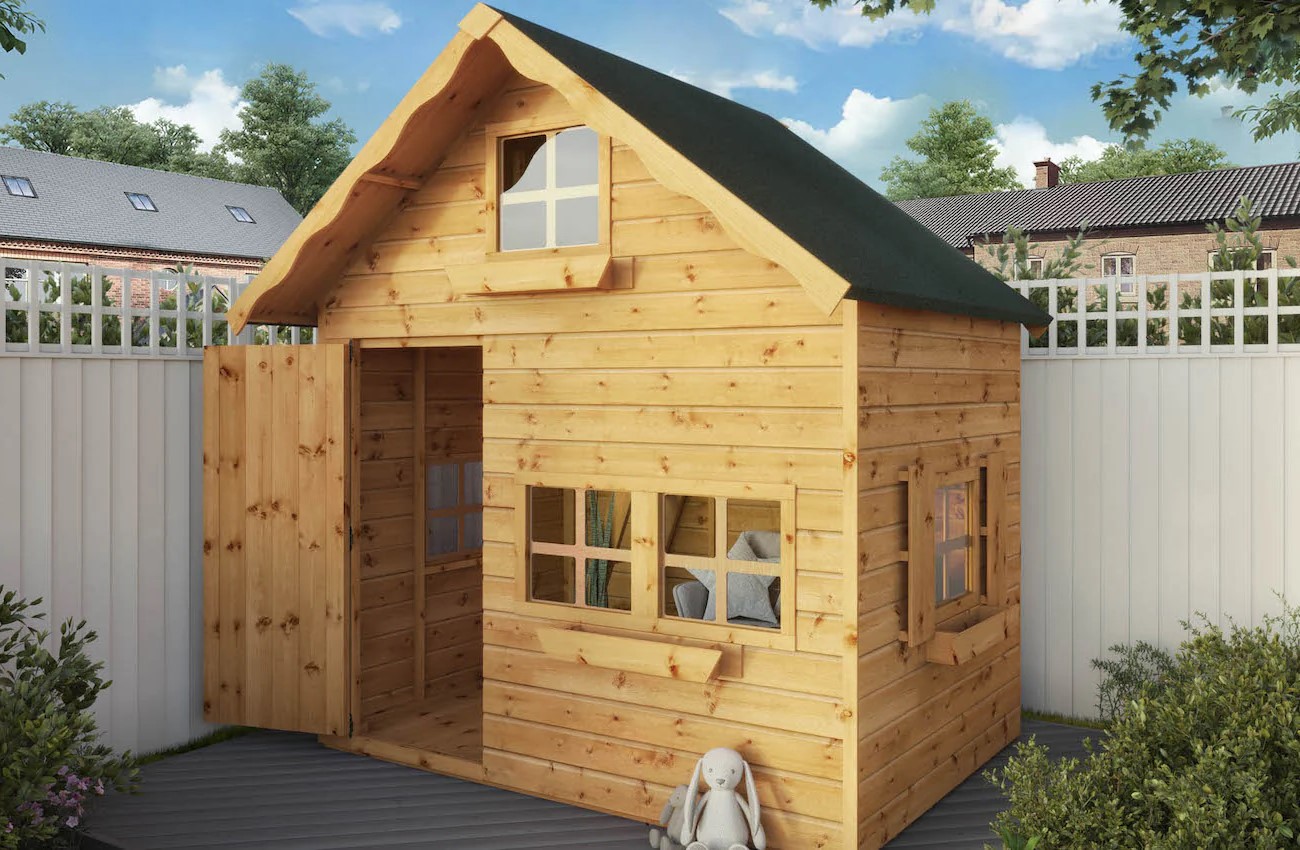
DIY Playhouse Roof Installation Guide
Published: August 23, 2024
Learn how to install a durable and stylish roof for your DIY playhouse with our step-by-step guide. Perfect for beginners and seasoned builders alike!
(Many of the links in this article redirect to a specific reviewed product. Your purchase of these products through affiliate links helps to generate commission for Twigandthistle.com, at no extra cost. Learn more)
Building a playhouse is a fun project that brings joy to kids and teaches valuable skills. One key part of this project is installing the roof. It might seem challenging, but with the right approach, anyone can do it. In this guide, you'll find simple steps and tips to ensure your playhouse roof is sturdy and safe. Whether you’re using shingles, corrugated metal, or something else, the process can be straightforward. With some basic tools, materials, and a little patience, you’ll have that roof up in no time. Let’s get started on making your playhouse complete!
Getting Ready for the Project
Gather Materials: Collect all necessary items like roofing shingles, nails, a hammer, a measuring tape, a ladder, and safety gear.
Safety First: Wear safety goggles, gloves, and a helmet. Ensure the ladder is stable and on a flat surface.
Clear the Area: Remove any debris or obstacles around the playhouse. This ensures a safe workspace.
Measure the Roof: Use a measuring tape to get the exact dimensions of the roof. This helps in cutting the shingles to the right size.
Prepare the Shingles: Cut the shingles according to the measurements. Lay them out in the order they will be installed.
Check the Weather: Ensure the weather is clear. Rain or strong winds can make the job dangerous.
Set Up Workspace: Arrange tools and materials within easy reach. This saves time and effort during installation.
Inspect the Roof Frame: Check for any damage or weak spots in the roof frame. Repair any issues before starting.
Plan the Layout: Decide the pattern for laying the shingles. This ensures a neat and efficient installation.
Get Help: If possible, have someone assist you. Extra hands make the job safer and quicker.
Gather Your Materials and Tools
- Plywood Sheets: These form the base of the roof. Choose weather-resistant plywood for durability.
- Roofing Felt: Provides a waterproof layer between the plywood and shingles.
- Asphalt Shingles: Commonly used for roofing, they protect against rain and sun.
- Roofing Nails: Used to secure the shingles and felt to the plywood.
- Hammer: Essential for driving nails into the plywood and shingles.
- Measuring Tape: Ensures accurate measurements for cutting plywood and shingles.
- Utility Knife: Handy for cutting roofing felt and shingles to size.
- Circular Saw: Needed for cutting plywood sheets to the correct dimensions.
- Chalk Line: Helps mark straight lines on the plywood for precise cuts.
- Ladder: Necessary for reaching the roof safely.
- Safety Goggles: Protects eyes from debris while cutting and nailing.
- Work Gloves: Keeps hands safe from splinters and sharp edges.
- Roofing Cement: Seals edges and overlaps to prevent leaks.
- Drill: Useful for pre-drilling holes in the plywood to prevent splitting.
- Screws: Sometimes used instead of nails for added strength.
Required Skills and Time Commitment
Skill Level: Intermediate
Time Required: Approximately 6-8 hours
- Gather Materials: 30 minutes
- Measure and Cut Wood: 1-2 hours
- Assemble Roof Frame: 1 hour
- Attach Roof Panels: 2-3 hours
- Install Shingles or Roofing Material: 1-2 hours
Important Keywords: Intermediate, 6-8 hours, Gather Materials, Measure and Cut Wood, Assemble Roof Frame, Attach Roof Panels, Install Shingles or Roofing Material
Detailed Steps for Installation
Gather Materials and Tools
- Plywood sheets
- Roofing felt
- Shingles
- Nails
- Hammer
- Measuring tape
- Utility knife
- Ladder
- Safety goggles
Measure and Cut Plywood
- Measure the dimensions of the playhouse roof.
- Cut plywood sheets to fit those dimensions using a saw.
Attach Plywood to Roof Frame
- Place plywood sheets on the roof frame.
- Secure them with nails, spacing nails about 6 inches apart.
Install Roofing Felt
- Roll out roofing felt over the plywood.
- Cut felt to size using a utility knife.
- Secure felt with nails, ensuring it lays flat without wrinkles.
Lay Down Shingles
- Start at the bottom edge of the roof.
- Lay the first row of shingles, overlapping the edge slightly.
- Nail shingles in place, using four nails per shingle.
Continue Shingling
- Lay the next row of shingles, overlapping the first row by half.
- Continue this process until reaching the top of the roof.
Trim Excess Shingles
- Use a utility knife to trim any excess shingles hanging over the edges.
Install Ridge Cap Shingles
- Fold shingles over the roof peak.
- Nail them in place, ensuring they cover the top row of shingles.
Inspect and Clean Up
- Check the roof for any loose nails or shingles.
- Clean up any debris or leftover materials.
Helpful Tips and Tricks
Measure twice, cut once. Always double-check measurements before cutting materials. This prevents waste and ensures pieces fit correctly.
Use lightweight materials. Plywood or corrugated plastic sheets work well for playhouse roofs. They are easy to handle and install.
Pre-drill holes. This avoids splitting wood when driving screws or nails. It also makes the process faster and smoother.
Seal edges. Apply waterproof sealant to all edges and seams. This keeps the playhouse dry and extends the roof's life.
Work with a partner. Having someone to hold materials in place while you secure them makes the job easier and safer.
Common mistakes to avoid:
- Skipping the level check. Ensure the roof frame is level before attaching roofing materials. An uneven roof can cause water pooling and damage.
- Ignoring safety gear. Always wear gloves, safety glasses, and a dust mask when cutting or handling materials.
- Using the wrong fasteners. Use weather-resistant screws or nails to prevent rust and ensure durability.
Alternatives for materials or methods:
- Tarps or canvas. For a temporary or budget-friendly option, use heavy-duty tarps or canvas secured with bungee cords or staples.
- Recycled materials. Old pallets or reclaimed wood can create a rustic, eco-friendly roof.
- Shingles. For a more traditional look, use lightweight asphalt shingles. They are easy to install and provide good weather protection.
Estimating the Costs
Materials:
- Plywood: $20 per sheet (you'll need about 3 sheets) = $60
- Roofing Felt: $30 per roll (one roll should be enough) = $30
- Shingles: $25 per bundle (you'll need about 3 bundles) = $75
- Nails: $5 per box (one box should be enough) = $5
- Drip Edge: $10 per piece (you'll need about 4 pieces) = $40
- Roofing Cement: $10 per can (one can should be enough) = $10
Tools:
- Hammer: $15
- Utility Knife: $10
- Tape Measure: $10
- Ladder: $50 (if you don't already have one)
Total Cost: $305
Budget-Friendly Alternatives:
- Plywood: Look for reclaimed wood or leftover pieces from other projects. This can reduce costs to around $30.
- Shingles: Consider using metal roofing sheets, which can be cheaper and more durable. Cost: $60 for the whole roof.
- Hammer, Utility Knife, Tape Measure: Borrow from friends or family. This can save you $35.
- Ladder: Rent from a local hardware store for about $10 per day instead of buying.
Creative Variations and Customizations
Materials: Instead of traditional shingles, try using corrugated metal sheets for a modern look. Wooden planks can give a rustic feel, while polycarbonate panels allow natural light to filter through.
Colors: Paint the roof in bright, cheerful colors like yellow or blue to make the playhouse stand out. For a more natural look, use earth tones like brown or green. Consider using chalkboard paint on one section for a fun, interactive surface.
Styles: Create a thatched roof using synthetic thatch for a tropical vibe. For a fairy-tale look, install curved shingles or scalloped edges. Add a skylight or dormer window for extra charm and natural light.
Decorations: Attach flower boxes along the edges for a garden feel. Hang string lights or bunting for a festive touch. Install a weather vane or flag on top for added character.
Functional Additions: Add solar panels to teach kids about renewable energy. Install a rainwater collection system to water nearby plants. Consider adding insulation if the playhouse will be used year-round.
Eco-Friendly Tips
Reclaimed Wood: Use old pallets or barn wood. Sand and treat them to ensure they are safe and durable.
Recycled Metal Sheets: Look for discarded metal roofing sheets. They are sturdy and can be cut to fit your playhouse roof.
Green Roof: Plant a small garden on top. Use lightweight soil and drought-resistant plants. This helps with insulation and looks great.
Recycled Shingles: Find shingles made from recycled materials. They are often made from rubber or plastic and last a long time.
Bamboo: Fast-growing and sustainable, bamboo can be used for roofing. It's lightweight and strong.
Solar Panels: Small solar panels can provide energy for lights inside the playhouse. This is a fun way to teach kids about renewable energy.
Natural Sealants: Use eco-friendly sealants made from natural oils and waxes. They protect the roof without harmful chemicals.
Rainwater Collection: Install a gutter system to collect rainwater. Use this water for the garden or other outdoor activities.
Insulation: Use recycled denim or wool for insulation. These materials are effective and eco-friendly.
Paint: Choose non-toxic, low-VOC paints. They are safer for kids and the environment.
Your Playhouse Roof is Ready!
You've done it! Your playhouse roof is now installed, providing a cozy shelter for countless hours of fun. With a bit of patience and some elbow grease, you've turned a simple structure into a magical hideaway. Remember, the key to any DIY project is preparation and attention to detail. If you ever need to make adjustments or repairs, you'll know exactly what to do. Enjoy the satisfaction of knowing you built something special with your own hands. Now, it's time to let the kids' imaginations run wild in their new playhouse. Happy building!
How do I choose the right materials for my playhouse roof?
Consider durability, weather resistance, and cost. Common choices include shingles, metal sheets, and corrugated plastic. Each has its pros and cons, so pick what fits your budget and climate.
What tools will I need for installing a playhouse roof?
You'll need a hammer, nails, measuring tape, saw, drill, and safety gear like gloves and goggles. A ladder might be handy too.
How do I measure the roof area accurately?
Measure the length and width of each roof section. Multiply these numbers to get the square footage. Don’t forget to add a bit extra for overhang and mistakes.
Should I install insulation under the roof?
Insulation isn’t a must, but it can help keep the playhouse cooler in summer and warmer in winter. Foam boards or reflective insulation are good options.
How do I ensure the roof is waterproof?
Use roofing felt or underlayment before adding the top layer. Make sure to overlap materials and seal edges with roofing tape or caulk.
Can I install a playhouse roof by myself?
Yes, but having a helper makes the job easier and safer. Some tasks, like lifting heavy materials, are simpler with two people.
How long does it take to install a playhouse roof?
It depends on your experience and the size of the playhouse. Generally, it can take anywhere from a few hours to a weekend.