
Home>Home & Furniture>Roof>DIY Guide: Budget-Friendly RV Roof Replacement
Roof
DIY Guide: Budget-Friendly RV Roof Replacement
Published: August 18, 2024
Discover a step-by-step DIY guide for budget-friendly RV roof replacement. Save money and ensure a durable, leak-free roof with our expert tips and detailed instructions.
(Many of the links in this article redirect to a specific reviewed product. Your purchase of these products through affiliate links helps to generate commission for Twigandthistle.com, at no extra cost. Learn more)
Replacing an RV roof might seem like a huge task, but doing it yourself can save a lot of money. With some basic tools and patience, you can tackle this project without breaking the bank. This guide aims to help you through the process step-by-step. Whether dealing with leaks, damage, or just old age, a new roof will keep your RV in tip-top shape. No need to hire expensive professionals when you can handle it on your own. Ready to roll up your sleeves and start? Let's dive into the DIY world of RV roof replacement!
Getting Ready for the Project
Gather Materials: Collect all necessary tools and materials. This includes a ladder, safety goggles, gloves, a utility knife, adhesive, sealant, and the new roofing material.
Safety First: Wear safety goggles and gloves to protect your eyes and hands. Ensure the ladder is stable and someone is nearby to assist if needed.
Clear the Area: Remove any items from the RV roof. This includes antennas, vents, and any other fixtures. Clean the roof surface to remove dirt and debris.
Inspect for Damage: Check the roof for any signs of damage or leaks. Repair any issues before proceeding with the replacement.
Measure and Cut: Measure the dimensions of the RV roof accurately. Cut the new roofing material to fit these measurements.
Workspace Setup: Set up a clean, flat workspace near the RV. Lay out all tools and materials within easy reach.
Weather Check: Ensure the weather is clear. Avoid working on the roof during rain or high winds.
Read Instructions: Carefully read the instructions for the adhesive and sealant. Follow the manufacturer's guidelines for the best results.
Plan the Process: Outline each step of the replacement process. This helps ensure you don't miss any critical tasks.
Test Fit: Before applying adhesive, place the new roofing material on the RV roof to ensure it fits correctly. Make any necessary adjustments.
Following these steps will help ensure a smooth and safe RV roof replacement.
Essential Materials and Tools
- EPDM Rubber Roofing: This is the main material for the new roof. It's durable and weather-resistant.
- Adhesive: Used to stick the EPDM rubber roofing to the RV. Make sure it's compatible with EPDM.
- Sealant: Helps to seal edges and seams, preventing water leaks.
- Butyl Tape: Used around vents and other openings to create a waterproof seal.
- Roof Coating: Provides an extra layer of protection against UV rays and weather damage.
- Utility Knife: Needed for cutting the EPDM rubber roofing to size.
- Measuring Tape: Ensures accurate measurements for cutting materials.
- Caulking Gun: Used to apply sealant smoothly and evenly.
- Roller: Helps to press the EPDM rubber roofing down firmly, ensuring good adhesion.
- Screwdriver: Needed for removing and reattaching any fixtures on the roof.
- Putty Knife: Useful for scraping off old sealant and smoothing new sealant.
- Ladder: Essential for safely accessing the roof.
- Safety Gear: Includes gloves, safety glasses, and knee pads to protect yourself during the project.
Required Skills and Time
Skill Level: Advanced
Time Required: 2-3 days
- Preparation: 4-6 hours
- Removing Old Roof: 6-8 hours
- Cleaning and Repairing: 4-6 hours
- Installing New Roof: 8-10 hours
- Sealing and Finishing Touches: 4-6 hours
Instructions for Each Step
Gather Materials and Tools
- Plywood sheets
- Rubber roofing material
- Adhesive
- Sealant
- Screws
- Screwdriver
- Utility knife
- Measuring tape
- Safety gear (gloves, goggles)
Remove Old Roof
- Use a screwdriver to remove screws from the old roof.
- Carefully peel off the old roofing material.
- Dispose of the old material properly.
Inspect Roof Structure
- Check for any damage or rot in the underlying structure.
- Replace damaged plywood if necessary.
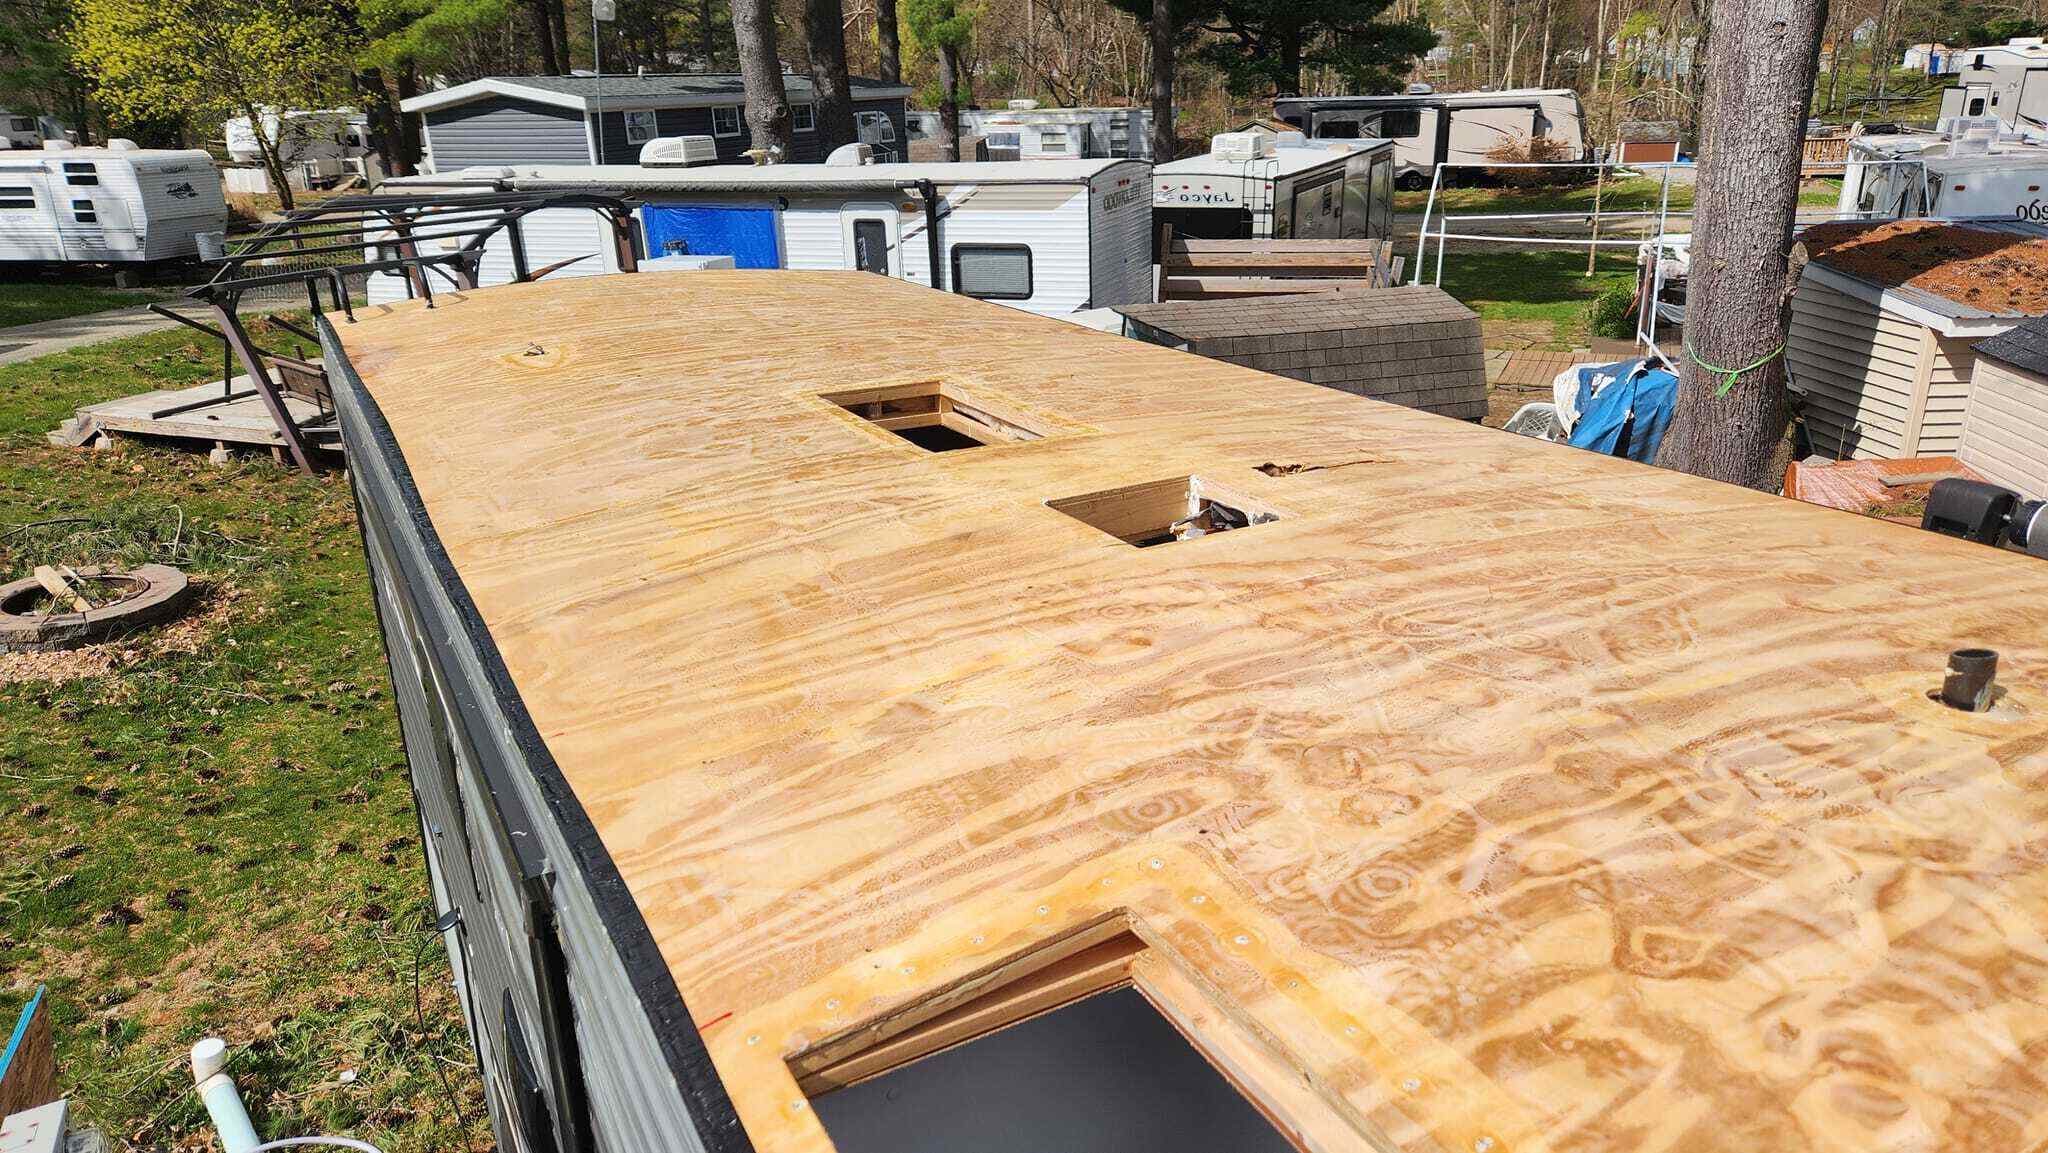
Measure and Cut New Plywood
- Measure the dimensions of your RV roof.
- Cut plywood sheets to fit these dimensions using a utility knife.
Install New Plywood
- Place the cut plywood sheets on the roof frame.
- Secure them with screws, ensuring they are tightly fastened.
Apply Adhesive
- Spread adhesive evenly over the plywood surface.
- Follow the adhesive manufacturer's instructions for drying time.
Lay Rubber Roofing Material
- Roll out the rubber roofing material over the adhesive.
- Smooth out any air bubbles or wrinkles.
Trim Excess Material
- Use a utility knife to trim any excess rubber material around the edges.
Seal Edges and Seams
- Apply sealant along the edges and seams of the rubber roofing.
- Ensure all areas are fully sealed to prevent leaks.
Reinstall Roof Fixtures
- Reattach any vents, antennas, or other fixtures removed earlier.
- Ensure they are securely fastened and sealed.
Inspect and Test
- Check the roof for any missed spots or weak areas.
- Test for leaks by spraying water over the roof and checking inside for any signs of water entry.
Helpful Tips and Tricks
Measure twice, cut once. Always double-check measurements before cutting materials. This saves time and money.
Use a tarp to cover the RV interior. This prevents debris from falling inside.
Work in sections. Breaking the job into smaller parts makes it more manageable.
Choose the right adhesive. Use a high-quality, waterproof adhesive to ensure a strong bond.
Seal all edges. Apply a generous amount of sealant around edges and seams to prevent leaks.
Inspect the roof frame. Before installing new material, check for any damage or rot in the frame.
Use a roller. Rolling out the adhesive helps remove air bubbles and ensures a smooth finish.
Wear safety gear. Gloves, goggles, and knee pads protect you from injuries.
Common mistakes to avoid:
Skipping the primer. Always apply a primer before the adhesive. It helps the new material stick better.
Ignoring weather conditions. Avoid working on the roof during rain or extreme heat. It can affect the adhesive's performance.
Not allowing enough drying time. Rushing the process can lead to poor adhesion and leaks.
Alternatives for materials or methods:
EPDM rubber roofing. This material is durable and easy to install. It’s also cost-effective.
TPO roofing. Thermoplastic Polyolefin is another good option. It’s resistant to UV rays and punctures.
Liquid roof coating. For minor repairs, a liquid roof coating can be applied directly over the existing roof. It’s a quick fix and extends the roof's life.
Butyl tape. Use this instead of traditional caulk for sealing seams. It’s more flexible and lasts longer.
Estimating the Costs
Materials:
- EPDM Rubber Roofing: $300-$400 for a 25-foot roll
- Adhesive: $50-$100 for a gallon
- Sealant: $20-$30 per tube (you'll need about 3 tubes)
- Butyl Tape: $15-$25 per roll
- Plywood (if needed for underlayment): $20-$30 per sheet (estimate 4 sheets)
- Screws and Fasteners: $10-$20
Tools:
- Utility Knife: $10-$15
- Caulking Gun: $5-$10
- Putty Knife: $5-$10
- Drill: $50-$100 (if you don't already have one)
- Measuring Tape: $5-$10
- Safety Gear (gloves, goggles): $10-$20
Total Estimated Cost:
- Materials: $415-$635
- Tools: $85-$165
Grand Total: $500-$800
Budget-Friendly Alternatives:
- EPDM Rubber Roofing: Consider TPO roofing, which can be cheaper, around $250-$350.
- Adhesive: Use a generic brand, which might cost $30-$50.
- Sealant: Opt for a multi-purpose sealant that costs $10-$20 per tube.
- Plywood: Check for discounted or reclaimed wood, which can be as low as $10-$15 per sheet.
- Tools: Borrow from friends or rent from a local hardware store to save money.
Different Ways to Customize
Alternative Materials: Instead of traditional rubber roofing, consider TPO (Thermoplastic Olefin) or EPDM (Ethylene Propylene Diene Monomer). Both are durable and weather-resistant. For a more eco-friendly option, try recycled rubber or metal roofing.
Colors: Most RV roofs come in white to reflect sunlight, but you can choose light gray or beige for a different look. Some people even opt for custom colors to match their RV's exterior.
Styles: Add a textured finish to your roof for a unique appearance. You can also install solar panels for energy efficiency or skylights to bring in natural light.
Sealants: Use silicone-based sealants for better flexibility and longevity. Acrylic sealants are another option, offering good UV resistance.
Insulation: Improve insulation by adding a layer of foam board or reflective insulation under the new roof material. This helps keep the RV cooler in summer and warmer in winter.
Edge Trim: Customize the edge trim with aluminum or stainless steel for a sleek, modern look. Vinyl trim is another option, providing a softer, more traditional appearance.
Gutters: Install rain gutters to manage water runoff better. Choose from plastic or metal options, depending on your budget and style preference.
Vents and Fans: Upgrade roof vents with powered fans for better airflow. Consider low-profile vents for a streamlined look.
Protective Coatings: Apply a UV-resistant coating to extend the life of your new roof. Reflective coatings can also help reduce heat absorption.
Decorative Elements: Add decals or painted designs to personalize your roof. Some people even install LED strip lights around the edges for a unique touch.
Eco-Friendly Tips
Recycled Rubber Roofing: Use recycled rubber roofing materials. They are durable, waterproof, and eco-friendly.
Reclaimed Wood: If your RV has wooden elements on the roof, consider using reclaimed wood. It adds a rustic look and reduces waste.
Solar Reflective Paint: Apply solar reflective paint to the roof. It helps keep the RV cooler, reducing the need for air conditioning.
Natural Insulation: Use natural insulation materials like wool or cotton. They are biodegradable and provide excellent insulation.
Recycled Metal Sheets: For metal roofs, opt for recycled metal sheets. They are strong and have a lower environmental impact.
Eco-Friendly Adhesives: Choose adhesives that are non-toxic and eco-friendly. They are safer for you and the environment.
Recycled Plastic Panels: Use recycled plastic panels for a lightweight, durable roofing option. They are easy to install and maintain.
Rainwater Harvesting: Install a rainwater harvesting system on the roof. It collects rainwater for use in the RV, reducing water waste.
Energy-Efficient Skylights: Add energy-efficient skylights to bring natural light into the RV. It reduces the need for artificial lighting.
Reusable Tools: Use reusable tools and materials whenever possible. Borrow or rent tools instead of buying new ones to save money and reduce waste.
Your RV Roof is Ready to Roll
You've tackled measuring, cutting, and sealing with confidence. Now, your RV roof is as good as new. Remember, regular maintenance will keep it in top shape. Check for leaks, clean off debris, and inspect seals every few months. If you spot any issues, fix them right away to avoid bigger problems down the road.
Feeling proud? You should be! You've saved money and learned valuable skills. Plus, your RV is ready for more adventures. Whether you're hitting the open road or camping under the stars, you can trust your handiwork. Keep those tools handy and stay curious. There's always another project waiting. Happy travels!
How do I know if my RV roof needs replacing?
Look for cracks, leaks, or soft spots. If water's getting in, it’s time for a new roof.
What materials do I need for a DIY RV roof replacement?
You’ll need EPDM or TPO roofing material, adhesive, sealant, screws, and tools like a utility knife and roller.
How long does it take to replace an RV roof?
It usually takes a weekend. Prep work on day one, installation on day two.
Can I replace my RV roof without professional help?
Yes, with some basic tools and patience, you can do it yourself. Just follow the steps carefully.
How much will it cost to replace my RV roof?
DIY replacement costs around $300 to $1,000, depending on the size of your RV and materials used.
What’s the best type of roofing material for an RV?
EPDM and TPO are popular choices. EPDM is more flexible, while TPO is more durable.
Do I need to remove the old roof before installing a new one?
Yes, removing the old roof ensures a smooth surface for the new material, preventing future issues.