
Home>Home & Furniture>Kitchen>How to Build Floating Shelves: Step-by-Step Guide
Kitchen
How to Build Floating Shelves: Step-by-Step Guide
Published: August 2, 2024
Learn how to build floating shelves with our step-by-step guide. Perfect for DIY enthusiasts, this tutorial covers materials, tools, and detailed instructions for a flawless finish.
(Many of the links in this article redirect to a specific reviewed product. Your purchase of these products through affiliate links helps to generate commission for Twigandthistle.com, at no extra cost. Learn more)
Building floating shelves is a fun and practical way to add storage and style to any room. These sleek, modern shelves appear to "float" on the wall without visible brackets or supports, giving your space a clean, contemporary look. Whether showcasing favorite books, displaying family photos, or organizing everyday items, floating shelves can do it all. The best part? You can easily make them yourself with a few tools and materials. Follow this guide to learn how to create your own floating shelves, and soon you'll have a stunning and functional addition to your home.
Getting Ready for Your Project
- Gather Materials: Collect wood, brackets, screws, a drill, a level, a stud finder, sandpaper, and paint or stain.
- Measure and Mark: Use a tape measure to determine the shelf length. Mark the wall where you want the shelves.
- Find Studs: Use a stud finder to locate wall studs. Mark these spots for secure mounting.
- Cut Wood: Cut the wood to your desired shelf length using a saw. Sand the edges for a smooth finish.
- Paint or Stain: Apply paint or stain to the wood. Let it dry completely.
- Install Brackets: Drill holes into the wall at the marked stud locations. Attach the brackets securely.
- Mount Shelves: Place the wood on the brackets. Secure it with screws from underneath.
- Check Level: Use a level to ensure the shelves are straight. Adjust if necessary.
Safety Tips:
- Wear Safety Gear: Use goggles and gloves to protect your eyes and hands.
- Work in a Ventilated Area: Ensure proper ventilation when painting or staining.
- Secure Tools: Keep tools organized to avoid accidents.
Gather Your Materials and Tools
Wood Boards: These form the shelves. Choose sturdy, high-quality wood like pine or oak.
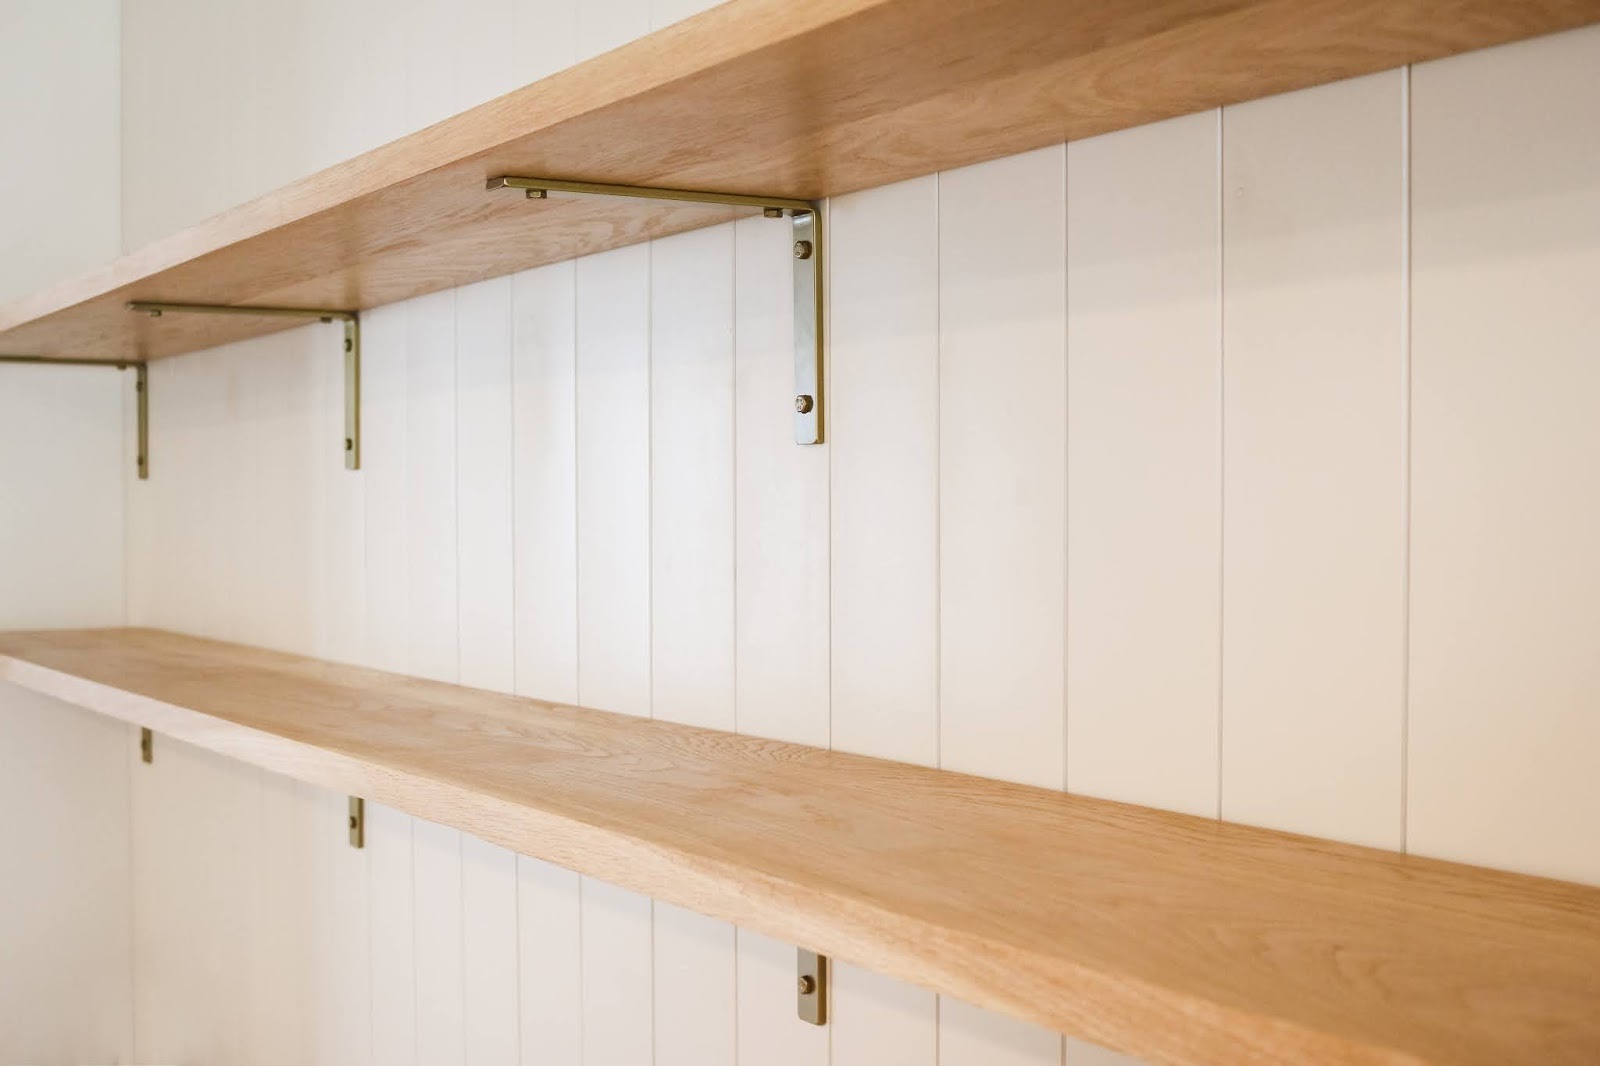
Brackets: Metal brackets provide support. Ensure they are strong enough to hold the weight of items placed on the shelves.
Screws: Use wood screws to attach the brackets to the wall and the shelves to the brackets. Make sure they are the right length for your wood thickness.
Wall Anchors: If attaching shelves to drywall, wall anchors prevent screws from pulling out.
Drill: A power drill makes it easier to create holes for screws. Use a drill bit slightly smaller than the screws.
Level: Ensures shelves are straight. A small bubble level works well.
Measuring Tape: Accurate measurements are crucial for even spacing and alignment.
Pencil: Mark spots for drilling and bracket placement.
Sandpaper: Smooths rough edges on wood. Use medium to fine grit.
Stud Finder: Locates wall studs for secure bracket attachment.
Paint or Stain: Adds color or finish to the wood. Choose based on your room’s decor.
Paintbrush or Roller: Applies paint or stain evenly.
Safety Gear: Protects you while working. Wear safety glasses and gloves.
Skill Level and Time Commitment
Skill Level: Intermediate
Time Required: 3-5 hours
- Gather Materials: 30 minutes
- Measure and Cut Wood: 1 hour
- Assemble Shelves: 1 hour
- Mount Brackets: 30 minutes
- Install Shelves: 1 hour
Detailed Instructions for Building Floating Shelves
Gather Materials and Tools
- Wooden boards
- Wall brackets
- Screws
- Drill
- Level
- Stud finder
- Measuring tape
- Pencil
Measure and Mark
- Use the measuring tape to determine the desired length of the shelves.
- Mark the spots on the wall where the brackets will be installed using a pencil.
Find Studs
- Use the stud finder to locate wall studs.
- Mark the stud locations with a pencil.
Install Brackets
- Hold the brackets against the wall at the marked spots.
- Use the level to ensure they are straight.
- Drill screws into the wall studs through the bracket holes.
Prepare Shelves
- Cut the wooden boards to the desired length if necessary.
- Sand the edges for a smooth finish.
Attach Shelves to Brackets
- Place the wooden boards on top of the installed brackets.
- Secure the boards to the brackets using screws.
Check Stability
- Ensure the shelves are level and securely attached.
- Adjust if necessary.
Decorate
- Place items on your new floating shelves.
Helpful Tips and Tricks
Measure twice, cut once. Always double-check measurements before cutting wood. This saves time and materials.
Use a stud finder. Ensure shelves are securely anchored to wall studs for maximum strength.
Level is key. Use a level to make sure shelves are perfectly horizontal. Crooked shelves look bad and can cause items to slide off.
Pre-drill holes. This prevents wood from splitting and makes screwing easier.
Sand edges. Smooth edges give a professional look and prevent splinters.
Paint or stain before assembly. This avoids messes and ensures even coverage.
Common mistakes to avoid:
- Skipping the stud finder. Anchoring shelves to drywall alone can lead to collapse.
- Ignoring weight limits. Overloading shelves can cause them to break.
- Rushing measurements. Incorrect measurements lead to wasted materials and frustration.
Alternatives:
- Brackets. If floating shelves seem too tricky, use decorative brackets for support.
- Ready-made kits. These come with all necessary parts and instructions, simplifying the process.
- Reclaimed wood. Adds character and can be more affordable than new wood.
Estimating the Cost
Wood: $20-$50 depending on type and size. Pine is cheaper, while oak or walnut costs more.
Brackets: $10-$30 for a set. Hidden brackets are pricier than standard ones.
Screws: $5-$10 for a box. Ensure they are suitable for your wall type.
Wall Anchors: $5-$10 for a pack. Necessary if mounting on drywall.
Sandpaper: $5-$10 for a pack. Smooths out rough edges.
Wood Stain or Paint: $10-$20. Adds color and protection.
Brushes or Rollers: $5-$10. Needed for applying stain or paint.
Level: $10-$20. Ensures shelves are straight.
Drill: $30-$100. Essential for making holes.
Saw: $20-$50. Needed to cut wood to size.
Tape Measure: $5-$15. Measures wood and wall space.
Safety Gear: $10-$20. Includes goggles and gloves.
Total Cost: $135-$345.
Budget-Friendly Alternatives:
- Use reclaimed wood: Often free or very cheap.
- Opt for standard brackets: Less expensive than hidden ones.
- Borrow or rent tools like a drill and saw: Saves money on purchases.
Different Ways to Customize Your Shelves
Materials: Instead of using wood, try metal or glass for a modern look. Reclaimed wood can give a rustic feel.
Colors: Paint shelves in bold colors like navy blue or emerald green for a statement piece. Use stains to highlight the natural wood grain.
Styles: Add brackets underneath for an industrial vibe. Use live-edge wood for a natural, organic look.
Shapes: Create geometric shapes like hexagons or triangles instead of traditional rectangles. Combine different shapes for a unique design.
Finishes: Use a high-gloss finish for a sleek, contemporary style. Opt for a matte finish for a more understated, elegant look.
Lighting: Install LED strip lights underneath for a dramatic effect. Use recessed lighting for a subtle glow.
Decor: Add plants or small sculptures to personalize shelves. Use picture frames or books to create a cozy atmosphere.
Mounting: Use invisible brackets for a true floating effect. Try rope or leather straps for a bohemian touch.
Eco-Friendly Tips for Your Project
Materials:
- Reclaimed Wood: Use old wood from pallets, barns, or furniture. Sand it down for a smooth finish.
- Bamboo: A fast-growing, renewable resource. Strong and durable.
- Recycled Metal Brackets: Find brackets at thrift stores or salvage yards.
- Eco-Friendly Paint: Choose low-VOC or zero-VOC paints to reduce harmful emissions.
Methods:
- Measure and Cut: Measure the space where shelves will go. Cut wood to desired length.
- Sand and Finish: Sand reclaimed wood to remove splinters. Apply eco-friendly paint or stain.
- Install Brackets: Use a level to ensure brackets are straight. Secure them to the wall using recycled metal brackets.
- Mount Shelves: Place wood on brackets. Secure with screws if needed.
Tips:
- Reuse Materials: Look for wood and brackets you already have.
- Shop Secondhand: Visit thrift stores for supplies.
- Plan Efficiently: Measure twice, cut once to avoid waste.
- Use Hand Tools: Reduce energy consumption by using manual tools when possible.
Your Floating Shelves Are Ready!
You've done it! Your floating shelves are now ready to showcase your favorite items. From measuring and cutting to sanding and mounting, each step brought you closer to a stylish, functional addition to your space. Remember, the key to a successful DIY project is patience and precision. If you hit a snag, don't sweat it—every mistake is a learning opportunity. Now, step back and admire your handiwork. These shelves aren't just practical; they're a testament to your creativity and determination. Whether you fill them with books, plants, or knick-knacks, they'll add a personal touch to any room. So, grab a cup of coffee, sit back, and enjoy the fruits of your labor. You've earned it!
What materials do I need to build floating shelves?
You'll need wood boards, brackets, screws, wall anchors, a drill, a level, a measuring tape, and sandpaper.
How do I choose the right wood for my shelves?
Pick sturdy wood like pine, oak, or maple. Ensure it's straight and free of knots for a smooth finish.
How do I find the studs in my wall?
Use a stud finder to locate the studs. Mark them with a pencil so you know where to drill.
How high should I install my floating shelves?
It depends on what you're storing. For books, about 48 inches from the floor works well. For decorative items, you can go higher or lower based on your preference.
How do I make sure the shelves are level?
Use a level while installing the brackets. Adjust as needed before securing them with screws.
Can I paint or stain my shelves?
Absolutely! Sand the wood first, then apply paint or stain. Let it dry completely before installing.
How much weight can floating shelves hold?
It depends on the brackets and anchors you use. Generally, they can hold 20-50 pounds if installed correctly.