
Home>Home & Furniture>Kitchen>DIY Stone Outdoor Kitchen Build
Kitchen
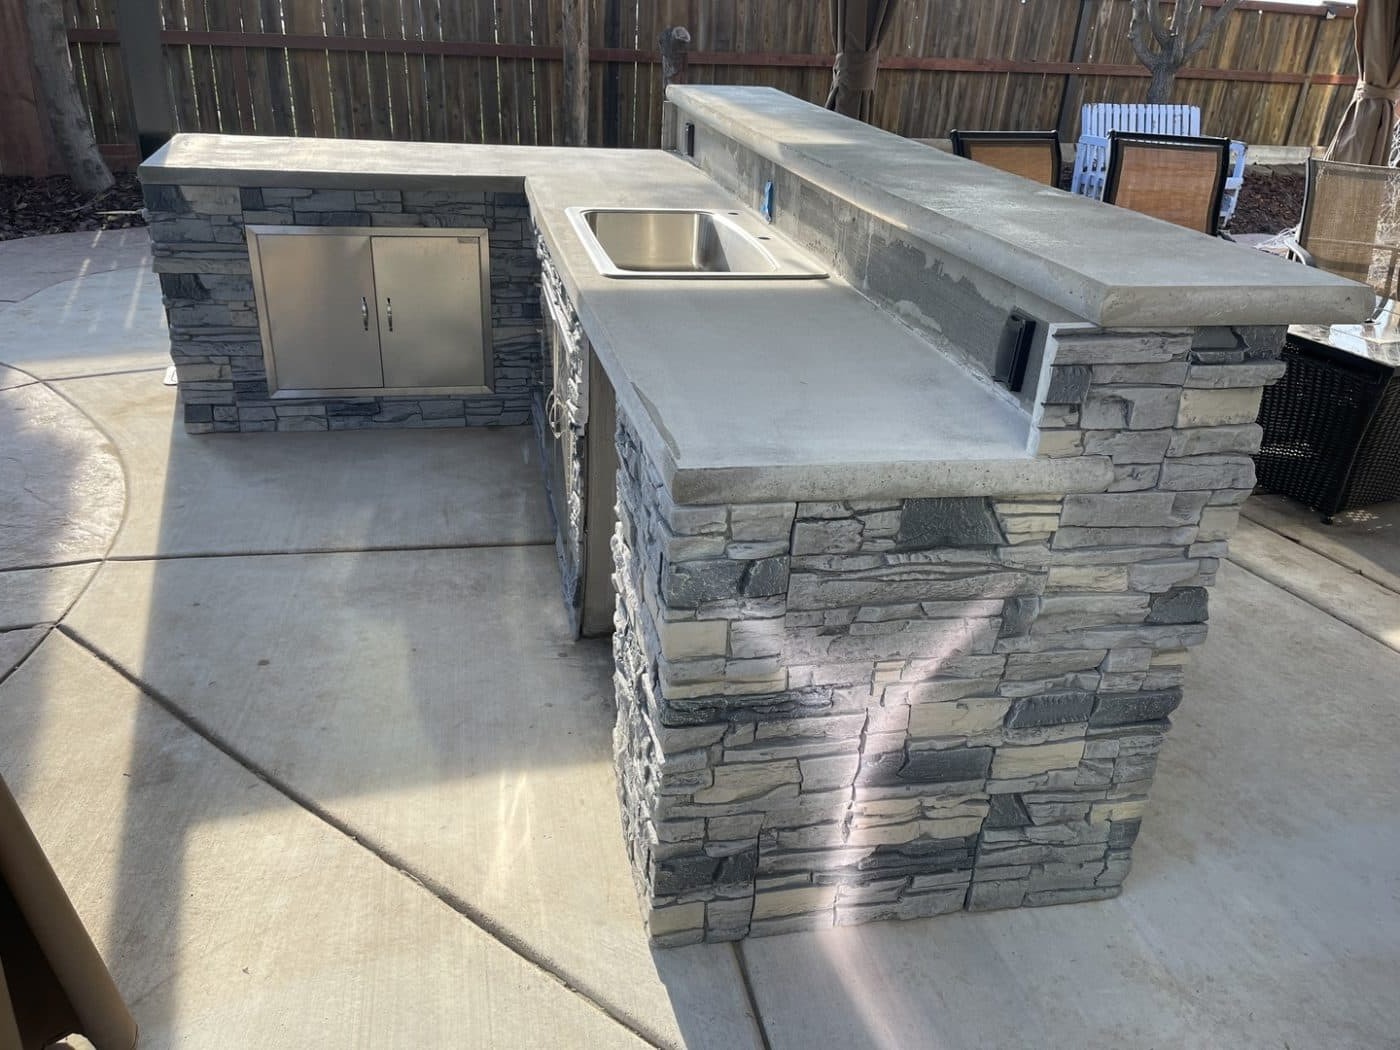
DIY Stone Outdoor Kitchen Build
Published: August 3, 2024
Discover how to build your own stone outdoor kitchen with our step-by-step guide. Enhance your backyard with a stylish, functional space perfect for cooking and entertaining.
(Many of the links in this article redirect to a specific reviewed product. Your purchase of these products through affiliate links helps to generate commission for Twigandthistle.com, at no extra cost. Learn more)
Thinking of upgrading your backyard? Building a stone outdoor kitchen might just be the perfect project. Not only does it add value to your home, but it also creates a fantastic space for family gatherings and barbecues. You might think building one is too complicated, but with the right tools and a bit of time, almost anyone can do it. This guide will walk you through the basics, from gathering materials to laying the final stone. Ready to get started? Roll up those sleeves and let's get building!
Getting Ready for Your Project
Plan Your Design: Sketch out your kitchen layout. Decide where you want the grill, sink, and countertops. Measure the space to ensure everything fits.
Gather Materials: Collect all necessary materials like stones, cement, grill, sink, and tools. Make a checklist to avoid missing anything.
Check Local Codes: Verify local building codes and permits. Some areas require permits for outdoor kitchens.
Prepare the Ground: Clear the area where you’ll build. Remove grass, rocks, and debris. Level the ground to create a stable base.
Safety Gear: Wear gloves, safety glasses, and sturdy shoes. Protect yourself from sharp tools and heavy materials.
Set Up Workspace: Organize your tools and materials nearby. Ensure you have enough space to move around safely.
Utility Lines: Mark any underground utility lines. Call your local utility company to avoid hitting gas, water, or electrical lines.
Foundation: Lay a concrete slab or pavers as the foundation. This provides a stable base for your stone structure.
Dry Fit Stones: Arrange stones without mortar first. This helps you see how they fit together and make adjustments.
Mix Mortar: Follow instructions to mix mortar. Use a wheelbarrow or mixing tub for easier handling.
Lay Stones: Start laying stones from the corners. Apply mortar between stones to hold them in place.
Cure Time: Allow mortar to cure for at least 24 hours. This ensures a strong bond between stones.
Install Appliances: Once the structure is solid, install the grill, sink, and countertops. Follow manufacturer instructions for each appliance.
Final Touches: Add finishing touches like sealing the stone, installing lighting, or adding decorative elements.
Essential Materials and Tools
Materials Needed:
- Stone Veneer: These are the decorative stones that will cover the exterior of the kitchen.
- Cement Board: Provides a sturdy base for the stone veneer.
- Mortar Mix: Used to adhere the stone veneer to the cement board.
- Concrete Blocks: Form the structure of the kitchen.
- Rebar: Reinforces the concrete blocks for added strength.
- Grout: Fills the gaps between the stones.
- Sealer: Protects the stone veneer from weather damage.
- Countertop Material: Options include granite, concrete, or stainless steel.
- Outdoor Appliances: Grill, sink, refrigerator, and any other desired appliances.
- Plywood: Used as a base for the countertop.
Tools Needed:
- Trowel: Spreads mortar mix.
- Level: Ensures surfaces are even.
- Masonry Saw: Cuts stone veneer and concrete blocks.
- Drill: For securing screws and bolts.
- Screwdriver: Tightens screws.
- Hammer: Drives nails and rebar.
- Measuring Tape: Measures dimensions accurately.
- Chalk Line: Marks straight lines.
- Bucket: Mixes mortar.
- Gloves: Protects hands from rough materials.
- Safety Glasses: Shields eyes from debris.
- Wheelbarrow: Transports heavy materials.
Required Skills and Time Commitment
Skill Level: Advanced
Time Required: 40-60 hours
- Planning and Design: 5-10 hours
- Gathering Materials: 3-5 hours
- Foundation Work: 10-15 hours
- Building the Structure: 15-20 hours
- Finishing Touches: 7-10 hours
Detailed Step-by-Step Guide
Plan Your Design
- Sketch the layout.
- Measure the area.
- Decide on features (grill, sink, counter space).
Gather Materials
- Stone or brick.
- Mortar mix.
- Cement board.
- Grill and other appliances.
Prepare the Site
- Clear the area.
- Level the ground.
- Lay a gravel base.
Build the Foundation
- Pour a concrete slab.
- Let it cure for 24-48 hours.
Construct the Frame
- Use cement board for the frame.
- Secure with screws.
Apply Mortar
- Mix mortar according to instructions.
- Spread a layer on the cement board.
Lay the Stone
- Start from the bottom.
- Press stones into the mortar.
- Use a level to ensure even placement.
Install Appliances
- Cut openings in the stone for the grill and sink.
- Secure appliances in place.
Finish Countertops
- Choose a countertop material (granite, tile).
- Install and secure.
Seal the Stone
- Apply a stone sealer.
- Let it dry completely.
Add Final Touches
- Install lighting.
- Add outdoor furniture.
Helpful Tips and Tricks
Plan your layout before starting. Measure twice, cut once. Use graph paper to sketch your design.
Choose durable materials like granite or concrete for countertops. They withstand weather better than wood.
Level the ground properly. Uneven surfaces can cause structural issues. Use a spirit level to ensure accuracy.
Dry-fit stones before using mortar. This helps you see how everything fits together.
Use rebar for added strength in your structure. It prevents shifting over time.
Seal your stone to protect against stains and weather damage. A good sealant extends the life of your kitchen.
Install proper drainage. Water pooling can damage your stone and create a mess.
Common mistakes to avoid: Skipping the planning phase, not leveling the ground, using low-quality materials, and forgetting to seal the stone.
Alternatives: Instead of natural stone, consider stone veneer. It’s lighter and easier to work with. For countertops, stainless steel can be a durable, weather-resistant option.
Estimating the Cost
Stone: $500-$1,000 depending on type and quantity.
Cement: $100 for several bags.
Grill: $300-$1,000 based on size and features.
Countertops: $200-$600 for basic materials like concrete or tile.
Sink: $100-$300 for a basic outdoor sink.
Plumbing supplies: $50-$150 for pipes, fittings, and sealants.
Electrical supplies: $50-$200 for wiring, outlets, and switches.
Framing lumber: $100-$300 for treated wood.
Mortar: $50-$100 for several bags.
Sealant: $30-$50 for waterproofing.
Tools: $100-$300 if you need basics like a trowel, level, and saw.
Budget-friendly alternatives:
- Use reclaimed stone or bricks: $200-$500.
- Opt for a portable grill: $100-$300.
- Choose concrete countertops: $100-$200.
- Install a basic faucet: $50-$100.
- Use PVC pipes for plumbing: $30-$80.
- Skip electrical work if not essential.
Creative Variations and Customizations
Materials: Instead of traditional stone, consider using brick for a classic look or concrete blocks for a modern touch. Reclaimed wood can add a rustic feel, while metal accents provide an industrial vibe.
Colors: Choose neutral tones like beige, gray, or white for a timeless appearance. For a bolder statement, use deep blues, greens, or even black. Stained wood can also introduce warmth and character.
Styles: Opt for a Mediterranean style with terracotta tiles and wrought iron details. A modern design might include sleek lines, stainless steel appliances, and minimalist decor. For a rustic look, incorporate rough-hewn stone, wooden beams, and vintage accessories.
Countertops: Use granite for durability and elegance, concrete for a contemporary feel, or tile for a colorful, customizable surface. Butcher block countertops can add warmth and functionality.
Cabinetry: Install stainless steel cabinets for a sleek, modern kitchen. Wooden cabinets can be stained or painted to match your desired color scheme. Open shelving offers a casual, accessible storage solution.
Appliances: Incorporate a built-in grill for a seamless look. Add a pizza oven for fun, family-friendly cooking. A mini-fridge or wine cooler can keep beverages cold and easily accessible.
Lighting: Use string lights for a cozy, inviting atmosphere. Recessed lighting provides a clean, modern look. Lanterns or sconces can add a touch of elegance and charm.
Seating: Choose bar stools for a casual, social setting. Built-in benches offer a space-saving solution. Outdoor sofas and chairs create a comfortable, lounge-like area.
Flooring: Opt for flagstone for a natural, rugged look. Pavers provide a clean, uniform surface. Decking can add warmth and a cohesive feel to your outdoor space.
Extras: Add a fire pit or outdoor fireplace for warmth and ambiance. Planters with herbs or flowers can bring life and color to your kitchen. Pergolas or shade sails offer protection from the sun and define the space.
Eco-Friendly Building Tips
Use reclaimed stone from old buildings or walls. This reduces waste and gives a rustic look. Recycled concrete can also be a great base material. For countertops, consider recycled glass or paper composite. These materials are durable and eco-friendly.
Salvaged wood can be used for shelves or cabinets. Look for wood from old barns or pallets. Natural stone like granite or slate is long-lasting and requires less maintenance. Choose locally sourced stone to cut down on transportation emissions.
For the grill, opt for a solar-powered or energy-efficient model. Use LED lighting to save energy. Install a rainwater collection system to use for cleaning or gardening.
Use non-toxic sealants and finishes to protect your materials without harming the environment. Plant native plants around your kitchen to create a green space that requires less water and care.
Your Outdoor Kitchen Awaits
Building your own stone outdoor kitchen is totally doable. With some planning, the right tools, and a bit of elbow grease, you'll have a stunning space to cook and entertain. Remember to measure twice, cut once, and always double-check your materials. Don't rush the process; patience will pay off in the end. Enjoy the journey of creating something with your own hands. Once finished, you'll not only have a functional kitchen but also a spot that adds value and charm to your home. So, gather your materials, roll up your sleeves, and get started. Your dream outdoor kitchen is just a few steps away. Happy building!
How much does it cost to build a stone outdoor kitchen?
The cost can vary widely based on materials, size, and features. On average, expect to spend between $5,000 and $15,000. Using high-end materials or adding custom features can push the cost higher.
What materials do I need for a stone outdoor kitchen?
You’ll need stone, cement, gravel, sand, rebar, and mortar. For the kitchen itself, you’ll need a grill, countertops, sink, and possibly a refrigerator. Don’t forget tools like a trowel, level, and wheelbarrow.
How long does it take to build?
Building a stone outdoor kitchen can take anywhere from a few weekends to a couple of months, depending on your experience and the complexity of the design. Plan for some extra time if you’re new to DIY projects.
Do I need any special permits?
You might need a permit, especially if you’re running electrical or plumbing lines. Check with your local building department to see what’s required in your area.
Can I build it myself, or do I need professional help?
You can definitely build it yourself if you’re handy and have some DIY experience. However, for electrical or plumbing work, it’s best to hire a professional to ensure everything’s up to code and safe.
What’s the best type of stone to use?
Granite, limestone, and slate are popular choices because they’re durable and weather-resistant. Choose a stone that matches your home’s style and can withstand the elements in your area.
How do I maintain my stone outdoor kitchen?
Regularly clean the stone surfaces with mild soap and water. Seal the stone annually to protect it from stains and weather damage. Check for any cracks or damage and repair them promptly to keep your kitchen looking great.