
Home>Home & Furniture>Kitchen>DIY Mud Kitchen for Outdoor Play
Kitchen
DIY Mud Kitchen for Outdoor Play
Published: August 1, 2024
Discover how to create a DIY mud kitchen for outdoor play! Engage your kids in imaginative, hands-on fun with our step-by-step guide to building the perfect mud kitchen.
(Many of the links in this article redirect to a specific reviewed product. Your purchase of these products through affiliate links helps to generate commission for Twigandthistle.com, at no extra cost. Learn more)
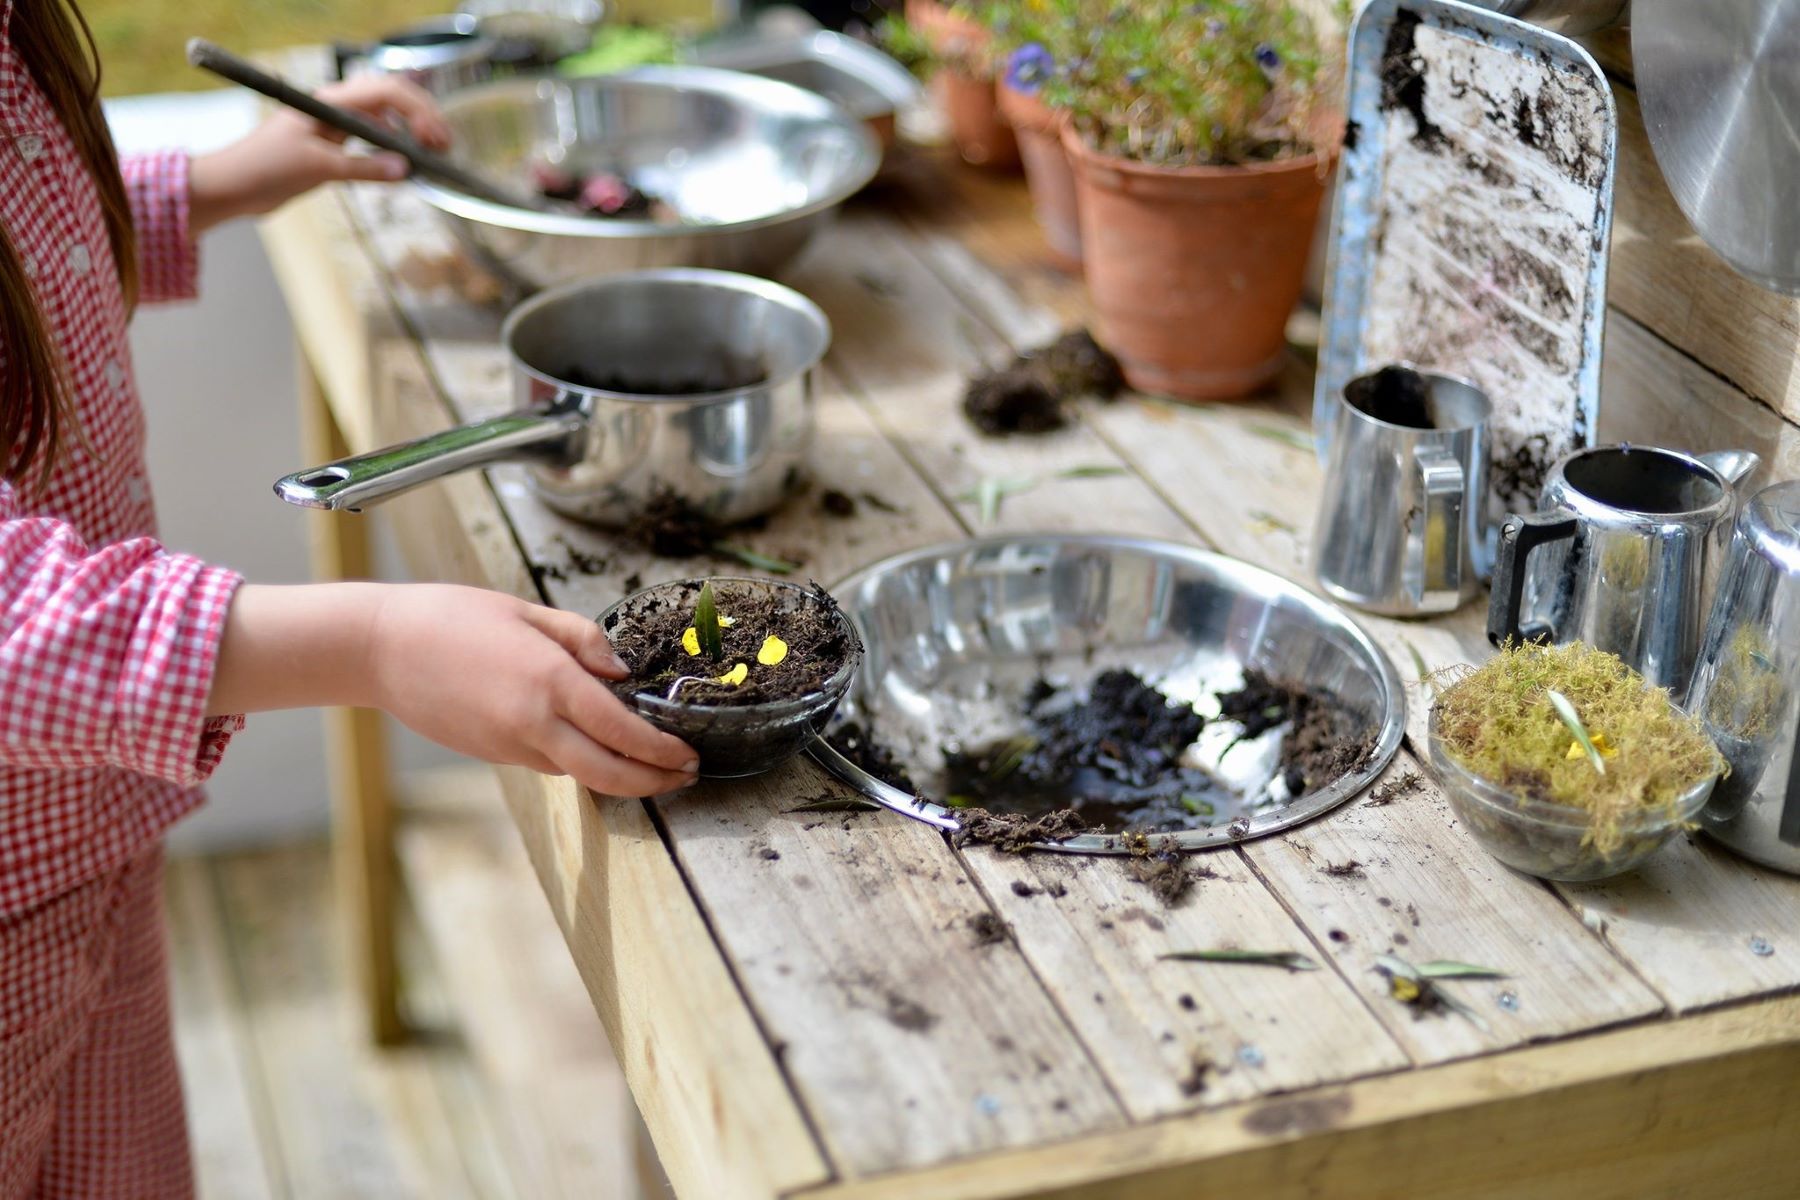
A DIY mud kitchen can transform your backyard into a bustling play area for kids. It's a fantastic way to encourage creativity, exploration, and messy fun. These outdoor kitchens can be simple or elaborate, depending on your resources and time. You can use old furniture, pallets, or even spare parts lying around. Kids love getting their hands dirty, making pretend meals, and enjoying nature. Plus, a mud kitchen provides an excellent opportunity for them to learn about textures, mixing, and basic cooking concepts. Ready to get started? Let’s dive into creating your very own mud kitchen!
Getting Ready for Your Project
Choose a Location: Pick a safe, shady spot in your yard. Avoid areas with lots of foot traffic.
Gather Materials: Collect old pallets, wooden planks, screws, nails, and waterproof paint. Make sure everything is in good condition.
Safety Gear: Wear gloves, safety goggles, and closed-toe shoes. Keep a first aid kit nearby.
Clear the Area: Remove any debris, rocks, or sharp objects from the chosen spot. Make sure the ground is level.
Measure and Cut: Measure the wood pieces according to your design. Use a saw to cut them to size. Double-check measurements to avoid mistakes.
Assemble the Frame: Start by building the base and sides. Use screws and nails to secure the pieces together. Ensure everything is sturdy.
Add Shelves and Countertops: Attach shelves and countertops at a comfortable height for kids. Sand down any rough edges to prevent splinters.
Paint and Seal: Apply waterproof paint to protect the wood from the elements. Let it dry completely before moving on.
Set Up Workspace: Arrange tools and materials within easy reach. Keep a bucket of water and a towel handy for quick clean-ups.
Install Accessories: Add hooks for hanging utensils, a basin for mixing, and storage bins for mud and water. Make sure everything is securely attached.
Test Stability: Give the structure a gentle shake to ensure it’s stable. Reinforce any wobbly parts.
Final Safety Check: Inspect for any protruding nails or sharp edges. Make necessary adjustments to ensure everything is safe for kids.
What You Need to Get Started
Materials:
- Wooden Pallets: Used for the main structure. They provide a sturdy base.
- Plywood Sheets: Create the countertop and shelves. Easy to cut and shape.
- Screws and Nails: Hold everything together. Ensure stability.
- Outdoor Paint: Protects wood from weather. Adds color.
- Plastic Bins: Act as sinks. Easy to clean.
- Hooks: Hang utensils. Keep things organized.
- Old Kitchen Utensils: For play. Pots, pans, spoons, etc.
- Sandpaper: Smooths rough edges. Prevents splinters.
- Waterproof Sealant: Protects wood. Keeps it durable.
Tools:
- Hammer: Drives nails. Essential for assembly.
- Screwdriver: Tightens screws. Ensures a firm hold.
- Saw: Cuts wood to size. Necessary for customization.
- Drill: Makes holes for screws. Speeds up the process.
- Paintbrushes: Apply paint and sealant. Provides a smooth finish.
- Measuring Tape: Ensures accurate cuts. Keeps dimensions correct.
- Level: Ensures surfaces are even. Prevents wobbling.
- Clamps: Hold pieces together while working. Adds stability during assembly.
How Much Time and Skill You Need
Skill Level: Beginner
Time Required: 4-6 hours
- Gather Materials: 30 minutes
- Build Frame: 2 hours
- Attach Countertop: 1 hour
- Add Sink and Accessories: 1 hour
- Paint and Finish: 1-2 hours
Follow These Steps
Gather Materials
- Wooden pallets or planks
- Screws and nails
- Hammer and screwdriver
- Saw
- Sandpaper
- Paint (optional)
- Old sink or large plastic tub
- Hooks for utensils
- Outdoor-safe sealant
Prepare the Wood
- Sand all wooden pieces to remove splinters.
- Cut wood to desired lengths for the frame, shelves, and countertop.
Build the Frame
- Assemble a rectangular frame using the wooden planks.
- Secure corners with screws or nails.
Attach the Countertop
- Place the countertop piece on top of the frame.
- Secure it with screws or nails.
Install the Sink
- Cut a hole in the countertop to fit the sink or tub.
- Place the sink/tub into the hole and secure it.
Add Shelves and Storage
- Attach shelves below the countertop for storage.
- Secure them with screws or nails.
Add Hooks
- Install hooks on the sides or back for hanging utensils.
Paint and Seal
- Paint the mud kitchen if desired.
- Apply outdoor-safe sealant to protect the wood.
Set Up
- Place the mud kitchen in your yard.
- Stock it with old pots, pans, and utensils.
Enjoy
- Let kids play and create with their new mud kitchen!
Helpful Tips and Tricks
Choose durable materials like treated wood or plastic to withstand weather. Repurpose old furniture such as tables or cabinets for the base. Add storage with hooks or shelves for utensils and pots. Use washable paint for easy cleaning. Create a water source with a simple bucket and spout system. Incorporate sensory elements like sand, gravel, and leaves.
Common mistakes to avoid: Using untreated wood that can rot, not securing the structure properly, and forgetting drainage for water play.
Alternatives: Instead of wood, use plastic crates or pallets. For a water source, consider a garden hose attachment instead of a bucket.
How Much Will It Cost?
Lumber: $50-$100 depending on wood type. Plywood for the countertop: $20-$30. Screws and nails: $10. Outdoor paint or sealant: $15-$25. Plastic bins for sinks: $10 each, usually need two, so $20. Hooks for hanging utensils: $5. Old kitchen utensils: $10-$20 if bought second-hand.
Tools: Saw: $20-$50 if you don't have one. Drill: $30-$60. Measuring tape: $5. Paintbrushes: $5.
Budget-friendly alternatives: Use pallet wood instead of buying new lumber, often free from local stores. Old plastic containers can replace purchased bins. Recycled paint from community centers can be cheaper. Borrow tools from friends or family to save costs.
Ways to Customize Your Mud Kitchen
Materials: Instead of using wood, try recycled pallets or plastic crates. These options are durable and often free or cheap. For countertops, consider stainless steel or laminate for easy cleaning.
Colors: Paint the kitchen in bright primary colors like red, blue, and yellow for a playful look. For a more natural feel, use earth tones like green, brown, and beige. Chalkboard paint on one section allows kids to draw or write recipes.
Styles: Add a rustic touch with old-fashioned knobs and handles. For a modern look, use sleek, minimalist designs. Incorporate a farmhouse style by adding a small roof or awning made from corrugated metal or shingles.
Accessories: Install a working water pump or attach a garden hose for real water play. Add hooks for hanging utensils, pots, and pans. Create a herb garden nearby so kids can use fresh herbs in their mud pies.
Storage: Use baskets or bins under the counter for storing mud kitchen tools. Add shelves or cubbies for extra storage. Repurpose old drawers or cabinets for a unique look.
Safety: Ensure all edges are smooth and rounded to prevent injuries. Use non-toxic paint and finishes. Secure the kitchen to the ground to avoid tipping.
Personal Touches: Let kids help with painting or decorating. Add a nameplate with their name or a fun kitchen name. Incorporate personalized signs or labels for different areas of the kitchen.
Eco-Friendly Ideas for Your Project
Reclaimed Wood: Use old pallets, fence panels, or scrap wood. Sand them down to avoid splinters.
Repurposed Sinks: An old kitchen sink or metal basin can serve as the "sink" area. Check thrift stores or garage sales.
Recycled Containers: Use old pots, pans, and plastic containers for mixing and storing mud. Clean them thoroughly before use.
Eco-Friendly Paint: Choose non-toxic, water-based paints to decorate the kitchen. These are safer for kids and the environment.
Natural Elements: Incorporate stones, sticks, and leaves as play items. These can be collected from your yard or local park.
Compostable Materials: Use biodegradable items like cardboard or paper for temporary play tools. These can be composted after use.
Rainwater Collection: Set up a small rainwater barrel to provide water for the mud kitchen. This teaches kids about water conservation.
Solar Lighting: If you want to add lighting, opt for solar-powered lights. These are energy-efficient and easy to install.
Recycled Fabric: Old curtains or tablecloths can be repurposed as awnings or covers. They provide shade and add a cozy touch.
Natural Cleaning Supplies: Use vinegar and baking soda for cleaning the kitchen. These are effective and eco-friendly.
Ready, Set, Play!
Building a DIY mud kitchen offers kids a fantastic way to engage in outdoor play. It’s simple, cost-effective, and can be customized to fit any backyard. Using recycled materials not only saves money but also teaches children about sustainability. The process of creating the kitchen can be a fun family project, fostering creativity and teamwork. Once built, the mud kitchen becomes a hub for imaginative play, helping kids develop motor skills and social interactions. So grab those old pallets, some pots and pans, and let your kids' imagination run wild. This project proves that with a bit of effort and creativity, you can create a play space that’s both educational and entertaining. Get started today and watch your backyard transform into a playground of endless possibilities.
What materials do I need to build a mud kitchen?
You’ll need wooden pallets, screws, a drill, sandpaper, paint (optional), and some old kitchen utensils like pots, pans, and spoons. You can also add a sink or plastic tub for extra fun.
How much time will it take to build?
Building a mud kitchen can take anywhere from a few hours to a weekend, depending on how detailed you want it to be. If you keep it simple, you might finish in an afternoon.
Do I need any special tools?
Basic tools like a saw, drill, screwdriver, and measuring tape should do the trick. If you have a sander, it’ll make smoothing the wood easier, but sandpaper works too.
Is it safe for kids?
Absolutely, as long as you sand down any rough edges and make sure everything is securely attached. Using non-toxic paint is also a good idea if you decide to paint it.
Can I use recycled materials?
Yes, using recycled wood and old kitchen items is a great way to save money and be eco-friendly. Just make sure the materials are clean and safe for kids to use.
How do I maintain the mud kitchen?
Regularly check for loose screws or splinters. If you painted it, you might need to touch up the paint occasionally. Cleaning it with water and a mild soap will keep it looking nice.
What age group is it suitable for?
Mud kitchens are great for kids aged 2 and up. Younger kids will enjoy the sensory play, while older kids can get creative with their “cooking.”