
Home>Home & Furniture>Kitchen>DIY Light Fixtures: How to Create Your Own Lighting
Kitchen
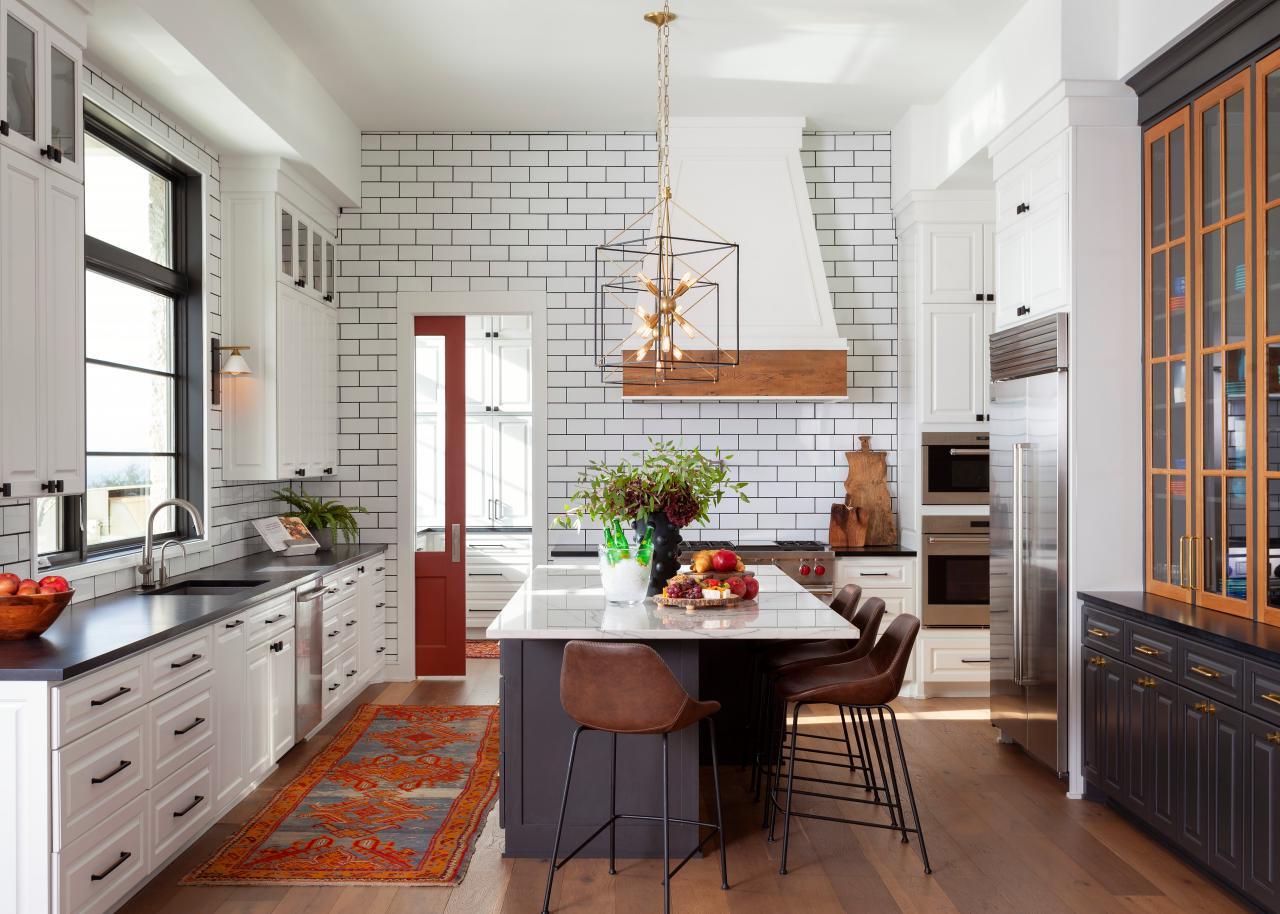
DIY Light Fixtures: How to Create Your Own Lighting
Published: July 30, 2024
Discover how to create your own DIY light fixtures with our step-by-step guide. Transform your space with unique, personalized lighting solutions that reflect your style.
(Many of the links in this article redirect to a specific reviewed product. Your purchase of these products through affiliate links helps to generate commission for Twigandthistle.com, at no extra cost. Learn more)
Creating your own light fixtures can be a fun and rewarding project. Whether you're looking to save money, personalize your space, or just love hands-on projects, DIY lighting lets you add a unique touch to your home. With basic tools, a few materials, and some creativity, you can craft beautiful and functional light fixtures. This guide will walk you through the process, offering tips, tricks, and ideas to help spark your imagination. Ready to brighten up your home with a personal touch? Let's get started on making your own DIY light fixtures.
Getting Ready for Your DIY Light Fixture Project
Gather Materials: Collect all necessary tools and materials like light bulbs, wires, sockets, and a lampshade. Make sure everything is within reach.
Read Instructions: Go through the instructions for each component. This helps avoid mistakes later.
Safety Gear: Wear gloves and safety goggles to protect your hands and eyes.
Turn Off Power: Switch off the power supply at the circuit breaker to prevent electric shocks.
Clear Workspace: Ensure your workspace is clean and well-lit. Remove any clutter to avoid accidents.
Measure and Mark: Measure the area where the fixture will be installed. Mark the spots for drilling or attaching components.
Test Components: Check that all electrical components work before assembly. This saves time and effort.
Organize Tools: Arrange tools like screwdrivers, pliers, and wire cutters in an orderly manner. This makes the process smoother.
Ventilation: Make sure the area is well-ventilated, especially if using adhesives or paints.
Check Regulations: Verify local electrical codes and regulations. This ensures your project is up to standard.
Materials and Tools Checklist
Materials Needed:
- Light Bulbs: Choose LED or incandescent bulbs based on preference.
- Lamp Sockets: Hold the light bulbs in place.
- Electrical Wire: Connects the bulb to the power source.
- Wire Nuts: Securely join electrical wires.
- Plug: Connects the fixture to an outlet.
- Switch: Allows you to turn the light on and off.
- Mounting Hardware: Screws, brackets, or hooks to attach the fixture to the wall or ceiling.
- Decorative Elements: Shades, covers, or other materials to customize the look.
Tools Needed:
- Wire Strippers: Remove insulation from electrical wires.
- Screwdriver: Tighten screws and secure components.
- Pliers: Grip and twist wires.
- Drill: Create holes for mounting hardware.
- Measuring Tape: Ensure accurate placement and measurements.
- Voltage Tester: Check if wires are live before working on them.
- Utility Knife: Cut wires and other materials.
- Safety Glasses: Protect eyes from debris and sparks.
Light bulbs provide illumination. Lamp sockets hold bulbs in place. Electrical wire connects the bulb to power. Wire nuts secure wire connections. Plugs connect fixtures to outlets. Switches control power flow. Mounting hardware attaches fixtures to surfaces. Decorative elements customize appearance.
Wire strippers remove insulation. Screwdrivers tighten screws. Pliers grip and twist. Drills create mounting holes. Measuring tapes ensure accuracy. Voltage testers check for live wires. Utility knives cut materials. Safety glasses protect eyes.
Required Skills and Time Commitment
Skill Level: Intermediate
Time Required: 4-6 hours
- Gather Materials: 30 minutes
- Disassemble Old Fixture: 20 minutes
- Prepare New Fixture: 1 hour
- Wiring: 1-2 hours
- Mounting: 1 hour
- Testing and Adjustments: 30 minutes
Detailed Steps to Create Your Light Fixture
Gather Materials:
- Light fixture kit
- Light bulb
- Wire cutters
- Screwdriver
- Electrical tape
- Ceiling hook or bracket
- Lampshade (optional)
Turn Off Power:
- Switch off the power at the circuit breaker to avoid any electrical hazards.
Prepare Wires:
- Use wire cutters to strip about 1/2 inch of insulation from the ends of the wires in the light fixture kit.
Mount the Bracket:
- Attach the ceiling hook or bracket where you want to hang the light fixture. Use a screwdriver to secure it firmly.
Connect Wires:
- Match the wires from the light fixture to the wires in the ceiling. Typically, black to black (hot), white to white (neutral), and green or copper to the ground wire.
- Twist the ends together and secure with wire nuts.
- Wrap electrical tape around the wire nuts for extra safety.
Attach Fixture:
- Secure the light fixture to the ceiling hook or bracket. Ensure it is stable and not wobbling.
Install Bulb:
- Screw the light bulb into the socket of the fixture.
Add Lampshade (Optional):
- If using a lampshade, attach it according to the manufacturer's instructions.
Turn On Power:
- Switch the power back on at the circuit breaker.
Test Light:
- Flip the light switch to ensure the fixture is working properly.
Helpful Tips and Tricks
Plan your design before starting. Sketch out what you want your light fixture to look like. This helps avoid mistakes and ensures you have all needed materials.
Use LED bulbs. They last longer and use less energy. Plus, they stay cool, reducing fire risk.
Repurpose old items. Turn mason jars, wine bottles, or even old colanders into unique light fixtures. This saves money and adds character.
Safety first. Always turn off the power at the breaker box before working with electrical wiring. Use a voltage tester to double-check.
Measure twice, cut once. Make sure all your cuts and measurements are accurate to avoid wasting materials.
Common mistakes to avoid:
- Overloading circuits. Check the wattage limits of your electrical system.
- Using the wrong type of bulb. Ensure the bulb fits the fixture and meets safety standards.
- Ignoring weight limits. Make sure your ceiling or wall can support the weight of the fixture.
Alternatives for materials or methods:
- Instead of buying new fixtures, thrift stores often have unique items you can repurpose.
- Battery-operated lights can be a good option if you don't want to deal with wiring.
- Solar-powered lights work well for outdoor fixtures and save on electricity.
Bold the important keywords to make your notes easier to follow.
Estimating the Cost of Your Project
Materials:
- Light Bulbs: $10-$20 for a pack of 4
- Lamp Sockets: $5-$10 each
- Electrical Wire: $10-$15 for 25 feet
- Wire Nuts: $2-$5 for a pack of 10
- Switches: $3-$7 each
- Plug: $2-$5 each
- Mounting Hardware: $5-$10
- Decorative Elements: $10-$30 (depends on style)
Tools:
- Wire Strippers: $10-$20
- Screwdrivers: $5-$15
- Pliers: $5-$15
- Drill: $30-$50 (if you don't already have one)
- Measuring Tape: $5-$10
Total Cost: $102-$212
Budget-Friendly Alternatives:
- Repurpose Old Fixtures: Use parts from old lamps or fixtures to save money.
- Thrift Stores: Find cheap decorative elements and hardware.
- Basic Tools: Borrow tools from friends or family instead of buying new ones.
Creative Variations and Customizations
Materials: Use mason jars for a rustic look, or metal pipes for an industrial vibe. Wooden planks can add a farmhouse feel, while bamboo offers a tropical touch. Recycled bottles or cans can create eco-friendly fixtures.
Colors: Paint fixtures in bold colors like red or blue for a pop of color. Metallic finishes like gold or silver add a touch of elegance. Pastel shades can make the room feel soft and cozy. Black and white combinations give a modern, sleek look.
Styles: For a vintage style, use Edison bulbs with exposed filaments. Minimalist designs can be achieved with simple shapes and neutral colors. Bohemian styles might include beaded or woven elements. Geometric shapes can create a contemporary feel.
Bulbs: Choose LED bulbs for energy efficiency. Smart bulbs can change colors and be controlled via smartphone. Dimmable bulbs allow for adjustable lighting. Colored bulbs can set different moods.
Mounting Options: Hang fixtures from the ceiling with chains or ropes for a unique look. Wall-mounted options can save space. Tabletop fixtures can be moved around easily. Floor lamps can add height and drama to a room.
Shades: Use fabric shades for a soft, diffused light. Glass shades can be clear or frosted for different effects. Metal shades direct light downward, perfect for task lighting. Paper shades offer a lightweight, easy-to-customize option.
Patterns: Stencil or paint patterns on shades or bases. Decoupage with decorative paper or fabric. Engrave or etch designs into metal or glass. Wrap fixtures with twine or ribbon for added texture.
Switches: Install touch-sensitive switches for modern convenience. Pull chains can add a vintage touch. Remote controls offer easy operation from a distance. Dimmer switches provide adjustable brightness.
Themes: Match fixtures to a nautical theme with ropes and anchors. Nature-inspired designs can include leaves, flowers, or branches. Steampunk styles might use gears and cogs. Art Deco fixtures can feature bold lines and geometric shapes.
Placement: Cluster multiple fixtures together for a dramatic effect. Place fixtures at different heights for visual interest. Use fixtures to highlight artwork or architectural features. Position fixtures to create zones within a room.
Eco-Friendly Lighting Ideas
Reclaimed Wood: Use old wooden pallets or barn wood to create rustic light fixtures. Sand them down and treat them with eco-friendly finishes.
Mason Jars: Repurpose mason jars as pendant lights or lanterns. Drill a hole in the lid for the light socket and use LED bulbs for energy efficiency.
Wine Bottles: Cut the bottoms off wine bottles to make stylish hanging lights. Use a glass cutter and sand the edges smooth. Insert a bulb and hang with recycled cord.
Bamboo: Bamboo grows quickly and is a sustainable material. Create lamp bases or shades by cutting and shaping bamboo stalks.
Fabric Scraps: Use leftover fabric to make lampshades. Stretch the fabric over a wire frame and secure it with eco-friendly glue.
Driftwood: Collect driftwood from beaches to create natural, unique light fixtures. Combine pieces to form a base or frame for your light.
Metal Cans: Clean and paint old metal cans to use as light covers. Punch holes in patterns to create interesting light effects.
Paper Mache: Use recycled paper to create paper mache lamp shades. Shape the paper around a balloon, let it dry, and then pop the balloon.
Bike Parts: Old bike gears and chains can be repurposed into industrial-style light fixtures. Clean and assemble them into a unique design.
Ceramic Pots: Small ceramic pots can be turned into pendant lights. Drill a hole in the bottom for the light socket and hang them upside down.
Natural Dyes: If you need to color any materials, use natural dyes made from plants, vegetables, or spices. This avoids harmful chemicals.
Solar Lights: Incorporate solar panels into your designs for outdoor lighting. Solar lights charge during the day and illuminate at night without using electricity.
LED Bulbs: Always use LED bulbs in your DIY fixtures. They use less energy and last longer than traditional bulbs, reducing waste.
Brighten Your Space with DIY Light Fixtures
Creating your own light fixtures can be a fun, rewarding project. You get to customize your space, save money, and learn new skills. From simple pendant lights to more complex chandeliers, the possibilities are endless. Just remember to prioritize safety when working with electricity. Always turn off the power before starting, use the right tools, and if you're unsure about something, consult a professional.
By using recycled materials or items you already have, you can make unique, eco-friendly fixtures. Plus, the satisfaction of seeing your own creation light up a room is unbeatable. So grab some tools, get creative, and start your next DIY lighting project. Your home will shine brighter, and you'll have a great story to tell about how you made it all happen.
How do I choose the right materials for my DIY light fixture?
Start by considering the style and function of your light fixture. For a rustic look, use wood or metal. For something modern, try glass or acrylic. Make sure the materials are heat-resistant and safe for electrical use.
What tools will I need to create a DIY light fixture?
You'll need a drill, screwdriver, wire cutters, pliers, and a measuring tape. Depending on your design, you might also need a saw, glue gun, or soldering iron.
How do I safely wire a DIY light fixture?
First, turn off the power at the breaker box. Follow a wiring diagram to connect the wires correctly. Use wire nuts to secure connections and electrical tape for extra safety. If unsure, consult an electrician.
Can I use LED bulbs in my DIY light fixture?
Absolutely! LED bulbs are energy-efficient and come in various shapes and sizes. Just ensure your fixture is compatible with LEDs and can handle the wattage.
How do I mount my DIY light fixture?
Use anchors and screws to secure the fixture to the wall or ceiling. Make sure it’s level and stable. If it’s heavy, consider using a stud finder to mount it on a stud for extra support.
What are some easy DIY light fixture ideas for beginners?
Try making a mason jar pendant light, a driftwood chandelier, or a copper pipe lamp. These projects are simple, require minimal tools, and offer a great way to start.
How can I customize my DIY light fixture?
Paint the fixture in your favorite color, add decorative elements like beads or crystals, or use unique bulbs. Personal touches make your fixture one-of-a-kind.