
Home>Home & Furniture>Kitchen>DIY Kitchen Organization Ideas
Kitchen
DIY Kitchen Organization Ideas
Published: July 31, 2024
Discover creative and practical DIY kitchen organization ideas to declutter your space, maximize storage, and enhance functionality. Transform your kitchen today!
(Many of the links in this article redirect to a specific reviewed product. Your purchase of these products through affiliate links helps to generate commission for Twigandthistle.com, at no extra cost. Learn more)
Organizing your kitchen can feel like a huge task, but DIY solutions make it fun and manageable. No matter your kitchen size or layout, simple and creative ideas can make a big difference. Tired of cluttered countertops or messy drawers? With a few basic materials, you can transform your space into a neat, efficient area. Imagine finding everything right when needed without digging through piles. Ready to take control? Let's explore easy, cost-effective ways to make your kitchen more functional and enjoyable. Get ready to love your kitchen again, one project at a time.
Preparation Steps
Clear the Space: Empty all cabinets, drawers, and shelves. This helps you see everything you have and decide what to keep or toss.
Clean Thoroughly: Wipe down all surfaces with a mild cleaner. Clean areas make it easier to organize and spot any issues like leaks or pests.
Sort Items: Group similar items together. For example, put all baking supplies in one pile, cooking utensils in another. This helps you see how much space each category needs.
Measure Your Space: Use a tape measure to get the dimensions of your cabinets, drawers, and shelves. Knowing the exact size helps when buying organizers or containers.
Plan Your Layout: Think about how you use your kitchen. Place frequently used items in easy-to-reach spots. Less-used items can go in higher or lower cabinets.
Gather Supplies: Get bins, baskets, drawer dividers, and shelf risers. These tools help maximize space and keep everything tidy.
Label Everything: Use labels to mark where items belong. This makes it easier to find things and keep the kitchen organized.
Set Up a Workspace: Clear a table or counter to lay out all your items. This gives you a dedicated area to work on your organization project.
Safety Tips: Wear gloves when handling cleaning products. Use a step stool for high shelves to avoid accidents. Keep sharp objects like knives safely stored away during the process.
Dispose of Unwanted Items: Throw away expired food, donate duplicate utensils, and recycle old containers. This reduces clutter and makes organizing easier.
Materials and Tools Needed for Kitchen Organization
- Storage Bins: Plastic or fabric containers to group similar items together.
- Drawer Dividers: Adjustable inserts to keep utensils and tools separated.
- Shelf Risers: Small platforms to create extra space in cabinets.
- Label Maker: Device to print labels for easy identification of items.
- Hooks: Metal or adhesive hooks to hang mugs, utensils, or towels.
- Lazy Susans: Rotating trays to make items in deep cabinets more accessible.
- Over-the-Door Organizers: Hanging racks for pantry doors to store spices or cleaning supplies.
- Command Strips: Adhesive strips for mounting lightweight items without damaging walls.
- Baskets: Woven or wire baskets for storing fruits, vegetables, or snacks.
- Pegboard: Board with holes to hang pots, pans, and other kitchen tools.
- Measuring Tape: Tool to measure spaces accurately for fitting organizers.
- Screwdriver: Essential for assembling or installing various organizers.
- Drill: Power tool for making holes to mount shelves or hooks.
- Level: Tool to ensure shelves and organizers are installed straight.
- Scissors: Cutting tool for trimming liners or opening packages.
- Shelf Liners: Protective layers for shelves to keep them clean and prevent slipping.
- Zip Ties: Plastic ties to bundle cords or secure items together.
- Plastic Wrap: Clear wrap to protect items or group them temporarily.
These materials and tools will help transform your kitchen into a more organized and efficient space.
Skill Level and Time Required
Skill Level: Beginner
Estimated Time Required:
- Declutter and Sort: 1-2 hours
- Install Shelf Dividers: 1 hour
- Label Containers: 30 minutes
- Organize Drawers: 1 hour
- Set Up a Spice Rack: 45 minutes
- Arrange Pantry: 2-3 hours
Total Time: Approximately 6-8 hours
Step-by-Step Instructions for Organizing Your Kitchen
Declutter:
- Empty all cabinets, drawers, and pantry.
- Sort items into categories: keep, donate, or trash.
- Clean all surfaces before putting anything back.
Categorize:
- Group similar items together (e.g., baking supplies, snacks, canned goods).
- Use clear bins or baskets to keep categories separate.
Maximize Cabinet Space:
- Install shelf risers to create more levels.
- Use hooks or racks on the inside of cabinet doors for extra storage.
- Place lazy Susans in corner cabinets for easy access.
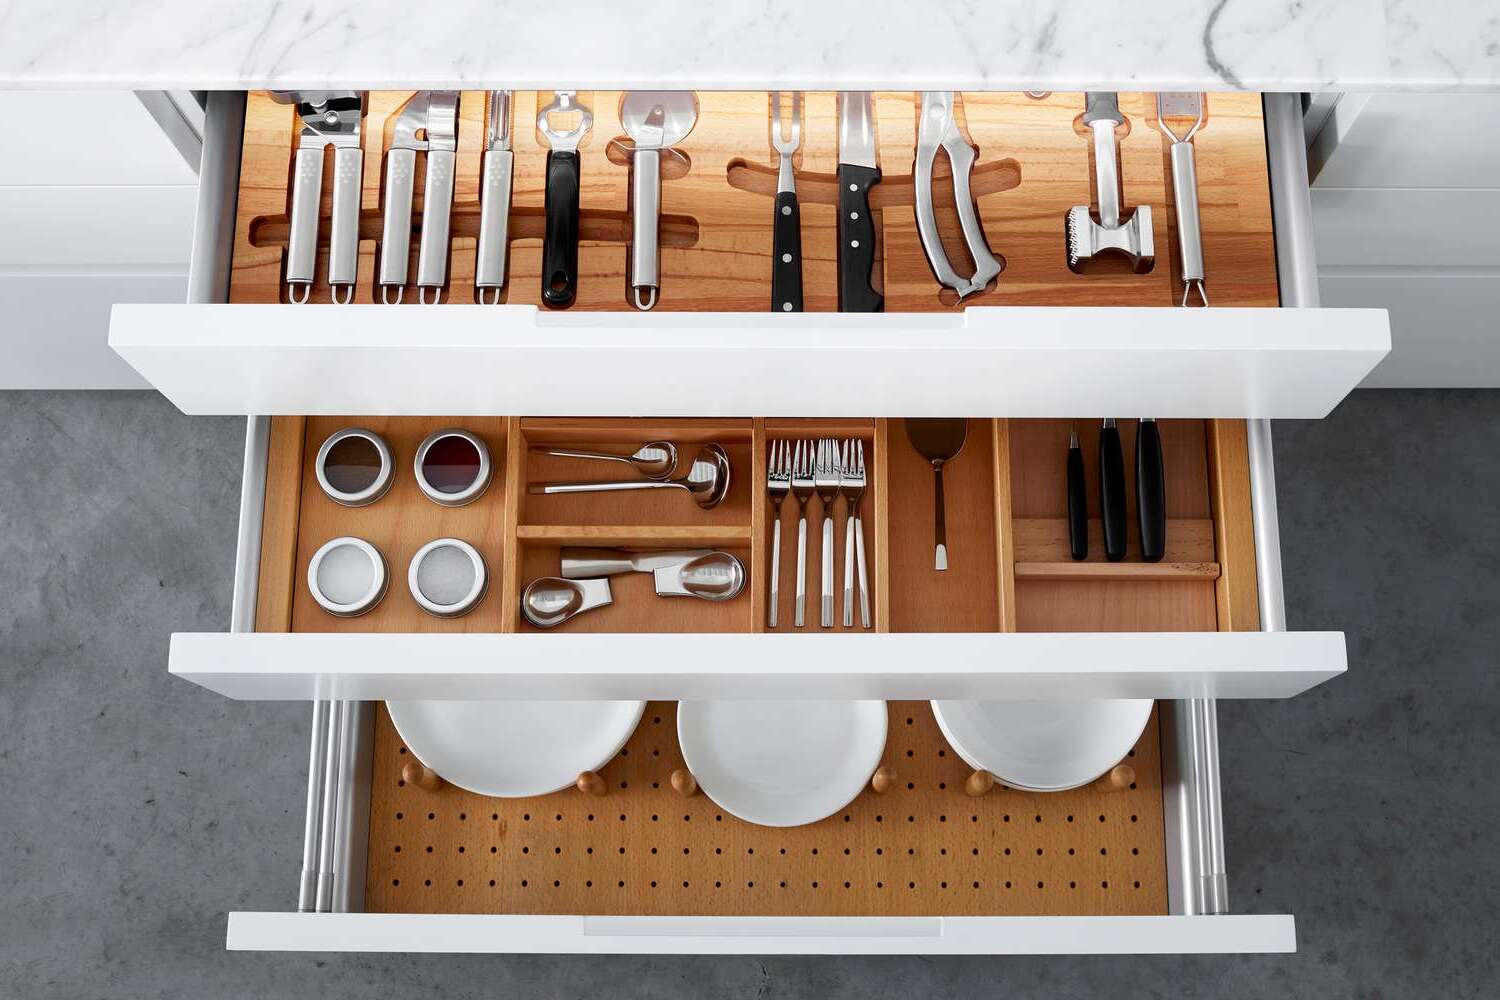
Drawer Organization:
- Use drawer dividers for utensils, cutlery, and small gadgets.
- Store items by frequency of use; everyday items should be easily accessible.
Pantry Solutions:
- Use clear, airtight containers for dry goods.
- Label containers for easy identification.
- Arrange items by type and frequency of use.
Countertop Management:
- Keep only essential items on the countertop.
- Use a tray or basket to corral frequently used items like oils and spices.
- Store appliances you rarely use in cabinets.
Vertical Space:
- Install wall-mounted racks or pegboards for pots, pans, and utensils.
- Use magnetic strips for knives and metal tools.
- Hang shelves for additional storage.
Refrigerator Organization:
- Use clear bins to group similar items.
- Label shelves and bins for easy access.
- Store leftovers in clear containers to see contents easily.
Under-Sink Storage:
- Use stackable bins or drawers for cleaning supplies.
- Install a tension rod to hang spray bottles.
- Keep a small caddy for everyday cleaning items.
Maintenance:
- Regularly check and declutter to maintain organization.
- Adjust storage solutions as needed based on usage patterns.
Tips and Tricks for DIY Kitchen Organization
Use clear containers for pantry items. This helps you see what you have and reduces clutter. Label everything to make finding items easier. Install hooks under cabinets for mugs or utensils. This saves counter space.
Common mistakes include overloading shelves, which can cause them to sag or break. Avoid using too many different types of containers; stick to a few styles for a cohesive look. Don't forget to measure your spaces before buying organizers.
Alternatives for materials include using baskets instead of plastic bins. They add a rustic touch and are eco-friendly. For drawer dividers, try cardboard from old boxes instead of buying new ones. Instead of expensive spice racks, use magnetic strips on the wall to hold metal spice containers.
Cost Estimation for Your Project
Shelving Units: Basic wall-mounted shelves cost around $20-$50 each. For a set of three, expect to spend $60-$150.
Storage Bins: Plastic bins for pantry organization range from $5-$15 each. A set of six might cost $30-$90.
Drawer Dividers: Adjustable dividers cost about $10-$20 per pack. For three packs, budget $30-$60.
Spice Racks: Wall-mounted or cabinet spice racks cost between $15-$30.
Hooks and Racks: Simple hooks for hanging utensils or mugs cost around $5-$10 per pack. Magnetic knife racks cost $15-$25.
Labels and Markers: Label packs cost $5-$10. Permanent markers for labeling cost about $2-$5.
Tools: Basic tools like a drill, screwdriver, and level might cost around $50-$100 if not already owned.
Total Cost: Expect to spend between $207-$430.
Budget-Friendly Alternatives:
- Use recycled jars for storage instead of buying new bins.
- Create DIY shelves using reclaimed wood and brackets.
- Use cardboard boxes as temporary drawer dividers.
- Make homemade labels using paper and tape.
Variations and Customizations
Alternative Materials: Instead of traditional wood, try bamboo for a more eco-friendly option. Use metal baskets instead of plastic for a sturdier feel. Glass jars can replace plastic containers for a cleaner look.
Colors: Paint shelves and cabinets in bright colors like yellow or turquoise to add a pop of color. Use chalkboard paint on pantry doors for a fun, writable surface. Neutral tones like white or gray can create a sleek, modern look.
Styles: For a rustic vibe, use reclaimed wood and mason jars. A modern style can be achieved with stainless steel and minimalist designs. Vintage styles can incorporate retro tins and patterned shelf liners.
Storage Solutions: Install pull-out drawers for easy access to pots and pans. Use magnetic strips to hold knives and metal utensils. Hanging racks can save counter space by storing mugs and pots overhead.
Labels and Tags: Use color-coded labels for different food groups. Chalkboard labels can be easily updated. Engraved wooden tags add a touch of elegance.
Custom Shelving: Create adjustable shelves to accommodate items of various heights. Add corner shelves to utilize every inch of space. Floating shelves can provide extra storage without taking up floor space.
Drawer Dividers: Use bamboo dividers for a natural look. Acrylic dividers can make it easier to see everything at a glance. Fabric-lined dividers can protect delicate items.
Spice Racks: Build a pull-out spice rack inside a cabinet. Use magnetic spice jars on the fridge. Create a tiered spice shelf to keep everything visible.
Pantry Organization: Install sliding baskets for easy access to snacks. Use clear containers to quickly see contents. Add lazy Susans to reach items in the back.
Under-Sink Storage: Use tension rods to hang cleaning supplies. Install pull-out bins for trash and recycling. Add stackable shelves to maximize vertical space.
Sustainability Tips for Kitchen Projects
Glass jars make excellent storage containers. Reuse old pasta sauce jars or pickle jars to store dry goods like rice, beans, or pasta. They are durable, easy to clean, and you can see what's inside without labels.
Wooden crates or boxes can be repurposed into shelves or storage bins. Sand them down, paint them if desired, and mount them on walls or place them on countertops for a rustic look.
Mason jars are versatile for organizing utensils, spices, or even small snacks. Attach them to a wooden board and hang it on the wall for a space-saving solution.
Old magazines or cereal boxes can be cut and decorated to create drawer dividers. This keeps utensils, cutlery, and other small items neatly separated.
Fabric scraps can be sewn into reusable produce bags. These are great for storing fruits and vegetables, reducing the need for plastic bags.
Wine corks can be glued together to create a trivet or hot pad. This not only organizes your kitchen but also provides a practical use for something that would otherwise be thrown away.
Tin cans can be cleaned, painted, and used as utensil holders. Group several together in a wooden crate for a charming, organized look.
Old pallets can be transformed into a spice rack or a pot rack. Sand them down, paint or stain them, and mount them on the wall for a functional and stylish storage solution.
Clothespins can be glued to a piece of wood to create a handy note or recipe holder. Attach it to the fridge or a cabinet door to keep important papers in sight.
Egg cartons can be used to store small items like rubber bands, twist ties, or even small packets of seasoning. Cut them to fit inside drawers for easy access.
Your Kitchen, Your Rules
Organizing your kitchen doesn't have to be a chore. With a bit of creativity and some elbow grease, you can transform your space into a functional, stylish haven. Use drawer dividers to keep utensils in check, shelf risers to maximize cabinet space, and magnetic strips for knives and metal tools. Don't forget about labeling jars and containers for easy access. Repurpose items like mason jars for storage or pegboards for hanging pots and pans. Remember, the goal is to make your kitchen work for you. Experiment with different setups until you find what fits your cooking style. Happy organizing!
How can I maximize cabinet space in my kitchen?
Use shelf risers to create extra layers, and add pull-out drawers for easy access. Install hooks on the inside of cabinet doors for hanging utensils or small pots.
What's a good way to organize pantry items?
Group similar items together, like snacks, canned goods, and baking supplies. Use clear containers to store dry goods so you can see what's inside. Label everything to keep it neat.
How do I keep my spices organized?
Use a spice rack or magnetic strips on the wall. Arrange spices alphabetically or by frequency of use. Small lazy Susans in cabinets can also help.
Any tips for organizing under the sink?
Place a tension rod to hang spray bottles. Use stackable bins for cleaning supplies and a caddy for items you use often. Keep trash bags on a roll for easy access.
How can I keep my countertops clutter-free?
Store appliances you don't use daily in cabinets. Use trays or baskets to corral items like mail or keys. Install a wall-mounted rack for utensils and spices.
What's the best way to organize pots and pans?
Use pot racks or pegboards to hang them. If you prefer cabinets, install pull-out shelves or dividers to keep them stacked neatly. Store lids in a separate rack.
How do I organize my refrigerator?
Use clear bins to group similar items. Store leftovers in stackable containers. Keep frequently used items at eye level and label shelves for easy identification.
Any advice for organizing drawers?
Use drawer dividers to separate utensils, gadgets, and tools. Store items by category and frequency of use. Keep a junk drawer for miscellaneous items but clean it out regularly.