
Home>Home & Furniture>Kitchen>DIY: How to Paint Kitchen Cabinets
Kitchen
DIY: How to Paint Kitchen Cabinets
Published: July 31, 2024
Transform your kitchen with our step-by-step guide on how to paint kitchen cabinets. Learn tips, tools, and techniques for a stunning, professional-looking finish.
(Many of the links in this article redirect to a specific reviewed product. Your purchase of these products through affiliate links helps to generate commission for Twigandthistle.com, at no extra cost. Learn more)
Painting kitchen cabinets can give your kitchen a fresh, new look without spending a fortune. It might seem like a big job, but with some basic tools and a bit of patience, it's a project anyone can tackle. Whether you want to brighten up a dark space or add a pop of color, painting your cabinets can make a huge difference. This guide will walk you through the steps to get your cabinets looking great. Get ready to roll up your sleeves, put on your old clothes, and transform your kitchen with just a few coats of paint.
Getting Ready for the Project
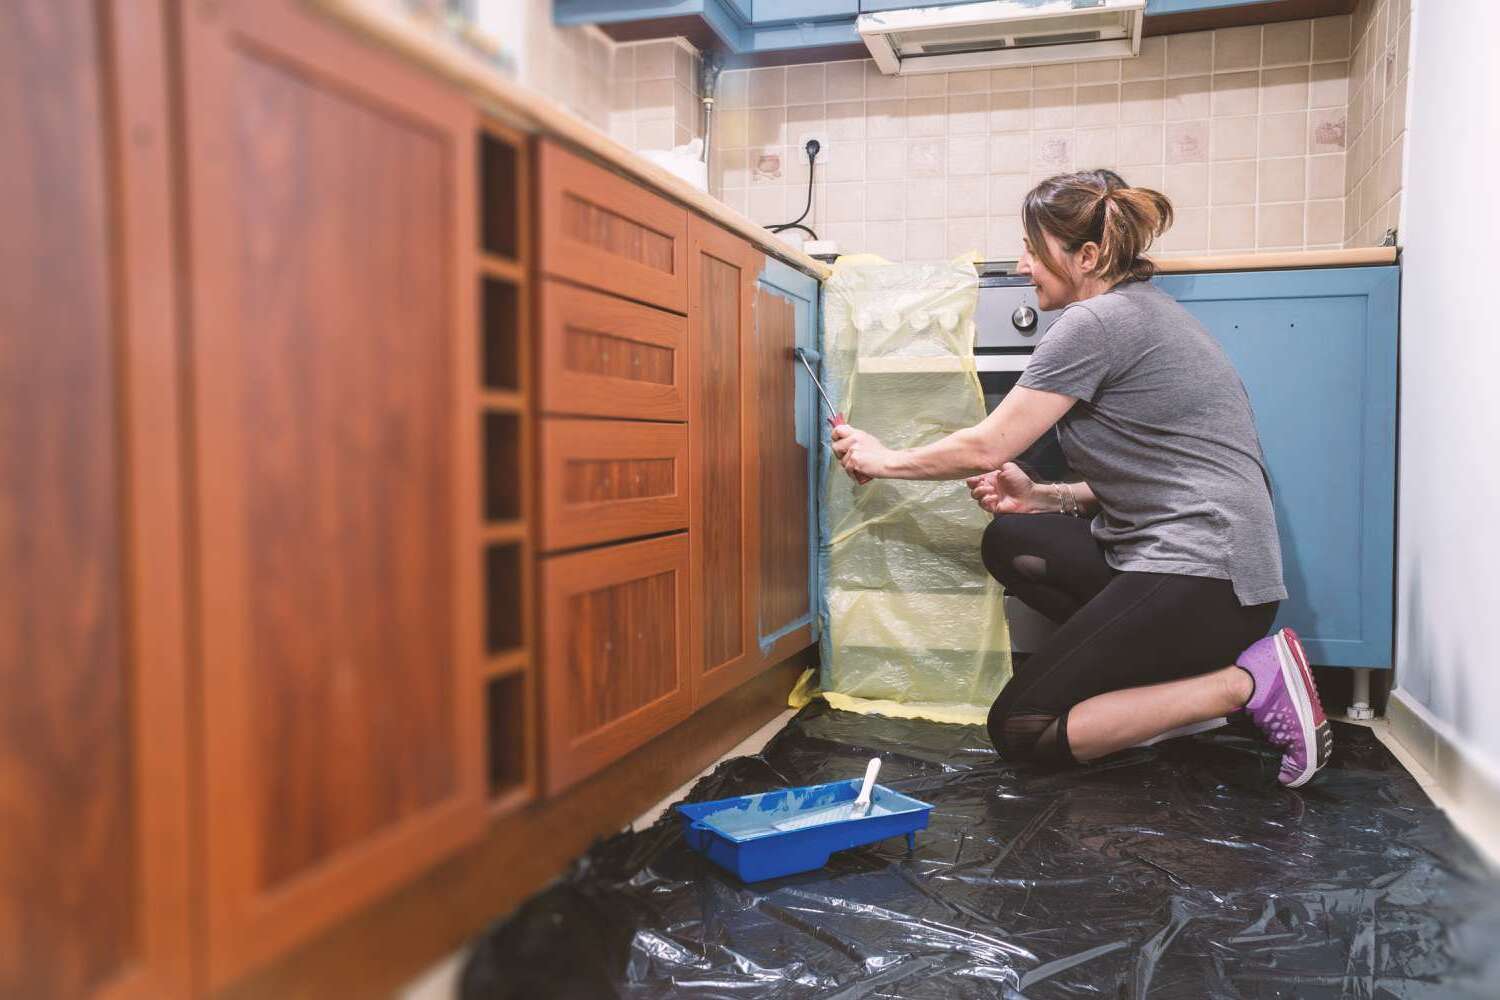
Clear the Area: Remove all items from cabinets. Lay down drop cloths to protect floors and countertops.
Gather Supplies: Get paint, primer, brushes, rollers, painter's tape, sandpaper, and a screwdriver.
Safety Gear: Wear gloves, safety goggles, and a mask to protect from dust and fumes.
Remove Hardware: Take off cabinet doors, hinges, and handles. Label each piece to make reassembly easier.
Clean Surfaces: Use a degreaser to clean all surfaces. This removes grease and grime, ensuring paint adheres well.
Sand Cabinets: Lightly sand all surfaces to create a smooth base for painting. Wipe away dust with a damp cloth.
Tape Off Areas: Use painter's tape to cover edges, walls, and any areas you don't want painted.
Prime Cabinets: Apply a coat of primer to all surfaces. This helps the paint stick better and last longer.
Set Up Workspace: Ensure good ventilation. Use a well-lit area to see your work clearly.
What You Need: Materials and Tools
- Screwdriver: Used to remove cabinet doors and hardware.
- Sandpaper: Helps smooth surfaces and remove old paint or varnish.
- Painter's Tape: Protects areas you don't want to paint.
- Drop Cloths: Keeps floors and countertops clean.
- Degreaser: Cleans cabinets to remove grease and grime.
- Primer: Prepares the surface for paint, ensuring better adhesion.
- Paint: Choose a durable paint suitable for kitchen cabinets.
- Paint Brushes: For detailed areas and edges.
- Paint Rollers: Covers larger surfaces quickly.
- Paint Tray: Holds paint for easy access while painting.
- Putty Knife: Fills in any holes or imperfections with wood filler.
- Wood Filler: Repairs dents, scratches, or holes in the cabinets.
- Sanding Block: Smooths out wood filler and primer.
- Vacuum or Tack Cloth: Removes dust after sanding.
- Drill: Reattaches hardware and doors after painting.
- Safety Gear: Includes gloves, goggles, and a mask to protect from fumes and dust.
Skill Level and Time Commitment
Skill Level: Intermediate
Time Required:
Preparation: 2-3 hours
- Remove cabinet doors and hardware
- Clean and sand surfaces
Priming: 1-2 hours
- Apply primer and let it dry
Painting: 4-6 hours
- Apply first coat and let it dry
- Apply second coat
Reassembly: 1-2 hours
- Reattach doors and hardware
Total Time: 8-13 hours
Detailed Steps to Paint Kitchen Cabinets
Remove Cabinet Doors and Hardware
- Use a screwdriver to take off doors, hinges, and handles.
- Label each door and its corresponding location for easy reassembly.
Clean Surfaces
- Mix a solution of warm water and mild detergent.
- Scrub all surfaces with a sponge to remove grease and grime.
- Rinse with clean water and let dry completely.
Sand the Cabinets
- Use 120-grit sandpaper to lightly sand all surfaces.
- Wipe away dust with a damp cloth.
Apply Primer
- Use a high-quality primer suitable for wood surfaces.
- Apply a thin, even coat with a brush or roller.
- Let the primer dry according to the manufacturer's instructions.
Sand Again
- Lightly sand the primed surfaces with 220-grit sandpaper.
- Remove any dust with a tack cloth.
Paint the Cabinets
- Choose a durable paint designed for cabinets.
- Apply the first coat with a brush or roller, following the grain of the wood.
- Allow the paint to dry completely before applying a second coat.
Reassemble the Cabinets
- Once the paint is fully dry, reattach the doors and hardware.
- Ensure all screws are tightened securely.
Final Touches
- Inspect for any missed spots or touch-ups needed.
- Clean up any drips or smudges with a damp cloth.
Helpful Tips and Tricks
Clean thoroughly before starting. Grease and grime can ruin the paint job. Use a degreaser or a mix of vinegar and water.
Label doors and hardware. Number each door and its corresponding hardware to avoid confusion when reassembling.
Sand lightly. Even if the cabinets are not wood, lightly sanding helps the paint adhere better. Use 220-grit sandpaper.
Use a primer. A good primer ensures the paint sticks well and lasts longer. Choose one designed for your cabinet material.
Choose the right paint. Use high-quality, semi-gloss or satin paint. These finishes are durable and easy to clean.
Apply thin coats. Multiple thin coats prevent drips and ensure a smooth finish. Let each coat dry completely before adding another.
Use a foam roller. Foam rollers provide a smooth finish without brush marks. Use a small brush for corners and edges.
Ventilate the area. Proper ventilation helps the paint dry faster and reduces fumes. Open windows or use fans.
Common mistakes to avoid:
Skipping cleaning. Paint won’t stick to dirty surfaces.
Not labeling doors. Reassembling can become a frustrating puzzle.
Skipping primer. Paint may peel or chip without a good primer.
Using thick coats. Thick coats can lead to drips and uneven texture.
Alternatives:
Instead of traditional paint, consider chalk paint. It requires less prep work and gives a rustic look.
For a modern finish, try spray painting. It provides a smooth, even coat but requires more prep to protect surrounding areas.
Instead of buying new hardware, spray paint existing hardware for a fresh look.
Estimating the Cost
Paint: A gallon of high-quality cabinet paint costs around $40-$60. Depending on the size of your kitchen, you might need 2-3 gallons, totaling $80-$180.
Primer: A gallon of primer costs about $20-$30. One gallon should be enough, so budget $20-$30.
Sandpaper: A pack of sandpaper (various grits) costs around $10-$15.
Painter's Tape: A roll of painter's tape costs about $5-$10. You might need 2-3 rolls, totaling $10-$30.
Paint Brushes and Rollers: A set of paint brushes and rollers costs around $20-$40.
Drop Cloths: A couple of drop cloths will cost about $10-$20.
Cleaning Supplies: Degreaser and cleaning cloths will cost around $10-$15.
Budget-Friendly Alternatives:
- Paint: Use a less expensive brand, costing around $20-$30 per gallon.
- Primer: Opt for a budget primer at $10-$15 per gallon.
- Sandpaper: Buy a smaller pack for $5-$10.
- Painter's Tape: Use a generic brand for $3-$5 per roll.
- Brushes and Rollers: Purchase a basic set for $10-$20.
- Drop Cloths: Use old sheets or newspapers instead of buying new ones.
- Cleaning Supplies: Use household cleaners you already have.
Total Cost: Standard materials and tools will cost around $150-$330. Budget-friendly options can reduce this to $80-$150.
Different Styles and Customizations
Alternative Materials:
- Chalk Paint: Gives a vintage, matte finish without needing primer.
- Milk Paint: Offers a natural, old-world look and is eco-friendly.
- Spray Paint: Provides a smooth, even coat but requires good ventilation.
Colors:
- Bold Colors: Bright reds, blues, or greens can make cabinets pop.
- Neutral Tones: Whites, grays, or beiges create a timeless, clean look.
- Two-Tone: Paint upper cabinets one color and lower cabinets another for a modern twist.
Styles:
- Distressed: Sand edges after painting for a rustic, worn appearance.
- High Gloss: Use high-gloss paint for a sleek, contemporary finish.
- Stenciled Designs: Add patterns or shapes with stencils for a personalized touch.
Hardware:
- New Handles: Swap out old handles for modern or vintage ones.
- Knobs and Pulls: Mix and match different styles for a unique look.
- Hinges: Replace visible hinges with hidden ones for a cleaner appearance.
Finishes:
- Matte: Non-reflective, subtle look.
- Satin: Slight sheen, easy to clean.
- Glossy: High shine, very durable.
Techniques:
- Ombre: Gradually blend colors from light to dark.
- Faux Wood Grain: Use a wood graining tool to mimic wood texture.
- Metallic Accents: Add metallic paint for a touch of glamour.
Eco-Friendly Painting Tips
Eco-friendly materials can make a big difference. Low-VOC paints are a great choice. VOCs, or volatile organic compounds, are harmful chemicals found in many traditional paints. Low-VOC options release fewer toxins, making them safer for you and the environment.
Reusing old brushes and rollers can save money and reduce waste. Clean them thoroughly after each use to extend their life. If you need new ones, look for brushes with recycled handles or made from sustainable materials like bamboo.
Sandpaper is essential for prepping cabinets. Choose recycled sandpaper or sandpaper made from natural materials. This helps reduce the demand for new resources.
Eco-friendly cleaners are a must for cleaning cabinets before painting. Many traditional cleaners contain harsh chemicals. Instead, use a mixture of vinegar and water or a plant-based cleaner.
Repurposing old sheets or newspapers can protect floors and countertops from paint splatters. This reduces the need for disposable plastic drop cloths.
Milk paint is another sustainable option. Made from natural ingredients like milk protein, lime, and earth pigments, it’s biodegradable and non-toxic. It gives a unique, matte finish.
Recycling old hardware like knobs and handles can add character to your cabinets. If you want a new look, consider refinishing them instead of buying new ones. This can be done with eco-friendly metal paints.
Energy-efficient lighting can help you see better while painting. Use LED bulbs which consume less power and last longer than traditional bulbs.
Proper ventilation is crucial. Open windows and use fans to circulate air. This helps reduce exposure to any fumes from the paint, even if it’s low-VOC.
Composting any organic waste, like old rags or paper towels used for cleaning, can reduce landfill waste. Make sure they are free from any paint or chemicals first.
Repurposing old cabinets instead of buying new ones can save resources. A fresh coat of paint can make them look brand new.
Your Kitchen Awaits
Painting kitchen cabinets yourself can be a game-changer. With some prep work, quality paint, and a bit of patience, you can transform your kitchen without breaking the bank. Remember to clean and sand the surfaces well, use primer, and apply thin coats for the best results. Don't rush the drying process; let each coat dry completely before moving to the next.
By following these steps, you'll have a fresh, updated kitchen that feels brand new. Plus, you'll have the satisfaction of knowing you did it yourself. So grab your brushes, roll up your sleeves, and get started. Your dream kitchen is just a few strokes away. Happy painting!
How do I prep my cabinets for painting?
First, remove all doors, drawers, and hardware. Clean everything with a degreaser. Sand the surfaces lightly to help the paint stick better. Wipe away dust with a damp cloth.
What kind of paint should I use?
Use a high-quality latex or oil-based paint. Latex is easier to clean up, but oil-based can be more durable. Choose a semi-gloss or satin finish for a nice sheen.
Do I need to use a primer?
Yes, primer helps the paint adhere better and provides a smoother finish. Use a bonding primer if your cabinets are laminate or have a glossy finish.
How many coats of paint are needed?
Usually, two coats are enough. Apply the first coat, let it dry completely, then lightly sand before applying the second coat. This ensures a smooth, even finish.
How long does it take for the paint to dry?
Drying time varies by paint type, but generally, latex paint dries in 4-6 hours, while oil-based paint takes 24 hours. Always check the paint can for specific drying times.
Can I use a roller or should I stick to a brush?
Use a combination. A brush works well for detailed areas and edges, while a foam roller provides a smooth finish on larger surfaces. This helps avoid brush marks.
How do I reattach the hardware?
Once the paint is fully dry, reattach the hardware. If you want a fresh look, consider replacing old hardware with new knobs or handles. Make sure everything is aligned properly.