
Home>Home & Furniture>Kitchen>DIY Breakfast Bar Ideas
Kitchen
DIY Breakfast Bar Ideas
Published: July 24, 2024
Discover creative DIY breakfast bar ideas to transform your kitchen into a stylish and functional space. Perfect for morning meals and family gatherings!
(Many of the links in this article redirect to a specific reviewed product. Your purchase of these products through affiliate links helps to generate commission for Twigandthistle.com, at no extra cost. Learn more)
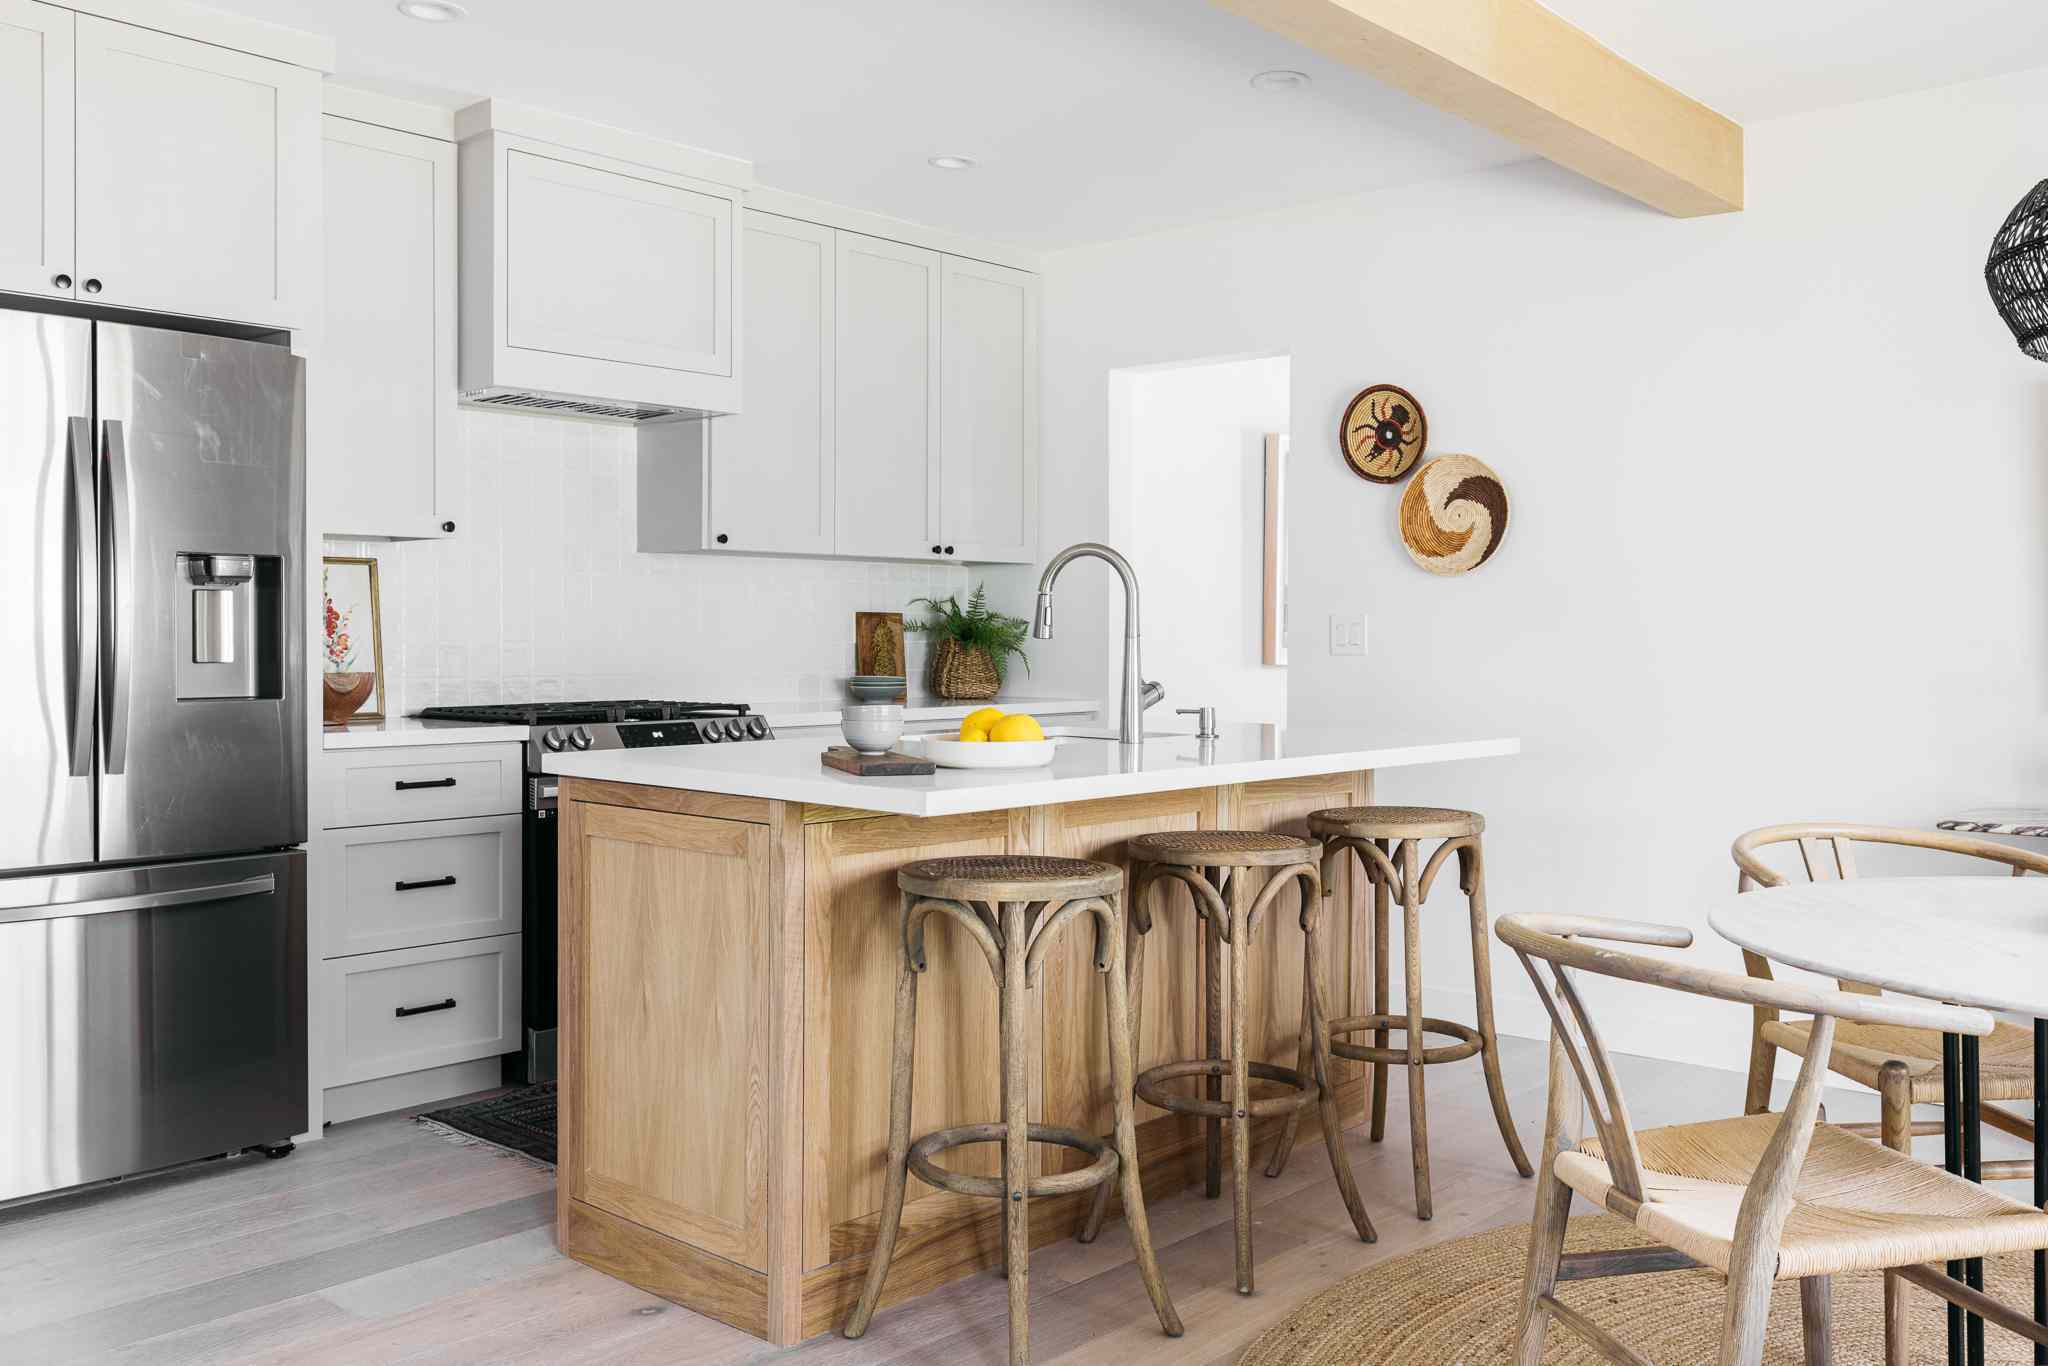
Adding a breakfast bar can transform your kitchen into a cozy nook for meals, coffee breaks, or casual chats. It's a practical project that beginners and seasoned DIYers can tackle. Building one yourself brings a sense of accomplishment and saves money while giving your space a personal touch. Whether you have limited space or an open layout, a breakfast bar can fit right in. Ready to jump into this fun project? Here's a lineup of creative ideas to get you started, showing how you can design a stylish and functional breakfast bar with your own two hands.
Preparation Steps
Measure Your Space: Use a tape measure to determine the dimensions of the area where the breakfast bar will go. Write down the width, length, and height.
Gather Materials: Make a list of all needed materials like wood, screws, brackets, and paint. Visit a hardware store to buy everything.
Set Up Workspace: Clear a space in your garage or another area. Lay down a tarp or old sheet to protect the floor.
Safety Gear: Wear safety goggles, gloves, and a dust mask to protect yourself from sawdust and splinters.
Cut Wood: Use a saw to cut the wood pieces to the measured sizes. Double-check measurements before cutting.
Sand Edges: Smooth the edges of the cut wood with sandpaper to avoid splinters.
Pre-Drill Holes: Mark where screws will go and use a drill to make small holes. This prevents wood from splitting.
Assemble Frame: Use screws and brackets to put together the frame of the breakfast bar. Make sure it’s sturdy.
Paint or Stain: Apply paint or wood stain to the breakfast bar. Let it dry completely before moving it inside.
Install: Place the breakfast bar in its designated spot. Use a level to ensure it’s even. Secure it to the wall if needed for extra stability.
Materials and Tools Needed
Wood Planks: These will form the main surface of your breakfast bar. Choose sturdy, high-quality wood for durability.
Brackets: Used to support the bar. Metal brackets are strong and can be decorative.
Screws and Nails: Essential for securing the wood planks and brackets together.
Sandpaper: Smooths out rough edges on the wood, making it safe and splinter-free.
Wood Stain or Paint: Adds color and protects the wood from damage.
Measuring Tape: Ensures accurate measurements for cutting and placing materials.
Saw: Cuts the wood planks to the desired size.
Drill: Makes holes for screws and helps in assembling the bar.
Level: Ensures your breakfast bar is even and balanced.
Clamps: Holds pieces of wood together while you work on them.
Protective Gear: Safety glasses and gloves to protect yourself while working.
Brushes or Rollers: Used to apply paint or stain evenly on the wood.
Drop Cloth: Protects your floor from paint or stain spills.
Pencil: Marks measurements and cutting lines on the wood.
Screwdriver: Tightens screws and helps in assembling the bar.
Skill Level and Time Required
Skill Level: Intermediate
Time Required: 1-2 days
- Materials Gathering: 2-3 hours
- Measuring and Cutting: 3-4 hours
- Assembling: 4-6 hours
- Finishing Touches: 2-3 hours
Step-by-Step Instructions
Measure the Space
- Use a tape measure to find the length and width of the area where the breakfast bar will go.
- Write down these measurements.
Choose Materials
- Decide on the type of wood or countertop material.
- Purchase the materials from a hardware store.
Cut the Wood
- Use a saw to cut the wood to the measured length.
- Sand the edges to make them smooth.
Install Support Brackets
- Mark where the brackets will go on the wall.
- Use a drill to attach the brackets securely.
Attach the Countertop
- Place the countertop on the brackets.
- Use screws to secure the countertop to the brackets.
Finish the Surface
- Apply a wood finish or paint to the countertop.
- Let it dry completely.
Add Stools
- Place stools around the breakfast bar.
- Make sure they are the right height for comfortable seating.
Decorate
- Add placemats, flowers, or other decorations.
- Enjoy your new breakfast bar!
Helpful Tips and Tricks
Measure Twice, Cut Once: Always double-check measurements before cutting materials. This avoids wasting wood or other supplies.
Use Quality Materials: Opt for sturdy wood like oak or maple. These last longer and look better.
Secure Properly: Use strong brackets and screws to attach the bar to the wall. This ensures stability.
Smooth Surfaces: Sand the wood thoroughly to avoid splinters. A smooth surface also makes painting or staining easier.
Level the Bar: Use a level tool to make sure the bar is even. An uneven bar can be uncomfortable and look unprofessional.
Add Storage: Incorporate shelves or cabinets underneath for extra storage. This maximizes space and keeps the area tidy.
Lighting: Install pendant lights above the bar. Good lighting enhances the space and makes it more inviting.
Comfortable Seating: Choose stools with back support for added comfort. Adjustable-height stools work well for different users.
Finish with Style: Use a high-quality sealant or varnish to protect the wood. This also gives the bar a polished look.
Common Mistakes to Avoid:
Skipping the Plan: Not having a clear plan can lead to mistakes. Sketch out your design and list all materials needed.
Ignoring Weight Limits: Make sure the wall and brackets can support the bar's weight. Overloading can cause it to collapse.
Poor Alignment: Misaligned screws or brackets can make the bar wobbly. Take your time to align everything correctly.
Alternatives for Materials or Methods:
Reclaimed Wood: Use reclaimed wood for a rustic look. It's eco-friendly and adds character.
Metal Brackets: For a modern touch, use metal brackets instead of wood. They offer a sleek, industrial look.
Butcher Block: Consider a butcher block countertop for a durable, stylish surface. It's great for food prep and easy to clean.
Floating Bar: Create a floating bar by attaching it directly to the wall without legs. This saves space and looks contemporary.
Cost Estimation
Wood: $50-$100 for lumber. Plywood costs around $20-$30 per sheet.
Countertop: Butcher block runs $100-$200. Laminate is cheaper at $50-$100.
Brackets: $10-$20 each. You’ll need 4-6, so $40-$120 total.
Stools: Basic ones cost $20-$50 each. For 2-4 stools, budget $40-$200.
Paint or Stain: $20-$40 per can.
Screws and Nails: $10-$20.
Tools: Drill ($50), saw ($50), sander ($30). If you already have these, no extra cost.
Total Cost: $240-$610.
Budget-Friendly Alternatives:
- Use reclaimed wood or pallets: Free or very cheap.
- Second-hand stools: Check thrift stores or online marketplaces.
- Skip the sander: Use sandpaper ($5).
Creative Variations and Customizations
Materials: Use reclaimed wood for a rustic look or butcher block for a more polished finish. Concrete countertops offer an industrial vibe, while granite or marble provide a luxurious touch.
Colors: Paint the bar in bright colors like teal or yellow for a cheerful atmosphere. For a more sophisticated feel, use neutral tones like gray, beige, or white. Stain the wood to highlight its natural grain.
Styles: Go for a modern look with clean lines and minimalistic design. A farmhouse style can be achieved with distressed wood and vintage stools. For a coastal theme, use light colors and nautical decor.
Seating: Choose bar stools with backs for comfort or backless stools for a sleek appearance. Mix and match different styles for an eclectic look.
Storage: Add shelves or cabinets underneath the bar for extra storage. Install wine racks or glass holders to keep everything organized.
Lighting: Hang pendant lights above the bar for focused lighting. Use LED strips under the countertop for a modern touch. Vintage bulbs can add a cozy, warm glow.
Accessories: Decorate with plants or herb gardens for a fresh feel. Use chalkboard paint on one side for notes or menus. Add hooks for mugs or utensils to keep things handy.
Eco-Friendly Tips
Reclaimed wood can be a fantastic choice for a breakfast bar. It adds character and reduces waste. Look for old barn wood or pallets. Sand it down, stain it, and seal it for a polished look.
Bamboo is another eco-friendly option. It grows quickly, making it a sustainable resource. Bamboo countertops are durable and stylish.
Recycled metal can be used for bar stools or accents. Old pipes or metal scraps can be repurposed into unique, industrial-style seating.
Eco-friendly paint is a must. Choose low-VOC or zero-VOC paints to reduce harmful emissions. These paints are better for indoor air quality.
Salvaged stone can be used for countertops. Look for remnants from other projects or reclaimed stone from old buildings. It’s a great way to add a touch of luxury without the environmental impact of new stone.
Upcycled furniture can serve as the base for your breakfast bar. An old dresser or table can be transformed with some creativity and elbow grease. This reduces waste and gives new life to old items.
Natural sealants like beeswax or linseed oil can protect your surfaces without the harsh chemicals found in many commercial sealants.
Energy-efficient lighting is essential. Use LED bulbs or fixtures made from recycled materials. This saves energy and reduces your carbon footprint.
Local materials are always a good choice. Sourcing materials locally reduces transportation emissions and supports your community. Look for local wood, stone, or metal suppliers.
Compostable or biodegradable materials for any disposable items you might use during your project, like drop cloths or painter’s tape, can also make a difference.
Your Breakfast Bar Awaits
Creating a DIY breakfast bar can be a rewarding project. By using reclaimed wood, floating shelves, and bar stools, you can craft a cozy spot for morning meals. Don't forget to add personal touches like mugs, plants, and artwork. These elements make the space uniquely yours. Remember, the key is to blend functionality with style. Whether you're a seasoned DIYer or just starting out, this project is manageable and fun. Plus, it adds value to your home. So grab your tools, gather your materials, and get started. Your perfect breakfast bar is just a few steps away. Enjoy the process and the delicious breakfasts that follow.
What materials do I need to build a breakfast bar?
You'll need wood for the countertop, brackets for support, screws, a saw, a drill, and sandpaper. Some folks also use stain or paint to finish the wood.
How much space should I allocate for a breakfast bar?
Aim for at least 24 inches of width per person. This gives enough elbow room. The depth should be around 18 inches.
Can I install a breakfast bar in a small kitchen?
Absolutely! Use a folding or wall-mounted bar to save space. These can be tucked away when not in use.
How high should a breakfast bar be?
Standard height is around 42 inches. This works well with bar stools that are about 30 inches high.
What type of wood is best for a breakfast bar countertop?
Hardwoods like oak, maple, or walnut are durable and look great. Pine is cheaper but softer and might dent easily.
How do I secure the breakfast bar to the wall?
Use heavy-duty brackets and screws. Make sure to anchor them into wall studs for stability.
Can I add storage to my breakfast bar?
Sure thing! Add shelves or cabinets underneath the bar. This maximizes space and keeps things tidy.