
Home>Home & Furniture>Garage & Basement>How to Build Metal Overhead Garage Storage
Garage & Basement
How to Build Metal Overhead Garage Storage
Published: September 29, 2024
Learn how to build metal overhead garage storage with our step-by-step guide. Maximize your space efficiently and safely with these expert tips and tricks.
(Many of the links in this article redirect to a specific reviewed product. Your purchase of these products through affiliate links helps to generate commission for Twigandthistle.com, at no extra cost. Learn more)
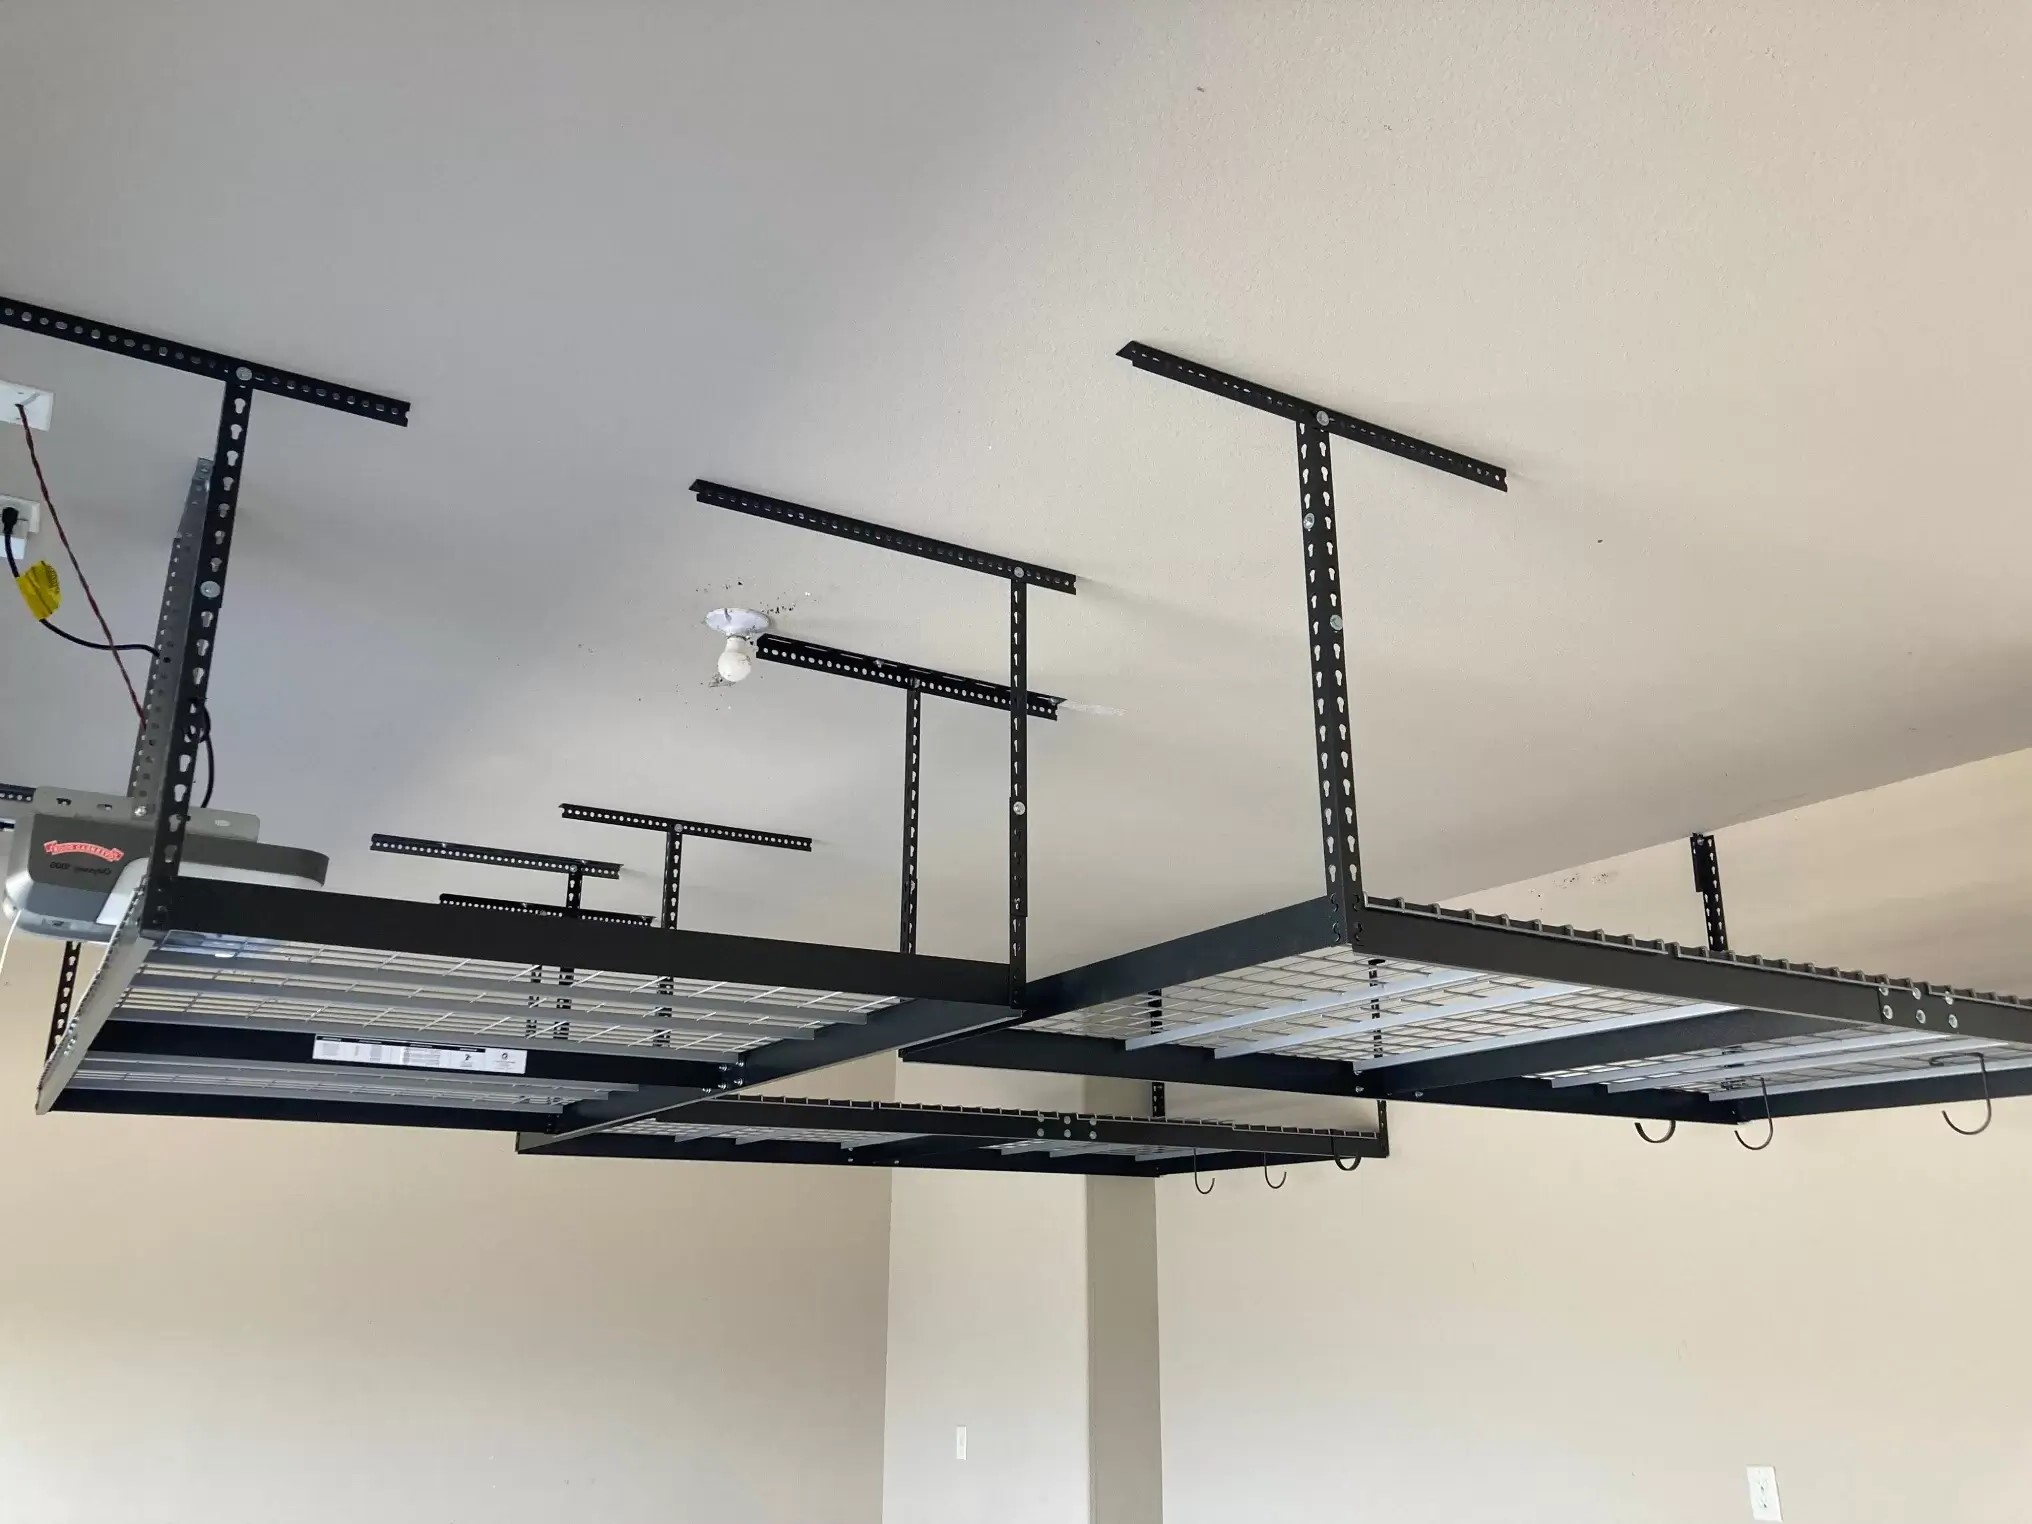
Maximizing garage space often challenges many homeowners. One practical solution involves adding metal overhead storage. This kind of storage makes excellent use of unused ceiling space, freeing up valuable floor area. Plus, it's a project you can tackle yourself with some basic tools and materials. Building your own overhead storage may seem tricky, but straightforward steps can make the process manageable. This guide will introduce you to what you need to know to get started. Whether you need to store seasonal items or just clear up clutter, metal overhead storage can be a game-changer for your garage.
Getting Ready for Your Project
Measure the Space: Use a tape measure to check the dimensions of your garage ceiling. Ensure there's enough room for the storage unit without interfering with garage doors or lights.
Gather Materials: Collect all necessary materials like metal brackets, screws, metal shelves, and a drill. Having everything ready saves time.
Check Ceiling Structure: Inspect the ceiling to ensure it can support the weight of the storage unit. Look for joists or beams to secure the brackets.
Safety Gear: Wear safety goggles, gloves, and a dust mask. Protect yourself from metal shavings and dust.
Clear the Area: Move any vehicles, tools, or other items out of the workspace. This prevents accidents and gives you room to work.
Mark Drill Points: Use a pencil to mark where you'll drill holes for the brackets. Double-check measurements to ensure accuracy.
Pre-Drill Holes: Drill pilot holes at the marked points. This makes it easier to insert screws and prevents metal from splitting.
Install Brackets: Secure the metal brackets to the ceiling using heavy-duty screws. Make sure they are level and firmly attached.
Attach Shelves: Place the metal shelves onto the brackets. Ensure they are stable and can hold the intended weight.
Test Stability: Gently push and pull on the shelves to check for any wobbling. Tighten screws if needed.
Organize Items: Place items on the shelves, distributing weight evenly. Avoid overloading to maintain safety.
Gathering Materials and Tools
Metal Storage Racks: These are the main components. Choose sturdy racks designed for overhead storage.
Measuring Tape: Essential for measuring the space where the racks will be installed. Ensures accurate placement.
Stud Finder: Helps locate the ceiling joists. Important for securely attaching the racks.
Drill: Needed for making holes in the ceiling joists. Use a power drill for efficiency.
Screws and Bolts: Secure the racks to the ceiling. Make sure they are heavy-duty to support the weight.
Level: Ensures the racks are installed evenly. Prevents items from sliding off.
Ladder: Necessary for reaching the ceiling. Choose a stable, tall ladder.
Safety Glasses: Protects your eyes while drilling. Important for safety.
Work Gloves: Protects your hands from sharp edges. Adds grip while handling tools.
Pencil: Marks measurements and drilling points. Helps with precise installation.
Socket Wrench: Tightens bolts securely. Ensures the racks are firmly attached.
Plywood Sheets: Optional but useful for creating a solid base on the racks. Adds extra stability for stored items.
Required Skills and Time Commitment
Skill Level: Intermediate
Time Required: 4-6 hours
Steps:
- Planning and Measuring: 1 hour
- Gathering Materials and Tools: 30 minutes
- Assembling the Frame: 1-2 hours
- Mounting the Frame to the Ceiling: 1-2 hours
- Securing and Testing: 30 minutes
Detailed Instructions for Building
Gather Materials and Tools
- Metal storage racks
- Screws and bolts
- Drill
- Stud finder
- Measuring tape
- Level
- Ladder
- Safety goggles and gloves
Measure and Mark
- Use the measuring tape to determine the space for the storage racks.
- Mark the spots where the racks will be installed.
Locate Ceiling Joists
- Use the stud finder to locate ceiling joists.
- Mark the joist locations with a pencil.
Install Mounting Brackets
- Position the mounting brackets on the marked spots.
- Drill pilot holes into the joists.
- Secure the brackets with screws and bolts.
Assemble Storage Racks
- Follow the manufacturer's instructions to assemble the metal storage racks.
- Ensure all parts are tightly secured.
Attach Racks to Brackets
- Lift the assembled racks onto the mounting brackets.
- Secure the racks to the brackets using screws and bolts.
Level and Secure
- Use the level to ensure the racks are even.
- Tighten all screws and bolts to secure the racks firmly.
Safety Check
- Inspect the installation to ensure everything is secure.
- Test the racks by placing a few items to check stability.
Organize Storage
- Place items on the racks, distributing weight evenly.
- Avoid overloading to maintain safety.
Helpful Tips and Tricks
Measure Twice, Cut Once: Always double-check measurements before cutting metal. Mistakes can be costly and time-consuming.
Use a Stud Finder: Ensure the storage is securely anchored by locating ceiling joists with a stud finder. This prevents the storage from falling.
Pre-Drill Holes: Pre-drill holes in metal to make screwing easier and prevent the metal from bending or warping.
Safety Gear: Wear gloves, safety glasses, and ear protection when cutting or drilling metal. Metal shards can be dangerous.
Leveling: Use a level to ensure the storage is even. Uneven storage can cause items to slide off or the structure to become unstable.
Common Mistakes to Avoid:
Overloading: Don’t exceed the weight limit of your storage. Overloading can cause it to collapse.
Ignoring Ceiling Height: Make sure there’s enough clearance for your car and other items. Measure the height of your garage before installation.
Skipping Instructions: Follow the manufacturer’s instructions carefully. Skipping steps can lead to an unsafe structure.
Alternatives for Materials or Methods:
Wooden Storage: If metal seems too challenging, consider using wood. It’s easier to cut and assemble.
Pre-Made Kits: Purchase a pre-made overhead storage kit. These kits come with all necessary parts and instructions, simplifying the process.
Plastic Bins: Instead of building a full storage system, use heavy-duty plastic bins with secure lids. Stack them on sturdy shelves for a simpler solution.
Estimating the Cost
Metal overhead garage storage can be a great way to maximize space. Here’s a rough estimate of the total cost of materials and tools:
- Metal Shelving Units: $100 - $200 each, depending on size and quality. You might need two or three units.
- Metal Brackets: $10 - $20 each. Typically, you’ll need four to six brackets per unit.
- Mounting Hardware: $20 - $30 for screws, bolts, and anchors.
- Drill: $50 - $100 if you don’t already have one.
- Level: $10 - $20 to ensure everything is straight.
- Measuring Tape: $5 - $15.
- Safety Gear: $10 - $20 for gloves and goggles.
Total Estimated Cost: $305 - $665.
Budget-Friendly Alternatives:
- Used Metal Shelving Units: Check local classifieds or online marketplaces. Prices can be as low as $50.
- DIY Brackets: Use sturdy wood or repurpose metal scraps. This can reduce costs to $5 - $10 each.
- Borrow Tools: Ask friends or family to borrow a drill, level, and measuring tape.
- Discount Stores: Purchase mounting hardware and safety gear from discount or dollar stores. This can save $10 - $20.
Total Estimated Cost with Alternatives: $150 - $300.
Different Ways to Customize
Materials: Instead of using only metal, consider wood or plastic for a different look. Wood adds a rustic feel, while plastic is lightweight and easy to clean.
Colors: Paint the metal parts with bright colors like red or blue for a lively touch. For a more subtle look, use neutral tones like gray or beige.
Styles: Opt for an industrial style with exposed bolts and a raw metal finish. For a sleek, modern look, use smooth, polished metal and hidden fasteners.
Shelving: Add adjustable shelves to accommodate items of various sizes. Use wire mesh for better visibility and airflow or solid panels for a cleaner appearance.
Hooks and Hangers: Install hooks or hangers on the sides for extra storage options. These can hold tools, bikes, or other hanging items.
Lighting: Integrate LED strip lights under the shelves to illuminate the garage. This makes it easier to find items and adds a modern touch.
Safety Features: Include safety rails or lip edges to prevent items from falling. Use locking mechanisms to secure the shelves in place.
Accessibility: Install a pulley system to lower and raise the shelves easily. This is especially useful for heavy or bulky items.
Decorative Elements: Add decorative brackets or trim to enhance the overall look. These can be painted or left in their natural finish for contrast.
Custom Sizes: Tailor the dimensions to fit your specific garage space. Make the shelves wider, narrower, deeper, or shallower as needed.
Multi-Functionality: Combine the storage with a workbench or folding table. This adds functionality without taking up extra space.
Eco-Friendly Tips
Reusing or recycling materials can make your project more eco-friendly. Start by repurposing old metal shelves or brackets. These can often be found at thrift stores or salvage yards. Use reclaimed wood for any wooden parts, like the platform. This reduces waste and gives your project a rustic look.
For the metal framework, consider using recycled steel. It’s strong, durable, and has a lower environmental impact than new steel. Opt for non-toxic paint or finishes to protect the metal from rust while being safe for the environment.
When assembling, use bolts and screws instead of welding. This makes it easier to disassemble and reuse parts in the future. Solar-powered tools can also reduce your carbon footprint during construction.
Lastly, ensure your design maximizes space and efficiency. This reduces the need for additional storage solutions, saving materials and energy.
Your Garage Will Thank You
Building metal overhead garage storage isn't just about creating more space. It's about organization, efficiency, and making your garage a place you actually enjoy. With the right tools and a bit of patience, you can transform that cluttered mess into a well-ordered haven. Remember, measure twice, cut once. Safety first, always. Don't rush the process; take your time to ensure everything is secure and level. Once you're done, you'll wonder how you ever managed without it. Your car, tools, and other belongings will finally have a proper home. Plus, you'll have the satisfaction of knowing you did it yourself. So grab your tools, roll up your sleeves, and get to work. Your garage will thank you, and you'll have a new project to be proud of. Happy building!
How much weight can metal overhead garage storage hold?
Most metal overhead garage storage units can hold between 250 to 600 pounds. Always check the manufacturer's specifications to be sure.
What tools do I need to install metal overhead garage storage?
You'll need a drill, stud finder, measuring tape, level, wrench, and screws. Some kits come with all necessary hardware.
Can I install metal overhead storage by myself?
Yes, but having a helper makes the job easier and safer. Some parts can be heavy or awkward to handle alone.
How high should I install the storage unit?
Install it high enough to clear your vehicle but low enough to access easily. Typically, 18-24 inches from the ceiling works well.
What should I store in overhead garage storage?
Store seasonal items, sports equipment, camping gear, and rarely used tools. Avoid storing items you need frequently.
How do I ensure the storage unit is secure?
Use a stud finder to locate ceiling joists and anchor the unit securely. Follow the installation instructions carefully.
Can I adjust the height of the storage unit after installation?
Some units offer adjustable heights, but it's easier to set the desired height during initial installation. Check your unit's features.