
Home>Home & Furniture>Garage & Basement>DIY Garage Pegboard Accessories: Organize Your Space
Garage & Basement
DIY Garage Pegboard Accessories: Organize Your Space
Published: September 27, 2024
Transform your garage with DIY pegboard accessories! Discover tips and ideas to organize your space efficiently. Perfect for tools, sports gear, and more.
(Many of the links in this article redirect to a specific reviewed product. Your purchase of these products through affiliate links helps to generate commission for Twigandthistle.com, at no extra cost. Learn more)
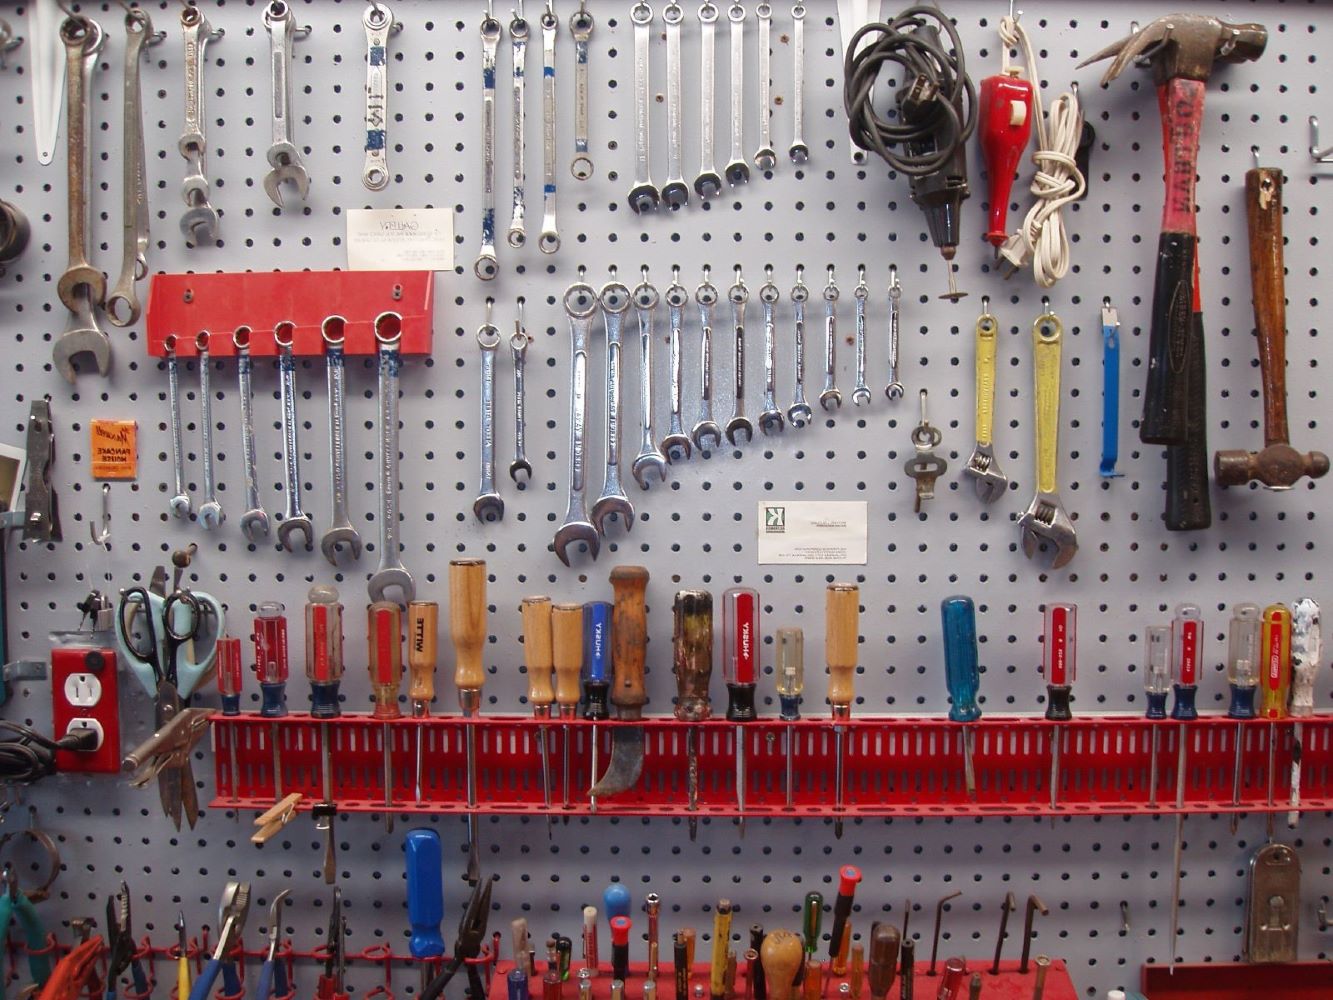
Transforming your garage into an organized haven doesn't have to be daunting. Pegboards offer an easy and efficient way to keep tools and supplies in order. With a few simple accessories, you can customize your pegboard to fit your needs perfectly. Whether hanging hammers, storing screws, or displaying drills, pegboard accessories streamline the process. They save space, improve accessibility, and make your garage look neat. This guide will introduce you to the essentials of DIY pegboard setups, helping you maximize both functionality and style in your garage. Ready to dig in and get organized? Let's get started!
Getting Ready for Your Project
Measure Your Wall: Use a tape measure to find the dimensions of the wall where the pegboard will go. Write down the measurements.
Gather Tools and Materials: Collect a pegboard, screws, a drill, a level, spacers, and hooks. Make sure everything is within reach.
Clear the Area: Move any items or tools away from the wall. This will give you enough space to work safely.
Wear Safety Gear: Put on safety goggles and gloves. This will protect your eyes and hands while drilling.
Mark the Wall: Use a pencil to mark where the screws will go. Make sure the marks are level.
Install Spacers: Attach spacers to the back of the pegboard. This will create space between the wall and the board, allowing hooks to fit.
Drill Pilot Holes: Drill small holes where you marked the wall. This makes it easier to insert screws.
Mount the Pegboard: Hold the pegboard against the wall and align it with the pilot holes. Use a drill to screw it into place.
Organize Hooks and Accessories: Attach hooks and other accessories to the pegboard. Arrange them in a way that makes tools easy to find.
Test Stability: Gently tug on the pegboard to ensure it is securely mounted. Make adjustments if needed.
What You Need: Materials and Tools
Pegboard: A perforated board used to hang tools and accessories. Choose a size that fits your garage wall.
Pegboard Hooks: Metal hooks that fit into the pegboard holes. They hold tools like hammers, screwdrivers, and wrenches.
Screws and Wall Anchors: Fasteners used to secure the pegboard to the wall. Wall anchors provide extra support for heavy items.
Drill: A power tool for making holes in the wall to insert screws and anchors.
Screwdriver: A hand tool for driving screws into the wall and pegboard.
Level: A tool to ensure the pegboard is mounted straight.
Measuring Tape: Used to measure the wall space and pegboard dimensions accurately.
Stud Finder: A device to locate wall studs, providing a stronger mounting point for the pegboard.
Pencil: For marking measurements and drill points on the wall.
Safety Goggles: Protect your eyes while drilling and installing the pegboard.
Work Gloves: Protect your hands from sharp edges and splinters.
Utility Knife: For cutting any excess material or trimming the pegboard if needed.
These materials and tools will help you organize your garage efficiently.
Skill Level and Time Commitment
Skill Level: Beginner
Time Required: 2-4 hours
- Gather Materials: 15 minutes
- Measure and Mark: 20 minutes
- Cut Pegboard (if needed): 30 minutes
- Install Pegboard: 1 hour
- Add Hooks and Accessories: 30 minutes
- Organize Tools: 30 minutes
How to Do It: Step-by-Step Guide
Gather Materials:
- Pegboard
- Pegboard hooks and accessories
- Screws and wall anchors
- Drill
- Level
- Measuring tape
- Pencil
Measure and Mark:
- Use the measuring tape to find the desired height and width for the pegboard.
- Mark the spots on the wall with a pencil.
Install Wall Anchors:
- Drill holes at the marked spots.
- Insert wall anchors into the holes.
Attach Pegboard:
- Hold the pegboard against the wall.
- Align it with the wall anchors.
- Screw the pegboard into place using the screws.
Add Hooks and Accessories:
- Insert hooks into the pegboard holes.
- Arrange them to fit your tools and accessories.
Organize Tools:
- Hang tools and accessories on the hooks.
- Adjust the arrangement as needed for easy access.
Check Stability:
- Ensure all hooks and tools are securely in place.
- Make adjustments if necessary.
Helpful Tips and Tricks
Measure and Plan: Before drilling, measure your wall space. Plan where each tool will go. This avoids overcrowding.
Use Spacers: Pegboards need space behind them for hooks. Use spacers or washers to create a gap between the board and wall.
Heavy-Duty Hooks: For heavier tools, use heavy-duty hooks. Regular hooks might bend or break.
Labeling: Label spots for each tool. This helps keep everything in its place.
Bins and Baskets: Use bins for small items like screws or nails. Baskets can hold larger items like tape or glue.
Magnetic Strips: Attach magnetic strips for metal tools. This keeps them easily accessible.
Common Mistakes to Avoid:
- Overloading: Don’t overload the pegboard. Too much weight can cause it to fall.
- Wrong Hooks: Using the wrong hooks for heavy items can lead to accidents.
- Ignoring Wall Studs: Always mount pegboards on wall studs for better support.
Alternatives for Materials or Methods:
- Slatwall Panels: Use slatwall panels instead of pegboards. They offer more flexibility.
- Shelving Units: Install shelving units for larger tools or items.
- Tool Racks: Use tool racks for items like brooms or shovels.
How Much Will It Cost?
Pegboard: A 4x8 foot sheet costs around $20-$30.
Mounting Hardware: Pegboard mounting kits, including screws and spacers, cost about $5-$10.
Pegboard Hooks: A set of 50 assorted hooks costs around $15-$20.
Bins and Baskets: Small plastic bins and wire baskets for holding tools and supplies range from $10-$25 per set.
Tool Holders: Specialized holders for items like screwdrivers, hammers, and pliers cost about $10-$15 each.
Paint or Finish: If you want to paint or finish the pegboard, a quart of paint costs around $10-$15.
Total Cost: Expect to spend between $70-$115 for all materials and tools.
Budget-Friendly Alternatives:
- Repurpose Old Materials: Use scrap wood or old shelves as pegboard alternatives.
- DIY Hooks: Bend old wire hangers into hooks.
- Dollar Store Bins: Find cheap bins and baskets at dollar stores.
- Second-Hand Tools: Check thrift stores or garage sales for tool holders and other accessories.
Different Ways to Customize
Materials: Instead of traditional wooden pegboards, try metal or plastic ones. Metal pegboards are more durable and can hold heavier tools. Plastic pegboards are lightweight and resistant to moisture.
Colors: Paint your pegboard to match your garage's color scheme. Use bright colors like red, blue, or yellow to make it stand out. For a more subtle look, choose neutral colors like gray or white.
Hooks and Holders: Use different types of hooks and holders. Magnetic strips can hold metal tools. Shelves can store larger items. Bins can hold smaller items like screws and nails.
Labels: Add labels to each section of your pegboard. This helps you quickly find what you need. Use a label maker or write directly on the pegboard with a marker.
Lighting: Install LED strip lights around your pegboard. This makes it easier to see your tools, especially in a dimly lit garage.
Custom Shapes: Cut your pegboard into custom shapes to fit your space better. For example, an L-shaped pegboard can fit into a corner, maximizing your storage area.
Decorative Elements: Add some decorative elements like stickers or decals. This personalizes your pegboard and makes your garage feel more inviting.
Adjustable Shelves: Use adjustable shelves that can be moved as your storage needs change. This adds flexibility to your pegboard setup.
Tool Outlines: Draw outlines of your tools on the pegboard. This helps you remember where each tool belongs, keeping your space organized.
Combination Boards: Combine your pegboard with a corkboard or whiteboard. This gives you a place to pin notes or write reminders, adding functionality to your storage system.
Eco-Friendly Tips
Reclaimed wood can be used to create shelves or hooks for your pegboard. Old pallets or leftover lumber from other projects work great. Metal scraps from old appliances or furniture can be repurposed into sturdy hooks or brackets. Glass jars with lids can be attached to the pegboard for storing small items like screws or nails. Recycled plastic containers can be cut and shaped into holders for tools or other accessories. Old belts can be used to create hanging loops for larger tools. Cardboard tubes from paper towels or toilet paper rolls can be used to store cables or cords. Fabric scraps can be sewn into pouches for holding smaller items. Wine corks can be glued together to create a unique tool holder. Tin cans can be cleaned and painted to hold brushes or other small tools. Old garden tools can be mounted directly onto the pegboard for easy access.
Your Garage, Your Rules
Organizing your garage with pegboard accessories can make a world of difference. With hooks, baskets, and shelves, you can keep tools, sports gear, and gardening supplies in check. No more hunting for that elusive wrench or tangled extension cord. Plus, customizing your setup means everything has its place, making your DIY projects smoother.
Remember, the key is to plan your layout before drilling any holes. Think about what you use most often and place those items within easy reach. Also, don't forget to label your spots. This way, you'll always know where things go, saving time and reducing frustration.
So, grab your tools, get creative, and transform your garage into a well-organized haven. You'll wonder how you ever managed without it. Happy organizing!
What materials do I need to install a pegboard in my garage?
You’ll need a pegboard, mounting hardware (like screws and anchors), spacers, a drill, a level, and measuring tape. Optional but helpful: a stud finder.
How do I choose the right pegboard size?
Measure the wall space where you want to install the pegboard. Standard sizes are 2x4 feet or 4x8 feet, but you can cut them to fit your space. Make sure it’s big enough to hold all your tools.
What types of hooks and accessories should I use?
Use metal hooks for heavier tools and plastic hooks for lighter items. You can also get baskets, shelves, and bins to hold smaller items like screws and nails.
How do I make sure the pegboard is securely mounted?
Use a level to ensure the pegboard is straight. Drill into wall studs if possible. If not, use wall anchors to provide extra support. Make sure the spacers create enough gap for the hooks to fit.
Can I paint or customize my pegboard?
Absolutely! You can paint it to match your garage decor or add labels for easy organization. Just make sure the paint is fully dry before adding hooks and tools.
How do I keep my pegboard organized?
Group similar tools together and use labels to mark their spots. Regularly reorganize to keep it tidy. Use baskets and bins for small items to avoid clutter.
What are some safety tips for using a pegboard?
Ensure heavy tools are securely hung to avoid accidents. Regularly check hooks and mounts for wear and tear. Keep sharp tools out of reach of children.