
Home>Home & Furniture>Garage & Basement>DIY Garage Dog Kennel Ideas
Garage & Basement
DIY Garage Dog Kennel Ideas
Published: September 25, 2024
Discover creative DIY garage dog kennel ideas to keep your furry friend comfortable and safe. Transform your garage into a pet haven with these easy and budget-friendly tips!
(Many of the links in this article redirect to a specific reviewed product. Your purchase of these products through affiliate links helps to generate commission for Twigandthistle.com, at no extra cost. Learn more)
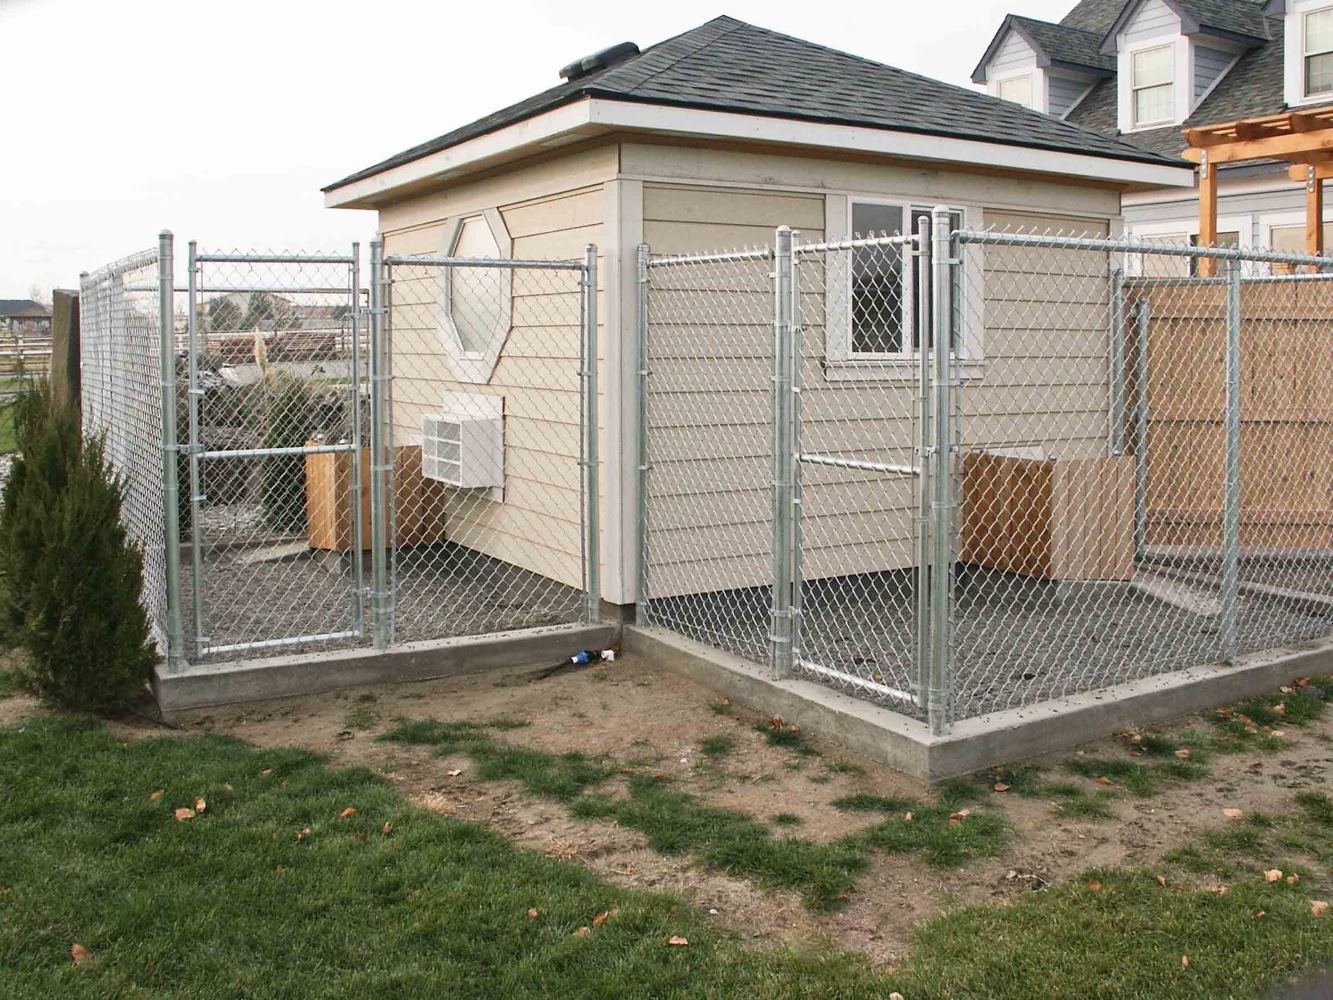
Creating a comfortable and safe space for your dog in your garage can be a rewarding DIY project. Dog kennels provide a cozy spot for your pet, keeping them secure when you can't supervise them. Building your own kennel allows for customization, ensuring it fits both your space and your dog's needs. With some basic tools and materials, you can transform part of your garage into a perfect haven for your furry companion. In this guide, we'll explore simple, budget-friendly kennel ideas that you can make yourself, making both you and your pet happy.
Getting Ready for the Project
Measure the Space: Use a tape measure to determine the dimensions of the garage area where the kennel will go. Ensure enough room for your dog to move comfortably.
Gather Materials: Collect all necessary items like wood panels, screws, hinges, a latch, and a dog bed. Don't forget tools like a saw, drill, and screwdriver.
Clean the Area: Sweep and mop the garage floor to remove dirt and debris. A clean workspace helps keep your materials and tools in good condition.
Plan Ventilation: Ensure proper airflow by installing vents or using a fan. Dogs need fresh air to stay healthy.
Set Up Lighting: Install adequate lighting so you can see clearly while working. Good lighting also helps your dog feel comfortable.
Safety Gear: Wear safety goggles, gloves, and a dust mask. Protecting yourself from sawdust and sharp tools is crucial.
Mark the Layout: Use chalk or tape to outline where the kennel walls will go. This helps visualize the final product and ensures accurate assembly.
Check for Hazards: Inspect the garage for any potential dangers like exposed wires or sharp objects. Remove or secure these hazards to keep your dog safe.
Prepare Tools: Lay out all tools and materials within easy reach. This saves time and keeps the project moving smoothly.
Test Fit: Before final assembly, do a dry run by placing the panels and parts together. This helps identify any adjustments needed before securing everything in place.
What You Need: Materials and Tools
Wooden Planks: Used for building the frame and walls of the kennel. Choose sturdy, treated wood to ensure durability.
Plywood Sheets: These will form the floor and roof. Plywood is strong and easy to cut to size.
Screws and Nails: Essential for fastening the wooden parts together. Use galvanized screws and nails to prevent rusting.
Hammer and Screwdriver: Basic tools for driving nails and screws into the wood. A power drill can also be handy for quicker assembly.
Measuring Tape: Ensures accurate measurements for cutting wood and placing components correctly.
Saw: Needed for cutting the wooden planks and plywood sheets to the required dimensions. A handsaw or circular saw works well.
Sandpaper: Smooths rough edges on the wood to prevent splinters and give a polished finish.
Paint or Wood Stain: Protects the wood from moisture and adds a nice finish. Choose non-toxic options safe for pets.
Paintbrushes or Rollers: Used to apply paint or stain evenly across the wood surfaces.
Wire Mesh: Creates ventilation and visibility. Attach it to the sides of the kennel for airflow.
Staple Gun: Secures the wire mesh to the wooden frame. Staples should be strong enough to hold the mesh firmly.
Hinges and Latch: Needed for the kennel door. Ensure they are sturdy and secure to keep the door functional and safe.
Rubber Mat or Carpet: Provides a comfortable surface for your dog to lie on. It also helps with insulation.
Level: Ensures that all parts of the kennel are even and properly aligned during assembly.
Pencil: Marks measurements and guides for cutting and assembling the wood.
Safety Gear: Includes gloves, safety glasses, and a dust mask to protect yourself while working with wood and tools.
Skill Level and Time Commitment
Skill Level: Intermediate
Time Required: 4-6 hours
- Planning and Measuring: 1 hour
- Gathering Materials: 30 minutes
- Building the Frame: 2 hours
- Installing Fencing: 1 hour
- Adding Comfort Items: 30 minutes
Important Keywords: Skill Level, Time Required, Planning, Measuring, Gathering Materials, Building Frame, Installing Fencing, Adding Comfort Items
How to Build It: Step-by-Step Guide
Plan the Space
- Measure the garage area where the kennel will go.
- Decide on the kennel size based on your dog's breed and size.
Gather Materials
- Wooden planks or metal panels for the frame.
- Mesh wire for the walls.
- Screws and nails.
- Hinges for the door.
- Latch for securing the door.
- Tools: Saw, drill, measuring tape, hammer, screwdriver.
Build the Frame
- Cut the wooden planks or metal panels to the desired size.
- Assemble the base frame using screws or nails.
- Attach vertical supports at each corner.
Attach the Walls
- Cut the mesh wire to fit each side of the frame.
- Secure the mesh wire to the frame using screws or nails.
Install the Door
- Cut an opening for the door in one of the mesh walls.
- Attach the door frame using hinges.
- Secure the latch to keep the door closed.
Add Flooring
- Place a rubber mat or wooden pallet on the floor for comfort.
- Ensure the flooring is easy to clean.
Provide Ventilation
- Ensure there are enough gaps in the mesh for air circulation.
- Consider adding a small fan if the garage gets too hot.
Add Comfort Items
- Place a dog bed or blanket inside.
- Add toys and water bowl.
Safety Check
- Inspect for any sharp edges or loose parts.
- Ensure the kennel is sturdy and secure.
Introduce Your Dog
- Let your dog explore the kennel.
- Encourage them with treats and praise.
Helpful Tips and Tricks
Measure your garage space before starting. This ensures the kennel fits well without blocking walkways or storage areas.
Use sturdy materials like metal or heavy-duty plastic for the frame. These materials last longer and resist chewing.
Install proper ventilation. Dogs need fresh air, so consider adding a small fan or vents.
Elevate the kennel slightly off the ground. This helps with cleaning and keeps your dog dry if the floor gets wet.
Add insulation if you live in a place with extreme temperatures. This keeps your dog comfortable year-round.
Use washable bedding. Easy-to-clean materials save time and keep the kennel hygienic.
Secure the kennel to the floor or wall. This prevents it from tipping over if your dog gets excited.
Include a feeding station. A built-in spot for food and water bowls keeps things organized.
Common mistakes to avoid:
Skipping measurements. This can lead to a kennel that's too big or too small.
Using weak materials. Flimsy materials can break easily, posing a risk to your dog.
Ignoring ventilation. Poor airflow can make the kennel uncomfortable and unhealthy.
Forgetting insulation. Extreme temperatures can stress your dog.
Alternatives for materials or methods:
PVC pipes instead of metal for a lighter frame.
Rubber mats instead of traditional bedding for easier cleaning.
Portable fans if installing a permanent one isn't possible.
Reflective blankets for insulation if you can't add permanent insulation.
Budgeting for Your DIY Kennel
Materials:
- Wooden pallets: $50-$100
- Plywood sheets: $20-$40 each (2-3 needed)
- Metal fencing: $50-$100
- Screws and nails: $10-$20
- Hinges and latches: $15-$30
- Paint or stain: $20-$40
- Dog bed: $20-$50
- Food and water bowls: $10-$20
Tools:
- Hammer: $10-$20
- Screwdriver set: $10-$30
- Saw: $20-$50
- Measuring tape: $5-$10
- Paintbrushes: $5-$15
- Drill: $30-$80
Total Cost: $275-$595
Budget-Friendly Alternatives:
- Repurpose old wood: Free or low cost
- Use second-hand tools: Check thrift stores or online marketplaces
- Skip paint: Use natural wood finish
- DIY dog bed: Use old blankets or pillows
Personalize Your Kennel: Variations and Customizations
Materials: Use wood for a rustic look or metal for a modern feel. PVC pipes can create a lightweight, easy-to-clean frame. For flooring, consider rubber mats for comfort or vinyl for easy maintenance.
Colors: Paint the kennel in neutral tones like beige or gray to match the garage. Bright colors like blue or red can make it stand out. Use chalkboard paint on one side for fun messages or drawings.
Styles: Opt for a farmhouse style with wooden slats and a tin roof. A contemporary style might include sleek lines and a minimalist design. For a cozy feel, add cushions and blankets inside.
Features: Install a built-in feeding station with bowls attached to the side. Add a small fan or heater for temperature control. Include storage compartments for toys and supplies.
Safety: Ensure the kennel has rounded edges to prevent injuries. Use non-toxic paint and materials. Install a secure latch to keep the door closed.
Personal Touches: Add a nameplate with your dog's name. Hang pictures or artwork on the outside. Include a window for natural light and a view.
Alternative Uses: When not in use, the kennel can double as a storage unit or workbench. Add shelves or hooks for tools and equipment.
Eco-Friendly Building Tips
Use reclaimed wood for the kennel frame. Old pallets or leftover lumber work great. Sand them down to avoid splinters.
For the flooring, consider recycled rubber mats. They are durable, easy to clean, and provide comfort for your dog.
Repurpose old blankets or towels for bedding. They can be washed easily and keep your dog cozy.
Use non-toxic paint or sealant to protect the wood. This ensures your dog stays safe from harmful chemicals.
Install recycled metal fencing or mesh for ventilation. It allows airflow and keeps your dog secure.
For insulation, use recycled denim or old clothing. It helps maintain a comfortable temperature inside the kennel.
Consider adding a green roof with plants. It provides extra insulation and helps the environment.
Solar-powered lights can illuminate the kennel area. They save energy and are easy to install.
Lastly, use recycled plastic for any additional structures like feeding stations or storage bins. It’s durable and eco-friendly.
Your DIY Dog Kennel Awaits
Building a DIY dog kennel in your garage is a rewarding project. It saves money, gives your dog a cozy space, and lets you customize every detail. Start with a solid plan, gather your materials, and follow the steps carefully. Use sturdy wood, secure fencing, and comfy bedding. Remember to add some toys and a water bowl. Your dog will appreciate the effort, and you'll feel proud of your handiwork. Plus, it's a great way to spend a weekend. So grab your tools, roll up your sleeves, and get started. Your furry friend will thank you with wagging tails and happy barks.
How can I make a comfortable kennel for my dog in the garage?
Use insulated materials to keep it warm in winter and cool in summer. Add a soft bed, some toys, and a water bowl. Make sure there's ventilation.
What materials should I use for building a sturdy kennel?
Plywood or OSB for walls, 2x4s for framing, and metal mesh for windows. These materials are durable and easy to work with.
How do I ensure my dog’s safety in the garage?
Remove any hazardous items like chemicals or sharp tools. Make sure the kennel is secure and can't be easily opened by your dog.
Can I add heating or cooling to the kennel?
Yes, you can use a heated pad for winter and a small fan for summer. Just make sure they are safe for pets and can't be chewed on.
How big should the kennel be?
The kennel should be large enough for your dog to stand, turn around, and lie down comfortably. Measure your dog and add a few extra inches.
What kind of flooring is best for a garage kennel?
Use rubber mats or vinyl flooring. They are easy to clean and comfortable for your dog to lie on.
How can I make the kennel escape-proof?
Use strong locks and reinforce any weak spots. Make sure the walls and roof are securely attached.