
Home>Home & Furniture>Doors & Windows>How to DIY Built-In Bookcase Around Window
Doors & Windows
How to DIY Built-In Bookcase Around Window
Published: August 10, 2024
Learn how to create a stunning DIY built-in bookcase around your window with our step-by-step guide. Transform your space with this functional and stylish home project!
(Many of the links in this article redirect to a specific reviewed product. Your purchase of these products through affiliate links helps to generate commission for Twigandthistle.com, at no extra cost. Learn more)
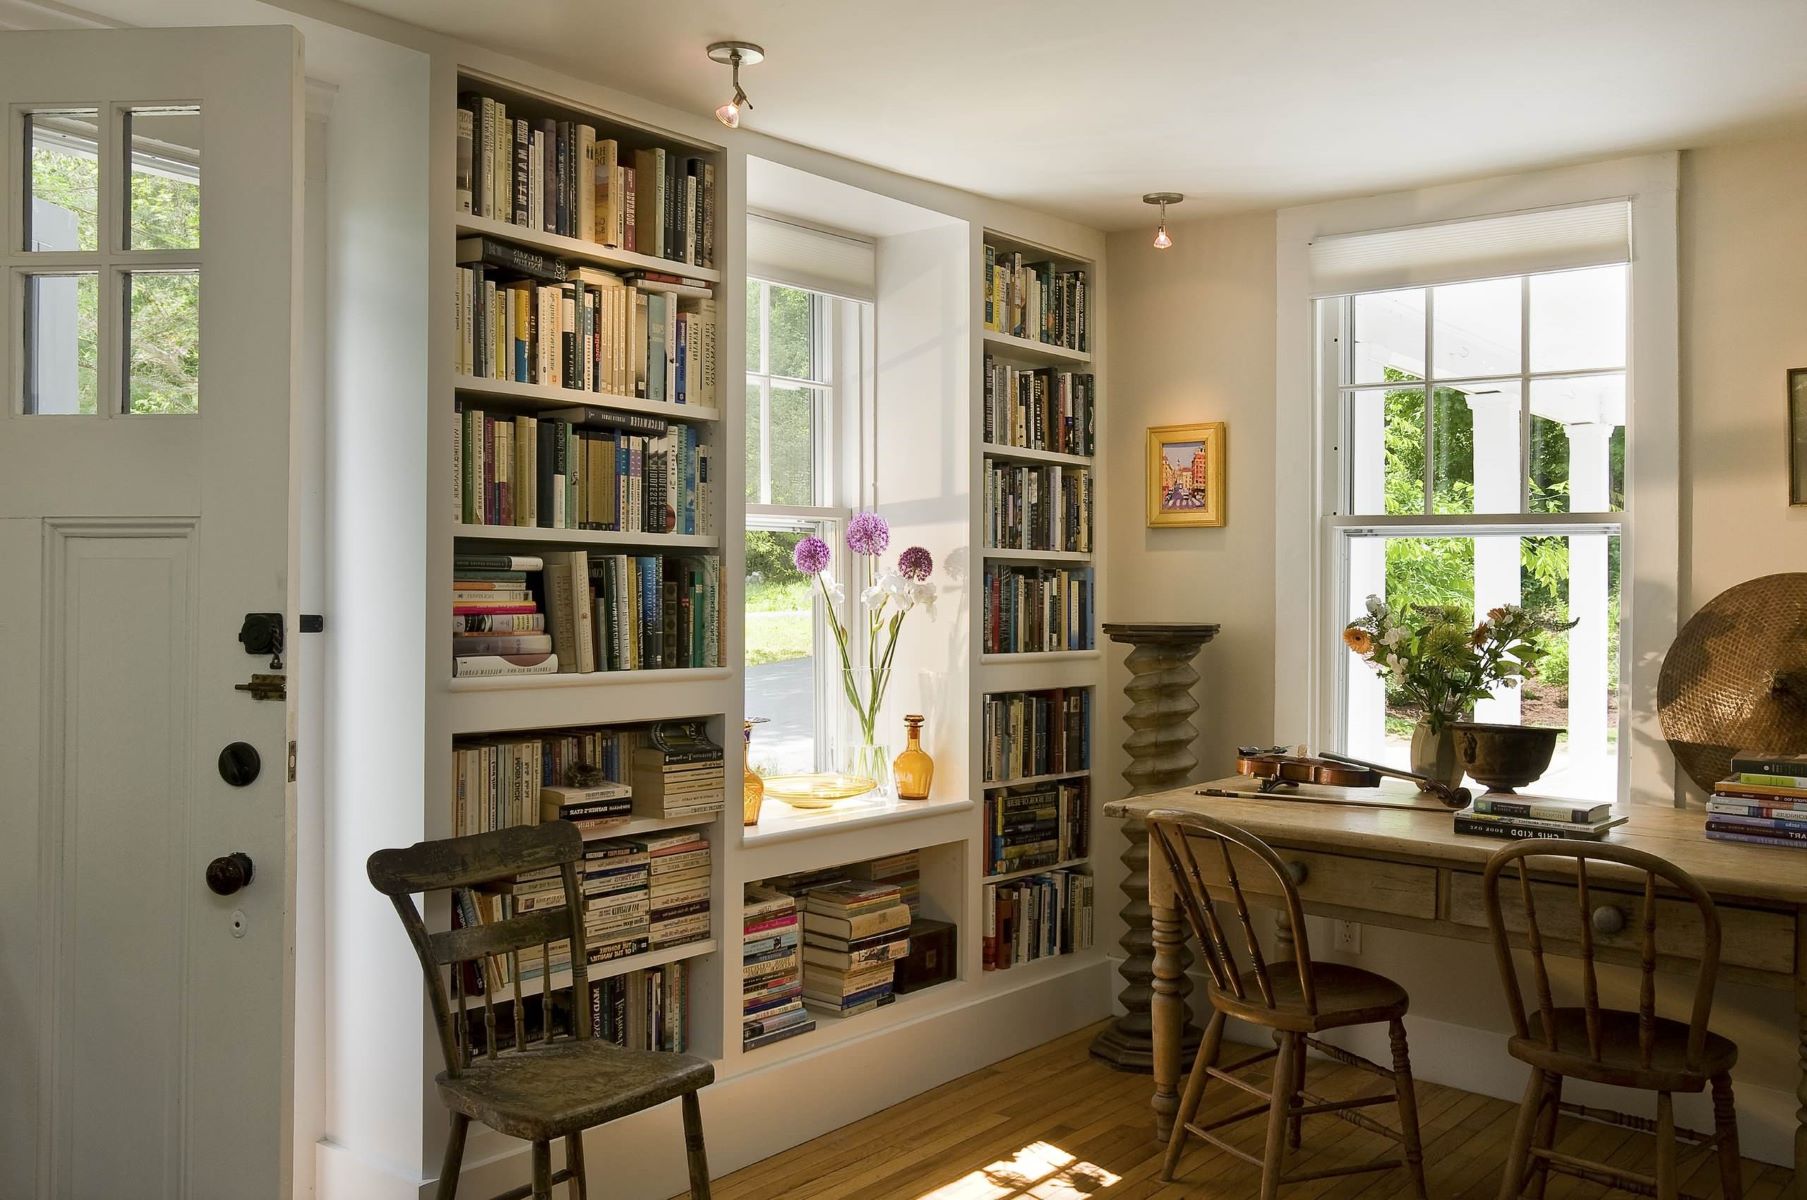
Creating a built-in bookcase around a window can transform any room, adding both functionality and charm. Instead of hunting for a ready-made solution that might not fit perfectly, why not craft your own? Building one yourself allows for customization to match your space and style. Plus, it can be a rewarding project that showcases your skills. Whether you are a seasoned DIY enthusiast or a beginner looking to try something new, this guide will walk you through the steps. Get ready to turn that blank wall into a stunning focal point.
Getting Ready for Your Project
Measure the Space: Use a tape measure to get the exact dimensions of the window and surrounding wall. Write down the width, height, and depth.
Gather Materials: Collect all necessary materials like wood, screws, brackets, and paint. Make sure to have a saw, drill, level, and measuring tape.
Create a Plan: Sketch a rough design of the bookcase. Include shelves, supports, and any decorative elements.
Safety Gear: Wear safety goggles, gloves, and a dust mask. Keep a first aid kit nearby.
Clear the Area: Remove any furniture or items around the window. Lay down a drop cloth to protect the floor.
Cut the Wood: Use a saw to cut wood pieces according to your measurements. Double-check each piece for accuracy.
Pre-Drill Holes: Pre-drill holes in the wood to make assembly easier. This helps prevent the wood from splitting.
Assemble the Frame: Start by building the outer frame of the bookcase. Use screws and brackets for stability.
Install Shelves: Attach shelves inside the frame. Use a level to ensure they are straight.
Secure to Wall: Attach the bookcase frame to the wall using brackets or anchors. Make sure it’s firmly in place.
Paint or Stain: Apply paint or stain to the bookcase. Let it dry completely before placing any books or items.
Final Check: Inspect the bookcase for any loose screws or uneven shelves. Make adjustments as needed.
Gathering Materials and Tools
Materials:
- Plywood Sheets: Used for the main structure of the bookcase.
- Wood Screws: Secure the plywood pieces together.
- Wood Glue: Provides extra strength to the joints.
- Wood Filler: Fills gaps or holes in the wood.
- Primer and Paint: Gives the bookcase a finished look.
- Sandpaper: Smooths the wood surfaces.
- Trim Molding: Adds decorative edges to the bookcase.
- Shelf Brackets: Supports the shelves.
- Caulk: Seals gaps between the bookcase and wall.
Tools:
- Tape Measure: Measures dimensions accurately.
- Circular Saw: Cuts plywood sheets to size.
- Drill: Makes holes for screws and shelf brackets.
- Screwdriver: Tightens screws.
- Paintbrushes or Rollers: Applies primer and paint.
- Level: Ensures shelves are even.
- Stud Finder: Locates wall studs for secure mounting.
- Clamps: Holds pieces together while glue dries.
- Putty Knife: Applies wood filler smoothly.
- Sanding Block: Holds sandpaper for easy sanding.
Required Skills and Time
Skill Level: Intermediate
Time Required: 2-3 days
- Planning and Measuring: 2-3 hours
- Cutting Wood: 4-5 hours
- Assembling Frame: 3-4 hours
- Installing Shelves: 2-3 hours
- Painting/Staining: 6-8 hours
- Final Touches: 1-2 hours
Step-by-Step Guide
Measure the Space
- Measure the width and height of the window.
- Measure the wall space on both sides of the window.
Plan the Design
- Sketch the design on paper.
- Decide on the number of shelves and their spacing.
Gather Materials
- Plywood or MDF for shelves and sides.
- Wood screws, nails, and wood glue.
- Paint or stain, primer, and brushes.
- Sandpaper and wood filler.
Cut the Wood
- Cut the plywood or MDF to the desired shelf lengths.
- Cut vertical side pieces to the height of the window.
Assemble the Frame
- Attach the vertical side pieces to the wall using screws.
- Ensure they are level and secure.
Install the Shelves
- Attach horizontal shelves to the vertical sides.
- Use wood glue and screws for stability.
- Ensure shelves are level.
Add Trim and Molding
- Cut and attach trim around the edges for a finished look.
- Use wood filler to cover nail holes.
Sand and Paint
- Sand all surfaces to smooth any rough edges.
- Apply primer, then paint or stain as desired.
Final Touches
- Allow paint or stain to dry completely.
- Decorate with books and accessories.
Helpful Tips and Tricks
Measure Twice, Cut Once: Always double-check your measurements before cutting any wood. This saves time and materials.
Use a Level: Ensure your bookcase is perfectly straight. A level helps avoid a crooked final product.
Pre-Drill Holes: Prevent wood from splitting by pre-drilling holes before inserting screws.
Paint Before Assembly: Painting or staining pieces before putting them together makes the process cleaner and easier.
Secure to Studs: Attach the bookcase to wall studs for stability. Use a stud finder to locate them.
Adjustable Shelves: Consider using adjustable shelf brackets. This allows flexibility for different book sizes.
Trim for a Finished Look: Adding trim around the edges gives a polished, professional appearance.
Common Mistakes to Avoid:
Skipping the Primer: If painting, always use a primer first. It helps paint adhere better and last longer.
Ignoring Weight Limits: Overloading shelves can cause sagging or collapse. Use sturdy materials and support brackets.
Not Sanding: Skipping sanding can result in rough edges and splinters. Smooth surfaces make a big difference.
Alternatives for Materials or Methods:
Plywood vs. MDF: Plywood is stronger but more expensive. MDF is cheaper and smoother but less durable.
Pocket Holes vs. Brackets: Pocket holes create a cleaner look, while brackets are easier for beginners.
Prefabricated Shelves: If building from scratch feels overwhelming, consider using prefabricated shelves and customizing them.
Estimating the Cost
Lumber: $150-$200. Use plywood for shelves and 2x4s for framing.
Paint: $30-$50. Choose a primer and paint combo.
Wood screws: $10-$15. Get a variety pack.
Wood filler: $5-$10. Fill gaps and holes.
Sandpaper: $5-$10. Smooth out rough edges.
Caulk: $5-$10. Seal gaps between the bookcase and wall.
Paintbrushes: $10-$20. Get a set with different sizes.
Level: $10-$15. Ensure shelves are straight.
Measuring tape: $5-$10. Measure twice, cut once.
Saw: $50-$100. A circular saw works well.
Drill: $50-$100. Essential for assembling.
Budget-friendly alternatives:
- Use MDF instead of plywood: $100-$150.
- Borrow tools from friends or rent: $20-$30.
- Buy paint rollers instead of brushes: $5-$10.
Total cost: $330-$550. Budget-friendly: $230-$380.
Different Variations and Customizations
Materials: Instead of traditional wood, consider using plywood for a more affordable option or MDF for a smoother finish. For a rustic look, reclaimed wood adds character. Metal brackets can provide industrial vibes.
Colors: Paint the bookcase in bright colors like teal or yellow for a fun, lively feel. For a classic look, use neutral tones such as white, beige, or gray. Stain the wood to highlight its natural grain.
Styles: For a modern touch, go with clean lines and minimalistic design. Add crown molding for a traditional look. Incorporate open shelving for a contemporary feel or glass doors for an elegant touch.
Lighting: Install LED strip lights under each shelf for a dramatic effect. Use recessed lighting above the bookcase to highlight your books and decor.
Storage Options: Add cabinets at the bottom for hidden storage. Use adjustable shelves to accommodate different book sizes. Incorporate drawers for extra functionality.
Decorative Elements: Add decorative trim or wainscoting to enhance the design. Use decorative brackets or corbels for added flair. Incorporate built-in seating under the window for a cozy reading nook.
Hardware: Choose brass or bronze handles for a vintage look. Use sleek, modern handles for a contemporary feel. Opt for hidden hinges for a seamless appearance.
Back Panel: Use beadboard for a cottage-style look. Consider wallpaper or fabric for a unique background. Paint the back panel a contrasting color to make the shelves pop.
Shelving: Mix open and closed shelving for variety. Use floating shelves for a modern touch. Add corner shelves to maximize space.
Personal Touches: Incorporate family photos, artwork, or souvenirs to make the space uniquely yours. Use plants to add a touch of nature. Add bookends or decorative items to personalize the shelves.
Eco-Friendly Tips
Reclaimed wood can be a great choice for building a bookcase. Look for old pallets, barn wood, or even wood from old furniture. This not only saves trees but also gives your bookcase a unique, rustic look.
Eco-friendly paint is another good option. Choose paints with low or zero VOCs (volatile organic compounds). These paints are better for your health and the environment.
Bamboo is a sustainable material that grows quickly. It's strong and can be used for shelves or trim.
Recycled metal brackets can support your shelves. Check local thrift stores or salvage yards for these.
Natural finishes like beeswax or linseed oil can protect the wood without harmful chemicals.
Energy-efficient tools can help reduce your carbon footprint. Use hand tools when possible or choose power tools with energy-saving features.
Insulation behind the bookcase can help with energy efficiency. Use eco-friendly insulation materials like recycled denim or cellulose.
LED lighting around the bookcase can save energy. These lights last longer and use less power than traditional bulbs.
Plan your cuts carefully to minimize waste. Measure twice, cut once to avoid mistakes and save materials.
Compost sawdust from your project. Sawdust can be added to compost piles or used as mulch in gardens.
Donate or recycle any leftover materials. Many communities have recycling programs for wood, metal, and other building materials.
Your DIY Masterpiece Awaits
You've got all the tools, materials, and know-how to create a stunning built-in bookcase around your window. Just remember to measure twice, cut once. Take your time with each step, especially when it comes to sanding and painting. Those details make a big difference. If you hit a snag, don’t sweat it. Every project has its hiccups. Just step back, reassess, and keep going. Before you know it, you’ll have a custom piece that not only adds storage but also enhances your room’s charm. Plus, you’ll have the satisfaction of knowing you built it yourself. So, roll up those sleeves, grab your tools, and get started. Your dream bookcase is just a few steps away. Happy building!
How do I measure for a built-in bookcase around a window?
Measure the width and height of the window, then measure the wall space around it. Make sure to account for trim and molding.
What materials will I need?
You’ll need wood or plywood for the shelves, brackets, screws, wood glue, paint or stain, and tools like a saw, drill, and level.
How do I ensure the bookcase is level?
Use a level when installing the shelves and brackets. Check each shelf as you go to make sure everything stays straight.
Can I customize the design?
Absolutely! You can add cabinets at the bottom, crown molding at the top, or even lighting to highlight your books.
How do I attach the bookcase to the wall?
Secure the brackets to the studs in the wall using screws. This ensures the bookcase is sturdy and can hold the weight of your books.
What kind of finish should I use?
You can paint or stain the wood to match your room’s decor. Make sure to use a sealant to protect the wood.
How long will this project take?
Depending on your skill level and the complexity of the design, it could take a weekend or a few days.