
Home>Home & Furniture>Doors & Windows>How to Create a Spooky DIY Halloween Window Display
Doors & Windows
How to Create a Spooky DIY Halloween Window Display
Published: August 14, 2024
Transform your home with a spooky DIY Halloween window display! Discover creative ideas, step-by-step guides, and tips to make your windows hauntingly festive.
(Many of the links in this article redirect to a specific reviewed product. Your purchase of these products through affiliate links helps to generate commission for Twigandthistle.com, at no extra cost. Learn more)
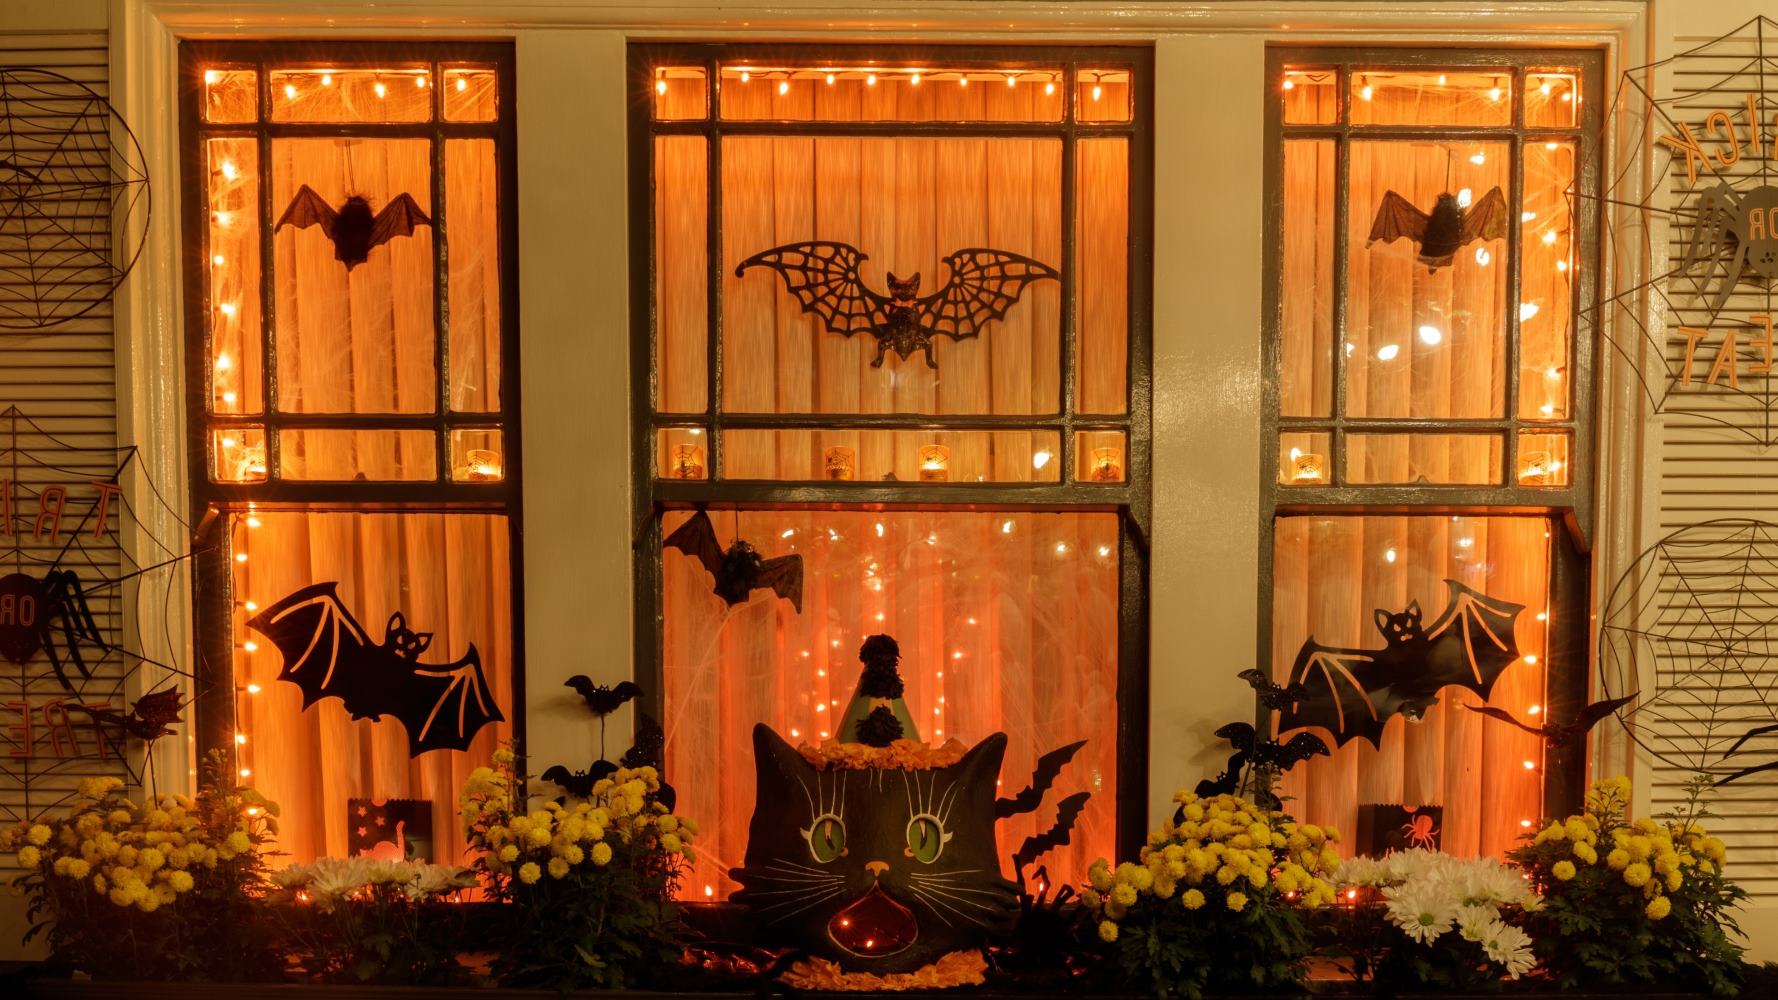
Halloween is just around the corner! Time to get creative with a spooky DIY window display. Transforming your window into a chilling scene doesn't require a lot of time or money. With some basic supplies and a bit of imagination, you can create something that will thrill trick-or-treaters and passersby alike. Think eerie silhouettes, creepy lights, and haunting decorations. This is a chance to let your inner artist shine, creating a festive atmosphere right from your own home. Ready to get started? Let's dive into making your window the talk of the neighborhood this Halloween!
Getting Ready for Your Halloween Window Display
Gather Materials: Collect black construction paper, scissors, tape, string lights, fake cobwebs, and spooky decals.
Safety First: Wear gloves when handling sharp tools. Ensure the ladder is stable if you need to reach high places.
Clear the Area: Remove any items from the window sill. Clean the window to ensure decorations stick well.
Measure and Cut: Measure the window dimensions. Cut construction paper to fit the window panes.
Create Designs: Draw and cut out spooky shapes like bats, ghosts, and pumpkins from the black paper.
Set Up Workspace: Lay out all materials on a table. Ensure good lighting to see what you're doing.
Test Lights: Plug in string lights to check if they work. Replace any faulty bulbs.
Plan Layout: Arrange your cutouts and lights on the table to visualize the final look.
Attach Decorations: Use tape to stick paper cutouts to the window. Drape fake cobwebs around the edges.
Hang Lights: Secure string lights around the window frame using tape or hooks.
Final Check: Step back and ensure everything looks balanced. Adjust as needed.
Essential Supplies and Equipment
- Black Construction Paper: Used to cut out spooky shapes like bats, cats, and witches.
- Scissors: Essential for cutting out shapes from the construction paper.
- Tape: Helps to stick the cut-out shapes onto the window.
- String Lights: Adds an eerie glow to the display, making it visible at night.
- Fake Spider Webs: Creates a creepy, abandoned look.
- Plastic Spiders: Enhances the spider web effect.
- Glow-in-the-Dark Paint: Used to add ghostly effects to the window.
- Markers: Useful for drawing details on the cut-out shapes.
- Cardboard: Acts as a sturdy base for larger decorations.
- Hot Glue Gun: Secures heavier items like plastic spiders and cardboard cut-outs.
- Window Markers: Allows for drawing directly on the glass, adding extra spooky details.
- Blackout Curtains: Provides a dark background to make the decorations pop.
- Candles or LED Candles: Adds a flickering, haunted house vibe.
- Halloween Stickers: Quick and easy way to add more spooky elements.
- Ladder or Step Stool: Helps reach higher parts of the window for decorating.
Required Skills and Time Commitment
Skill Level: Beginner
Time Required: 2-4 hours
Gather Materials: 30 minutes
- Black construction paper
- Scissors
- Tape
- String lights
- Window markers
Design Cutouts: 1 hour
- Draw spooky shapes like bats, ghosts, and pumpkins on black paper.
- Cut out the shapes carefully.
Arrange Cutouts: 30 minutes
- Tape cutouts to the window in a spooky pattern.
Add Lights: 30 minutes
- Hang string lights around the window frame.
Final Touches: 30 minutes
- Use window markers to draw spider webs or other spooky designs.
Detailed Guide to Creating Your Spooky Display
Gather Materials:
- Black construction paper
- Scissors
- Tape or adhesive putty
- String lights (orange or purple)
- Fake cobwebs
- Halloween-themed window clings
- Markers or paint (optional)
Clean the Window:
- Wipe down the window to ensure a clean surface for decorations.
Create Silhouettes:
- Draw spooky shapes (bats, witches, ghosts) on black construction paper.
- Cut out the shapes carefully.
Arrange Silhouettes:
- Tape or use adhesive putty to stick the silhouettes on the window.
- Place larger shapes in the center, smaller ones around the edges.
Add String Lights:
- Drape string lights around the window frame.
- Secure lights with tape or hooks.
Apply Fake Cobwebs:
- Stretch fake cobwebs across the window.
- Attach cobwebs to the corners and edges.
Place Window Clings:
- Stick Halloween-themed window clings on the glass.
- Arrange clings to complement the silhouettes.
Optional: Add Details:
- Use markers or paint to add extra details on the window.
- Draw spider webs, cracks, or other spooky elements.
Turn on Lights:
- Plug in the string lights to illuminate the display.
- Adjust lights for the best effect.
Final Touches:
- Step back and check the overall look.
- Make any necessary adjustments to silhouettes, lights, or cobwebs.
Helpful Hints for a Spooktacular Window
Use black construction paper to cut out spooky shapes like bats, witches, and ghosts. Attach them to the window with double-sided tape for easy removal. Add LED candles or string lights behind the shapes to create eerie shadows.
Common mistakes include using regular tape, which can leave residue, and overloading the window with too many decorations, making it look cluttered.
For alternatives, try using black garbage bags instead of construction paper for larger shapes. Instead of LED candles, use fairy lights for a softer glow. If you don't have string lights, consider using glow-in-the-dark paint to outline your shapes.
Budgeting for Your Halloween Project
Black construction paper for silhouettes: $5
LED string lights: $10
Fake spider webs: $3
Plastic spiders: $2
Window clings: $5
Tape: $2
Scissors: $3
Markers: $2
Cardboard for cutouts: $5
Paint: $5
Brushes: $3
Total cost: $45
Budget-friendly alternatives:
Use old newspapers instead of construction paper.
Replace LED lights with battery-operated tea lights: $5
Make spider webs from cotton balls: $1
Draw spiders on paper instead of buying plastic ones.
Create window clings using clear plastic sheets and markers.
Use leftover paint from other projects.
Total cost with alternatives: $23
Personalizing Your Spooky Window
Alternative Materials: Instead of paper cutouts, use felt or fabric for a more durable display. Swap out plastic decorations for wooden or metal ones to add a rustic touch. Use LED lights instead of traditional bulbs for energy efficiency and safety.
Colors: Go beyond the typical orange and black. Try purple and green for a witchy vibe. Use white and silver for a ghostly, eerie look. Incorporate red for a blood-curdling effect.
Styles: Create a vintage Halloween display with old-fashioned decorations like antique lanterns and Victorian silhouettes. Opt for a modern look with sleek, minimalist designs and geometric shapes. Go for a nature-inspired theme using twigs, leaves, and pumpkins.
Themes: Choose a haunted house theme with spooky silhouettes of windows, doors, and ghosts. Create a graveyard scene with tombstones, skeletons, and bats. Design a witch’s lair with cauldrons, broomsticks, and black cats.
Interactive Elements: Add motion sensors to make decorations move or light up when someone walks by. Use sound effects like creaking doors, howling wolves, or eerie music. Incorporate fog machines for a truly spooky atmosphere.
Personal Touches: Include family photos dressed in Halloween costumes. Use handwritten signs or messages for a personal touch. Create custom decorations with your kids' artwork or crafts.
Eco-Friendly Ideas for Halloween Decorations
Reuse old sheets or fabric to create ghostly figures. Cut them into spooky shapes and hang them with string. Recycle cardboard boxes to make silhouettes of bats, witches, or pumpkins. Paint them black and tape them to the window.
Use LED lights instead of traditional bulbs. They consume less energy and last longer. Collect fallen branches from your yard to create a creepy tree silhouette. Spray paint them black and attach them to the window frame.
Repurpose jars and bottles as candle holders. Fill them with LED tea lights for a safe, flickering effect. Create spider webs using old cotton balls or yarn. Stretch them across the window for a spooky look.
Make use of old newspapers or magazines to create paper mache pumpkins or skulls. Paint them in eerie colors and place them on the windowsill. Utilize old clothes to create scarecrows or other spooky figures. Stuff them with leaves or old fabric scraps.
Opt for natural decorations like gourds, cornstalks, or hay bales. They can be composted after Halloween. Avoid plastic decorations that can’t be recycled. Choose biodegradable materials whenever possible.
Your Spooky Masterpiece Awaits
You've got all the tools and tips to create a spooky Halloween window display. From creepy silhouettes to glowing eyes, your window will be the talk of the neighborhood. Remember, creativity is key. Mix and match materials like cardboard, tissue paper, and LED lights to bring your vision to life. Don't forget to add some sound effects or fog for that extra chill factor. Most importantly, have fun with it. Halloween is all about embracing the spooky and the fun. So, gather your supplies, get crafting, and watch your window transform into a haunting masterpiece. Happy Halloween!
How do I make a simple Halloween window display?
Start with black construction paper to cut out spooky shapes like bats, ghosts, and spiders. Use tape or adhesive putty to stick them on the window. Add some string lights for an eerie glow.
What materials do I need?
You'll need construction paper, scissors, tape or adhesive putty, string lights, and maybe some fake cobwebs or plastic spiders for extra spookiness.
How can I make my display look scarier?
Use red LED lights to mimic blood, add fake cobwebs and plastic spiders, and play with shadows by placing a light source behind your cutouts.
Can I involve my kids in making the display?
Absolutely! Kids can help cut out shapes, stick them on the window, and even come up with their own spooky designs. Just supervise them with scissors and small parts.
How do I make the display visible at night?
Use string lights or LED candles to illuminate your window from behind. This will make your spooky shapes stand out in the dark.
What if I don't have construction paper?
You can use old newspapers, magazines, or even cardboard. Just paint them black or any dark color to create the same spooky effect.
How do I remove the display after Halloween?
Gently peel off the tape or adhesive putty. If any residue remains, use a bit of window cleaner and a cloth to wipe it away.