
Home>Home & Furniture>Doors & Windows>How to Create a DIY Window Herb Garden
Doors & Windows
How to Create a DIY Window Herb Garden
Published: August 14, 2024
Learn how to create a DIY window herb garden with our step-by-step guide. Perfect for any kitchen, this project brings fresh herbs and greenery into your home effortlessly.
(Many of the links in this article redirect to a specific reviewed product. Your purchase of these products through affiliate links helps to generate commission for Twigandthistle.com, at no extra cost. Learn more)
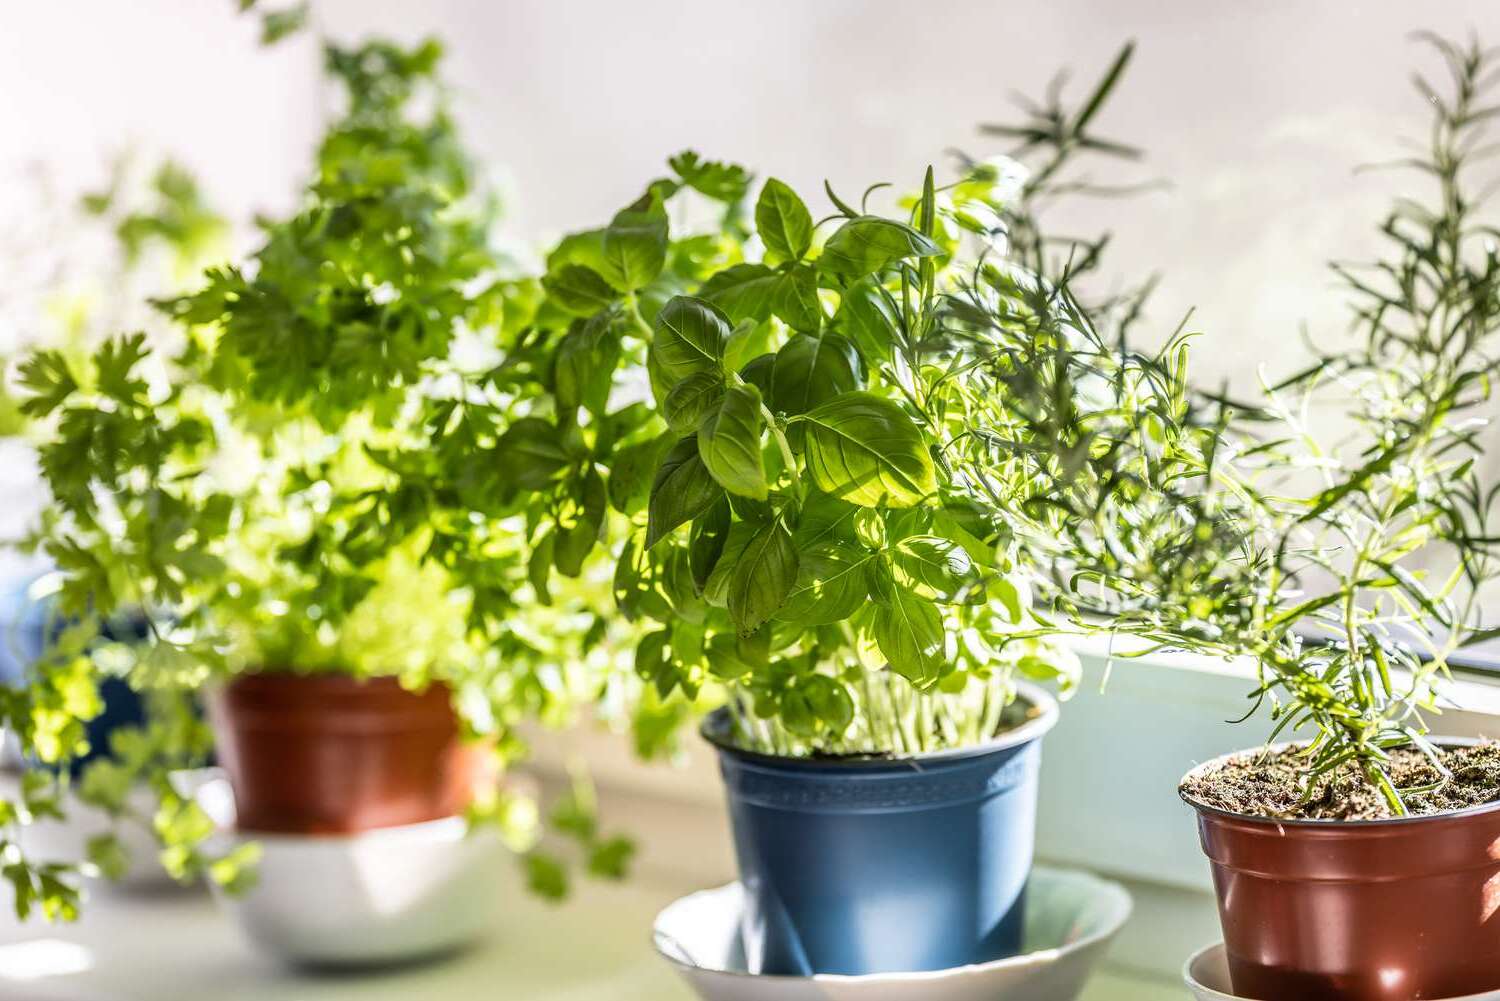
Growing your herbs at home can be a fun and rewarding project. A window herb garden brightens up your space and provides fresh, flavorful ingredients right from your kitchen. It's an easy way to start gardening, even if you don't have much outdoor space. Plus, having herbs within arm's reach makes cooking more enjoyable. Whether it's basil for pasta, mint for tea, or parsley for garnish, you'll always have fresh herbs on hand. Creating your own window herb garden is simple, cost-effective, and perfect for both beginners and experienced gardeners. Let's get started on this green journey!
Getting Ready for Your Herb Garden
Choose Your Herbs: Decide which herbs you want to grow. Popular choices include basil, mint, parsley, and thyme.
Gather Supplies: You'll need pots, potting soil, seeds or seedlings, a watering can, and labels.
Set Up Your Workspace: Find a clean, flat surface to work on. Lay down newspaper or a plastic sheet to catch any soil spills.
Safety First: Wear gloves to protect your hands from dirt and any sharp tools. Make sure your workspace is well-ventilated.
Prepare Pots: Ensure pots have drainage holes. If not, drill some to prevent waterlogging.
Fill Pots with Soil: Fill each pot with potting soil, leaving about an inch from the top.
Plant Seeds or Seedlings: Follow the instructions on the seed packet or plant seedlings at the same depth they were in their original containers.
Label Each Pot: Use labels to mark which herb is in each pot. This helps keep track of your plants.
Water Plants: Water each pot thoroughly but avoid overwatering. The soil should be moist, not soggy.
Place in Window: Position your herb garden in a sunny window. Most herbs need at least 6 hours of sunlight daily.
Regular Maintenance: Check soil moisture regularly, water as needed, and trim herbs to encourage growth.
What You Need to Get Started
Herb Seeds or Seedlings: Choose your favorite herbs like basil, mint, or parsley. Seeds take longer to grow, while seedlings give you a head start.
Planter Boxes or Pots: These hold the soil and herbs. Make sure they fit on your windowsill and have drainage holes to prevent waterlogging.
Potting Soil: Use a high-quality potting mix. It provides the necessary nutrients and good drainage for your herbs.
Watering Can or Spray Bottle: Helps keep the soil moist without overwatering. A spray bottle is great for delicate seedlings.
Small Shovel or Trowel: Useful for filling pots with soil and planting seeds or seedlings.
Labels or Markers: Identify each herb to avoid confusion. You can use popsicle sticks or store-bought plant labels.
Scissors or Pruning Shears: Trim herbs to encourage growth and prevent them from becoming too leggy.
Tray or Saucer: Place under pots to catch excess water and protect your windowsill from damage.
Fertilizer: Optional but beneficial. Use a balanced, water-soluble fertilizer to give your herbs an extra boost.
Grow Light: If your window doesn’t get enough sunlight, a grow light ensures your herbs get the light they need to thrive.
How Much Time and Skill Are Needed?
Skill Level: Beginner
Time Required: 2-3 hours
Steps:
Gather Materials: 15 minutes
- Small pots or containers
- Potting soil
- Herb seeds or seedlings
- Watering can
- Labels (optional)
Prepare Containers: 10 minutes
- Fill pots with soil
- Ensure proper drainage
Plant Herbs: 20 minutes
- Place seeds or seedlings in soil
- Cover lightly with more soil
Label Pots: 5 minutes (optional)
- Write herb names on labels
- Stick labels in pots
Water Plants: 5 minutes
- Water thoroughly but not excessively
Place in Window: 5 minutes
- Choose a sunny window
- Arrange pots for optimal sunlight
Ongoing Care: 1-2 hours per week
- Water regularly
- Trim herbs as needed
Follow These Steps to Create Your Garden
Gather Materials:
- Small pots or containers with drainage holes
- Potting soil
- Herb seeds or seedlings
- Watering can or spray bottle
- Labels or markers
- Tray to catch excess water
Choose Herbs:
- Select herbs like basil, mint, parsley, thyme, or chives.
Prepare Containers:
- Fill each pot with potting soil, leaving about an inch from the top.
Plant Seeds or Seedlings:
- If using seeds, follow the planting depth instructions on the packet.
- For seedlings, dig a small hole, place the seedling inside, and cover roots with soil.
Label Pots:
- Use labels or markers to identify each herb.
Water Plants:
- Gently water the soil until it’s moist but not soggy.
- Place pots on a tray to catch any excess water.
Place in Window:
- Position the pots in a sunny window that gets at least 6 hours of sunlight daily.
Care for Herbs:
- Water regularly, keeping soil moist.
- Rotate pots occasionally to ensure even sunlight exposure.
- Trim herbs as needed to encourage growth.
Harvest:
- Once herbs are mature, snip leaves as needed for cooking or garnishing.
Helpful Tips and Tricks
Choose the Right Herbs: Pick herbs that thrive indoors like basil, mint, parsley, or chives.
Use Proper Containers: Ensure pots have drainage holes to prevent root rot.
Good Soil: Use high-quality potting mix, not garden soil.
Sunlight: Place your garden where it gets 6-8 hours of sunlight daily.
Watering: Water when the top inch of soil feels dry. Avoid overwatering.
Labeling: Label each pot to remember which herb is which.
Rotate Pots: Rotate pots every few days for even sunlight exposure.
Pruning: Regularly trim herbs to encourage growth and prevent legginess.
Common Mistakes to Avoid:
- Using garden soil instead of potting mix.
- Overwatering or underwatering.
- Not providing enough sunlight.
- Ignoring pests like aphids or spider mites.
Alternatives:
- Instead of traditional pots, use mason jars with pebbles at the bottom for drainage.
- If sunlight is limited, use grow lights to supplement.
How Much Will This Project Cost?
Materials:
- Herb Seeds or Seedlings: $10-$20
- Potting Soil: $5-$10 per bag
- Small Pots or Containers: $1-$5 each (need 5-6)
- Tray or Saucers: $1-$3 each (need 5-6)
- Labels: $2-$5
Tools:
- Small Shovel or Trowel: $5-$10
- Watering Can or Spray Bottle: $5-$10
Total Cost: $40-$90
Budget-Friendly Alternatives:
- Reuse Containers: Old jars, cans, or plastic bottles can replace store-bought pots.
- DIY Labels: Use popsicle sticks or cut-up plastic containers.
- Watering: Use a recycled spray bottle instead of buying new.
Different Ways to Customize Your Garden
Materials: Instead of traditional clay pots, use mason jars, tin cans, or even teacups for a quirky look. Wooden crates or hanging baskets can also add a rustic charm.
Colors: Paint the containers in bright colors like yellow, blue, or green to make them pop. For a more elegant touch, use metallic paints like gold or silver. Chalkboard paint allows you to label each herb directly on the container.
Styles: For a modern look, use geometric-shaped containers and sleek metal shelves. A vintage style can be achieved with distressed wood and antique-looking pots. Boho enthusiasts might prefer woven baskets and macramé hangers.
Arrangement: Create a tiered garden using stacked shelves or a ladder shelf. Hanging gardens with rope or chain can save space and add visual interest. Vertical gardens using pallets or wall-mounted planters maximize space in small areas.
Lighting: Add LED grow lights if natural light is limited. Fairy lights or string lights can add a cozy ambiance in the evening.
Labels: Use wooden stakes, chalkboard labels, or painted rocks to identify each herb. Engraved metal tags can add a touch of sophistication.
Watering System: Install a self-watering system using wicking or drip irrigation to make maintenance easier. Watering globes can also help keep the soil moist.
Additional Features: Incorporate a small trellis for climbing herbs like mint or thyme. Add a miniature scarecrow or garden gnome for a whimsical touch.
Eco-Friendly Gardening Tips
Reuse old containers like mason jars, tin cans, or plastic bottles for planting herbs. Repurpose wooden pallets or scrap wood to build a sturdy frame for the garden. Use organic soil and compost to provide nutrients for the plants. Collect rainwater in a barrel to water the herbs, reducing water waste. Choose heirloom or organic seeds to avoid chemicals and promote biodiversity. Create labels from recycled materials like old popsicle sticks or wine corks. Install energy-efficient LED grow lights if natural light is insufficient. Upcycle old fabric or burlap sacks to make plant hangers or liners. Use natural pest control methods like neem oil or companion planting to keep herbs healthy.
Your Green Thumb Adventure Awaits
Creating a DIY window herb garden is a rewarding project. You get fresh herbs, a touch of nature, and a sense of accomplishment. Start with the right containers and soil, then choose herbs that thrive indoors like basil, mint, and parsley. Remember to place your garden in a sunny spot and water regularly. Don't forget to prune your herbs to encourage growth. If you face any issues, like pests or yellowing leaves, tackle them early. With a bit of care, your herbs will flourish. Enjoy the process and the fresh flavors in your cooking. Happy gardening!
What supplies do I need to start a window herb garden?
You'll need small pots, herb seeds or seedlings, potting soil, a watering can, and a sunny window. Optional items include plant labels and a small trowel.
How much sunlight do herbs need?
Most herbs need at least 6 hours of sunlight daily. A south-facing window usually works best. If you don't have enough natural light, consider using grow lights.
How often should I water my herbs?
Water when the top inch of soil feels dry. Overwatering can lead to root rot, so make sure your pots have drainage holes.
Can I grow herbs from kitchen scraps?
Yes, some herbs like basil, mint, and green onions can be regrown from cuttings or scraps. Place them in water until roots form, then transfer to soil.
What are the easiest herbs to grow indoors?
Basil, mint, parsley, chives, and thyme are great for beginners. They're hardy and adapt well to indoor conditions.
How do I prevent pests in my indoor herb garden?
Keep an eye out for aphids, spider mites, and whiteflies. Use a mild soap solution to spray affected plants, and make sure there's good air circulation.
Can I use regular garden soil for my indoor herbs?
It's better to use potting soil because it's lighter and drains well. Garden soil can be too dense and may contain pests or diseases.