
Home>Home & Furniture>Doors & Windows>How to Build DIY Window Security Bars
Doors & Windows
How to Build DIY Window Security Bars
Published: August 27, 2024
Learn how to build DIY window security bars with our step-by-step guide. Enhance your home security affordably and effectively with these easy-to-follow instructions.
(Many of the links in this article redirect to a specific reviewed product. Your purchase of these products through affiliate links helps to generate commission for Twigandthistle.com, at no extra cost. Learn more)
Keeping your home safe is important, and one way to do that is by adding window security bars. These bars can be a simple and effective way to deter burglars. Building your own security bars might sound challenging, but with some basic tools and materials, you can do it yourself. This guide will walk you through the process step-by-step. By making your own, you can customize the bars to fit your windows perfectly and save money compared to buying pre-made options. Roll up your sleeves, and let’s get started on making your home more secure!
Getting Ready for the Project
Measure Windows: Use a tape measure to get the exact dimensions of your windows. Write down the width and height.
Choose Materials: Decide on the type of metal bars you want. Steel or iron are good choices. Make sure they are strong enough to provide security.
Gather Tools: You will need a drill, metal saw, measuring tape, level, screws, and safety gear like gloves and goggles.
Safety Gear: Wear gloves to protect your hands and goggles to shield your eyes from metal shavings.
Workspace Setup: Clear an area where you can work comfortably. Make sure it is well-lit and has enough space for your tools and materials.
Cut Metal Bars: Use a metal saw to cut the bars to the measured lengths. Double-check measurements before cutting.
Drill Holes: Mark where the bars will be attached to the window frame. Drill holes in the frame and the ends of the bars.
Pre-fit Bars: Place the bars in position to ensure they fit correctly. Adjust if necessary.
Secure Bars: Use screws to attach the bars to the window frame. Make sure they are tightly secured.
Check Stability: Give the bars a firm shake to ensure they are stable and secure. Adjust screws if needed.
Clean Up: Remove any metal shavings and put away tools. Make sure the area is clean and safe.
Gather Your Materials and Tools
Materials:
- Steel Bars: These provide the main structure and strength for the security bars.
- Mounting Brackets: Used to attach the bars securely to the window frame.
- Screws and Bolts: Essential for fastening the brackets and bars together.
- Primer and Paint: Protects the steel from rust and adds a finished look.
- Measuring Tape: Ensures accurate measurements for cutting and fitting.
- Sandpaper: Smooths out any rough edges on the steel bars.
Tools:
- Drill: Needed for making holes in the window frame for the mounting brackets.
- Saw or Angle Grinder: Cuts the steel bars to the required lengths.
- Wrench or Socket Set: Tightens the screws and bolts securely.
- Paintbrush or Spray Paint: Applies primer and paint to the steel bars.
- Level: Ensures the bars are installed straight and even.
- Safety Gear: Includes gloves, goggles, and ear protection for safe handling of tools and materials.
Required Skills and Time Commitment
Skill Level: Intermediate
Time Required: 4-6 hours
- Measure the window dimensions.
- Cut metal bars to fit.
- Weld or screw bars together.
- Install mounting brackets.
- Secure bars to the window frame.
Tools Needed: Measuring tape, metal saw, welder or drill, screws, mounting brackets.
Building Instructions
Measure the Window:
- Use a tape measure to find the height and width of the window.
- Write down the measurements.
Cut the Metal Bars:
- Use a hacksaw or angle grinder to cut metal bars to fit the window's height.
- Cut horizontal bars to fit the window's width.
Smooth the Edges:
- Use a metal file to smooth any rough edges on the cut bars.
Weld the Bars Together:
- Arrange the vertical and horizontal bars in a grid pattern.
- Use a welding machine to weld the bars at each intersection.
Drill Mounting Holes:
- Drill holes in the window frame where the bars will be mounted.
- Ensure holes are evenly spaced.
Paint the Bars:
- Apply a coat of rust-resistant paint to the bars.
- Let the paint dry completely.
Install the Bars:
- Hold the bars against the window frame.
- Use screws and a drill to secure the bars to the frame.
Check Stability:
- Ensure the bars are firmly attached and do not move.
- Make any necessary adjustments.
Helpful Tips and Tricks
Measure accurately before cutting any materials. Use a level to ensure bars are straight. Pre-drill holes to avoid splitting wood or metal. Use rust-resistant paint to prevent corrosion. Secure bars with tamper-proof screws for added security.
Common mistakes to avoid: Not measuring correctly can lead to ill-fitting bars. Using regular screws makes it easier for intruders to remove them. Forgetting to paint or treat metal can result in rust.
Alternatives: Instead of metal, consider using heavy-duty PVC for a lighter option. For a less permanent solution, use removable security bars that can be taken down when not needed.
Estimating the Costs
Materials:
- Steel bars: $50-$100 (depends on size and quantity)
- Mounting brackets: $10-$20
- Screws and bolts: $5-$10
- Primer and paint: $15-$25
- Concrete anchors: $5-$10
Tools:
- Drill: $50-$100 (if you don't have one)
- Metal saw: $20-$50
- Measuring tape: $5-$10
- Level: $10-$15
- Safety gear (gloves, goggles): $10-$20
Total Cost: $180-$360
Budget-friendly alternatives:
- Recycled metal bars: Check local scrapyards for cheaper options
- Borrow tools: Ask friends or neighbors to save on tool costs
- Basic paint: Use leftover paint from other projects
Different Ways to Customize
Materials: Instead of using steel bars, try aluminum for a lighter option or wrought iron for a more decorative look. PVC pipes can be used for a budget-friendly alternative, though they may not offer the same level of security.
Colors: Paint the bars to match your home's exterior. Use black or white for a classic look, or go bold with bright colors like red or blue. Metallic finishes like bronze or silver can add a touch of elegance.
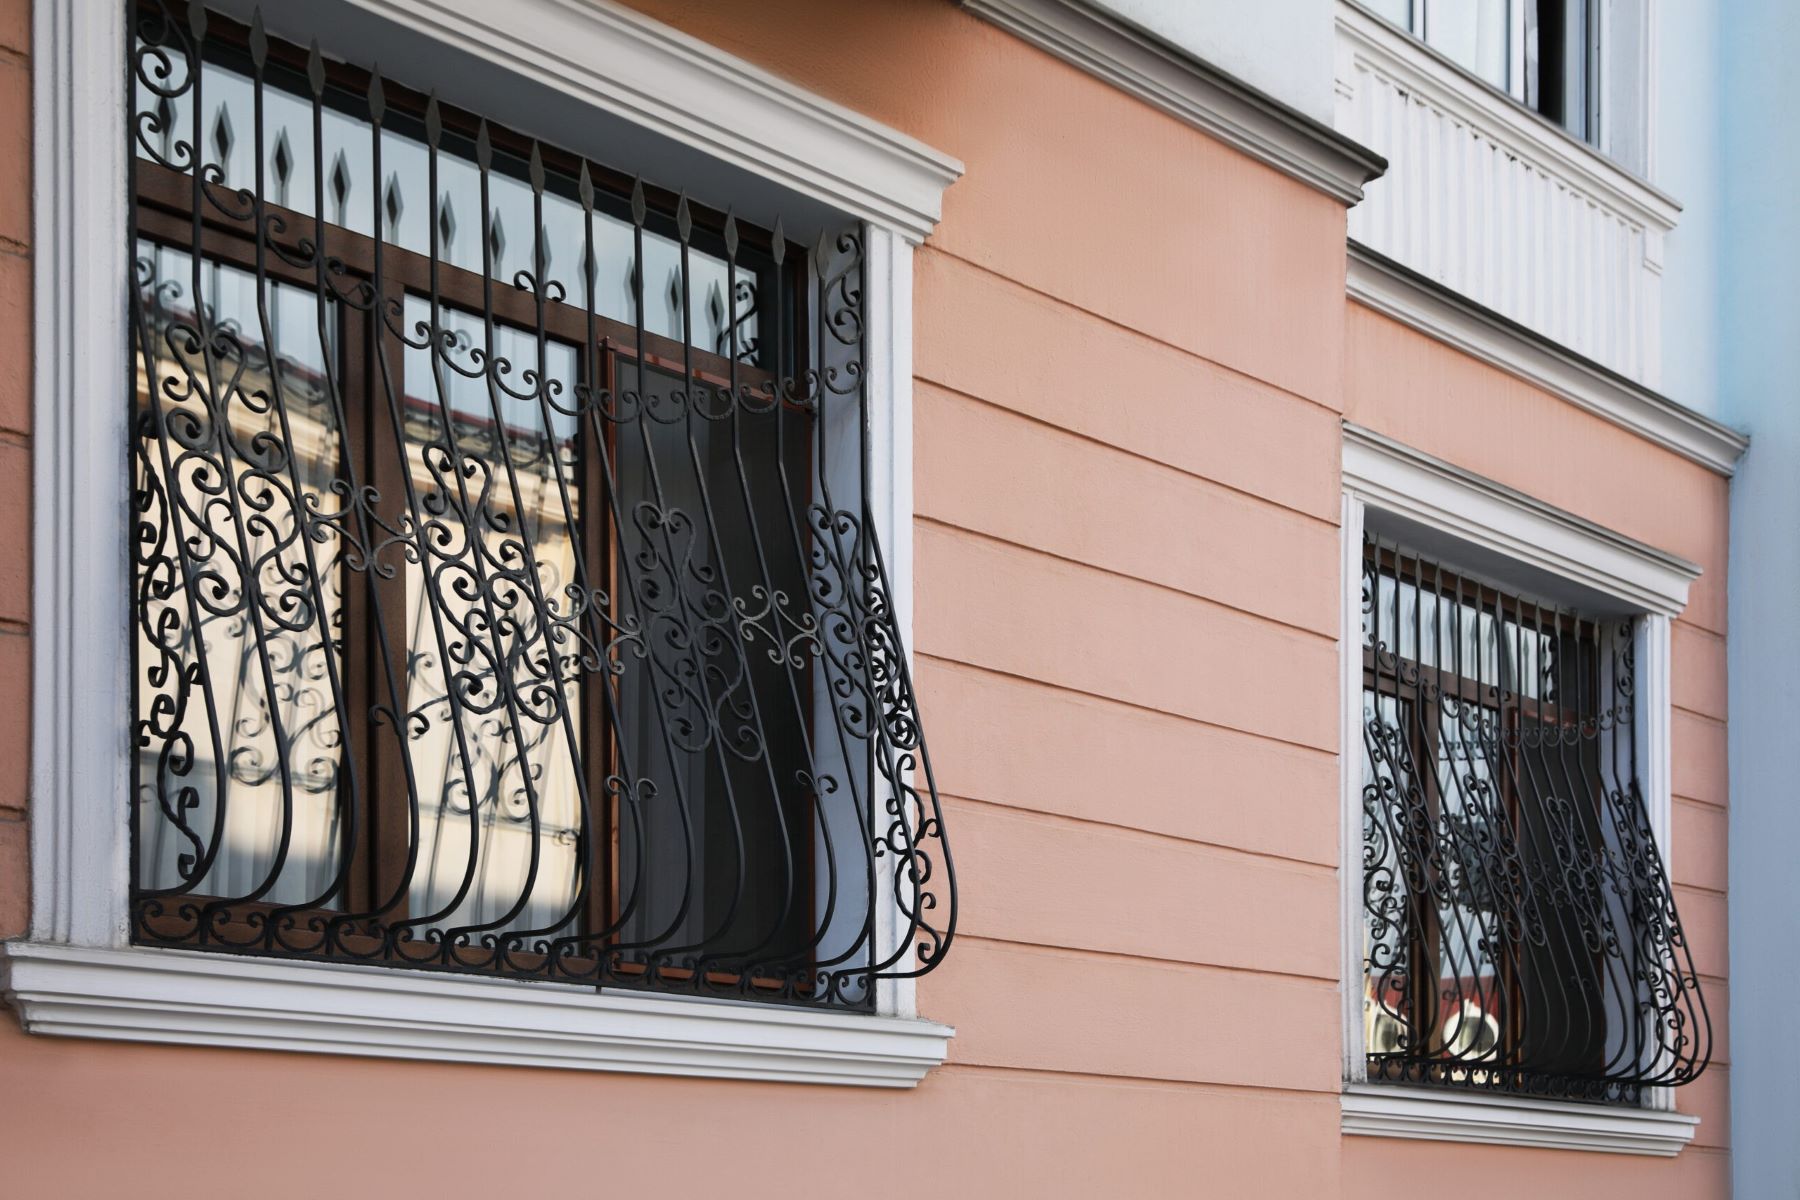
Styles: Opt for straight bars for a minimalist design or curved bars for a more ornate appearance. Decorative elements like scrolls or floral patterns can be added for a unique touch. Consider horizontal bars instead of vertical ones for a modern twist.
Mounting Options: Install the bars inside the window frame for a cleaner look or outside for easier access. Use removable brackets if you want the option to take the bars down occasionally.
Additional Features: Add a hinged section with a lock for emergency exits. Integrate mesh screens to keep bugs out while maintaining security. Install planter boxes at the base for a functional and aesthetic upgrade.
Eco-Friendly Suggestions
Reclaimed Wood: Use old wooden pallets or leftover lumber. Sand and treat the wood to ensure durability.
Recycled Metal: Look for scrap metal at salvage yards. Old bed frames or metal pipes can be repurposed.
Non-Toxic Paint: Choose eco-friendly paint to coat your bars. This reduces harmful chemicals.
Bamboo: Strong and sustainable, bamboo can be an alternative to metal. It’s also lightweight.
Natural Sealants: Use beeswax or linseed oil to protect wood. These are safer for the environment.
Solar-Powered Tools: If you need power tools, opt for solar-powered ones. This saves electricity.
Local Materials: Source materials locally to reduce transportation emissions. This supports local businesses too.
Upcycled Hardware: Use old hinges, screws, or bolts from other projects. This minimizes waste.
Energy-Efficient Lighting: Work during daylight hours to save on electricity. Natural light is best.
Minimal Packaging: Buy materials with minimal or recyclable packaging. This reduces waste.
Securing Your Home with DIY Window Bars
Building DIY window security bars isn't just cost-effective, it's also a rewarding project. You've learned how to measure windows, choose materials, and install bars securely. With these skills, you can protect your home from intruders while adding a personal touch. Remember, safety first—always wear protective gear and double-check measurements. If you hit a snag, don't hesitate to ask for help or consult online resources. Your home is your sanctuary, and these bars will give you peace of mind. So, grab your tools, get to work, and enjoy the satisfaction of a job well done. Happy building!
What materials do I need to build window security bars?
You'll need steel bars, a hacksaw, a drill, screws, brackets, and measuring tape. Some folks also use welding equipment if they want extra strength.
How do I measure my windows for security bars?
Measure the height and width of the window frame. Add a couple of inches to each side so the bars can be securely mounted to the wall or frame.
Can I install window security bars by myself?
Absolutely! With the right tools and a bit of patience, you can install them yourself. Just make sure to follow safety guidelines and double-check your measurements.
Are window security bars safe in case of a fire?
Yes, but it's crucial to install quick-release mechanisms on at least one window in each room. This way, you can easily open the bars from the inside during an emergency.
How do I maintain my window security bars?
Regularly check for rust and loose screws. Clean them with a mild detergent and water, then apply a rust-resistant paint if needed.
Can I paint my window security bars?
Sure thing! Use a rust-resistant primer and paint. This not only makes them look better but also adds an extra layer of protection against the elements.
How much does it cost to build DIY window security bars?
Costs can vary, but generally, you'll spend around $50 to $100 on materials. If you already have some tools, it might be even cheaper.