
Home>Home & Furniture>Doors & Windows>How to Build a Cozy Window Bench
Doors & Windows
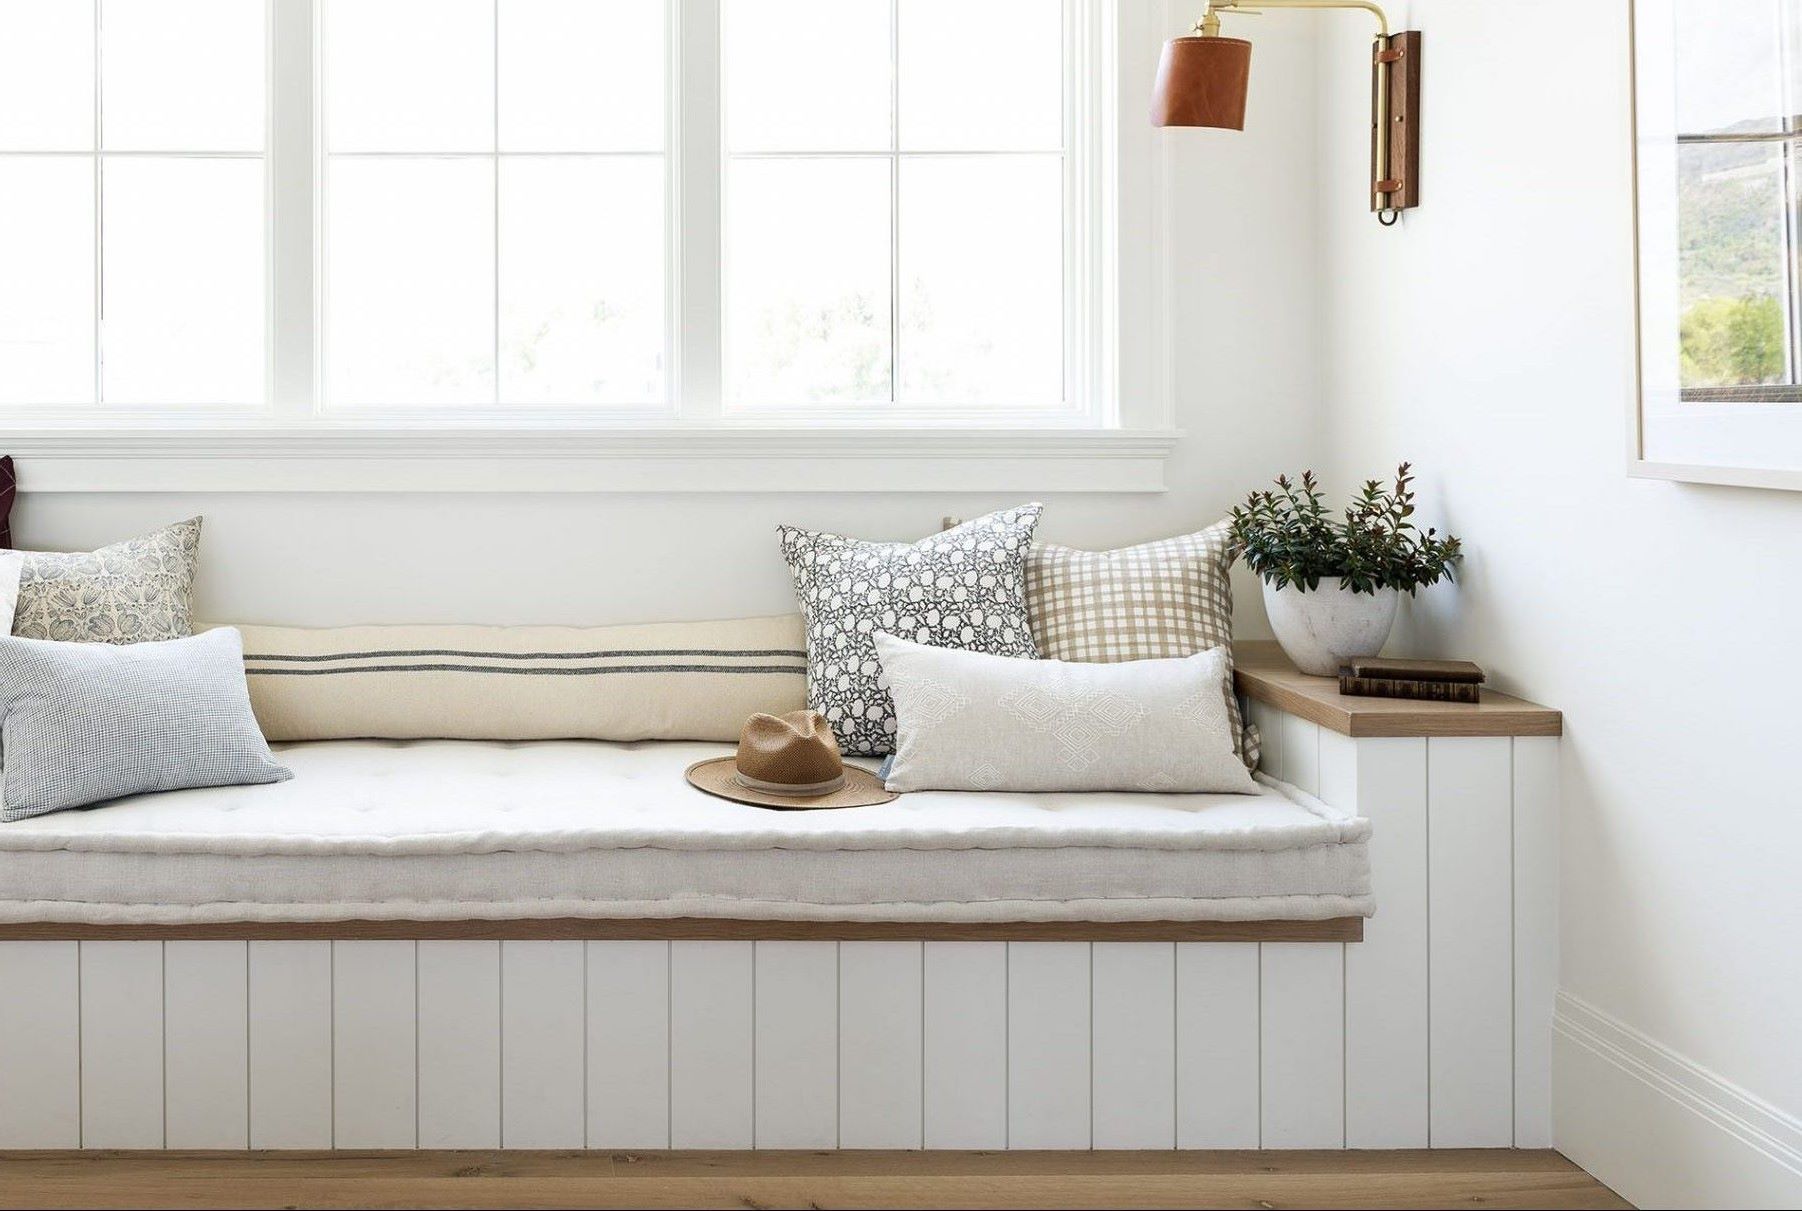
How to Build a Cozy Window Bench
Published: August 9, 2024
Learn how to build a cozy window bench with our step-by-step guide. Create a perfect reading nook or extra seating with these easy DIY instructions and tips.
(Many of the links in this article redirect to a specific reviewed product. Your purchase of these products through affiliate links helps to generate commission for Twigandthistle.com, at no extra cost. Learn more)
Creating a cozy window bench can be a fun and rewarding DIY project. Imagine having a comfortable spot by the window where you can read, relax, or enjoy a cup of tea. This project doesn't require advanced carpentry skills, just some basic tools, materials, and a bit of patience. Whether you have a bay window, a large picture window, or even a smaller one, a well-built bench can add charm and functionality to your space. In this guide, you'll learn how to construct a sturdy and inviting window bench that suits any room.
Getting Ready for Your Project
Measure the Space: Use a tape measure to get the exact dimensions of the window area where the bench will go. Write down the width, height, and depth.
Gather Materials: Collect all necessary materials like wood, screws, nails, brackets, and cushions. Make sure you have enough to complete the project without running out.
Safety Gear: Wear safety goggles, gloves, and a dust mask to protect yourself from wood dust and sharp tools.
Clear the Area: Remove any furniture, curtains, or other items near the window. This will give you enough room to work comfortably.
Check for Obstructions: Look for any electrical outlets, vents, or pipes that might be in the way. Plan around these to avoid any issues.
Mark the Wall: Use a pencil to mark where the bench will be attached to the wall. This will help you align everything correctly.
Cut the Wood: Use a saw to cut the wood pieces according to your measurements. Double-check each piece to ensure accuracy.
Pre-Drill Holes: Pre-drill holes in the wood to make it easier to screw everything together. This also helps prevent the wood from splitting.
Set Up a Workspace: Lay down a drop cloth or old sheet to catch any sawdust or debris. Set up a sturdy table or workbench to hold your tools and materials.
Organize Tools: Arrange your tools like a drill, saw, hammer, and screwdriver within easy reach. This will save time and keep the project moving smoothly.
Test Fit: Before assembling, place the cut pieces in the designated area to ensure they fit properly. Make any adjustments if needed.
Secure the Frame: Attach the frame to the wall using brackets and screws. Make sure it is level and sturdy before proceeding.
Install the Seat: Place the seat on top of the frame and secure it with screws. Ensure it is firmly attached and can support weight.
Add Cushions: Finally, add cushions or padding to make the bench comfortable. Choose materials that match your room's decor.
Gathering Materials and Tools
Materials:
- Plywood: Forms the base and sides of the bench.
- 2x4 Lumber: Provides structural support.
- Foam Cushion: Adds comfort to the seating area.
- Fabric: Covers the foam cushion for a finished look.
- Wood Screws: Holds the pieces together securely.
- Wood Glue: Adds extra strength to the joints.
- Sandpaper: Smooths out rough edges.
- Paint or Stain: Finishes the wood to match your decor.
- Hinges: Allows the seat to open for storage underneath.
- Storage Bins: Keeps items organized inside the bench.
Tools:
- Tape Measure: Ensures accurate measurements.
- Circular Saw: Cuts the plywood and lumber to size.
- Drill: Makes holes for screws and hinges.
- Screwdriver: Tightens screws.
- Staple Gun: Attaches fabric to the cushion.
- Paintbrush: Applies paint or stain.
- Clamps: Holds pieces together while the glue dries.
- Level: Ensures the bench sits evenly.
- Utility Knife: Cuts the foam cushion to size.
- Safety Gear: Protects eyes and hands during construction.
Skills and Time Needed
Skill Level: Intermediate
Time Required: 6-8 hours
- Measure and Plan: 1 hour
- Cut Wood Pieces: 1 hour
- Assemble Frame: 2 hours
- Attach Seat and Backrest: 1 hour
- Paint or Stain: 1-2 hours
Step-by-Step Guide
Measure the Space
- Use a tape measure to find the width, height, and depth of the window area.
- Write down these measurements.
Gather Materials
- Plywood for the bench frame
- 2x4 lumber for support
- Foam cushion for seating
- Fabric for covering the cushion
- Screws and wood glue
- Paint or stain for finishing
Cut the Wood
- Cut plywood pieces for the top, front, and sides of the bench.
- Cut 2x4 lumber for internal supports.
Assemble the Frame
- Attach the 2x4 supports to the wall using screws.
- Secure the plywood pieces to the 2x4 supports with screws and wood glue.
Add the Top
- Place the plywood top on the frame.
- Secure it with screws.
Sand and Paint
- Sand all surfaces to remove rough edges.
- Paint or stain the bench to match your decor.
Prepare the Cushion
- Cut the foam cushion to fit the top of the bench.
- Wrap the fabric around the cushion and staple it to the underside.
Attach the Cushion
- Place the cushion on the bench.
- Secure it with Velcro strips if needed.
Add Finishing Touches
- Decorate with throw pillows or a blanket.
- Ensure everything is secure and comfortable.
Helpful Tips and Tricks
Measure Twice, Cut Once: Always double-check measurements before cutting wood. This saves time and materials.
Use Quality Materials: Choose sturdy wood like pine or oak. These types hold up well over time.
Pre-Drill Holes: Prevent wood from splitting by pre-drilling holes for screws.
Level Surface: Ensure the floor where the bench will sit is level. Use shims if necessary.
Add Storage: Incorporate storage beneath the bench. Hinged lids or pull-out drawers work great.
Comfortable Cushion: Use high-density foam for the cushion. It provides better support and lasts longer.
Secure the Bench: Attach the bench to the wall for added stability. Use L-brackets or cleats.
Paint or Stain: Finish the wood with paint or stain to match your room's decor. Seal it with a clear coat for protection.
Common Mistakes to Avoid:
Skipping Sanding: Sand all wood surfaces to avoid splinters and ensure a smooth finish.
Ignoring Weight Limits: Make sure the bench can support the weight it will hold. Reinforce if needed.
Poor Cushion Fit: Measure the cushion accurately. A poorly fitting cushion looks sloppy and feels uncomfortable.
Alternatives for Materials or Methods:
Plywood Instead of Solid Wood: Plywood can be a cheaper alternative. It's also easier to work with.
Ready-Made Cushions: If making a cushion seems tough, buy a ready-made one. Just ensure it fits your bench.
Paint Instead of Stain: If staining feels complicated, paint the bench. It's easier and offers more color options.
Velcro for Cushions: Use Velcro strips to keep the cushion in place. This makes it easy to remove for cleaning.
Estimating the Cost
Materials:
- Plywood (for the bench frame): $30-$50
- 2x4 Lumber (for support): $20-$30
- Foam Cushion: $40-$60
- Fabric (for covering the cushion): $20-$40
- Screws and Nails: $10-$15
- Wood Glue: $5-$10
- Paint or Stain: $15-$25
Tools:
- Circular Saw: $50-$100 (or borrow)
- Drill: $30-$60 (or borrow)
- Measuring Tape: $5-$10
- Screwdriver: $5-$15
- Staple Gun: $10-$20
- Paint Brushes: $5-$10
Total Cost: $245-$445
Budget-Friendly Alternatives:
- Use Pallet Wood instead of buying new lumber: Free or very cheap
- Repurpose Old Cushions: Free if you have some at home
- Borrow Tools from friends or family: Free
- Check Thrift Stores for fabric: $5-$15
- Use Leftover Paint from previous projects: Free
Creative Variations and Customizations
Materials: Instead of using wood, try plywood for a lighter option or reclaimed wood for a rustic look. MDF can also work well if you plan to paint the bench.
Colors: Paint the bench in bright colors like yellow or turquoise for a cheerful vibe. For a more elegant look, use neutral tones like gray or beige. Staining the wood can highlight its natural beauty.
Cushions: Use foam cushions covered in fabric that matches your room's decor. For a luxurious feel, try velvet or silk covers. Outdoor fabric can make the bench more durable.
Storage: Add drawers or cabinets underneath the bench for extra storage. Baskets can also be placed under the bench for a more casual look.
Backrest: Attach a padded backrest for added comfort. Use tufted fabric for a classic look or plain fabric for a modern touch.
Legs: Instead of a solid base, use hairpin legs for a mid-century modern style. Turned wooden legs can give a more traditional appearance.
Trim: Add decorative trim or molding around the edges for a polished look. Beadboard can also be used on the sides for added texture.
Lighting: Install under-bench lighting for a cozy ambiance. LED strips can be a good option for this.
Accessories: Place throw pillows and blankets on the bench for added comfort and style. Use seasonal or themed accessories to change the look throughout the year.
Eco-Friendly Tips
Reclaimed Wood: Use old wood from pallets or barns. It adds character and reduces waste.
Eco-Friendly Paint: Choose low-VOC or zero-VOC paints. These are better for indoor air quality.
Natural Fabrics: Opt for cushions made from organic cotton or linen. These materials are sustainable and comfortable.
Recycled Insulation: Use recycled denim or wool for padding. These materials provide good insulation and are eco-friendly.
Non-Toxic Adhesives: Select water-based or plant-based glues. These are safer for you and the environment.
Upcycled Furniture: Repurpose an old dresser or bookshelf as the base. This saves money and resources.
Energy-Efficient Tools: Use hand tools or energy-efficient power tools. This reduces your carbon footprint.
Local Materials: Source materials from local suppliers. This supports local businesses and reduces transportation emissions.
Sustainable Wood: If buying new wood, choose FSC-certified lumber. This ensures the wood comes from responsibly managed forests.
Natural Finishes: Use beeswax or linseed oil for finishing. These are natural and non-toxic options.
Your Cozy Window Bench Awaits
You've got all the tools and materials ready. Measure your space, cut the wood, and assemble the frame. Secure everything with screws and brackets. Add some cushions and pillows for that extra touch of comfort. Don't forget to sand and paint for a polished look.
This project not only adds a functional piece to your home but also a personal touch. Imagine curling up with a good book or enjoying a cup of coffee by your new window bench.
Remember, the key is to take your time and enjoy the process. Mistakes might happen, but that's part of the fun. Your cozy window bench is just a few steps away. Get started, and soon you'll have a new favorite spot in your home. Happy building!
What materials do I need to build a window bench?
You'll need wood (like plywood or MDF), screws, wood glue, paint or stain, foam for the cushion, fabric for upholstery, and tools like a saw, drill, and measuring tape.
How long will it take to build a window bench?
Depending on your skill level, it might take a weekend or a few days. Cutting, assembling, and painting can be done in a day, but waiting for paint to dry or upholstery might take longer.
Do I need any special skills to build a window bench?
Basic carpentry skills are helpful. If you can measure, cut, and use a drill, you're good to go. Upholstering the cushion might need some patience, but it's not too tricky.
Can I customize the size of my window bench?
Absolutely! Measure your window space and adjust the dimensions of your bench to fit perfectly. Customizing the size ensures it looks built-in and fits snugly.
How do I make the cushion for the window bench?
Cut a piece of foam to fit the bench top, then wrap it in fabric. Use a staple gun to secure the fabric underneath the foam. You can also sew a removable cover if you prefer.
What kind of paint or stain should I use?
Use interior paint or wood stain that matches your room's decor. If you want a durable finish, consider using a polyurethane topcoat to protect the wood.
Can I add storage to my window bench?
Yes, you can! Design the bench with hinged lids or drawers underneath the seat. This adds functionality and gives you extra space to store blankets, books, or other items.