
Home>Home & Furniture>Doors & Windows>DIY Saloon Doors Ideas
Doors & Windows
DIY Saloon Doors Ideas
Published: September 20, 2024
Discover creative DIY saloon doors ideas to enhance your home decor. Learn step-by-step guides, materials needed, and tips for a stylish and functional upgrade.
(Many of the links in this article redirect to a specific reviewed product. Your purchase of these products through affiliate links helps to generate commission for Twigandthistle.com, at no extra cost. Learn more)
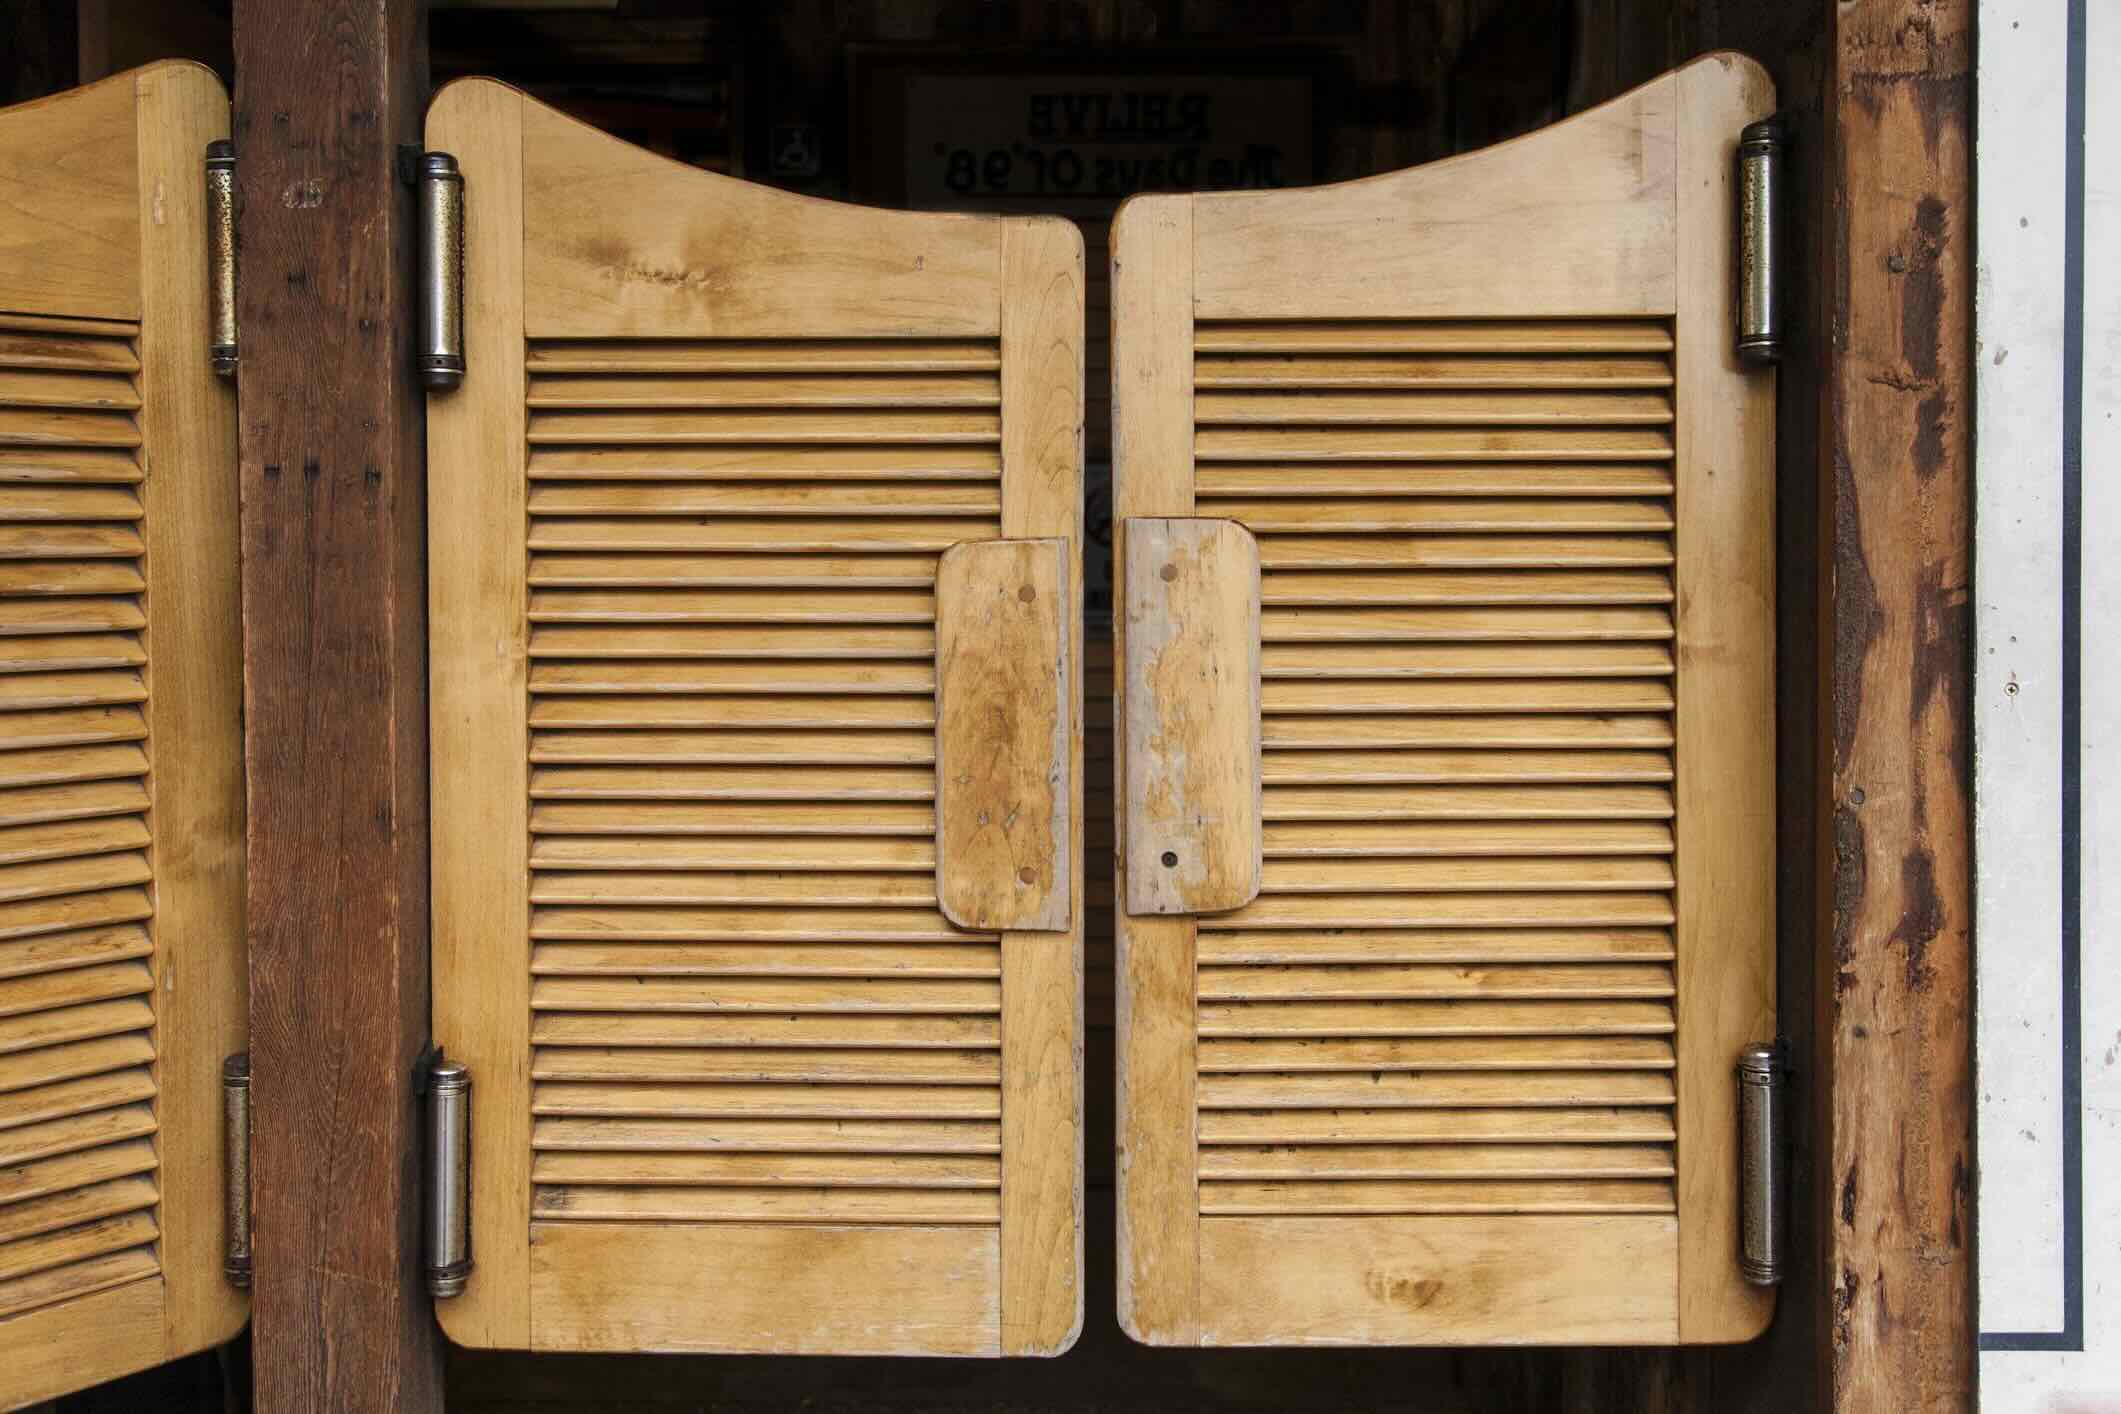
Saloon doors add a touch of old western charm to any space. They swing both ways, making them perfect for a busy kitchen or pantry. You don't need to be a carpenter to build your own saloon doors. With basic tools and materials, anyone can create a set that fits their unique style. Imagine walking through those classic swinging doors each day! This guide will provide simple ideas, step-by-step instructions, and helpful tips to get you started on your DIY saloon door project. Get ready to bring a bit of the Wild West into your home.
Getting Ready for Your Project
Measure the Doorway: Use a tape measure to get the width and height of the doorway. Write down these measurements.
Choose the Right Doors: Pick doors that match the width of your doorway. Saloon doors usually come in pairs.
Gather Tools and Materials: You will need a drill, screws, hinges, a level, a pencil, and a screwdriver. Make sure everything is within reach.
Prepare the Workspace: Clear the area around the doorway. Lay down a drop cloth to catch any debris.
Safety Gear: Wear safety goggles and gloves to protect your eyes and hands.
Mark Hinge Placement: Use a pencil to mark where the hinges will go on both the door frame and the doors. Make sure the marks are level.
Pre-Drill Holes: Use the drill to make small holes where you marked for the hinges. This makes it easier to screw them in.
Install Hinges: Attach the hinges to the doors first, then to the door frame. Use a level to ensure the doors hang straight.
Test the Doors: Open and close the doors a few times to make sure they swing properly. Adjust the hinges if needed.
Clean Up: Remove any debris and put away your tools. Your saloon doors are ready to use!
What You Need: Materials and Tools
Wood Panels: These will form the main structure of the saloon doors. Choose sturdy wood like pine or oak.
Hinges: Special saloon door hinges allow the doors to swing both ways. Look for spring-loaded ones for easy installation.
Screws: Essential for attaching the hinges to the door frame and wood panels. Use wood screws for a secure fit.
Screwdriver: Needed to drive screws into the wood. A power drill with a screwdriver bit can speed up the process.
Measuring Tape: Ensures accurate measurements for cutting wood panels and placing hinges.
Saw: Used to cut the wood panels to the desired size. A circular saw or handsaw works well.
Sandpaper: Smooths the edges of the wood panels. Choose medium to fine grit for a polished finish.
Paint or Stain: Adds color or a protective layer to the wood. Choose based on your desired look.
Paintbrushes: Needed to apply paint or stain evenly. Use different sizes for detailed work.
Level: Ensures the doors are hung straight. A small bubble level works perfectly.
Pencil: Marks measurements on the wood. Essential for accuracy.
Clamps: Hold the wood panels in place while cutting or sanding. Makes the job easier and safer.
Safety Gear: Includes gloves, goggles, and a dust mask. Protects you from splinters, dust, and debris.
Skill Level and Time Commitment
Skill Level: Intermediate
Estimated Time Required: 4-6 hours
- Measure and Cut Wood: 1 hour
- Sand and Smooth Edges: 30 minutes
- Assemble Door Panels: 1 hour
- Install Hinges: 1 hour
- Paint or Stain: 1-2 hours
Important Keywords: Measure, Cut, Sand, Assemble, Install, Paint, Stain
How to Build Saloon Doors: Step-by-Step
Gather Materials:
- Two wooden doors (pre-made or custom cut)
- Hinges (spring-loaded for swinging action)
- Screws
- Screwdriver or drill
- Measuring tape
- Level
- Sandpaper
- Paint or stain (optional)
- Paintbrush (if painting or staining)
Measure Doorway:
- Use measuring tape to find the width and height of the doorway.
- Divide the width by two to determine the width of each door.
Prepare Doors:
- Sand edges and surfaces of the doors to remove rough spots.
- Paint or stain doors if desired. Allow them to dry completely.
Attach Hinges to Doors:
- Place hinges on the side of each door. Position one hinge near the top and another near the bottom.
- Mark screw holes with a pencil.
- Use a drill or screwdriver to attach hinges to the doors.
Mark Hinge Placement on Door Frame:
- Hold one door in place within the doorway.
- Mark where the hinges meet the door frame.
- Repeat for the second door.
Attach Hinges to Door Frame:
- Align hinges with marks on the door frame.
- Use a level to ensure doors hang straight.
- Screw hinges into the door frame.
Test Doors:
- Swing doors open and closed to ensure they move freely.
- Adjust hinges if necessary for smooth operation.
Final Touches:
- Sand any rough spots that may have appeared during installation.
- Touch up paint or stain if needed.
Enjoy Your New Saloon Doors:
- Step back and admire your work.
Helpful Tips and Tricks
Measure Twice, Cut Once: Always double-check measurements before cutting wood. This ensures doors fit perfectly in the doorway.
Use Quality Hinges: Invest in good-quality spring hinges. They allow doors to swing both ways and return to the center.
Sand Smooth: Sand all edges and surfaces of the doors. This prevents splinters and gives a professional finish.
Paint or Stain Before Installation: Apply paint or stain to the doors before hanging them. This avoids messes and ensures even coverage.
Pre-Drill Holes: Pre-drill holes for screws to prevent wood from splitting.
Level the Doors: Use a level to ensure doors are hung straight. Crooked doors won't swing properly.
Common Mistakes to Avoid:
Skipping Measurements: Not measuring accurately can lead to doors that don’t fit.
Cheap Hinges: Using low-quality hinges can cause doors to sag or not swing correctly.
Ignoring Sanding: Skipping sanding can result in rough edges and an unprofessional look.
Painting After Installation: Painting doors after hanging can be messy and uneven.
Alternatives for Materials or Methods:
Reclaimed Wood: Use reclaimed wood for a rustic look. It’s eco-friendly and adds character.
Pre-Made Doors: Purchase pre-made saloon doors if you’re short on time or tools.
Magnetic Catches: Instead of spring hinges, use magnetic catches for a different closing mechanism.
Decorative Trim: Add decorative trim or molding to plain doors for a custom look.
Estimating the Cost
Materials:
- Wood: $50-$100 (depends on type and quality)
- Hinges: $10-$20 (spring-loaded for swinging action)
- Handles: $10-$15 (optional but adds a nice touch)
- Sandpaper: $5-$10 (for smoothing edges)
- Paint or Stain: $15-$30 (for finishing)
Tools:
- Saw: $30-$60 (hand saw or jigsaw)
- Drill: $40-$80 (for attaching hinges and handles)
- Screwdriver: $5-$15 (manual or electric)
- Measuring Tape: $5-$10 (for accurate measurements)
- Clamps: $10-$20 (to hold wood in place while working)
Budget-Friendly Alternatives:
- Reclaimed Wood: Free or cheap from pallets or old furniture
- Basic Hinges: $5-$10 (instead of spring-loaded)
- DIY Handles: Use rope or old drawer pulls
- Borrow Tools: From friends or family to save costs
Total estimated cost: $170-$370. Using budget-friendly options can reduce this to $80-$150.
Different Styles and Customizations
Materials: Instead of traditional wood, try reclaimed wood for a rustic look, metal for an industrial vibe, or bamboo for a tropical feel. Plexiglass can add a modern touch while still allowing light to pass through.
Colors: Paint the doors in bold colors like red or blue for a statement piece. Use pastel shades for a softer, vintage look. Stain the wood to highlight its natural grain or use a whitewash for a shabby chic style.
Styles: Add decorative carvings or stencils to the doors for a personalized touch. Install mirrored panels to make the space feel larger. Use barn door hardware for a farmhouse aesthetic or wrought iron accents for a more traditional look.
Finishes: Opt for a matte finish for a contemporary feel or a glossy finish for a polished look. Use distressing techniques to give the doors an aged appearance.
Hardware: Choose antique brass or oil-rubbed bronze hinges for a vintage look. Stainless steel or black hardware can give a modern touch. Consider adding decorative knobs or handles to enhance the overall design.
Eco-Friendly Tips
Reclaimed wood makes a great choice for saloon doors. Old barn wood or pallets can be repurposed into stylish, rustic doors. Bamboo is another eco-friendly option. It grows quickly and is very durable.
Recycled metal can be used for hinges or decorative elements. Look for old metal pieces at thrift stores or salvage yards. Eco-friendly paint or stain, made from natural ingredients, can give your doors a fresh look without harmful chemicals.
Upcycling old doors or shutters into saloon doors is another sustainable idea. This reduces waste and gives new life to items that might otherwise be discarded. Natural fibers like jute or hemp can be used for decorative touches, adding a unique, earthy feel.
Energy-efficient tools should be used during construction. Hand tools or battery-operated tools with rechargeable batteries are better for the environment. Local sourcing of materials reduces the carbon footprint associated with transportation.
Non-toxic adhesives and finishes ensure a healthier indoor environment. Look for products labeled as low-VOC (volatile organic compounds). Insulating materials like cork can be added to the doors to improve energy efficiency in your home.
Your DIY Adventure Awaits
Building saloon doors yourself is a rewarding project. You get to customize the design, choose the materials, and add your personal touch. Whether you prefer a rustic look or a more modern style, the possibilities are endless. Plus, you’ll save money compared to buying pre-made doors.
Remember to measure your doorway accurately, gather all necessary tools, and follow safety guidelines. Don’t rush the process; take your time to ensure everything fits perfectly. If you hit a snag, there are plenty of online resources and communities ready to help.
Once your doors are up, you’ll feel a sense of accomplishment every time you walk through them. So grab your tools, roll up your sleeves, and dive into this fun and practical project. Your home will thank you for the unique touch!
How do I choose the right material for saloon doors?
Pick a material that matches your home's style. Wood is classic, while metal gives a modern look. Plastic is budget-friendly but less durable.
What tools will I need for this project?
You'll need a screwdriver, drill, measuring tape, level, and screws. A saw might be necessary if you need to cut the doors to size.
How do I measure the doorway for saloon doors?
Measure the width and height of the doorway. Subtract about an inch from the width so the doors can swing freely. The height should be about half the doorway.
Can I install saloon doors by myself?
Yes, you can! Just follow the instructions carefully. It helps to have a friend hold the doors while you screw them in place.
How do I ensure the doors swing properly?
Use a level to make sure the doors are straight. Install spring hinges so the doors can swing back and forth easily.
What if my doorway is not a standard size?
Custom saloon doors can be made to fit any doorway. You might need to cut standard doors to size or order custom ones.
How do I paint or stain my saloon doors?
Sand the doors first to remove any rough spots. Apply primer if you're painting, then add your paint or stain. Let them dry completely before installing.