
Home>Home & Furniture>Doors & Windows>DIY Guide: Building Exterior Door Frame with Threshold
Doors & Windows
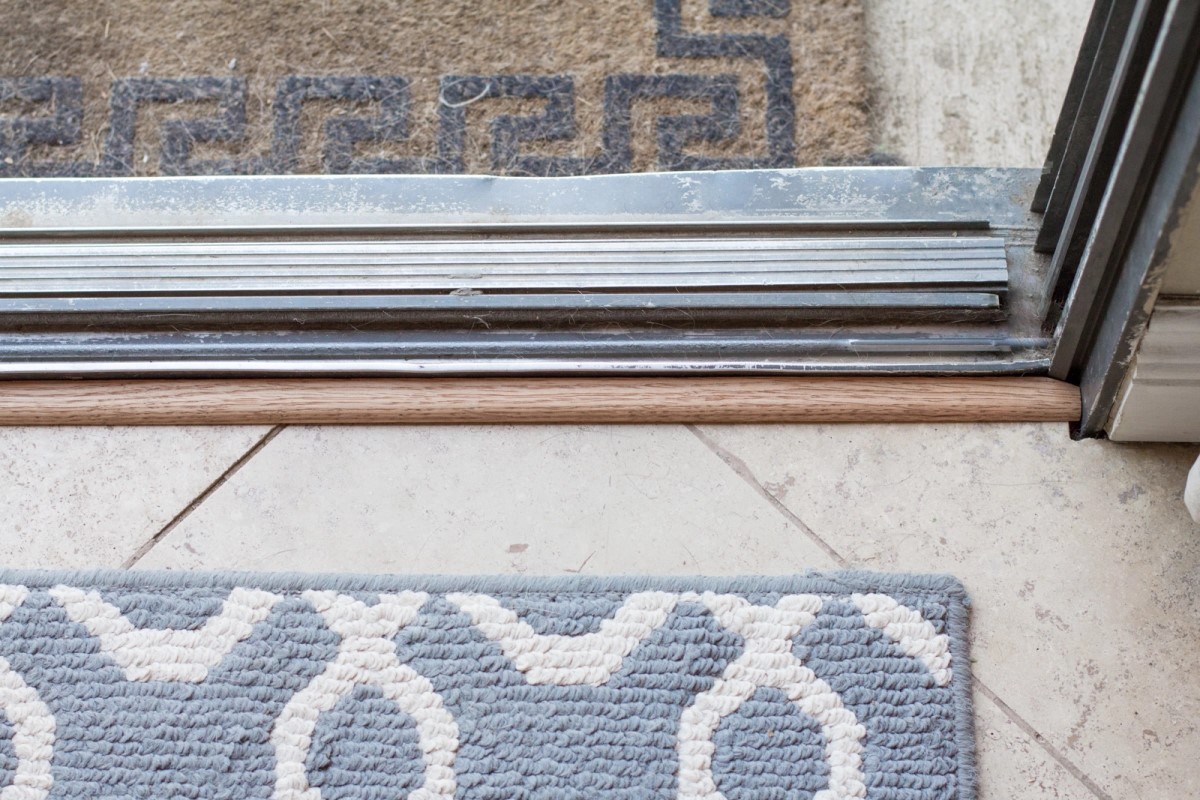
DIY Guide: Building Exterior Door Frame with Threshold
Published: September 12, 2024
Learn how to build an exterior door frame with a threshold in this comprehensive DIY guide. Step-by-step instructions, tools, and tips for a perfect fit and finish.
(Many of the links in this article redirect to a specific reviewed product. Your purchase of these products through affiliate links helps to generate commission for Twigandthistle.com, at no extra cost. Learn more)
Building an exterior door frame with a threshold can seem like a big project, but with the right tools and some basic knowledge, it’s definitely doable. This guide will walk you through everything you need to know, step by step. Whether you’re replacing an old frame or starting from scratch, having a sturdy door frame is essential for keeping your home secure and weatherproof. We'll cover materials, measurements, and installation tips to make sure your new door fits perfectly and looks great. Roll up your sleeves, and let’s get started on building that door frame!
Getting Ready for the Project
Gather Materials: Collect all necessary tools and materials like a tape measure, level, saw, hammer, nails, screws, drill, wood for the frame, and threshold.
Safety Gear: Wear safety glasses, gloves, and a dust mask to protect yourself from debris and dust.
Workspace Setup: Clear a work area near the door. Ensure there's enough space to move around and lay out materials.
Measure and Mark: Measure the door opening accurately. Mark the dimensions on the wood for the frame and threshold.
Cut Wood: Use a saw to cut wood pieces according to the measurements. Double-check measurements before cutting to avoid mistakes.
Check for Level: Ensure the floor where the threshold will sit is level. Use a level tool to check and make adjustments if needed.
Pre-Drill Holes: Pre-drill holes in the wood pieces to make it easier to screw them together. This helps prevent the wood from splitting.
Dry Fit: Assemble the frame and threshold without nails or screws to ensure everything fits correctly. Make any necessary adjustments.
Weatherproofing: Apply weatherproofing materials like caulk or weatherstripping to the bottom of the threshold to prevent water from seeping in.
Secure Frame: Once satisfied with the fit, secure the frame pieces together using nails or screws. Make sure everything is square and level.
Install Threshold: Attach the threshold to the bottom of the frame securely. Ensure it sits flush with the floor and is level.
Final Check: Double-check all measurements, levels, and secure connections before installing the door.
Materials and Tools Checklist
- Tape Measure: Used to measure the dimensions of the door frame accurately.
- Pencil: For marking measurements and cutting lines on materials.
- Circular Saw: Cuts wood to the required sizes for the frame.
- Hammer: Drives nails into the wood to secure the frame.
- Nails: Fasten the wooden pieces together.
- Screws: Provide additional strength and stability to the frame.
- Screwdriver: Tightens screws into the wood.
- Level: Ensures the frame is straight and even.
- Wood Glue: Adds extra bonding strength between wooden pieces.
- Chisel: Carves out wood for precise fitting.
- Drill: Makes holes for screws and other fittings.
- Wooden Planks: Form the main structure of the door frame.
- Threshold: The bottom part of the door frame that provides a seal.
- Shims: Small wedges used to level and plumb the frame.
- Caulk: Seals gaps around the frame to prevent drafts.
- Caulk Gun: Dispenses caulk smoothly and evenly.
- Safety Glasses: Protects eyes from debris while cutting or drilling.
- Work Gloves: Protects hands from splinters and sharp edges.
- Sandpaper: Smooths rough edges on the wood.
- Paint or Stain: Finishes the wood for a polished look.
- Paintbrush or Roller: Applies paint or stain to the wood.
Required Skills and Time Commitment
Skill Level: Intermediate
Time Required: 4-6 hours
- Gather Materials: 30 minutes
- Remove Old Frame: 1 hour
- Measure and Cut New Frame: 1 hour
- Install New Frame: 1.5 hours
- Add Threshold: 1 hour
- Finishing Touches: 30 minutes
How to Build an Exterior Door Frame with Threshold
Gather Materials and Tools
- Door frame kit
- Threshold
- Measuring tape
- Level
- Saw
- Screws
- Drill
- Hammer
- Nails
- Wood shims
- Caulk
Measure the Opening
- Measure the width and height of the door opening.
- Ensure measurements are accurate for a proper fit.
Cut the Frame Pieces
- Cut the top and side pieces of the frame to match the measurements.
- Use a saw for precise cuts.
Assemble the Frame
- Lay out the frame pieces on a flat surface.
- Attach the top piece to the side pieces using screws.
- Ensure corners are square using a level.
Install the Frame
- Place the assembled frame into the door opening.
- Use wood shims to adjust and level the frame.
- Secure the frame with screws through the shims.
Attach the Threshold
- Measure and cut the threshold to fit the bottom of the door frame.
- Place the threshold in position.
- Secure it with screws or nails.
Check Alignment
- Use a level to ensure the frame and threshold are straight.
- Adjust as needed using shims.
Secure the Frame
- Once aligned, fully secure the frame with additional screws.
- Remove any excess shims.
Seal the Frame
- Apply caulk around the edges of the frame and threshold.
- Ensure all gaps are sealed to prevent drafts.
Install the Door
- Hang the door on the hinges.
- Check that it opens and closes smoothly.
- Make any final adjustments to the frame or threshold if necessary.
Helpful Tips and Tricks
Measure Twice, Cut Once: Always double-check measurements before cutting any material. This prevents waste and ensures a perfect fit.
Use Treated Lumber: For exterior door frames, use pressure-treated wood to resist moisture and pests.
Pre-Hang the Door: If possible, buy a pre-hung door. It saves time and ensures the door fits the frame perfectly.
Level and Plumb: Use a level to make sure the frame is straight and plumb. This ensures the door will open and close properly.
Shims Are Your Friend: Use shims to adjust the frame and make it level. Place them behind hinges and latch points for extra stability.
Seal the Threshold: Apply a bead of silicone caulk under the threshold to prevent water from seeping in.
Weatherstripping: Install weatherstripping around the door frame to improve insulation and keep out drafts.
Pilot Holes: Drill pilot holes before screwing into the wood to prevent splitting.
Common Mistakes to Avoid:
Skipping the Level Check: Not ensuring the frame is level can lead to a door that sticks or doesn't close properly.
Ignoring Weatherproofing: Failing to seal the threshold or install weatherstripping can lead to water damage and higher energy bills.
Incorrect Measurements: Cutting materials without double-checking measurements can result in wasted materials and a poor fit.
Alternatives for Materials or Methods:
Composite Materials: Use composite materials for the threshold to resist rot and wear better than wood.
Adjustable Thresholds: Consider using an adjustable threshold for easier installation and better sealing.
Foam Insulation: Use foam insulation around the frame for better energy efficiency instead of traditional fiberglass.
Estimating the Cost
Lumber: $50-$100 (depends on wood type)
Threshold: $20-$40
Screws/Nails: $10
Wood Glue: $5
Weatherstripping: $10-$20
Primer and Paint: $20-$40
Tools:
- Saw: $50 (or borrow)
- Hammer: $10
- Screwdriver: $5
- Measuring Tape: $5
- Level: $10
Total Cost: $185-$290
Budget-Friendly Alternatives:
- Reclaimed Wood: $20-$50
- Basic Threshold: $10
- Borrow Tools: Free
- Discount Paint: $10
Revised Total Cost: $85-$155
Different Ways to Customize
Materials: Instead of traditional wood, consider using composite or PVC for a more durable, weather-resistant frame. Metal options like aluminum or steel can provide extra security and a modern look.
Colors: Paint or stain the frame to match your home's exterior. Bold colors like red or blue can make the door stand out, while neutral tones like white, gray, or beige offer a classic appearance.
Styles: For a rustic touch, use reclaimed wood or add decorative trim. A modern style might include clean lines and a minimalist threshold. For a traditional look, consider ornate moldings and a wooden threshold.
Threshold Options: Use a wooden threshold for a warm, natural feel. Aluminum thresholds are durable and often come with a weatherstrip to keep out drafts. Vinyl thresholds are another weather-resistant option.
Hardware: Choose decorative hinges and handles to enhance the door's appearance. Brass, nickel, or black finishes can complement different styles.
Glass Inserts: Add a glass insert to the door for extra light. Options include frosted, stained, or clear glass. This can also be a way to add a unique design element.
Weatherproofing: Ensure the frame is well-sealed with caulk and weatherstripping to prevent drafts and moisture. Consider adding a door sweep at the bottom for extra protection.
Decorative Elements: Add side lights or a transom window above the door for more light and a grander entrance. Decorative corbels or brackets can also be added for extra flair.
Eco-Friendly Building Tips
Reclaimed Wood: Use old wood from barns or pallets. It gives a rustic look and reduces waste.
Bamboo: Strong and grows quickly. Great for door frames and thresholds.
Recycled Metal: Use metal from old structures. It’s durable and eco-friendly.
Natural Sealants: Choose sealants made from natural oils and waxes. They protect wood without harmful chemicals.
Insulation: Use eco-friendly insulation like wool or recycled denim. Keeps your home warm and reduces energy use.
Low-VOC Paints: Use paints with low volatile organic compounds. They’re better for your health and the environment.
Energy-Efficient Glass: Install double or triple-glazed glass. It improves insulation and saves energy.
Recycled Plastic: Use recycled plastic for thresholds. It’s durable and keeps plastic out of landfills.
Local Materials: Buy materials from local suppliers. Reduces transportation emissions and supports local businesses.
Solar-Powered Tools: Use tools powered by solar energy. Reduces electricity use and is better for the planet.
Your Door Frame Awaits
Building an exterior door frame with a threshold isn't as tough as it seems. With the right tools, some patience, and a bit of elbow grease, you can create a sturdy, functional frame. Measure twice, cut once. Always check for level and plumb. Use weather-resistant materials to ensure longevity. Don’t forget to seal gaps to keep the elements out. If you hit a snag, take a step back and reassess. Mistakes happen, but they’re part of the learning process. By the end, you’ll have a door frame that not only looks great but also stands up to the test of time. So grab your tools, roll up your sleeves, and get to work. Your new door frame is just a few steps away. Happy building!
What tools do I need to build an exterior door frame with a threshold?
You'll need a measuring tape, saw, hammer, screwdriver, level, drill, chisel, and screws. Having a caulking gun and wood glue can also be handy.
How do I measure for the door frame?
Measure the width and height of the door opening. Add about 1/2 inch to each side for shimming and adjustments. Make sure to measure at multiple points to account for any unevenness.
What type of wood should I use for the frame?
Use pressure-treated wood for the frame. It's resistant to moisture and pests, making it ideal for exterior use. Cedar or redwood are also good choices due to their natural resistance to decay.
How do I install the threshold?
Cut the threshold to fit the width of the door opening. Place it at the bottom of the frame, ensuring it's level. Secure it with screws or nails. Apply caulk along the edges to seal any gaps.
How do I ensure the door frame is level and square?
Use a level to check both the vertical and horizontal alignment of the frame. Adjust as needed by adding shims. Check the diagonals to ensure the frame is square. Both diagonals should measure the same.
Should I paint or stain the frame before installation?
It's a good idea to prime and paint or stain the frame before installation. This helps protect the wood from moisture and weather. Touch up any areas after installation if needed.
How do I attach the door to the frame?
Position the door within the frame, ensuring even gaps on all sides. Attach the hinges to the door first, then to the frame. Use shims to adjust the door's position until it opens and closes smoothly.