
Home>Home & Furniture>Doors & Windows>DIY Garage Door Fishing Rod Holder
Doors & Windows
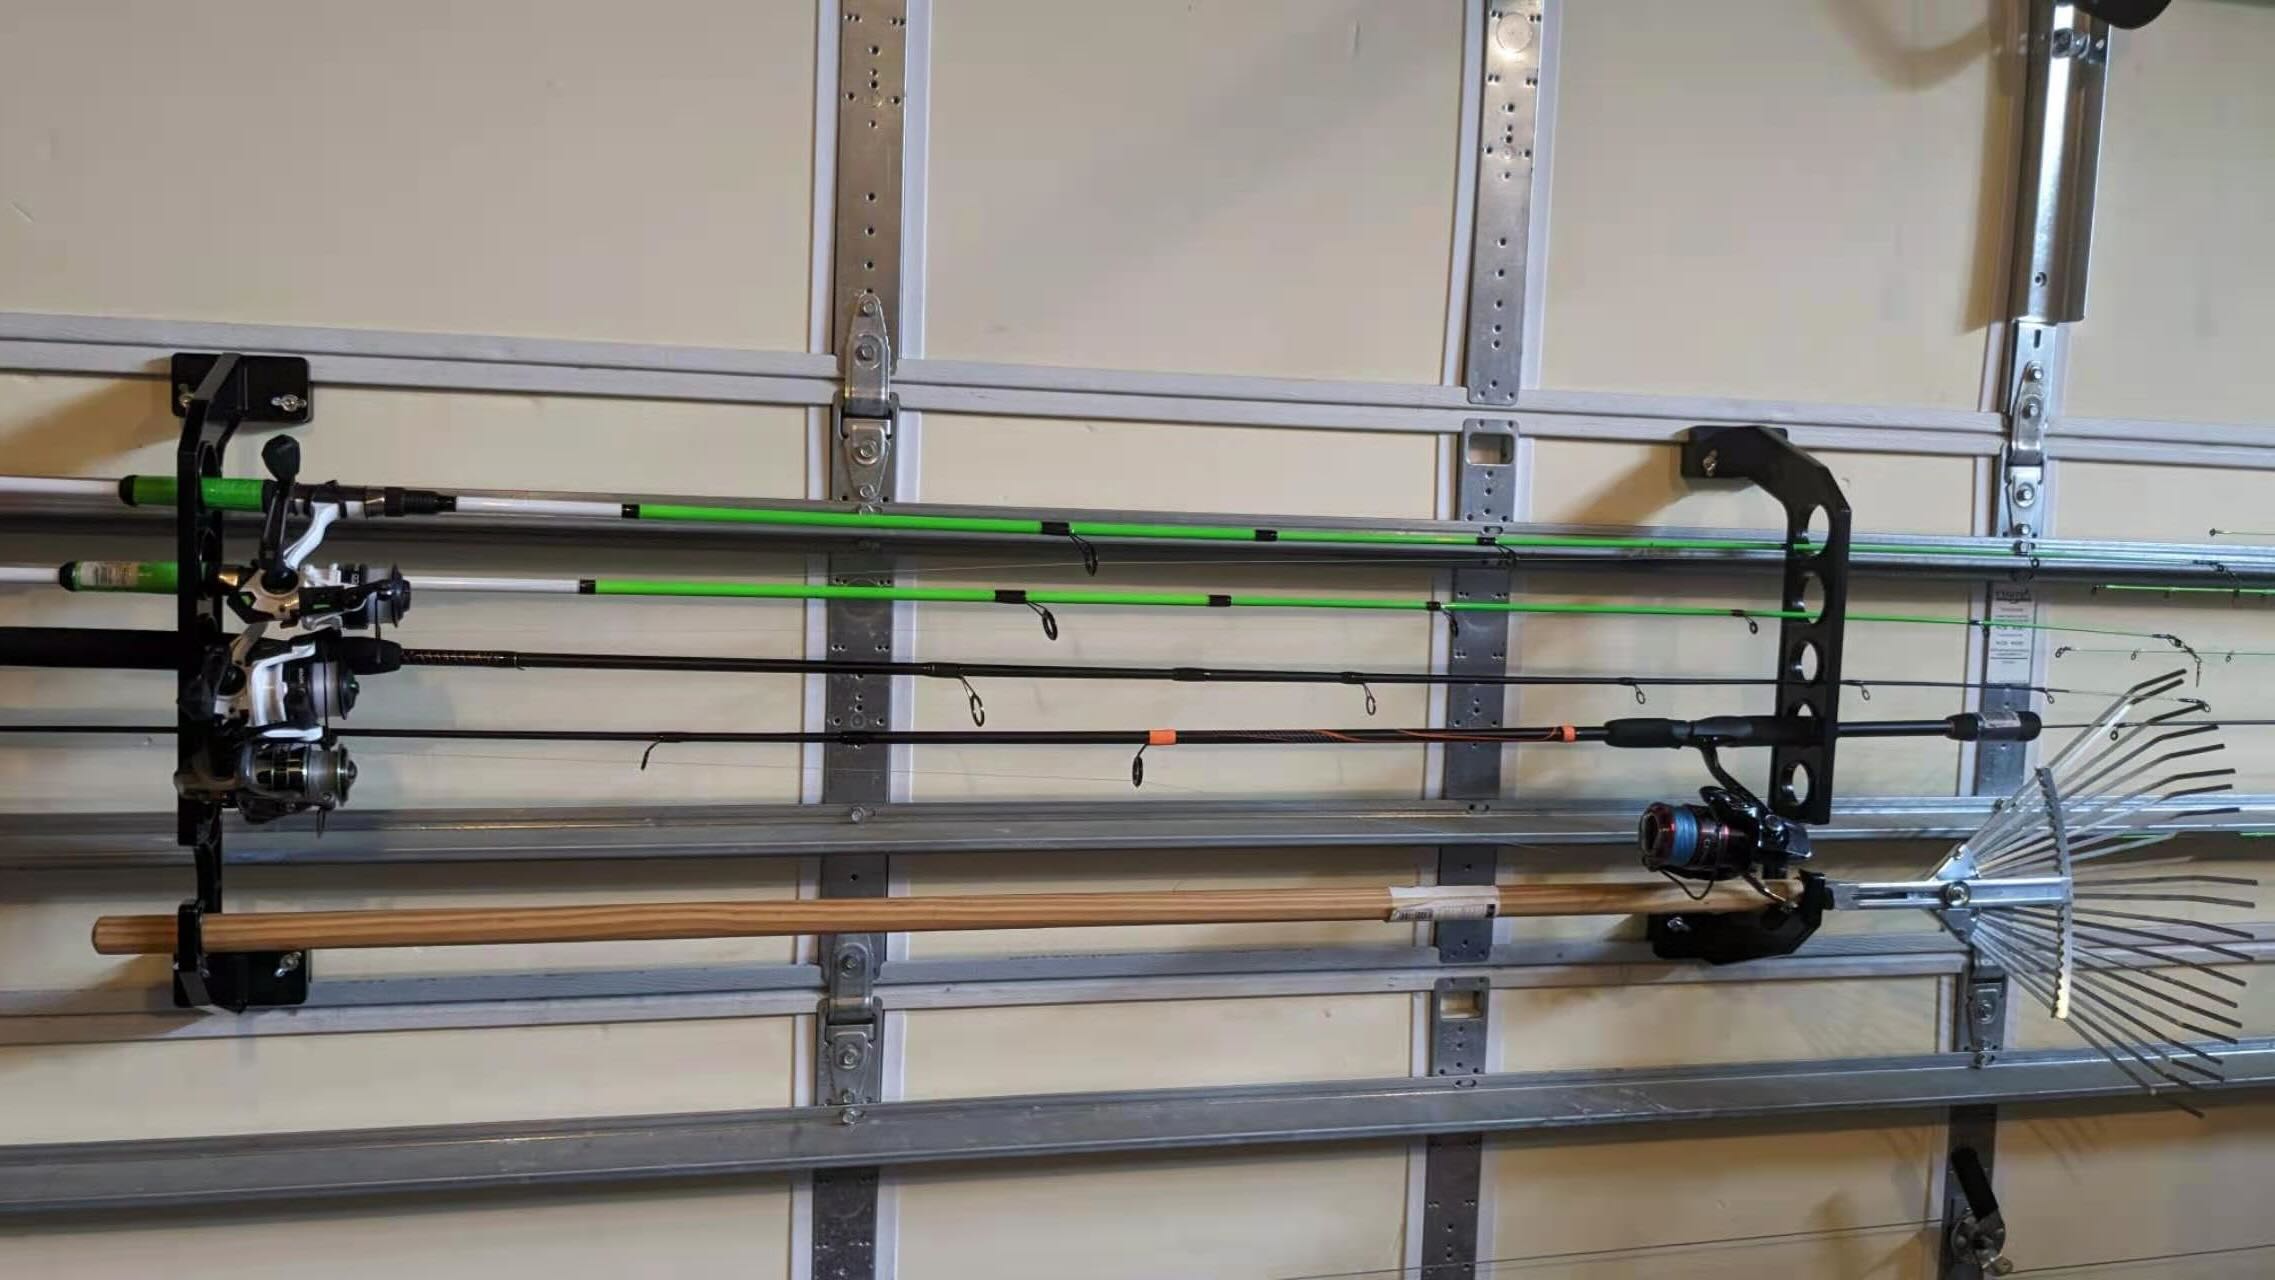
DIY Garage Door Fishing Rod Holder
Published: September 14, 2024
Learn how to create a DIY garage door fishing rod holder with our step-by-step guide. Maximize space, protect your gear, and keep your garage organized effortlessly!
(Many of the links in this article redirect to a specific reviewed product. Your purchase of these products through affiliate links helps to generate commission for Twigandthistle.com, at no extra cost. Learn more)
Ever tripped over fishing rods cluttering your garage? A DIY garage door fishing rod holder can be the perfect solution. This simple project helps keep rods organized, protected, and easily accessible. By mounting the holder on your garage door, you save floor space and reduce the risk of damage to your fishing gear. You'll only need a few materials and basic tools to get started. With a bit of time and effort, you can create a custom storage solution that fits your needs perfectly. Let's dive into how you can make your own fishing rod holder in no time!
Getting Ready for the Project
Gather Materials: Collect all necessary items like PVC pipes, brackets, screws, a drill, measuring tape, and a saw.
Safety Gear: Wear safety goggles and gloves to protect your eyes and hands.
Clear Workspace: Ensure your garage is tidy. Move any obstacles to create a clear area for working.
Measure Twice: Use a measuring tape to determine the length and width of the space where the holder will be installed.
Mark Spots: Mark the spots on the garage door where the brackets will be mounted. Use a pencil for easy adjustments.
Pre-Drill Holes: Pre-drill holes at the marked spots to make it easier to screw in the brackets.
Cut PVC Pipes: Measure and cut the PVC pipes to the desired length for holding the fishing rods.
Check Alignment: Before final installation, double-check the alignment of the brackets and pipes to ensure everything fits perfectly.
Secure Brackets: Use screws to secure the brackets to the garage door, making sure they are tightly fastened.
Install PVC Pipes: Place the cut PVC pipes into the brackets, ensuring they are stable and secure.
Test Stability: Gently place a fishing rod in the holder to test its stability and make any necessary adjustments.
What You Need to Get Started
Materials:
- PVC Pipes: Used to create the holders for the fishing rods. They are lightweight, durable, and easy to cut.
- PVC End Caps: These cap the ends of the PVC pipes, giving a finished look and preventing rods from slipping out.
- PVC Pipe Clamps: Secure the PVC pipes to the garage door.
- Screws: Fasten the pipe clamps to the garage door.
- Fishing Rods: The items you will be storing in the holder.
Tools:
- Measuring Tape: Measures the length of PVC pipes and the distance between clamps.
- Marker: Marks cutting points on the PVC pipes.
- Hacksaw: Cuts the PVC pipes to the desired length.
- Drill: Creates holes for the screws in the garage door.
- Screwdriver: Tightens the screws to secure the pipe clamps.
PVC pipes and end caps form the main structure of the holder. Pipe clamps and screws attach the holder to the garage door. Measuring tape, marker, and hacksaw help prepare the PVC pipes. Drill and screwdriver secure everything in place.
How Much Time and Skill You Need
Skill Level: Beginner
Time Required: 1-2 hours
Follow These Steps
Gather Materials:
- PVC pipes (1-inch diameter)
- Pipe clamps
- Screws
- Drill
- Measuring tape
- Saw
Measure and Cut PVC Pipes:
- Measure the length of your garage door.
- Cut PVC pipes into equal lengths (about 12 inches each).
Mark Drill Points:
- Mark spots on the garage door where you want to attach the pipes.
- Ensure marks are evenly spaced.
Drill Holes:
- Drill holes at the marked spots.
- Make sure holes are slightly smaller than screws.
Attach Pipe Clamps:
- Place pipe clamps over the drilled holes.
- Secure clamps using screws.
Insert PVC Pipes:
- Slide PVC pipes into the clamps.
- Ensure pipes are secure and level.
Test the Holder:
- Place fishing rods into the PVC pipes.
- Check stability and make adjustments if needed.
Secure Rods:
- Use additional clamps or bungee cords to hold rods in place if necessary.
Helpful Tips and Tricks
Measure Twice, Cut Once: Always double-check measurements before cutting materials. This ensures everything fits perfectly.
Use PVC Pipes: PVC pipes are lightweight, durable, and easy to cut. They make excellent holders for fishing rods.
Secure with Zip Ties: Zip ties are strong and easy to use. They can secure the PVC pipes to the garage door without drilling holes.
Add Foam Padding: Place foam padding inside the PVC pipes to protect fishing rods from scratches.
Label Each Holder: Use labels or colored tape to mark each holder. This helps quickly identify which rod is in which holder.
Common Mistakes to Avoid:
Overloading the Holder: Avoid placing too many rods in one holder. This can cause damage to both the rods and the holder.
Ignoring Weight Limits: Ensure the garage door can handle the added weight of the fishing rods and holder. Too much weight can strain the door mechanism.
Using Weak Materials: Avoid using flimsy materials that can break easily. Opt for sturdy options like PVC or metal.
Alternatives for Materials or Methods:
Wooden Dowels: Instead of PVC pipes, use wooden dowels. They are strong and can be easily customized.
Velcro Straps: Use Velcro straps instead of zip ties for a more adjustable and reusable option.
Magnetic Strips: Install magnetic strips on the garage wall as an alternative to a door-mounted holder. This keeps rods easily accessible without affecting the door's function.
How Much Will It Cost?
Materials:
- PVC pipes (10 feet): $10
- PVC pipe caps (8 pieces): $5
- Screws (pack of 50): $5
- Mounting brackets (4 pieces): $10
- Sandpaper: $3
Tools:
- Drill: $30 (or borrow)
- Saw: $15 (or borrow)
- Measuring tape: $5
- Screwdriver: $10 (or borrow)
Total Cost: $93
Budget-Friendly Alternatives:
- PVC pipes: Use leftover pipes from other projects or ask friends/family.
- Drill and Saw: Borrow from neighbors or rent from a local hardware store.
- Screws: Use any extra screws you have at home.
Adjusted Total Cost: $43 (if borrowing tools and using leftover materials)
Different Ways to Customize
Materials: Instead of using PVC pipes, try wooden dowels or metal rods. These can offer a different look and might be sturdier.
Colors: Paint the holder to match your garage. Use spray paint for a quick job or stain for a natural wood finish. Bright colors can make it easier to see your rods.
Styles: For a rustic look, use reclaimed wood. For a modern style, use aluminum or stainless steel.
Mounting Options: Instead of mounting directly to the garage door, consider attaching the holder to a wall or ceiling. This can free up space and keep rods out of the way.
Hooks and Clips: Use rubber-coated hooks to prevent scratches. Velcro straps can also secure rods in place.
Additional Storage: Add small shelves or hooks for storing tackle boxes, nets, or other fishing gear.
Personalization: Add nameplates or labels for each rod. This helps keep everything organized and easy to find.
Lighting: Install LED strips or small clip-on lights to illuminate the area, making it easier to grab your gear in low light.
Eco-Friendly Tips
Use reclaimed wood for the base. Old pallets or leftover lumber work great. PVC pipes from previous projects can hold the rods. Secure them with recycled screws or nails. Repurpose old bungee cords to keep rods in place. Use eco-friendly paint or varnish to protect the wood. Attach the holder to the garage door using reused brackets or hooks. This method reduces waste and gives new life to old materials.
Your Fishing Rods Have a New Home
Building a DIY garage door fishing rod holder is a smart way to keep your gear organized. It’s simple, cost-effective, and makes use of space you probably didn’t think about. With just a few materials like PVC pipes, screws, and some basic tools, you can create a sturdy holder that keeps your rods safe and out of the way.
Remember to measure your rods and garage door carefully before starting. This ensures everything fits perfectly. Once installed, you’ll find it much easier to grab your gear and head out for a day on the water. Plus, you’ll free up floor space in your garage for other projects or storage.
So, grab those tools and get started. Your fishing rods will thank you, and you’ll enjoy a more organized garage. Happy building!
How do I make a fishing rod holder for my garage door?
You’ll need PVC pipes, screws, and brackets. Cut the pipes to fit your rods, then attach the brackets to the garage door. Slide the pipes into the brackets, and you’re good to go!
What tools will I need?
Grab a drill, screwdriver, measuring tape, and a saw. These will help you cut the pipes and secure everything in place.
Can I use materials other than PVC pipes?
Sure thing! Wooden dowels or metal pipes work too. Just make sure they’re sturdy enough to hold your rods.
How much time will this project take?
It should take about 1-2 hours. Most of the time goes into measuring and cutting the pipes.
Is this safe for my garage door?
Yes, as long as you use lightweight materials and don’t overload it. Make sure the screws are tight and the brackets are secure.
How many rods can this holder store?
Depending on the length of your pipes, you can store 4-6 rods comfortably. Adjust the number of pipes if you need more space.
Can I customize the holder?
Absolutely! Paint the pipes, add hooks for extra gear, or even label each spot for different rods. Make it your own!