
Home>Home & Furniture>Doors & Windows>Create Your Own Magical DIY Fairy Door
Doors & Windows
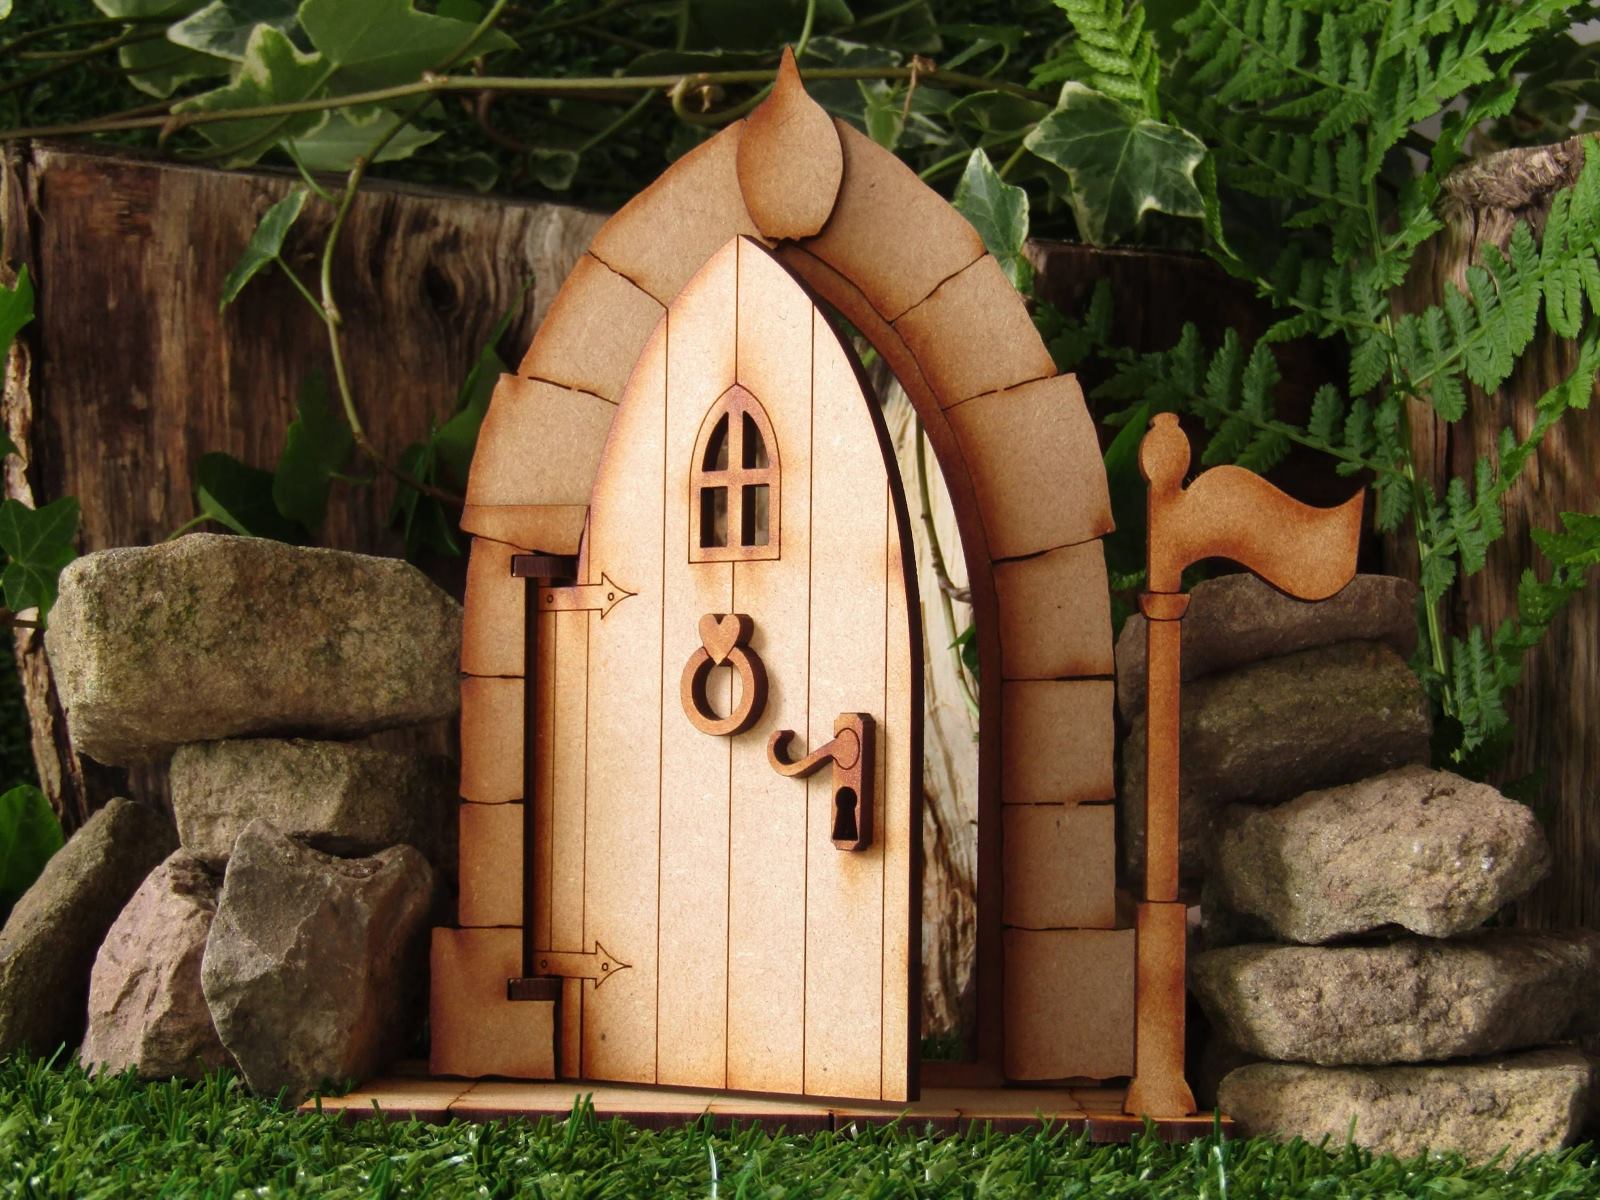
Create Your Own Magical DIY Fairy Door
Published: September 13, 2024
Discover how to create your own magical DIY fairy door with our step-by-step guide. Perfect for adding a whimsical touch to your garden or home decor!
(Many of the links in this article redirect to a specific reviewed product. Your purchase of these products through affiliate links helps to generate commission for Twigandthistle.com, at no extra cost. Learn more)
Have you ever dreamed of adding a touch of magic to your home or garden? Making your own fairy door can do just that! Fairy doors are tiny, decorative doors that you can place at the base of a tree, along a garden path, or even inside your home. They create a sense of wonder and whimsy, sparking the imagination of kids and adults alike. Creating one is a fun and simple DIY project that you can do with easily found materials. Whether it's for a child's room or a secret garden, a fairy door adds a sprinkle of enchantment to any space.
Getting Ready for Your Fairy Door Project
Gather Materials: Collect all necessary items like wood, paint, glue, small decorations, and tools. Make sure everything is within reach.
Choose a Safe Workspace: Set up in a well-ventilated area with good lighting. Use a sturdy table or workbench to avoid accidents.
Wear Safety Gear: Put on safety goggles and gloves to protect your eyes and hands from splinters, paint, or glue.
Prepare the Wood: Sand down any rough edges on the wood pieces to avoid splinters. Measure and cut the wood to the desired size for your fairy door.
Plan Your Design: Sketch out your fairy door design on paper. Decide where each decoration will go before you start gluing or painting.
Lay Down Protective Covering: Use old newspapers or a drop cloth to protect your workspace from paint spills or glue drips.
Test Your Tools: Ensure all tools like paintbrushes, glue guns, and sandpaper are in good working condition.
Organize Small Parts: Keep tiny decorations like beads, buttons, or miniature doorknobs in small containers to prevent losing them.
Check Ventilation: If using strong adhesives or paints, make sure the area is well-ventilated to avoid inhaling fumes.
Keep Water Nearby: Have a cup of water handy for rinsing paintbrushes or cleaning up small spills quickly.
Gathering Materials and Tools
Wooden Craft Sticks: These will form the main structure of the fairy door. They are easy to cut and glue together.
Craft Glue: Essential for sticking the wooden sticks together. Make sure it dries clear for a neat finish.
Acrylic Paints: Use these to paint the door and add colorful details. They dry quickly and are available in many colors.
Paintbrushes: Needed for applying the acrylic paints. Different sizes help with both broad strokes and fine details.
Small Hinges: These allow the door to open and close. Look for tiny ones that fit the scale of your fairy door.
Miniature Doorknob: Adds a realistic touch. You can find these at craft stores or online.
Sandpaper: Smooths the edges of the wooden sticks. This helps the paint adhere better and gives a polished look.
Hot Glue Gun: Useful for attaching heavier items like the hinges and doorknob. It provides a strong, quick-drying bond.
Decorative Items: Think tiny flowers, beads, or moss. These add whimsy and charm to your fairy door.
Pencil and Ruler: For measuring and marking where to cut the wooden sticks. Ensures everything fits together perfectly.
Scissors or Craft Knife: Needed for cutting the wooden sticks to the right size. Be careful when using these tools.
Varnish: Protects the paint and wood from weather if you plan to place the door outside. Gives a nice finish too.
Skill Level and Time Commitment
Skill Level: Beginner
Time Required: 1-2 hours
How to Make a Fairy Door
Gather Materials:
- Small wooden door (or craft wood to cut one)
- Acrylic paint and brushes
- Small hinges
- Hot glue gun
- Decorative items (tiny doorknob, flowers, glitter)
Prepare the Door:
- Sand the wooden door to smooth any rough edges.
- Wipe off dust with a damp cloth.
Paint the Door:
- Choose your favorite colors.
- Paint the door and let it dry completely.
- Add a second coat if needed.
Attach Hinges:
- Use small hinges to attach the door to a wall or tree.
- Secure with screws or hot glue.
Decorate:
- Glue on a tiny doorknob.
- Add flowers, glitter, or other decorations.
- Let everything dry.
Install the Door:
- Find a spot in your garden or home.
- Secure the door with hot glue or screws.
Final Touches:
- Add a small welcome mat or sign.
- Sprinkle some fairy dust (glitter) around the door.
Enjoy your magical fairy door!
Helpful Tips and Tricks
Choose the Right Wood: Use balsa wood or popsicle sticks for easy cutting and shaping.
Paint Before Assembling: Paint each piece before gluing them together. This prevents smudging and makes it easier to reach small areas.
Use Strong Glue: Opt for wood glue or a hot glue gun for a sturdy hold. Avoid school glue as it may not hold well.
Add Details: Use tiny beads, buttons, or small stones to create doorknobs and other decorations.
Seal the Paint: Apply a clear sealant to protect the paint and make the door weather-resistant if placing it outside.
Common Mistakes to Avoid:
- Skipping Sanding: Always sand the edges of the wood to avoid splinters and ensure a smooth finish.
- Overloading Glue: Too much glue can make a mess and weaken the bond. Use just enough to hold pieces together.
- Ignoring Measurements: Measure twice, cut once. Incorrect measurements can lead to mismatched pieces.
Material Alternatives:
- Instead of wood, use cardboard for a lightweight option.
- For paint, acrylic paint works well, but markers can be used for finer details.
- Replace beads with clay to mold custom doorknobs and decorations.
Estimating the Cost
Wooden Craft Sticks: $5 for a pack of 100.
Acrylic Paints: $10 for a basic set.
Paintbrushes: $5 for a small set.
Hot Glue Gun: $10.
Glue Sticks: $5 for a pack.
Decorative Items: $10 (small flowers, beads, glitter).
Sandpaper: $3.
Small Hinges: $5 for a pack.
Varnish: $7 for a small can.
Total Cost: $60.
Budget-Friendly Alternatives:
Wooden Craft Sticks: Use popsicle sticks from home.
Acrylic Paints: Use leftover paint from other projects.
Paintbrushes: Use old brushes.
Hot Glue Gun: Borrow from a friend.
Decorative Items: Use natural items like leaves or pebbles.
Sandpaper: Use a nail file.
Small Hinges: Skip hinges, make a simple door.
Varnish: Use clear nail polish.
Total Cost with Alternatives: $20.
Different Ways to Customize
Materials: Instead of using wood, try polymer clay for a more detailed design. Cardboard can be a lightweight alternative. Air-dry clay offers a sculptable option that hardens without baking.
Colors: Paint your fairy door in pastel shades for a soft, dreamy look. Metallic paints like gold or silver can give it a magical, enchanted feel. Glow-in-the-dark paint adds a fun twist for nighttime magic.
Styles: Create a rustic fairy door with bark and twigs for a natural look. For a modern fairy door, use clean lines and geometric shapes. A Victorian style can be achieved with intricate patterns and antique colors.
Decorations: Add miniature flowers and vines for a garden theme. Use tiny doorknobs and hinges for a realistic touch. Fairy lights can be wrapped around the door for a sparkling effect.
Themes: Make a seasonal fairy door by changing decorations for spring, summer, fall, and winter. Create a holiday-themed door for Christmas, Halloween, or Easter. A storybook theme can bring favorite tales to life.
Textures: Use sandpaper to give the door a weathered look. Embossing tools can add raised designs. Fabric scraps can create a soft, textured surface.
Accessories: Add a miniature mailbox or welcome mat. Create a tiny pathway with pebbles or moss. Include a small sign with a welcoming message.
Mounting Options: Attach the door to a tree trunk for an outdoor fairy home. Place it on a wall or baseboard inside your house. Use magnets to make it removable and repositionable.
Eco-Friendly Crafting Tips
Use reclaimed wood from old furniture or pallets. This gives the door a rustic look and reduces waste. Recycled cardboard can be cut and painted for intricate details. Natural materials like twigs, stones, and leaves add charm and are eco-friendly. Non-toxic paints and natural dyes ensure safety for both you and the environment. Upcycle old buttons or beads for doorknobs and decorations. Glue made from flour and water works well for sticking parts together without harmful chemicals. Solar-powered fairy lights can illuminate the door, adding a magical touch while saving energy.
Your Fairy Door Awaits
You've got all the tools and materials to create a magical fairy door. Just follow the steps and let your imagination run wild. Remember, there's no right or wrong way to do this. Each door is unique, just like the fairies who will use it. Once finished, place it in a special spot in your garden or home. Watch as it adds a touch of whimsy and wonder to your space. Share your creation with friends and family, and maybe even inspire them to make their own. Keep experimenting with different designs and materials. The more you create, the better you'll get. So, grab your paintbrush, some glue, and start crafting. Your fairy door is just the beginning of endless DIY adventures. Happy crafting!
What materials do I need to make a fairy door?
You'll need craft sticks, paint, glue, small decorations like buttons or beads, and cardboard or wood for the base.
How do I start building the fairy door?
Begin by cutting the base to your desired shape. Then, glue craft sticks vertically to form the door. Let it dry before painting.
Can I customize my fairy door?
Absolutely! Paint it any color you like, and add decorations such as tiny flowers, moss, or even a miniature doorknob.
Where should I place my fairy door?
Place it at the base of a tree, on a wall, or even inside your home along a baseboard. Fairies love cozy, hidden spots.
How long does it take to make a fairy door?
It usually takes about an hour to assemble and paint, plus drying time for the glue and paint.
Is this project suitable for kids?
Yes, kids can definitely help! Just supervise when using scissors and glue. It's a fun way to get creative together.
Can I add lights to my fairy door?
Sure thing! Use battery-operated fairy lights to add a magical glow. Just make sure they're safe for outdoor use if placing outside.