Home>Home & Furniture>Dining Room>DIY Wainscoting: Step-by-Step Guide

Dining Room
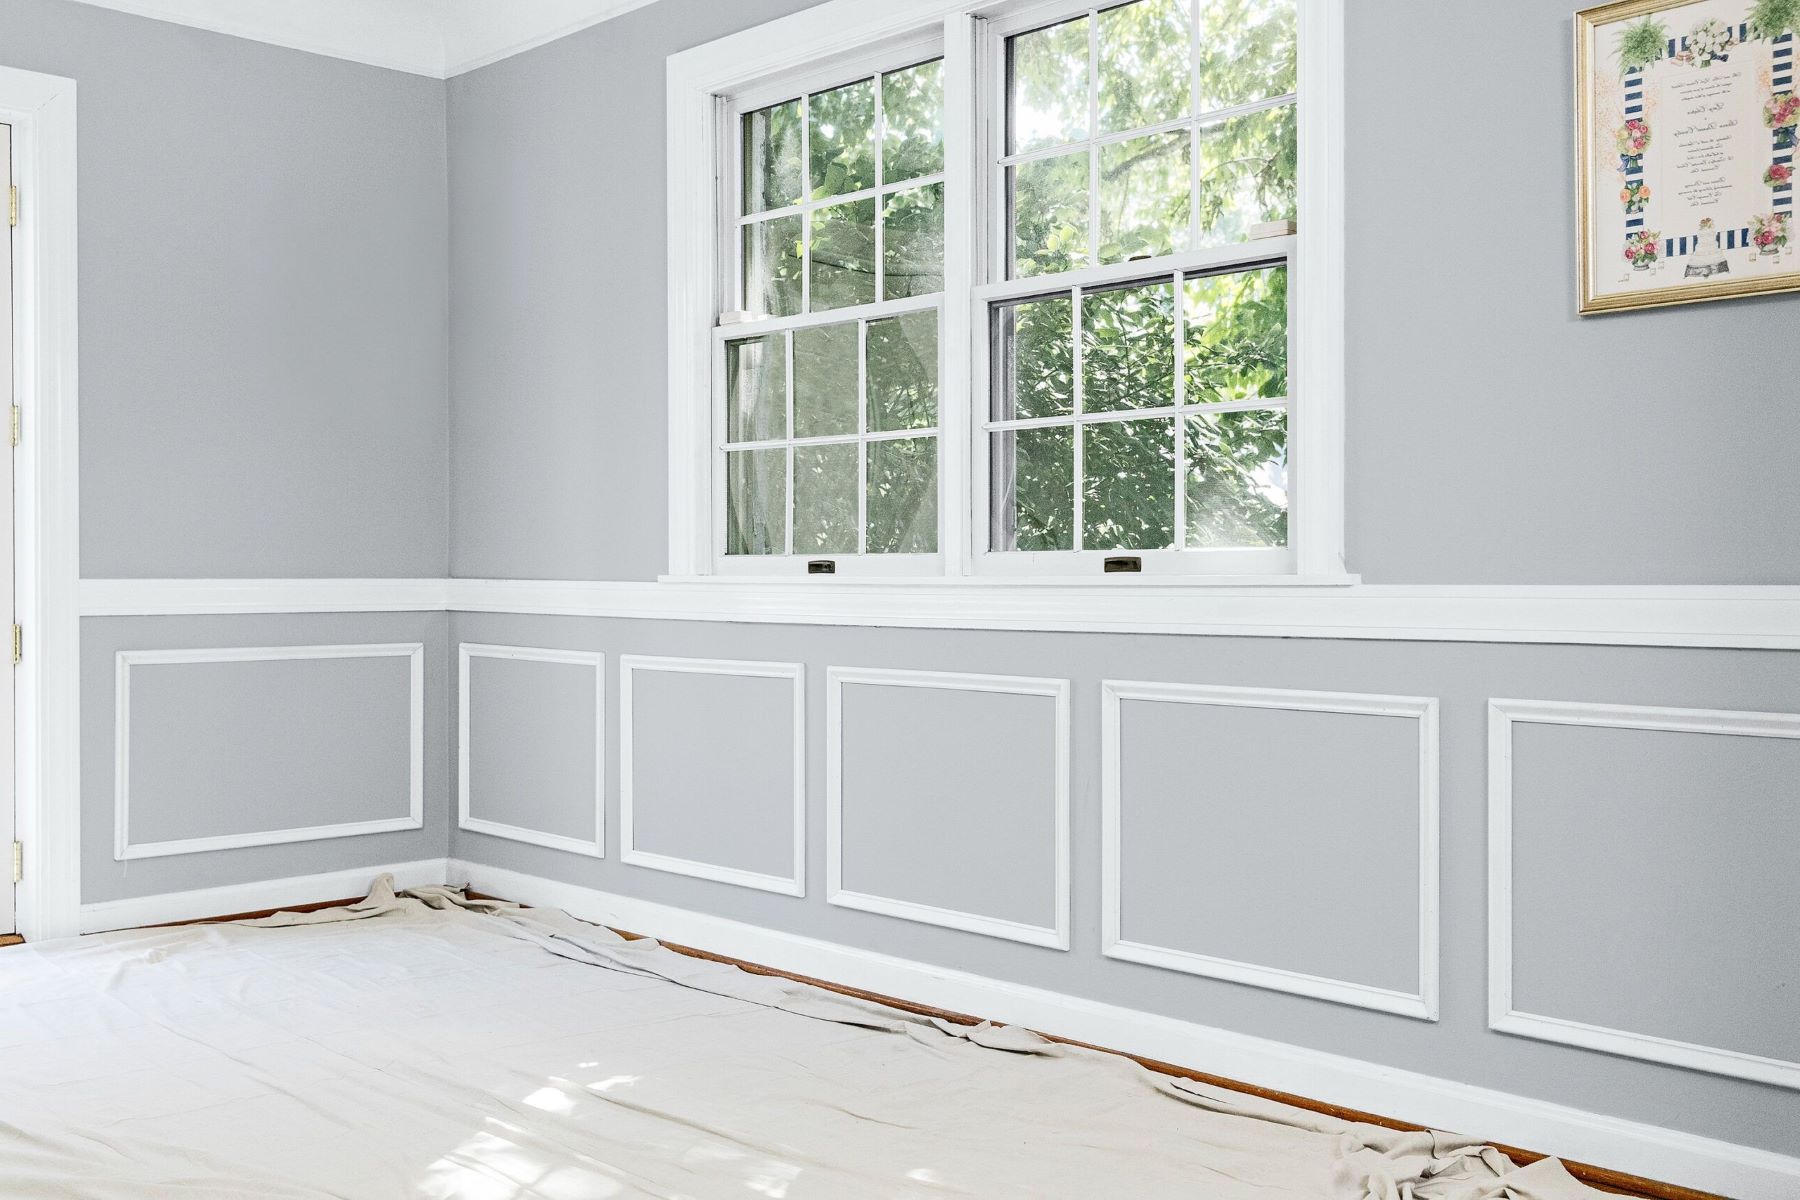
DIY Wainscoting: Step-by-Step Guide
Published: August 8, 2024
Transform your dining room with our DIY wainscoting guide! Learn step-by-step instructions, tips, and tools needed to create a stunning, professional look.
(Many of the links in this article redirect to a specific reviewed product. Your purchase of these products through affiliate links helps to generate commission for Twigandthistle.com, at no extra cost. Learn more)
Wainscoting adds charm and character to any room. Traditionally used for protecting walls, it's now a popular decorative feature in homes. Installing wainscoting yourself can seem like a big job, but with the right tools and some patience, anyone can do it. This guide will break down each step, making it easy to understand and follow. Whether you're new to DIY projects or looking to add a fresh touch to your space, wainscoting is a great way to enhance your home’s look and feel. Get ready to transform your walls into something truly special!
Getting Ready for Your Project
Measure Your Walls: Use a tape measure to get the exact dimensions of your walls. Write these down.
Choose Your Wainscoting Style: Decide if you want raised panels, flat panels, or beadboard.
Gather Materials: Get wood panels, trim, nails, adhesive, a saw, a level, a measuring tape, and paint or stain.
Prepare the Walls: Clean the walls thoroughly. Remove any old wallpaper or paint that might interfere with adhesion.
Cut Panels and Trim: Use a saw to cut the panels and trim to the correct sizes based on your measurements.
Set Up Workspace: Lay down a drop cloth to protect your floor. Make sure you have good lighting and enough space to move around.
Safety Gear: Wear safety goggles, gloves, and a dust mask to protect yourself from wood dust and debris.
Mark the Wall: Use a pencil and level to mark where the panels and trim will go. This helps ensure everything is straight.
Dry Fit Panels: Place the panels and trim on the wall without adhesive to make sure they fit correctly.
Check for Obstacles: Look for any outlets or switches that might need adjustments in your paneling.
Gather Tools: Have a hammer, nails, adhesive, a level, and a saw within reach.
Ventilation: Make sure the room is well-ventilated, especially if you are using adhesive or paint. Open windows or use fans.
Essential Materials and Tools
Wainscoting Panels: These are the main pieces that will cover the lower part of your wall. Choose from wood, MDF, or PVC based on your preference and budget.
Chair Rail Molding: This decorative trim goes on top of the wainscoting panels, adding a finished look.
Baseboard Molding: This trim goes at the bottom of the panels, providing a seamless transition to the floor.
Panel Adhesive: A strong adhesive to attach the panels to the wall securely.
Nails and Nail Gun: Nails will help secure the panels and moldings. A nail gun makes this process quicker and easier.
Level: Ensures your panels and moldings are straight.
Measuring Tape: Accurate measurements are crucial for cutting panels and moldings to the correct size.
Saw: A miter saw or circular saw will help cut the panels and moldings to the right dimensions.
Caulk and Caulk Gun: Fills in gaps and seams between panels and moldings for a smooth finish.
Sandpaper: Smooths out any rough edges on the panels and moldings.
Paint and Paintbrushes: Adds color and protection to your wainscoting. Choose a paint that matches your room's decor.
Stud Finder: Helps locate wall studs to ensure panels are securely attached.
Pencil: Marks measurements and cutting lines on panels and moldings.
Safety Gear: Includes safety glasses, gloves, and a dust mask to protect yourself while cutting and installing materials.
Required Skills and Time Commitment
Skill Level: Intermediate
Time Required: 1-2 days
Steps:
- Measure and Plan: 1-2 hours
- Cut Panels and Trim: 2-3 hours
- Install Panels: 3-4 hours
- Attach Trim: 2-3 hours
- Fill Gaps and Sand: 1-2 hours
- Paint or Stain: 4-6 hours
Tools Needed:
- Tape Measure
- Saw
- Nail Gun
- Level
- Caulk Gun
- Paintbrush or Roller
Materials Needed:
- Wainscoting Panels
- Trim Pieces
- Nails
- Caulk
- Paint or Stain
Tips:
- Measure Twice, Cut Once
- Use a Level for Accuracy
- Sand Smoothly for a Professional Finish
Detailed Instructions for Wainscoting
Measure the Wall:
- Use a tape measure to find the height and width of the wall.
- Decide how high you want the wainscoting to go, typically 32-36 inches.
Mark the Wall:
- Use a pencil to mark the desired height of the wainscoting.
- Draw a horizontal line across the wall using a level to ensure it’s straight.
Cut the Panels:
- Measure and cut the wainscoting panels to fit the wall dimensions.
- Use a saw to make precise cuts.
Install the Baseboard:
- Attach the baseboard to the bottom of the wall using a nail gun or adhesive.
- Ensure it’s level and secure.
Attach the Panels:
- Apply construction adhesive to the back of each panel.
- Press the panels onto the wall, aligning them with the marked line.
- Secure with nails for extra hold.
Install the Top Rail:
- Measure and cut the top rail to fit the length of the wall.
- Attach it above the panels using nails or adhesive.
Add the Cap Molding:
- Cut the cap molding to fit the top rail.
- Attach it using nails or adhesive for a finished look.
Fill Nail Holes:
- Use wood filler to fill any nail holes or gaps.
- Let it dry, then sand smooth.
Prime and Paint:
- Apply primer to the wainscoting.
- Once dry, paint the wainscoting with your chosen color.
Clean Up:
- Remove any painter’s tape.
- Clean the area and enjoy your new wainscoting!
Helpful Tips and Tricks
Measure Twice, Cut Once: Always double-check measurements before cutting. This saves time and materials.
Use a Level: Ensure panels are straight. Crooked wainscoting looks unprofessional.
Pre-Paint Panels: Paint panels before installation. Touch up after they're on the wall.
Use Construction Adhesive: Apply adhesive to the back of panels. This helps them stick better.
Caulk Gaps: Fill gaps between panels and wall with caulk. This gives a seamless look.
Sand Edges: Smooth edges of cut panels with sandpaper. This prevents splinters and gives a clean finish.
Prime the Wall: Apply primer to the wall before installing panels. This helps paint adhere better.
Common Mistakes to Avoid:
- Skipping Primer: Paint may peel if you skip priming.
- Ignoring Wall Imperfections: Fix dents or holes before installing panels.
- Wrong Measurements: Incorrect measurements lead to wasted materials.
- Not Using a Level: Panels will look uneven without a level.
Material Alternatives:
- MDF Panels: Cheaper than wood, easy to paint.
- PVC Panels: Water-resistant, good for bathrooms.
- Beadboard: Adds texture, easy to install.
Method Alternatives:
- Peel-and-Stick Panels: Quick installation, no nails needed.
- Painted Wainscoting: Use paint to create the look of wainscoting without panels.
Estimating Your Project Costs
Materials:
- Wainscoting Panels: $50-$100 per panel (depends on material and size)
- Chair Rail: $1-$3 per linear foot
- Baseboard: $1-$3 per linear foot
- Adhesive: $5-$10 per tube
- Caulk: $3-$5 per tube
- Paint: $20-$50 per gallon
Tools:
- Miter Saw: $100-$200 (or rent for $20-$40/day)
- Nail Gun: $50-$150 (or rent for $20-$30/day)
- Level: $10-$20
- Measuring Tape: $5-$15
- Caulk Gun: $5-$15
- Paintbrushes/Rollers: $10-$20
Budget-Friendly Alternatives:
- Use MDF Panels: $30-$60 per panel
- Hand Saw: $10-$20 (instead of miter saw)
- Hammer and Nails: $10-$20 (instead of nail gun)
- Borrow Tools: Free (ask friends or family)
Total Cost Estimate:
- High-End: $400-$700
- Budget-Friendly: $200-$400
Creative Variations and Customizations
Materials: Instead of traditional wood, try MDF (medium-density fiberboard) for a smoother finish. PVC panels work well in moisture-prone areas like bathrooms. For a rustic look, consider reclaimed wood.
Colors: Paint wainscoting in bold colors like navy blue or forest green for a modern touch. Use white or light gray for a classic, clean look. For a unique twist, try a two-tone effect with different colors on the top and bottom sections.
Styles: Beadboard wainscoting adds a cottage feel. Raised panel wainscoting offers a more formal, traditional look. Shiplap can give a farmhouse vibe. For a contemporary style, use flat panels with minimal detailing.
Height: Standard wainscoting height is about one-third of the wall, but you can customize it. For a dramatic effect, extend it to two-thirds of the wall height. In smaller rooms, keep it lower to avoid making the space feel cramped.
Trim: Add crown molding at the top for an elegant finish. Use baseboard trim at the bottom for a polished look. For a more intricate design, incorporate chair rail molding.
Patterns: Create a geometric pattern with the panels for a modern twist. Use vertical slats for a traditional look or horizontal slats for a contemporary feel. Mix and match different patterns for a unique design.
Finishes: For a sleek look, use a high-gloss finish. For a more subtle appearance, opt for a matte or satin finish. To add texture, consider a distressed or weathered finish.
Accessories: Add hooks or shelves to the wainscoting for extra functionality. Incorporate picture frames or mirrors within the panels for added visual interest. Use LED strip lights along the top edge for a modern touch.
Eco-Friendly Tips for Your Project
Materials Needed:
- Reclaimed Wood: Use old barn wood, pallets, or leftover planks.
- Low-VOC Paint: Choose paints with low volatile organic compounds.
- Recycled MDF: Medium-density fiberboard made from recycled wood fibers.
- Eco-friendly Adhesive: Opt for water-based, non-toxic glue.
Step-by-Step Guide:
Measure the Wall: Determine the height and length for your wainscoting. Mark these measurements on the wall.
Cut the Reclaimed Wood: Using a saw, cut the wood to fit your measurements. Sand the edges to smooth them out.
Prepare the Wall: Clean the wall surface. If needed, apply a primer using low-VOC paint.
Attach the Panels: Apply eco-friendly adhesive to the back of each wood piece. Press them firmly onto the wall, starting from the bottom.
Secure with Nails: For extra stability, use a nail gun to secure the panels. Make sure to use nails made from recycled materials.
Fill Gaps: Use a non-toxic wood filler to fill any gaps between the panels. Let it dry completely.
Paint or Stain: Apply low-VOC paint or an eco-friendly stain to the wainscoting. This will protect the wood and give it a finished look.
Install the Top Rail: Cut and attach a top rail to cap off the wainscoting. Secure it with eco-friendly adhesive and nails.
Final Touches: Touch up any areas with paint or stain. Clean up using biodegradable cleaning products.
Using reclaimed wood and eco-friendly materials helps reduce waste and promotes sustainability.
Your Wainscoting Masterpiece Awaits
You've got all the tools and know-how to tackle your wainscoting project. Measure your walls, cut your panels, and secure them with nails or adhesive. Don't forget to fill gaps with caulk and give everything a good sanding. A fresh coat of paint will make your hard work shine.
Remember, patience is key. Take your time to ensure everything lines up perfectly. Mistakes happen, but they can be fixed. Enjoy the process and take pride in your craftsmanship.
Once finished, step back and admire your work. You've transformed a plain wall into a stunning feature. Your space now has character and charm, all thanks to your effort.
So grab your tools, roll up your sleeves, and get started. Your wainscoting masterpiece is just a few steps away. Happy DIY-ing!
What materials do I need for DIY wainscoting?
You'll need wainscoting panels, trim pieces, measuring tape, level, saw, nails, adhesive, and paint.
How do I measure for wainscoting?
Measure the height and width of your wall. Decide how high you want the wainscoting to go, usually 32-36 inches from the floor.
Can I install wainscoting over existing walls?
Yes, you can install it over drywall or plaster. Just make sure the surface is clean and smooth.
How do I cut wainscoting panels?
Use a saw to cut the panels to the desired size. A miter saw works best for angle cuts.
How do I attach the panels to the wall?
Apply adhesive to the back of each panel, then press it onto the wall. Secure with nails for extra hold.
Do I need to paint or finish the wainscoting?
Yes, painting or finishing helps protect the wood and gives it a polished look. Use primer before painting for best results.
How long does it take to install wainscoting?
It usually takes a weekend to complete, depending on the size of the room and your experience level.