
Home>Home & Furniture>Bedroom>DIY Makeup Vanity: How to Create Your Own Glam Station
Bedroom
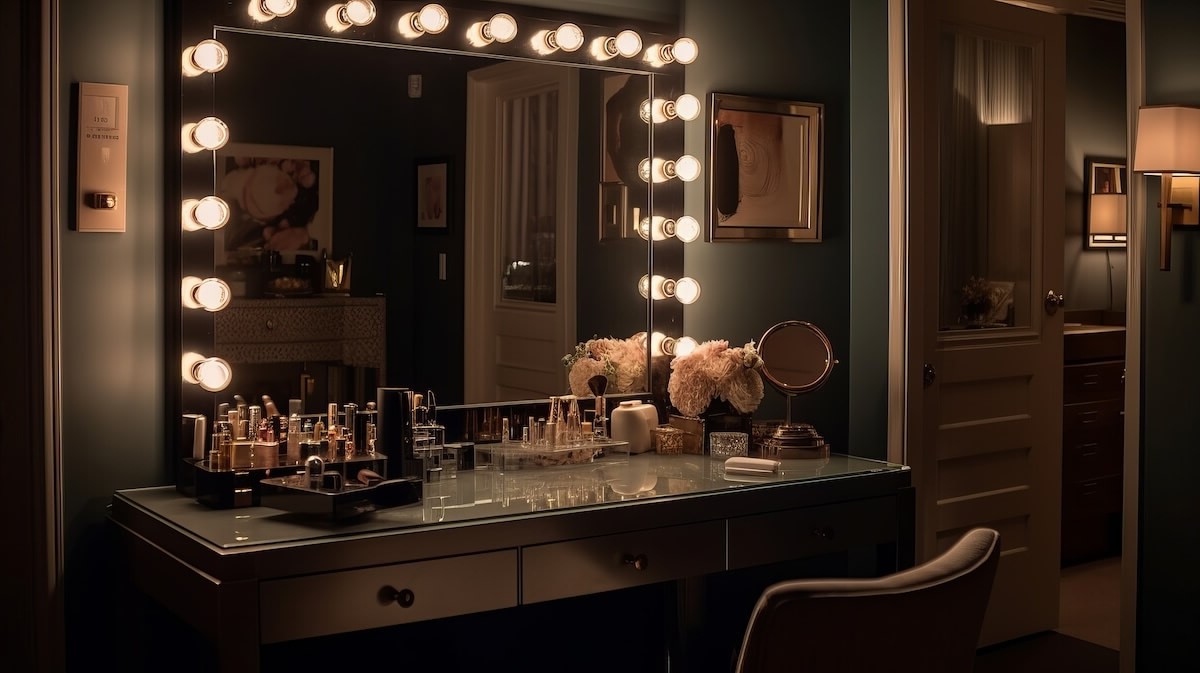
DIY Makeup Vanity: How to Create Your Own Glam Station
Published: July 23, 2024
Transform your space with a DIY makeup vanity! Discover step-by-step instructions, tips, and ideas to create your own glam station. Perfect for beauty enthusiasts!
(Many of the links in this article redirect to a specific reviewed product. Your purchase of these products through affiliate links helps to generate commission for Twigandthistle.com, at no extra cost. Learn more)
Ever wanted a special spot just for your makeup routine? Creating a DIY makeup vanity can be fun, easy, and super rewarding. You don’t need to be an expert carpenter or interior designer to make a beautiful, functional glam station right at home. With some basic materials, a bit of creativity, and a few handy tips, you can have a space that feels both luxurious and personal. Let's get started on making your dream vanity spot where you can get ready in style every day. Get ready to transform an ordinary corner into your go-to beauty haven!
Getting Ready for Your Project
Gather Materials: Collect all necessary items like a mirror, table, chair, lights, screws, and tools. Make sure everything is within reach.
Choose a Location: Pick a spot with good natural light. Ensure there's enough space for your vanity and chair.
Clean the Area: Clear out any clutter. Wipe down surfaces to remove dust and dirt.
Measure and Mark: Use a tape measure to mark where you want to place the mirror and lights. This ensures everything is aligned.
Set Up Workspace: Lay down a drop cloth to protect the floor. Arrange tools and materials for easy access.
Safety Gear: Wear safety goggles and gloves. Keep a first aid kit nearby in case of minor injuries.
Check Electrical Outlets: Ensure there are outlets nearby for plugging in lights and other devices. Use extension cords if needed.
Pre-Drill Holes: If attaching lights or a mirror to the wall, pre-drill holes to make installation easier.
Test Lights: Before mounting, plug in and test the lights to ensure they work properly.
Organize Supplies: Have containers or drawers ready to store makeup and accessories. This keeps your vanity tidy.
Secure Furniture: Make sure the table and chair are stable. Tighten any loose screws or bolts.
Ventilation: Ensure the area is well-ventilated, especially if using adhesives or paints. Open windows or use a fan to circulate air.
What You Need: Materials and Tools
Wooden Boards: These will form the base, sides, and shelves of the vanity. Choose sturdy, smooth boards for a polished look.
Mirror: A large, clear mirror is essential. Opt for one with a frame that matches your style.
Paint or Stain: Customize the color of your vanity. Paint for a solid color, stain for a natural wood finish.
Sandpaper: Smooth out rough edges on the wood. This ensures a sleek, professional finish.
Screws and Nails: Secure the boards together. Use screws for stronger joints, nails for lighter attachments.
Drill: Create holes for screws. A drill makes assembly quicker and easier.
Hammer: Drive nails into the wood. Essential for attaching smaller pieces.
Measuring Tape: Measure wood accurately. Ensures all pieces fit together perfectly.
Saw: Cut wooden boards to size. A hand saw or circular saw works well.
Wood Glue: Strengthen joints. Apply between boards before screwing or nailing.
Drawer Slides: Install for smooth-opening drawers. Choose slides that match your drawer size.
Knobs or Handles: Add to drawers and doors. Choose styles that complement your vanity.
Lighting: Install around the mirror. LED strips or bulbs provide bright, even lighting.
Power Strip: Keep all your devices charged. Mount it discreetly for easy access.
Level: Ensure your vanity is even. Prevents wobbling and uneven surfaces.
Clamps: Hold pieces together while glue dries. Keeps everything aligned during assembly.
Pencil: Mark measurements and cutting lines. Essential for accuracy.
Protective Gear: Wear gloves and safety glasses. Protect yourself from splinters and dust.
Skill Level and Time Commitment
Skill Level: Intermediate
Estimated Time Required:
- Planning and Gathering Materials: 2-3 hours
- Building the Vanity Table: 4-6 hours
- Painting and Finishing: 2-3 hours
- Installing the Mirror and Lights: 1-2 hours
- Organizing Makeup and Accessories: 1-2 hours
Total Time: 10-16 hours
How to Build Your Vanity: Step-by-Step Guide
Gather Materials:
- Vanity table or desk
- Mirror (preferably with lights)
- Chair or stool
- Drawer organizers or trays
- Makeup storage containers
- Screwdriver and screws
- Paint and brushes (optional)
- Decorative items (optional)
Choose a Location:
- Find a spot with good natural light.
- Ensure there's an electrical outlet nearby for lighting.
Assemble the Vanity Table:
- Follow the instructions provided with your table or desk.
- Secure all parts tightly using a screwdriver.
Install the Mirror:
- Position the mirror at eye level.
- If using a wall-mounted mirror, mark the spots for screws.
- Drill holes and attach the mirror securely.
Add Lighting:
- Attach vanity lights around the mirror.
- Plug the lights into the nearby outlet.
Organize Storage:
- Place drawer organizers inside the table drawers.
- Arrange makeup storage containers on the tabletop.
Paint and Decorate (Optional):
- Paint the table or mirror frame to match your room’s decor.
- Add decorative items like vases, candles, or frames.
Set Up Your Makeup:
- Sort makeup by type (e.g., lipsticks, eyeshadows).
- Place frequently used items in easy-to-reach spots.
- Store less-used items in drawers or containers.
Add a Chair or Stool:
- Choose a comfortable chair or stool that fits the vanity height.
- Ensure it allows you to sit comfortably while applying makeup.
Final Touches:
- Plug in and test the lights.
- Adjust the mirror angle if needed.
- Enjoy your new glam station!
Helpful Tips and Tricks
Choose a Good Spot: Pick a well-lit area, preferably near a window. Natural light helps with makeup application.
Use a Sturdy Table: An old desk or small table works great. Make sure it's stable and has enough surface area for your items.
Add a Mirror: A large mirror is essential. You can mount it on the wall or use a tabletop version. Consider one with built-in lights for better visibility.
Organize with Trays and Containers: Use small trays, cups, or containers to keep brushes, lipsticks, and other items organized. Drawer organizers can also help.
Install Shelves: Floating shelves above the vanity can store extra products or decorative items. Make sure they’re securely mounted.
Comfortable Seating: A cushioned stool or chair makes a big difference. Choose one that fits well under your table.
Power Outlets: Ensure you have access to power outlets for hair tools and chargers. Use a power strip if needed.
Decorate: Personalize your space with photos, plants, or artwork. It makes the area feel more inviting.
Lighting: If natural light isn’t enough, add a ring light or LED strip lights around the mirror. Good lighting is key for makeup.
Common Mistakes to Avoid:
- Overcrowding: Don’t clutter the surface with too many items. Keep it tidy.
- Ignoring Lighting: Poor lighting can make makeup application difficult. Ensure you have enough light.
- Unstable Furniture: Make sure your table and shelves are sturdy to avoid accidents.
Alternatives:
- Table: If you don’t have a desk, use a sturdy shelf or even a wide windowsill.
- Mirror: A handheld mirror can work if you don’t have space for a large one.
- Storage: Use a rolling cart for extra storage if your table lacks drawers.
Budgeting for Your DIY Vanity
Materials:
- Wood (for the table and shelves): $50-$100
- Mirror: $30-$70
- Paint or Stain: $15-$30
- Drawer Pulls/Knobs: $10-$20
- Lighting (LED strips or bulbs): $20-$50
- Screws, Nails, and Glue: $10-$15
Tools:
- Drill: $30-$60
- Saw: $40-$80
- Screwdriver Set: $10-$20
- Paintbrushes/Rollers: $5-$10
- Measuring Tape: $5-$10
- Sandpaper: $5-$10
Total Estimated Cost: $230-$475
Budget-Friendly Alternatives:
- Repurpose Old Furniture: Use an old desk or table instead of buying new wood.
- Thrift Store Mirror: Find a mirror at a thrift store for $10-$20.
- Basic Lighting: Use simple desk lamps or battery-operated lights for $10-$20.
- Borrow Tools: Ask friends or family to borrow tools, reducing costs significantly.
Personalizing Your Glam Station
Alternative Materials: Instead of using wood for the vanity, try metal or glass for a modern look. Reclaimed wood can give a rustic feel. For the tabletop, consider marble or granite for a luxurious touch.
Colors: Paint the vanity in pastel shades for a soft, feminine vibe. Bold colors like deep blue or emerald green can make a statement. Use metallic finishes like gold or silver for a glamorous touch.
Styles: For a vintage look, add ornate handles and decorative trim. A minimalist style can be achieved with clean lines and simple hardware. For a boho feel, incorporate woven baskets and macramé accents.
Lighting: Install LED strip lights around the mirror for even lighting. Use vintage-style bulbs for a retro look. Consider a lighted mirror for a professional makeup setup.
Storage: Add floating shelves above the vanity for extra storage. Use drawer organizers to keep makeup sorted. Incorporate hooks on the sides for hanging accessories.
Seating: Choose a plush stool for comfort. A clear acrylic chair can give a modern touch. For a vintage feel, use a reupholstered antique chair.
Mirrors: Opt for a large, frameless mirror for a sleek look. A round mirror can add a soft touch. For a vintage style, use a mirror with an ornate frame.
Decor: Add a small vase of flowers for a fresh look. Use decorative trays to organize perfumes and jewelry. Hang artwork or inspirational quotes above the vanity.
Eco-Friendly Ideas for Your Vanity
Reclaimed Wood: Use old pallets or barn wood for the vanity table. Sand and stain them for a polished look.
Repurposed Furniture: Transform an old desk or dresser into a vanity. Add a fresh coat of eco-friendly paint.
Recycled Glass: Use recycled glass tiles for the tabletop. They add a touch of elegance and are environmentally friendly.
LED Lighting: Install LED bulbs around the mirror. They use less energy and last longer than traditional bulbs.
Natural Fabrics: Choose organic cotton or linen for the stool cushion. These materials are sustainable and biodegradable.
Non-Toxic Paint: Opt for low-VOC or zero-VOC paints. They emit fewer harmful chemicals into the air.
Second-Hand Finds: Visit thrift stores for mirrors, stools, and decorative items. Giving these items a new life reduces waste.
Bamboo Accessories: Use bamboo organizers for brushes and makeup. Bamboo grows quickly and is a renewable resource.
Upcycled Jars: Store makeup brushes and tools in cleaned-out glass jars. Decorate them with twine or paint for a personal touch.
Eco-Friendly Adhesives: Use water-based glues and adhesives. They are less harmful to the environment and your health.
Your DIY Vanity Awaits
Building your own makeup vanity isn't just about saving money, it's about creating a personalized space that fits your style. From choosing the right materials to adding those final touches, every step brings you closer to a unique glam station. Remember, the key is to plan well, measure twice, and enjoy the process. Don't stress over perfection; it's your space, so make it reflect your personality. Whether you go for a minimalist look or something more elaborate, the satisfaction of using something you built yourself is unbeatable. So, gather your tools, roll up your sleeves, and get started. Your perfect vanity is just a few steps away. Happy DIY-ing!
What materials do I need to build a DIY makeup vanity?
You'll need wood for the frame, a mirror, paint or stain, screws, a drill, and some sandpaper. Optional items include LED lights, drawer pulls, and decorative trim.
How much time will it take to complete the vanity?
It depends on your skill level and the complexity of your design. A simple vanity might take a weekend, while a more elaborate one could take several weekends.
Can I customize the size of my vanity?
Absolutely! Measure your space and decide how much storage you need. You can adjust the dimensions to fit your room perfectly.
Do I need any special tools?
Basic tools like a drill, screwdriver, saw, and measuring tape should suffice. If you're adding lights, you might need a wire stripper and soldering iron.
How do I add lighting to my vanity?
You can use LED strip lights or bulb kits. Attach them around the mirror for even lighting. Make sure to follow the manufacturer's instructions for safe installation.
What type of mirror should I use?
A flat mirror works best for makeup application. You can choose a framed or frameless mirror based on your style preference.
How can I make my vanity more organized?
Add drawers, shelves, and dividers to keep your makeup and tools tidy. Use small containers or trays inside drawers for extra organization.