
Home>Home & Furniture>Bedroom>Create a Stunning DIY Flower Wall
Bedroom
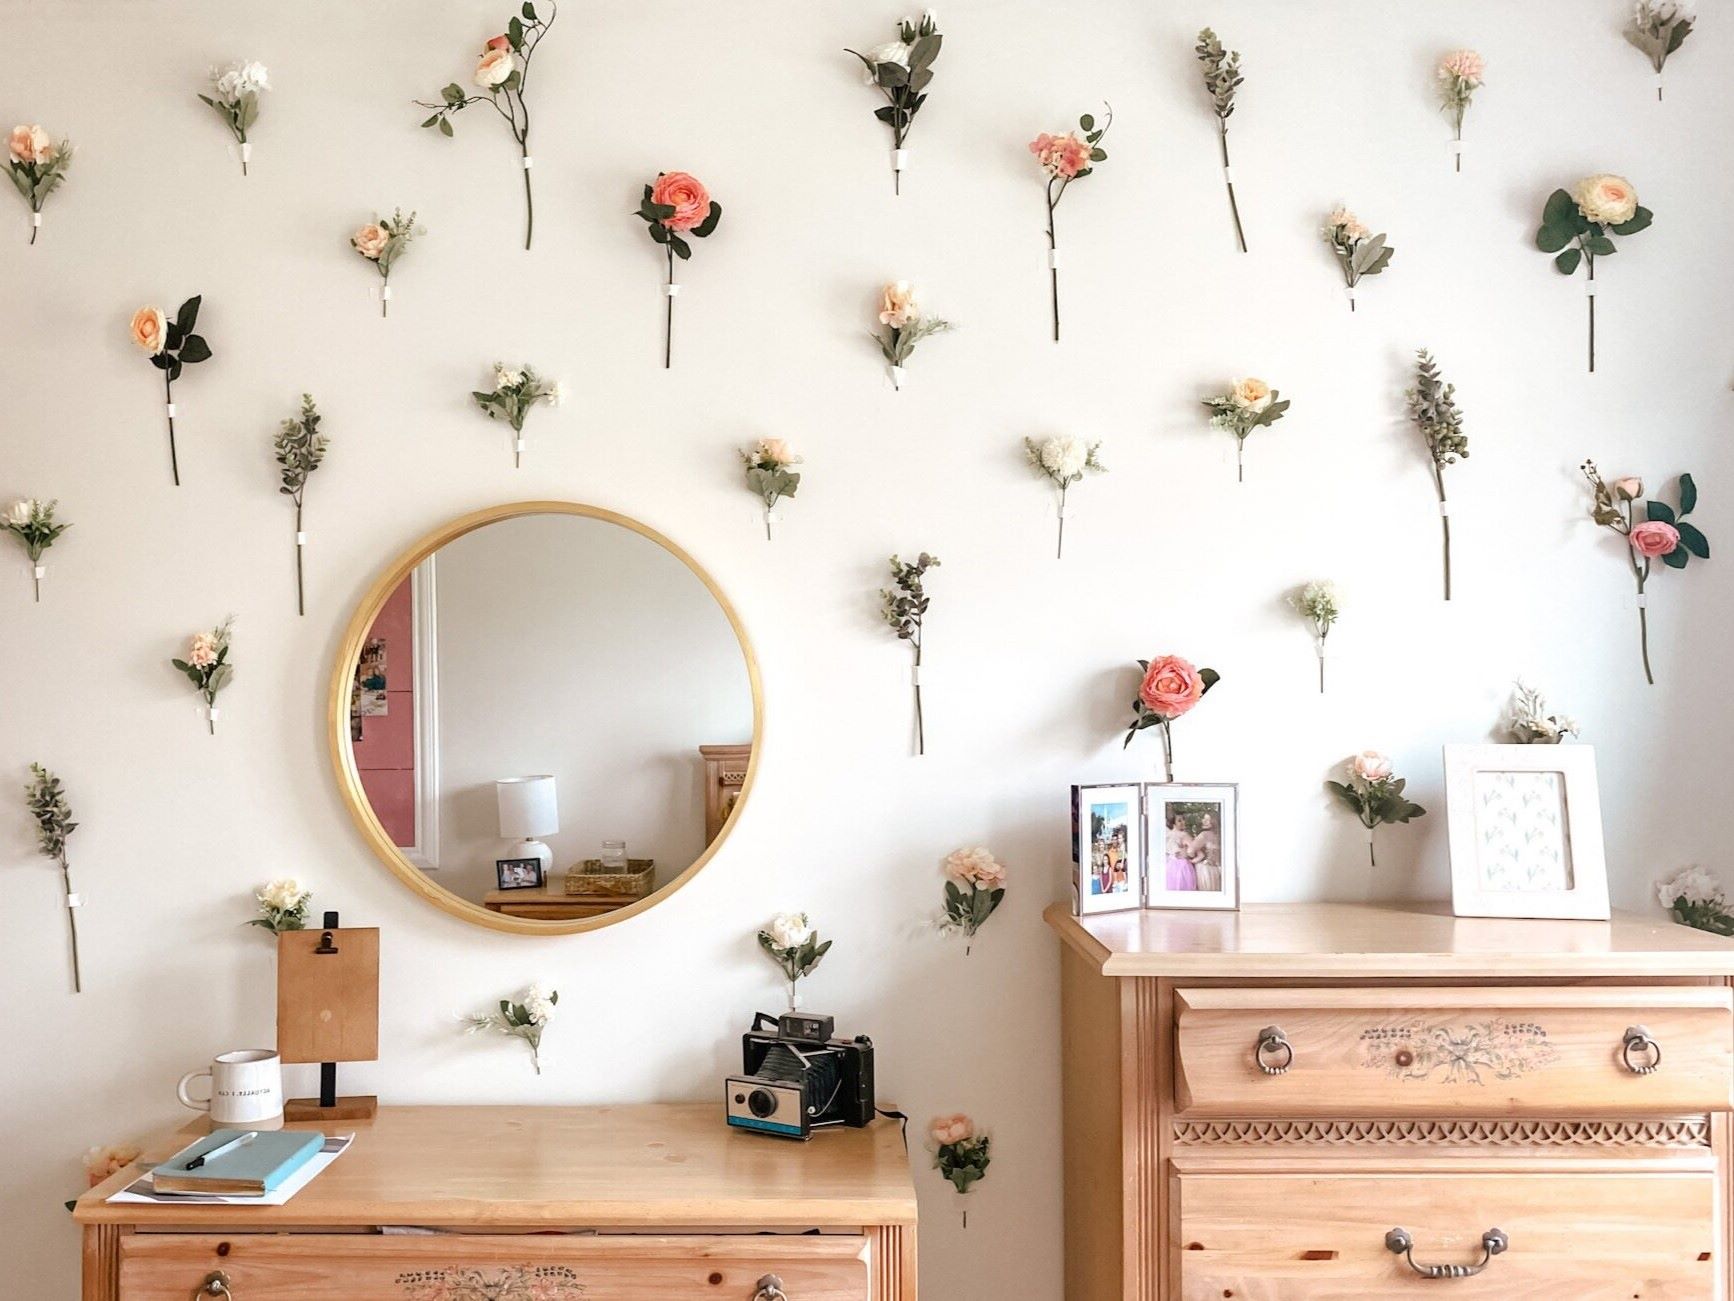
Create a Stunning DIY Flower Wall
Published: July 20, 2024
Learn how to create a stunning DIY flower wall with our step-by-step guide. Perfect for weddings, parties, or home decor. Easy, affordable, and beautiful!
(Many of the links in this article redirect to a specific reviewed product. Your purchase of these products through affiliate links helps to generate commission for Twigandthistle.com, at no extra cost. Learn more)
Creating a flower wall at home adds beauty and charm to any space. Whether for a special event or just to brighten up a room, making one yourself can be fun and rewarding. You'll get to choose colors and styles that fit your taste perfectly. No need for professional skills—just some basic materials, a bit of creativity, and a little time. This guide will walk you through each step, ensuring your DIY flower wall becomes a stunning focal point. Get ready to bring a touch of nature indoors and impress everyone with your handiwork.
Getting Ready for Your Project
Gather Materials: Collect artificial flowers, a foam board, hot glue gun, glue sticks, scissors, and a ruler.
Choose a Location: Pick a wall with enough space. Make sure it's clean and dry.
Measure and Mark: Use a ruler to measure the foam board. Mark where you want to place the flowers.
Cut Foam Board: Cut the foam board to fit the wall space. Be careful with the scissors.
Arrange Flowers: Lay out the flowers on the foam board. Decide on a pattern or random placement.
Glue Flowers: Use the hot glue gun to attach flowers to the foam board. Press firmly to ensure they stick.
Safety Tips: Wear gloves to protect hands from hot glue. Keep the glue gun away from children.
Mount the Board: Use strong adhesive strips or nails to attach the foam board to the wall.
Check Stability: Make sure the board is securely attached. Adjust if necessary.
Clean Up: Dispose of any leftover materials. Store tools safely.
What You Need to Get Started
- Artificial Flowers: Choose a variety of colors and types to make the wall look vibrant and natural.
- Foam Board: Acts as the base for attaching the flowers. Lightweight and easy to work with.
- Hot Glue Gun: Essential for securely attaching flowers to the foam board.
- Glue Sticks: Used with the hot glue gun to stick the flowers.
- Scissors: Needed for trimming flower stems and cutting the foam board.
- Wire Cutters: Useful for cutting thicker flower stems or wires.
- Measuring Tape: Ensures the foam board and flower placements are accurate.
- Pencil: Marks measurements and placement spots on the foam board.
- Command Strips: Allows for easy hanging of the flower wall without damaging the wall.
- Ruler: Helps in making straight cuts and measurements on the foam board.
How Much Time and Skill You Need
Skill Level: Intermediate
Time Required: 4-6 hours
- Gather Materials: 30 minutes
- Prepare the Wall: 1 hour
- Arrange Flowers: 2-3 hours
- Secure Flowers: 1-2 hours
Follow These Steps
Gather Materials:
- Artificial flowers (variety of colors and sizes)
- Greenery (leaves, vines)
- Foam board or plywood
- Hot glue gun and glue sticks
- Scissors
- Wire cutters
- Measuring tape
- Command strips or mounting hooks
Prepare the Base:
- Measure the wall space where the flower wall will go.
- Cut the foam board or plywood to fit the measured space.
Arrange Flowers:
- Lay out the flowers and greenery on the board to plan the design.
- Mix different colors and sizes for a natural look.
Attach Flowers:
- Use the hot glue gun to attach flowers and greenery to the board.
- Start from one corner and work your way across.
- Ensure flowers are close together to avoid gaps.
Fill Gaps:
- Add smaller flowers or extra greenery to fill any visible gaps.
- Check from different angles to ensure even coverage.
Mount the Flower Wall:
- Attach command strips or mounting hooks to the back of the board.
- Secure the flower wall to the desired spot on the wall.
Final Touches:
- Adjust any flowers or greenery that may have shifted.
- Step back and admire your work, making any necessary tweaks.
Helpful Tips and Tricks
Plan your design before starting. Sketch out how you want the flowers arranged. This helps avoid mistakes and ensures a balanced look.
Use a sturdy base like a foam board or chicken wire. This provides support for the flowers and keeps them in place.
Mix different flower types and colors. Combining various sizes and shapes adds depth and interest to your wall.
Cut stems at an angle. This makes it easier to insert them into the base and helps them stay secure.
Secure flowers with hot glue if needed. For heavier flowers, a dab of hot glue can keep them from falling out.
Fill gaps with greenery. Leaves and small branches can cover empty spaces and make the wall look fuller.
Common mistakes to avoid:
- Overcrowding flowers can make the wall look messy. Leave some space between blooms.
- Using too few flowers can make the wall look sparse. Have enough to cover the base well.
- Not securing the base properly can cause the wall to collapse. Make sure it’s stable.
Alternatives for materials or methods:
- Instead of foam board, use a wooden frame with chicken wire.
- For a more eco-friendly option, use real flowers and moss. Keep in mind they will need maintenance.
- If hot glue isn’t available, floral tape can also secure flowers in place.
How Much Will It Cost?
Artificial Flowers: $50-$100, depending on quality and quantity. Foam Board: $10-$20 for a large piece. Hot Glue Gun: $10-$15. Glue Sticks: $5-$10 for a pack. Scissors: $5-$10. Command Strips: $10-$15 for a pack. Measuring Tape: $5-$10.
Total Cost: $95-$180.
Budget-Friendly Alternatives: Use paper flowers instead of artificial ones, which can cost $20-$40. Substitute foam board with cardboard for free if you have some lying around. Borrow a hot glue gun and scissors from a friend to save $15-$25.
Ways to Customize Your Flower Wall
Alternative Materials: Use paper flowers for a lightweight option. Try silk flowers for a more realistic look. Use felt flowers for a soft, textured feel. Dried flowers give a rustic, vintage vibe. Plastic flowers are durable and easy to clean.
Colors: Choose pastel colors for a soft, romantic look. Use bright, bold colors for a vibrant, energetic wall. Try monochromatic schemes for a sleek, modern style. Use earth tones for a natural, calming effect. Metallic colors add a touch of glamour and elegance.
Styles: Create a geometric pattern for a modern, structured look. Arrange flowers in a random pattern for a natural, wildflower feel. Use a gradient effect to blend colors smoothly. Make a themed wall like tropical or seasonal. Add fairy lights for a magical, glowing effect.
Eco-Friendly Tips
Reclaimed wood makes a great base for a flower wall. Look for old pallets or barn wood to give your wall a rustic feel. Recycled paper can be used to create beautiful, long-lasting flowers. Try using old newspapers, magazines, or even wrapping paper.
Fabric scraps from old clothes or linens can be cut into petal shapes and sewn together to make fabric flowers. Upcycled plastic bottles can be transformed into flower shapes by cutting and painting them. This not only reduces waste but also adds a unique touch to your wall.
Natural adhesives like flour-based glue or cornstarch paste can be used instead of synthetic glues. These are eco-friendly and safe. Biodegradable twine or jute can be used to hang or attach flowers to the wall. It’s strong and decomposes naturally over time.
Living plants in small, recycled containers can be added to your flower wall. Use old cans, jars, or even plastic containers as planters. This not only looks beautiful but also helps purify the air.
Your Flower Wall Awaits
Building a DIY flower wall isn't just a fun project, it's a chance to add a personal touch to your space. You've got the tools, the materials, and the know-how. Now, it's time to let your creativity shine. Whether you choose real flowers for a fresh, fragrant display or faux blooms for a long-lasting masterpiece, your wall will be a showstopper. Remember, the key is to plan your design, secure your flowers well, and enjoy the process. Don't stress over perfection; the beauty of DIY lies in its uniqueness. So grab your supplies, roll up your sleeves, and get started. Your stunning flower wall is just a few steps away from becoming a reality. Happy crafting!
How do I choose the right flowers for my DIY flower wall?
Pick flowers that match your color scheme and theme. Use a mix of real and artificial flowers for a lasting effect. Consider the season and availability of flowers.
What materials do I need to create a flower wall?
You'll need a sturdy frame, chicken wire or floral foam, flowers, floral tape, scissors, and zip ties. Optional items include greenery and fairy lights for added flair.
How do I attach the flowers to the wall?
Use floral tape or zip ties to secure the stems to the frame. For artificial flowers, you can use hot glue. Make sure to cover any gaps with greenery or smaller flowers.
Can I reuse the flower wall for different events?
Yes, if you use artificial flowers and a sturdy frame, you can easily rearrange or add new flowers for different events. Store it in a cool, dry place to keep it in good condition.
How long does it take to make a flower wall?
Depending on the size and complexity, it can take anywhere from a few hours to a full day. Having all your materials ready and a clear plan will speed up the process.
What are some tips for making the flower wall look professional?
Start with a base layer of greenery to cover the frame. Use a variety of flower sizes and colors for depth. Make sure to step back and check your work frequently to ensure even coverage.