
Home>Home & Furniture>Bathroom>Step-by-step guide to installing a bathroom faucet
Bathroom
Step-by-step guide to installing a bathroom faucet
Published: July 14, 2024
Learn how to install a bathroom faucet with our step-by-step guide. From tools needed to final touches, ensure a smooth and leak-free installation. Perfect for DIY enthusiasts!
(Many of the links in this article redirect to a specific reviewed product. Your purchase of these products through affiliate links helps to generate commission for Twigandthistle.com, at no extra cost. Learn more)
Getting a new bathroom faucet installed doesn't require a professional. With some basic tools and a bit of patience, you can do it yourself and save money. A simple, step-by-step approach makes the process straightforward. Whether you're replacing an old faucet or setting up a new one, this guide provides clear instructions to help you get the job done. This guide simplifies the process to make sure you get a leak-free, functioning faucet. Ready to give your bathroom an upgrade? Let’s get started on installing that faucet.
Getting Ready for the Project
Gather Tools and Materials: Collect a wrench, plumber's tape, basin wrench, bucket, and the new faucet. Make sure you have all parts included in the faucet package.
Turn Off Water Supply: Locate the shut-off valves under the sink. Turn them clockwise to stop water flow. Open the faucet to drain any remaining water.
Clear the Workspace: Remove items from under the sink. Place a bucket or towels to catch any water that might spill.
Safety Gear: Wear safety goggles and gloves to protect your eyes and hands from debris and sharp edges.
Disconnect Water Lines: Use a wrench to loosen the nuts connecting the water supply lines to the faucet. Have a bucket ready to catch any water.
Remove Old Faucet: Use a basin wrench to loosen and remove the mounting nuts holding the old faucet in place. Lift the old faucet out.
Clean the Area: Scrub away any old sealant or grime from the sink surface where the new faucet will sit.
Check Instructions: Read the installation guide that comes with the new faucet. Ensure you understand each step before proceeding.
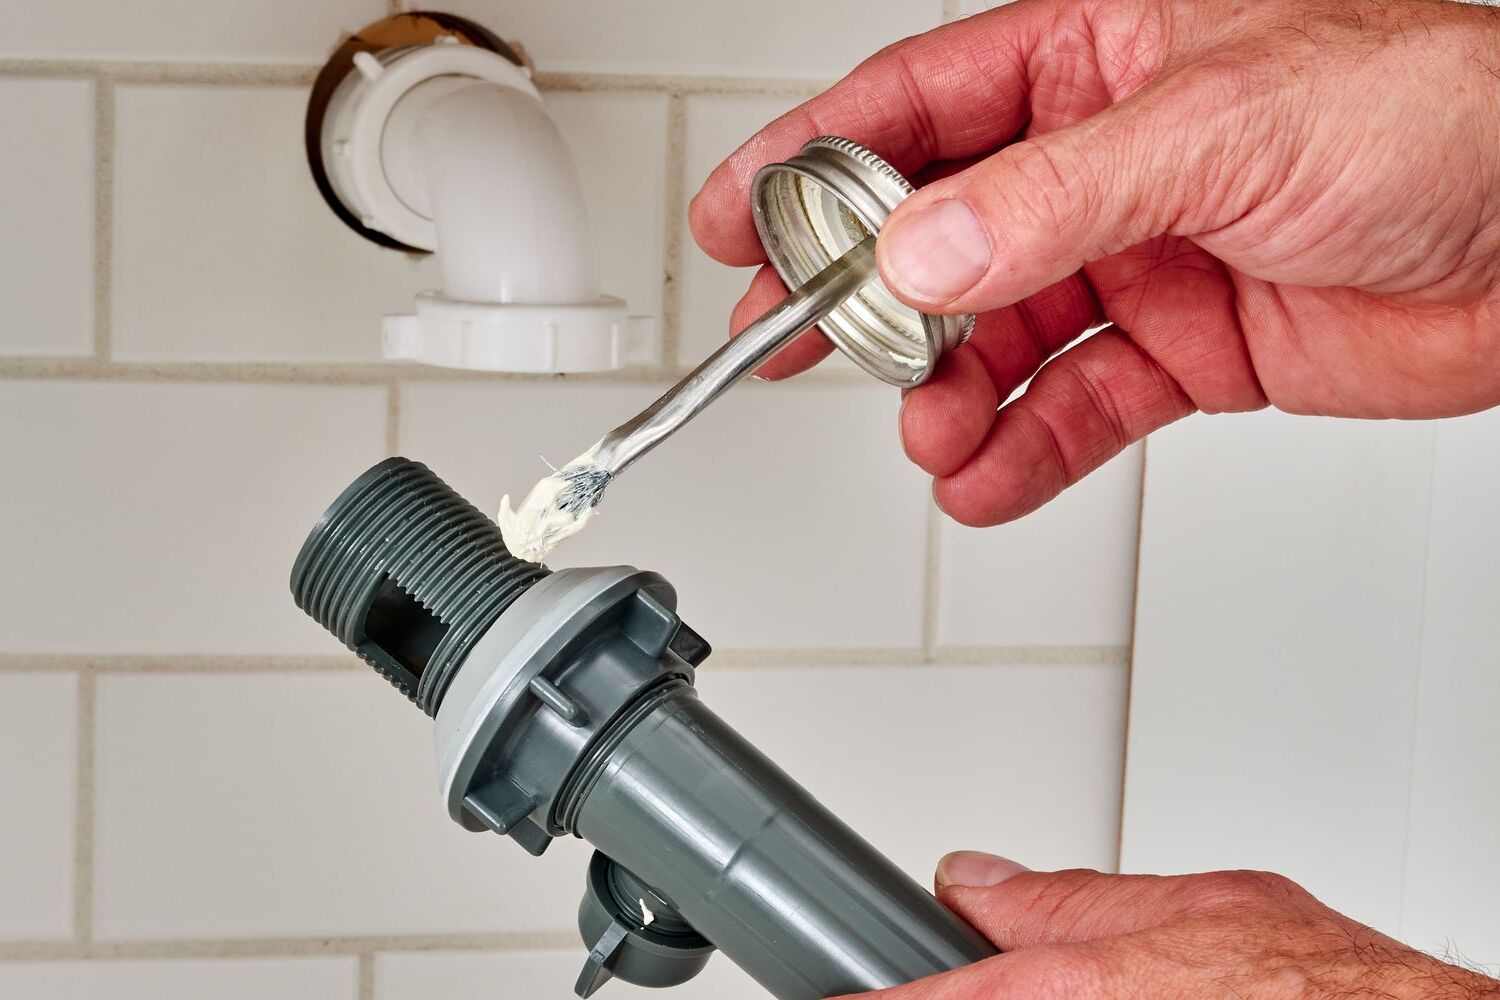
Prepare New Faucet: Assemble any parts of the new faucet as instructed. Apply plumber's tape to the threads of the faucet connections to ensure a tight seal.
Test Fit: Place the new faucet in the mounting holes to ensure it fits properly. Adjust as needed before final installation.
What You Need: Materials and Tools
- New Faucet: The main component. Choose one that fits your sink's configuration.
- Adjustable Wrench: Used to tighten or loosen nuts and bolts.
- Basin Wrench: Specially designed for hard-to-reach areas under the sink.
- Plumber's Tape: Helps create a watertight seal on threaded pipe joints.
- Bucket: Catches any water that might spill during the installation.
- Towel: Useful for wiping up spills and keeping the area dry.
- Plumber's Putty: Seals gaps between the faucet and sink to prevent leaks.
- Screwdriver: Needed for removing and attaching screws.
- Pipe Wrench: Provides extra grip for tightening or loosening pipes.
- Flashlight: Illuminates dark areas under the sink.
- Cleaning Supplies: Ensures the sink area is clean before and after installation.
- Safety Glasses: Protects your eyes from debris and splashes.
- Gloves: Keeps your hands clean and safe from sharp edges.
Each tool and material plays a crucial role in ensuring a smooth and successful faucet installation.
Skill Level and Time Commitment
Skill Level: Intermediate
Time Required: 2-3 hours
- Gather Tools and Materials: 15 minutes
- Turn Off Water Supply: 5 minutes
- Remove Old Faucet: 30 minutes
- Clean Sink Area: 10 minutes
- Install New Faucet: 45 minutes
- Connect Water Supply Lines: 20 minutes
- Check for Leaks: 15 minutes
Total Time: 2-3 hours
Detailed Steps to Install a Bathroom Faucet
Turn off the water supply: Locate the shut-off valves under the sink. Turn them clockwise to stop the water flow.
Remove the old faucet:
- Disconnect the water supply lines using an adjustable wrench.
- Unscrew the mounting nuts holding the faucet in place.
- Lift the old faucet out.
Clean the sink area: Remove any old putty or debris from the sink surface.
Install the new faucet:
- Place the rubber or plastic gasket, or use plumber’s putty, on the bottom of the new faucet.
- Insert the faucet through the mounting holes in the sink.
Secure the faucet:
- From underneath the sink, screw on the mounting nuts to hold the faucet in place.
- Tighten the nuts with a basin wrench.
Connect the water supply lines:
- Attach the hot and cold water supply lines to the corresponding faucet inlets.
- Tighten the connections with an adjustable wrench.
Turn on the water supply: Open the shut-off valves by turning them counterclockwise.
Check for leaks: Turn on the faucet and inspect all connections for any leaks. Tighten connections if necessary.
Seal the base: Apply a bead of silicone caulk around the base of the faucet to prevent water from seeping underneath.
Helpful Tips and Tricks
Gather all tools before starting. You'll need a wrench, plumber's tape, and a basin wrench. Turn off the water supply to avoid any mess. Use a bucket to catch any water left in the pipes.
Clean the area where the old faucet was. Remove any old putty or debris. This ensures a good seal for the new faucet.
Use plumber's tape on the threads of the new faucet. This helps prevent leaks. Wrap it clockwise so it doesn't unravel when you screw on the connections.
Hand-tighten first before using a wrench. This helps avoid over-tightening, which can damage parts.
Check for leaks after installation. Turn the water back on slowly. If you see any drips, tighten connections a bit more.
Common mistakes to avoid:
- Forgetting to turn off the water supply. This can cause a big mess.
- Over-tightening connections. This can crack parts and cause leaks.
- Not using plumber's tape. This can lead to leaks.
Alternatives for materials or methods:
- Use silicone sealant instead of plumber's putty. It can be easier to work with and provides a good seal.
- Consider a faucet with a quick-connect system. These are easier to install and require fewer tools.
- Use flexible supply lines. They are easier to maneuver and install compared to rigid ones.
Estimating the Cost
Faucet: $50-$150
Plumber's Putty: $3-$5
Adjustable Wrench: $10-$20
Basin Wrench: $10-$15
Teflon Tape: $1-$2
Bucket: $5-$10
Rags: $2-$5
Silicone Sealant: $5-$10
Total Cost: $86-$217
Budget-Friendly Alternatives:
Faucet: $30
Adjustable Wrench: $8
Basin Wrench: $8
Teflon Tape: $1
Bucket: Use an old one
Rags: Use old cloths
Silicone Sealant: $4
Total Budget-Friendly Cost: $51
Different Ways to Customize
Alternative Materials:
- Brass: Durable and classic, brass faucets resist corrosion.
- Stainless Steel: Modern and sleek, stainless steel offers a clean look.
- Bronze: Adds a vintage touch with a dark, rich finish.
- Plastic: Budget-friendly and easy to install, though less durable.
Colors:
- Chrome: Shiny and reflective, chrome fits most bathroom styles.
- Matte Black: Trendy and bold, matte black stands out.
- White: Clean and simple, white blends seamlessly.
- Gold: Luxurious and elegant, gold adds a touch of opulence.
Styles:
- Single-Handle: Easy to use, single-handle faucets offer a minimalist look.
- Double-Handle: Classic and functional, double-handle faucets allow precise temperature control.
- Waterfall: Creates a spa-like experience with a gentle, cascading flow.
- Wall-Mounted: Saves counter space and adds a modern touch.
Handles:
- Lever: Simple and ergonomic, lever handles are easy to operate.
- Cross: Traditional and stylish, cross handles add a vintage feel.
- Knob: Compact and straightforward, knob handles are classic.
- Touchless: Hygienic and convenient, touchless handles use sensors to activate water flow.
Spout Designs:
- High-Arc: Provides more space under the faucet, ideal for filling large containers.
- Low-Arc: Compact and unobtrusive, low-arc spouts are great for small sinks.
- Pull-Out: Versatile and functional, pull-out spouts offer flexibility.
- Fixed: Simple and sturdy, fixed spouts are reliable and easy to maintain.
Eco-Friendly Tips
Gather Materials: Use eco-friendly materials like a low-flow faucet to save water. Reuse old tools instead of buying new ones. If replacing an old faucet, recycle the metal parts.
Turn Off Water Supply: Locate the shut-off valves under the sink. Turn them clockwise to stop the water flow. This prevents water waste during installation.
Remove Old Faucet: Use a wrench to loosen the nuts holding the old faucet. Carefully remove it, keeping any reusable parts. Recycle the old faucet if possible.
Clean Area: Clean the sink area using natural cleaners like vinegar and baking soda. Avoid harsh chemicals that can harm the environment.
Install New Faucet: Follow the manufacturer's instructions. Use plumber's putty or eco-friendly sealant to prevent leaks. Hand-tighten connections to avoid over-tightening and damaging parts.
Connect Water Supply Lines: Attach the water supply lines to the new faucet. Use Teflon tape to ensure a tight seal. Turn the shut-off valves counterclockwise to restore water flow.
Check for Leaks: Turn on the faucet and check for leaks. If any are found, tighten connections or apply more sealant. Fixing leaks promptly saves water.
Dispose of Waste Properly: Recycle any packaging materials and dispose of old parts responsibly. Many communities have recycling programs for metal and plastic components.
Maintain Faucet: Regularly clean the faucet with natural cleaners to keep it in good condition. This extends its lifespan, reducing the need for replacements and conserving resources.
Your Faucet Awaits
You've got this! Installing a bathroom faucet might seem tricky, but with patience and the right tools, it's totally doable. Remember to turn off the water supply first. Then, remove the old faucet carefully. When installing the new one, make sure to tighten all connections to avoid leaks. Don't forget to apply plumber's tape on threads for a snug fit. Once everything's in place, turn the water back on and check for any leaks. If you spot any, tighten the connections a bit more.
Now, step back and admire your work. You've just upgraded your bathroom with your own hands. Enjoy the satisfaction of a job well done. Happy DIY-ing!
How do I remove the old faucet?
First, turn off the water supply under the sink. Then, use a wrench to disconnect the water lines. Unscrew the mounting nuts holding the faucet in place. Lift the old faucet out.
What tools will I need?
You'll need a wrench, pliers, screwdriver, plumber's tape, and a basin wrench. Having a bucket handy can help catch any water drips.
How do I prepare the sink for the new faucet?
Clean the area around the faucet holes. Remove any old plumber's putty or sealant. Make sure the surface is dry and free of debris.
How do I install the new faucet?
Place the gasket or putty on the sink holes. Insert the faucet through the holes. Secure it with mounting nuts underneath. Connect the water supply lines to the faucet.
How do I ensure there are no leaks?
Turn the water supply back on. Check for any leaks around the connections. If you see any, tighten the connections or add more plumber's tape.
What should I do if the water pressure is low?
Check if the aerator on the faucet is clogged. Unscrew it and clean any debris. If that doesn't work, check the water supply lines for blockages.
Can I install a faucet by myself?
Yes, you can! With the right tools and a bit of patience, installing a faucet is a manageable DIY project. Just follow the steps carefully.