
Home>Home & Furniture>Bathroom>How to Install Peel and Stick Flooring
Bathroom
How to Install Peel and Stick Flooring
Published: July 14, 2024
Learn how to install peel and stick flooring with our step-by-step guide. Transform your space easily and affordably with these expert tips and tricks. Perfect for DIY enthusiasts!
(Many of the links in this article redirect to a specific reviewed product. Your purchase of these products through affiliate links helps to generate commission for Twigandthistle.com, at no extra cost. Learn more)
Peel and stick flooring offers a quick and cost-effective way to refresh any room. With minimal tools and effort, anyone can achieve a professional-looking finish. These flooring tiles come with adhesive backing, which means there's no need for messy glue or special tools. Perfect for renters or homeowners wanting a temporary solution, peel and stick flooring can be easily removed or replaced. This guide will take you through each step, ensuring your new floor looks great and lasts long. Whether working on a kitchen, bathroom, or living room, installing these tiles is simple and rewarding.
Getting Ready for Your Flooring Project
Measure the Room: Use a tape measure to find the length and width of the room. Multiply these numbers to get the total square footage. This helps you know how much flooring to buy.
Clean the Subfloor: Sweep and mop the floor to remove dust, dirt, and debris. Make sure the surface is dry before starting.
Repair Any Damage: Fill in cracks or holes with a floor patching compound. Let it dry completely.
Remove Baseboards: Use a pry bar to gently remove baseboards. This makes it easier to install the flooring close to the walls.
Acclimate the Flooring: Leave the peel and stick tiles in the room for 48 hours. This helps them adjust to the room’s temperature and humidity.
Gather Tools: Have a utility knife, straight edge, measuring tape, and a pencil ready. These tools will help you cut and place the tiles accurately.
Plan Your Layout: Start from the center of the room and work your way out. This ensures a balanced look.
Safety Tips: Wear knee pads to protect your knees. Use gloves to avoid cuts from the utility knife. Make sure the room is well-ventilated.
Test a Tile: Place one tile without peeling the backing to see how it fits. Adjust your layout if needed.
What You Need: Materials and Tools
Peel and Stick Flooring: These are the main materials. They come in tiles or planks with adhesive backing.
Utility Knife: Essential for cutting the tiles or planks to fit around corners and edges.
Tape Measure: Used to measure the room and ensure accurate cuts.
Straight Edge or Ruler: Helps make straight cuts with the utility knife.
Chalk Line: Useful for marking straight lines on the floor to guide tile placement.
Floor Roller: Ensures the tiles stick well by pressing them firmly into place.
Cleaning Supplies: Broom, vacuum, and mop to clean the floor before installation.
Level: Ensures the floor is even before laying the tiles.
Pencil: Marks measurements and cutting lines on the tiles.
Adhesive Remover: Helps clean any excess adhesive from the tiles or floor.
Safety Gear: Gloves and knee pads protect your hands and knees during installation.
How Much Skill and Time You Need
Skill Level: Beginner
Time Required: 4-6 hours
Preparation: 1-2 hours
- Clean the floor
- Measure the area
- Gather materials
Installation: 2-3 hours
- Peel backing
- Stick tiles in place
- Cut tiles to fit edges
Finishing Touches: 1 hour
- Press tiles firmly
- Check for gaps
- Clean up workspace
Step-by-Step Guide to Installing Your Floor
Prepare the Floor
- Clean the floor thoroughly. Remove any dirt, dust, or debris.
- Repair any cracks or holes using a filler. Let it dry completely.
- Ensure the floor is dry and smooth.
Measure the Room
- Measure the length and width of the room.
- Calculate the total square footage to determine how many tiles you need.
- Add 10% extra for mistakes or future repairs.
Plan the Layout
- Find the center of the room by measuring and marking the midpoint of each wall.
- Snap chalk lines between opposite midpoints to create a cross in the center.
- Lay out a few tiles along these lines to see how they fit.
Cut the Tiles
- Measure the space where a full tile won't fit.
- Mark the tile where it needs to be cut.
- Use a utility knife to score and snap the tile along the mark.
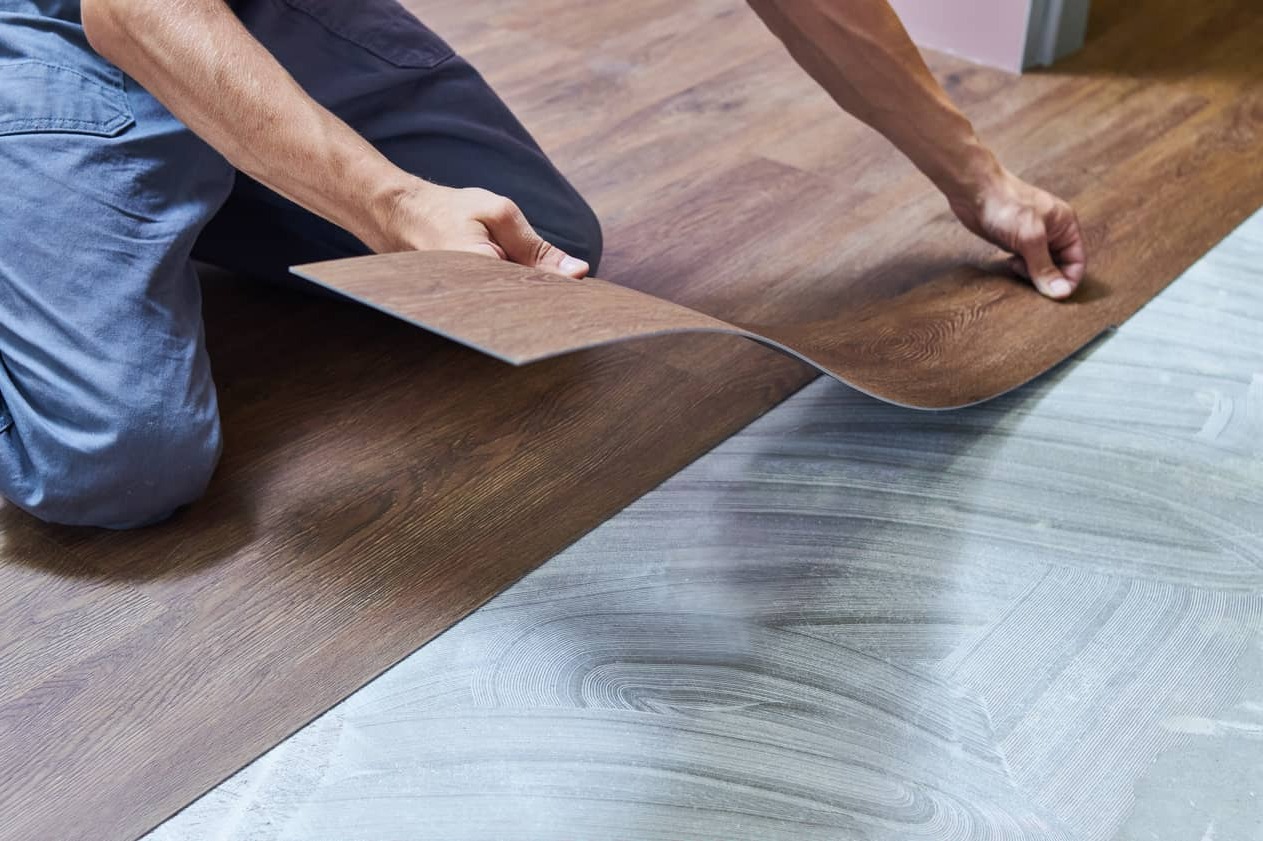
Peel and Stick
- Start at the center of the room.
- Peel the backing off the first tile.
- Align the tile with the chalk lines and press it firmly onto the floor.
- Continue laying tiles, working outward from the center.
Roll the Floor
- Use a floor roller to press down the tiles.
- Ensure all edges are firmly adhered to the floor.
- Roll over the entire floor to secure the tiles.
Finish the Edges
- Cut tiles to fit along walls and around obstacles.
- Press these cut tiles firmly into place.
- Use a roller to ensure they are secure.
Clean Up
- Remove any adhesive residue with a damp cloth.
- Dispose of backing paper and scraps properly.
- Enjoy your new floor!
Helpful Tips and Tricks
Clean the floor thoroughly before starting. Any dirt or dust can prevent the adhesive from sticking properly. Measure the room carefully to determine how many tiles you need. Start from the center of the room and work your way outwards to ensure a balanced look. Use a chalk line to keep your rows straight. Press firmly on each tile to ensure it sticks well. Use a roller to apply even pressure across the tiles.
Common mistakes to avoid: Not cleaning the floor well enough, which can cause tiles to lift. Not measuring correctly, leading to wasted tiles. Starting from one corner instead of the center, which can make the layout look uneven. Not pressing down firmly enough, causing tiles to come loose over time.
Alternatives: If peel and stick tiles aren't your thing, consider floating vinyl planks. They click together and don't require adhesive. Another option is sheet vinyl, which can be cut to fit the room and glued down.
How Much Will It Cost?
Peel and Stick Flooring: $1-$3 per square foot. For a 200 sq. ft. room, expect $200-$600.
Utility Knife: $10-$15 for cutting tiles.
Measuring Tape: $5-$10 to measure the room.
Straight Edge/Ruler: $5-$10 for straight cuts.
Cleaning Supplies: $10-$20 for floor prep (broom, mop, cleaner).
Total Cost: $230-$655.
Budget-Friendly Alternatives:
Peel and Stick Flooring: Look for sales or clearance items, $0.50-$1 per square foot.
Utility Knife: Use a sharp kitchen knife if available.
Measuring Tape: Borrow from a friend or neighbor.
Straight Edge/Ruler: Use a piece of wood or cardboard.
Cleaning Supplies: Use what you already have at home.
Total Cost with Alternatives: $110-$235.
Different Ways to Customize Your Floor
Materials: Instead of traditional vinyl, try luxury vinyl tiles (LVT) for a more durable option. Cork tiles offer a softer, eco-friendly alternative. Bamboo tiles provide a natural look and are also sustainable.
Colors: Choose neutral tones like beige or gray for a classic look. For a bold statement, go with vibrant colors like teal or red. Wood-look patterns can mimic the appearance of hardwood floors.
Styles: Opt for herringbone patterns to add visual interest. Checkerboard designs can give a retro feel. Geometric shapes like hexagons create a modern aesthetic.
Finishes: Matte finishes hide scratches better. Glossy finishes reflect light, making spaces appear larger. Textured finishes add grip, reducing slip risks.
Borders and Insets: Use contrasting tiles to create a border around the room. Add decorative insets in the center or corners for a unique touch.
Mix and Match: Combine different tile sizes for a custom look. Mix various colors or patterns to create a one-of-a-kind design.
Grout Lines: Although peel and stick tiles don't require grout, adding faux grout lines with a paint pen can give a more traditional tile appearance.
Underlayment: For added comfort, install a foam underlayment beneath the tiles. This also helps with soundproofing.
Edge Trims: Use coordinating edge trims to finish the edges neatly. This gives a professional look and prevents peeling.
Room Themes: Match tile designs to room themes. For example, use nautical-themed tiles in a bathroom or rustic wood-look tiles in a kitchen.
Custom Shapes: Cut tiles into custom shapes to fit unique spaces or create intricate designs. This adds a personal touch to the project.
Eco-Friendly Flooring Tips
Choose eco-friendly materials like peel and stick flooring made from recycled content or sustainable sources. Look for certifications such as FloorScore or GreenGuard to ensure low VOC emissions.
Prepare the subfloor by cleaning it thoroughly. Use a mixture of vinegar and water instead of chemical cleaners. Repair any damage using eco-friendly patching compounds.
Measure and cut the flooring carefully to minimize waste. Save any large offcuts for future repairs or other projects.
Install the flooring starting from the center of the room. This method reduces the need for excessive trimming, which can create waste.
Press down firmly on each tile to ensure a strong bond. Use a rolling pin or a heavy book wrapped in a cloth to avoid using a specialized tool.
Recycle the backing paper from the peel and stick tiles. Check local recycling guidelines to see if they accept this type of material.
Maintain the flooring using natural cleaners like a mixture of water and a few drops of essential oil. Avoid harsh chemicals that can damage the floor and harm the environment.
Reuse any leftover tiles for small projects like lining shelves or creating coasters. This reduces waste and gives new life to the materials.
Your New Floor Awaits
You've got all the steps down for installing peel and stick flooring. It's not rocket science, but it does need some patience and attention. Measure your space, clean the floor, and start sticking those tiles. If you mess up, don't sweat it. Just peel it up and try again. Remember, the key is to take your time and make sure each tile is aligned properly. Once you're done, you'll have a fresh, new look without breaking the bank. So, grab your tools, roll up your sleeves, and get to work. Your new floor is just a few steps away. Enjoy the satisfaction of a job well done and the beauty of your updated space. Happy DIY-ing!
What tools do I need to install peel and stick flooring?
You'll need a utility knife, measuring tape, straight edge, pencil, and a roller to press the tiles down.
Can I install peel and stick flooring over existing floors?
Yes, you can install it over vinyl, tile, hardwood, or concrete as long as the surface is clean, dry, and smooth.
How do I prepare the floor before installation?
Clean the floor thoroughly, removing any dirt, dust, or grease. Fill in any cracks or holes and ensure the surface is completely dry.
How do I cut the tiles to fit around corners and edges?
Measure the area, mark the tile with a pencil, and use a utility knife and straight edge to make precise cuts.
How long does it take for peel and stick flooring to set?
The tiles adhere immediately, but it's best to avoid heavy traffic for 24 hours to ensure they stick well.
Can I use peel and stick flooring in bathrooms or kitchens?
Yes, it's water-resistant, making it suitable for bathrooms and kitchens. Just ensure the surface is dry before installation.
How do I maintain peel and stick flooring?
Sweep or vacuum regularly and mop with a damp cloth. Avoid using harsh chemicals or abrasive cleaners.