
Home>Home & Furniture>Bathroom>DIY Shower Remodel: Step-by-Step Guide
Bathroom
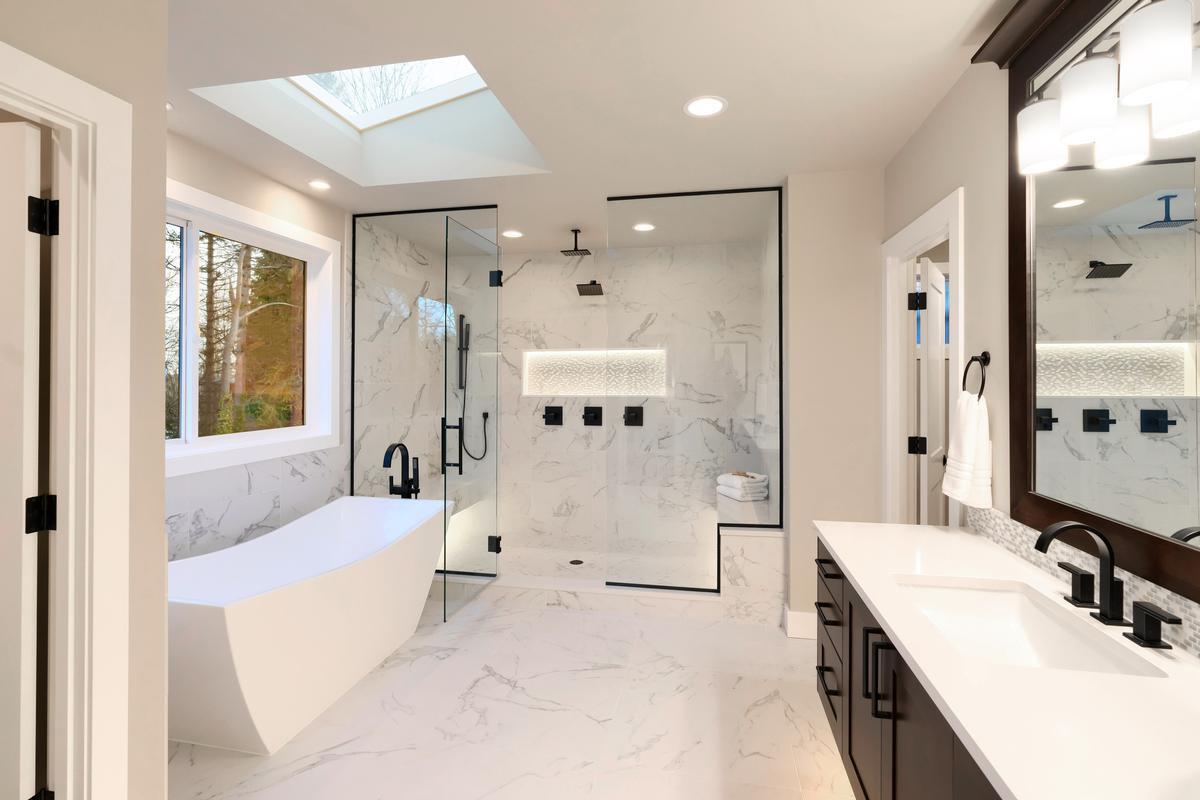
DIY Shower Remodel: Step-by-Step Guide
Published: July 16, 2024
Transform your bathroom with our DIY shower remodel guide! Step-by-step instructions, tips, and tricks to create a stunning shower space on a budget.
(Many of the links in this article redirect to a specific reviewed product. Your purchase of these products through affiliate links helps to generate commission for Twigandthistle.com, at no extra cost. Learn more)
Remodeling a shower can seem like a big project, but doing it yourself can save money and give a sense of achievement. Whether upgrading for better water pressure, fixing leaks, or just wanting a fresh look, this guide will help. We'll go step-by-step through planning, demolition, plumbing, tiling, and finishing touches. With some basic tools, materials, and a bit of patience, anyone can transform their bathroom into a more functional and stylish space. Ready to roll up your sleeves and get started on this exciting home improvement adventure? Let's dive right in!
Getting Ready for Your Shower Remodel
Gather Materials and Tools: Make sure you have all necessary items like tiles, grout, waterproofing materials, a trowel, a level, and safety gear.
Turn Off Water Supply: Locate and shut off the water supply to avoid any leaks or flooding.
Clear the Area: Remove any items from the shower area. This includes shower curtains, toiletries, and any detachable fixtures.
Wear Safety Gear: Put on safety goggles, gloves, and a dust mask to protect yourself from debris and dust.
Set Up Workspace: Lay down a drop cloth to catch debris. Keep a trash bin nearby for easy disposal of old materials.
Remove Old Fixtures: Carefully take out old tiles, showerheads, and faucets. Use a utility knife to cut through old caulk.
Inspect for Damage: Check for any water damage or mold. If found, address these issues before proceeding.
Measure and Plan: Measure the area to ensure you have enough materials. Plan the layout of tiles or other materials.
Prepare the Surface: Clean the walls and floor thoroughly. Apply a waterproof membrane to prevent future water damage.
Test Fit: Lay out tiles or panels without adhesive to ensure they fit correctly. Make any necessary adjustments.
Ventilation: Ensure the area is well-ventilated to help with drying times and to keep the workspace comfortable.
Check Electricals: If your shower has any electrical components, make sure they are safely disconnected and protected.
Following these steps will help you start your DIY shower remodel safely and efficiently.
Essential Materials and Tools
- Tiles: Choose tiles for walls and floor. Ceramic, porcelain, or natural stone work well.
- Tile Adhesive: Used to stick tiles to surfaces. Comes in powder or pre-mixed form.
- Grout: Fills gaps between tiles. Available in different colors.
- Waterproof Membrane: Prevents water from seeping into walls and floors.
- Backer Board: Provides a stable surface for tiles. Made of cement or foam.
- Shower Pan: Base of the shower. Can be pre-made or custom-built.
- Shower Valve: Controls water flow and temperature.
- Showerhead: Choose one that suits your style and water pressure needs.
- Plumbing Pipes: Needed for water supply and drainage.
- Sealant: Used to seal edges and joints to prevent water leaks.
- Screws and Anchors: Secure backer board and other components.
- Tape Measure: Ensures accurate measurements.
- Level: Ensures surfaces are even.
- Tile Cutter: Cuts tiles to fit around edges and corners.
- Trowel: Spreads tile adhesive evenly.
- Grout Float: Applies grout between tiles.
- Sponge: Cleans excess grout from tiles.
- Bucket: Mixes adhesive and grout.
- Drill: Makes holes for screws and anchors.
- Utility Knife: Cuts waterproof membrane and backer board.
- Safety Gear: Includes gloves, goggles, and a mask to protect from dust and debris.
Skill Level and Time Commitment
Skill Level: Advanced
Time Required: 3-5 days
- Demolition: 1 day
- Plumbing Adjustments: 1 day
- Installing Backer Board: 1 day
- Tiling: 1-2 days
- Grouting and Sealing: 1 day
Detailed Instructions for Remodeling
Plan and Design
- Measure your shower space.
- Choose materials (tiles, fixtures, etc.).
- Sketch a layout.
Gather Materials and Tools
- Purchase tiles, grout, adhesive, waterproofing membrane.
- Get tools: trowel, tile cutter, level, sponge, bucket.
Demolition
- Turn off water supply.
- Remove old tiles and fixtures.
- Clean the area thoroughly.
Prepare the Surface
- Repair any damaged walls.
- Install a waterproofing membrane.
- Ensure the surface is smooth and level.
Install the Shower Pan
- Place the shower pan according to manufacturer instructions.
- Ensure proper drainage.
Tile Installation
- Apply tile adhesive with a trowel.
- Place tiles starting from the bottom.
- Use spacers for even gaps.
- Cut tiles to fit edges and corners.
Grouting
- Mix grout according to package instructions.
- Apply grout with a rubber float.
- Wipe excess grout with a damp sponge.
Install Fixtures
- Attach showerhead, faucet, and handles.
- Seal around fixtures with silicone caulk.
Finishing Touches
- Clean tiles and grout lines.
- Apply a grout sealer to protect against moisture.
- Reconnect the water supply and test for leaks.
Helpful Tips and Tricks
Plan ahead: Measure your space accurately. Sketch a layout to visualize the changes.
Prep work: Remove old tiles and fixtures carefully to avoid damaging plumbing. Use a tarp to protect your floor.
Waterproofing: Apply a waterproof membrane to prevent leaks. Use waterproof backer board instead of drywall.
Tile installation: Start tiling from the bottom and work up. Use spacers for even gaps. Cut tiles with a wet saw for clean edges.
Grouting: Mix grout to a peanut butter consistency. Apply with a rubber float, pressing into gaps. Wipe excess with a damp sponge.
Sealant: Use silicone caulk around edges and corners to prevent water seepage. Smooth with a wet finger for a clean finish.
Fixtures: Install showerheads and faucets last. Ensure connections are tight to avoid leaks.
Common mistakes to avoid: Skipping waterproofing, uneven tile placement, not allowing grout to cure properly, and using the wrong type of caulk.
Alternatives: Consider peel-and-stick tiles for easier installation. Use pre-fabricated shower panels instead of tiling for a quicker remodel.
Estimating Your Project Costs
Tiles: Expect to spend around $200-$500 for tiles, depending on quality and design. Budget-friendly options include ceramic tiles, which cost about $1-$3 per square foot.
Grout and Adhesive: These materials will cost approximately $50-$100. Opt for pre-mixed grout to save time.
Shower Pan: A basic shower pan costs around $100-$300. Consider using a pre-fabricated pan for easier installation.
Shower Fixtures: Basic fixtures, including a showerhead, faucet, and handles, will cost about $100-$200. Look for sales or discounts to save money.
Waterproofing Materials: Waterproofing membrane and sealant will cost around $50-$100. This step is crucial to prevent water damage.
Backer Board: Cement backer board costs about $10-$15 per sheet. You’ll need around 5-10 sheets, depending on shower size.
Tools: Essential tools include a tile cutter ($30-$50), notched trowel ($10-$15), and a grout float ($10-$20). Renting tools can save money if you don’t plan to use them again.
Miscellaneous Supplies: Include items like spacers, screws, and caulk, which will cost around $20-$50.
Total Estimated Cost: Expect to spend between $550-$1,335.
Unique Variations and Customizations
Tiles: Instead of standard ceramic tiles, consider glass, marble, or porcelain. These materials offer different looks and durability. For a unique touch, mix and match different tile sizes or create a mosaic pattern.
Showerhead: Swap out a basic showerhead for a rainfall or multi-function model. These options can enhance your shower experience.
Colors: Choose a color scheme that reflects your style. Neutral tones like beige or gray create a calming atmosphere, while bold colors like navy or emerald green make a statement.
Fixtures: Upgrade to brushed nickel, matte black, or oil-rubbed bronze fixtures. These finishes add a modern or vintage touch to your shower.
Storage: Install built-in niches or corner shelves for extra storage. These additions keep your shower essentials organized and accessible.
Glass Doors: Replace a shower curtain with frameless glass doors for a sleek, modern look. Frosted or textured glass offers more privacy.
Lighting: Add LED strip lights or recessed lighting to brighten up your shower. Dimmable options allow you to adjust the ambiance.
Flooring: Consider pebble tiles or slip-resistant flooring for safety and style. These options provide texture and grip.
Shower Bench: Install a built-in bench or a folding seat for comfort and convenience. This feature is especially useful for shaving or relaxing.
Waterproofing: Use waterproof membranes or liquid waterproofing solutions to protect your walls and floors from moisture damage.
Ventilation: Ensure proper ventilation with a high-quality exhaust fan. This helps prevent mold and mildew buildup.
Accessories: Personalize your shower with decorative hooks, soap dispensers, or plant holders. These small touches add character and functionality.
Eco-Friendly Remodeling Tips
Plan and Design: Start by planning your shower remodel. Measure your space and decide on the layout. Sketch a design to visualize the final look.
Reuse Existing Materials: If your current shower tiles or fixtures are in good condition, consider reusing them. Clean and polish old tiles to give them a fresh look.
Eco-Friendly Tiles: Choose tiles made from recycled glass or ceramic. These materials reduce waste and are often more sustainable than new tiles.
Low-VOC Paint: Use low-VOC (volatile organic compounds) paint for any painting needs. This type of paint has fewer harmful chemicals, making it better for your health and the environment.
Water-Efficient Fixtures: Install water-efficient showerheads and faucets. These fixtures use less water without sacrificing performance, helping you save on water bills.
Natural Stone: Opt for natural stone like granite or marble for countertops and accents. These materials are durable and can last a long time, reducing the need for replacements.
Recycled Wood: Use recycled or reclaimed wood for any shelving or cabinetry. This reduces the demand for new wood and gives a unique, rustic look.
Eco-Friendly Grout: Choose eco-friendly grout made from sustainable materials. This type of grout is often more durable and less toxic.
LED Lighting: Replace old light fixtures with LED lights. They use less energy and last longer than traditional bulbs.
Proper Ventilation: Ensure your shower has proper ventilation to prevent mold and mildew. Install an energy-efficient exhaust fan to improve air circulation.
Seal and Insulate: Properly seal and insulate your shower area to prevent water leaks and improve energy efficiency. Use eco-friendly sealants and insulation materials.
Recycling Old Fixtures: When removing old fixtures, recycle them if possible. Many metal and plastic parts can be recycled instead of ending up in a landfill.
DIY Cleaning Products: Use homemade cleaning solutions made from natural ingredients like vinegar and baking soda. These are less harmful to the environment and your health.
Energy-Efficient Water Heater: If replacing your water heater, choose an energy-efficient model. This will save energy and reduce your utility bills.
Donate Unused Items: If you have leftover materials or fixtures, donate them to local charities or reuse centers. This helps others and reduces waste.
Your New Shower Awaits
You've tackled a DIY shower remodel like a pro. From planning and demolition to tiling and grouting, each step brought you closer to a fresh, new bathroom. Remember, patience and attention to detail are key. If something didn't go as planned, don't sweat it. Mistakes happen, and they can be fixed. Now, stand back and admire your hard work. You've not only saved money but also gained valuable skills. Enjoy the satisfaction of knowing you did it yourself. Next time you step into your shower, you'll feel a sense of pride. Ready for your next project? Keep this momentum going. Whether it's another room or a new hobby, you've proven you can handle it. Happy DIY-ing!
How long does a DIY shower remodel usually take?
A DIY shower remodel can take anywhere from a weekend to a couple of weeks. It depends on the complexity of the project and your experience level. If you're just replacing tiles, it might be quicker than a full overhaul.
What tools will I need for a shower remodel?
You'll need a few key tools: a tile cutter, grout float, trowel, level, drill, screwdriver, and measuring tape. Don't forget safety gear like gloves and goggles.
Can I remodel my shower without professional help?
Absolutely! Many people successfully remodel their showers without hiring pros. Just make sure to do your research, follow instructions carefully, and take your time. If you run into trouble, there are plenty of online forums and videos to help out.
How much does a DIY shower remodel cost?
Costs can vary widely. On average, you might spend between $500 and $2,500. This includes materials like tiles, grout, sealant, and any new fixtures. Doing the labor yourself saves a lot of money.
What are the common mistakes to avoid?
Common mistakes include not properly waterproofing, rushing the tiling process, and not leveling tiles correctly. Take your time with each step, especially when it comes to waterproofing and tiling. These are crucial for a long-lasting shower.
Do I need to turn off the water supply?
Yes, you'll need to turn off the water supply before starting any plumbing work. This prevents leaks and water damage. Make sure to test that the water is off by turning on the shower and checking for any flow.
Can I reuse old tiles or fixtures?
You can reuse old tiles or fixtures if they're in good condition. However, it might be more challenging to match old tiles with new ones. Sometimes, starting fresh with new materials gives a more cohesive look.