
Home>Home & Furniture>Bathroom>DIY Floating Bathroom Shelves
Bathroom
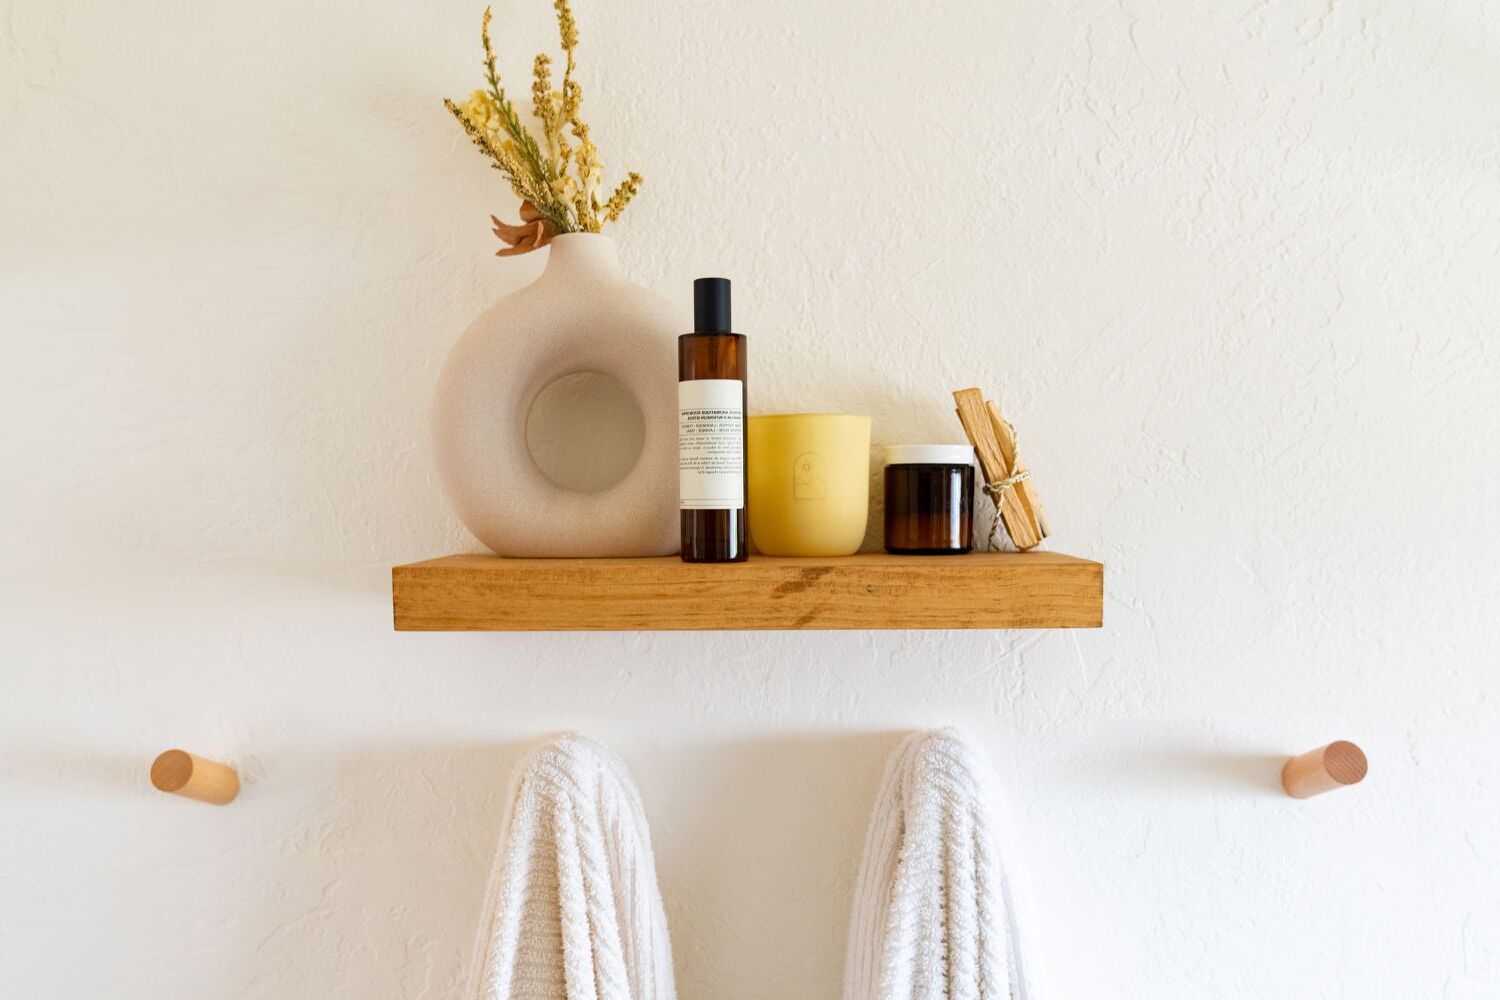
DIY Floating Bathroom Shelves
Published: July 11, 2024
Learn how to create stylish and functional DIY floating bathroom shelves with our step-by-step guide. Perfect for maximizing space and adding a modern touch to your bathroom.
(Many of the links in this article redirect to a specific reviewed product. Your purchase of these products through affiliate links helps to generate commission for Twigandthistle.com, at no extra cost. Learn more)
Ready to add some style and storage to your bathroom? Floating shelves might be the perfect project for you. These sleek shelves appear to float on your wall without visible supports, giving your space a modern, clean look. They're not just about looks; floating shelves provide additional storage for towels, toiletries, and decorations. Plus, making them yourself can be a satisfying and cost-effective home improvement. Whether you're an experienced DIYer or just starting, creating floating shelves is a manageable project that can make a big impact. Let's dive in and transform your bathroom with some easy-to-make floating shelves.
Preparation Steps
Gather Materials: Get wood planks, brackets, screws, wall anchors, a level, a drill, a stud finder, sandpaper, and paint or stain.
Measure and Mark: Measure the wall space where shelves will go. Mark the spots for brackets, ensuring they are level.
Find Studs: Use a stud finder to locate wall studs. Mark these spots; they provide the best support for heavy items.
Safety Gear: Wear safety goggles and gloves to protect eyes and hands while drilling and handling wood.
Prepare Wood: Sand the wood planks to smooth any rough edges. Paint or stain them and let them dry completely.
Drill Pilot Holes: Drill small pilot holes where the brackets will be attached. This helps prevent wood from splitting.
Install Brackets: Attach brackets to the wall using screws and wall anchors. Make sure they are level and securely fastened.
Mount Shelves: Place the wood planks on the brackets. Secure them with screws if needed to ensure they don’t move.
Clean Workspace: Clear away any sawdust or debris to keep the area safe and tidy.
Materials and Tools Checklist
Materials:
- Wood Boards: These will form the shelves. Choose a sturdy type like pine or oak.
- Brackets: Metal brackets will support the shelves. Make sure they are strong enough to hold the weight.
- Screws: Used to attach the brackets to the wall and the shelves to the brackets.
- Wall Anchors: Provide extra support for the screws, especially in drywall.
- Sandpaper: Smooths the edges and surfaces of the wood boards.
- Wood Stain or Paint: Adds color and protects the wood from moisture.
- Clear Sealant: Protects the wood from water damage, especially in a bathroom.
Tools:
- Drill: Makes holes for the screws and wall anchors.
- Screwdriver: Tightens the screws into the wall and shelves.
- Level: Ensures the shelves are straight.
- Measuring Tape: Measures the space and the wood boards accurately.
- Pencil: Marks where to drill holes and place brackets.
- Paintbrush or Rag: Applies the wood stain or paint.
- Saw: Cuts the wood boards to the desired length.
Required Skills and Time Commitment
Skill Level: Intermediate
Time Required: 3-4 hours
Steps:
- Measure and Mark - 30 minutes
- Cut Wood - 45 minutes
- Sand and Stain - 1 hour
- Install Brackets - 30 minutes
- Mount Shelves - 30 minutes
Detailed Instructions
Gather Materials:
- Wooden boards (cut to desired shelf size)
- Wall brackets
- Screws
- Wall anchors
- Level
- Drill
- Screwdriver
- Measuring tape
- Pencil
Measure and Mark:
- Use the measuring tape to determine where you want the shelves.
- Mark the spots with a pencil.
Install Brackets:
- Hold the bracket against the wall at the marked spot.
- Use the level to ensure it’s straight.
- Mark the screw holes with a pencil.
- Drill holes at the marked spots.
- Insert wall anchors into the holes.
- Attach the brackets to the wall using screws and a screwdriver.
Prepare Shelves:
- Sand the wooden boards to smooth any rough edges.
- Optionally, paint or stain the wood for a finished look. Let it dry completely.
Attach Shelves:
- Place the wooden boards on top of the installed brackets.
- Secure the boards to the brackets using screws.
Check Stability:
- Ensure the shelves are level and securely attached.
- Adjust if necessary.
Organize Items:
- Place bathroom essentials or decorations on the shelves.
Helpful Tips and Tricks
Measure twice, cut once. Accurate measurements prevent wasted materials and ensure shelves fit perfectly.
Use a stud finder to locate wall studs. Anchoring shelves to studs provides better support, especially for heavier items.
Pre-drill holes before screwing in brackets or supports. This prevents wood from splitting and makes installation smoother.
Level your shelves using a spirit level. Crooked shelves can look unprofessional and cause items to slide off.
Sand and finish the wood before installation. This gives a polished look and protects against moisture damage.
Common mistakes to avoid:
Skipping the stud finder can lead to weak shelves that might fall. Drywall alone won't support much weight.
Not leveling the shelves can result in a lopsided appearance and unstable storage.
Using the wrong screws or anchors can cause shelves to come loose. Make sure they are appropriate for the wall type and weight load.
Alternatives for materials or methods:
Instead of wood, consider using metal or glass for a modern look. Metal brackets can add industrial flair, while glass offers a sleek, minimalist style.
Floating shelf kits are available if you prefer not to build from scratch. These kits often include all necessary hardware and instructions.
Command strips or adhesive mounts can work for lightweight shelves, avoiding the need for drilling altogether.
Budgeting for Your Project
Wood: $30-$50 for three 2x10 boards, each 8 feet long.
Brackets: $20-$30 for a set of heavy-duty floating shelf brackets.
Screws: $5 for a box of wood screws.
Wall Anchors: $5 for a pack of wall anchors.
Sandpaper: $5 for a pack of assorted grits.
Stain or Paint: $10-$20 for a small can.
Brushes or Rags: $5 for a set.
Level: $10 if you don't already have one.
Drill: $40-$60 if you need to buy one.
Measuring Tape: $5.
Total Cost: $135-$195.
Budget-Friendly Alternatives:
Wood: Use reclaimed wood or pallets, often free or very cheap.
Brackets: Make your own with scrap metal or use cheaper L-brackets.
Stain or Paint: Use leftover paint or stain from other projects.
Drill: Borrow from a friend or rent from a hardware store.
Creative Customization Ideas
Materials: Instead of traditional wood, try reclaimed wood for a rustic look or plywood for a budget-friendly option. For a sleek, modern style, use acrylic or glass.
Colors: Paint the shelves in bold colors like navy blue or emerald green for a statement piece. For a more subtle look, use neutral tones like white, beige, or gray.
Styles: Add metal brackets for an industrial vibe. Use rope to hang the shelves for a nautical feel. For a minimalist approach, opt for hidden brackets to make the shelves appear to float seamlessly.
Finishes: Stain the wood for a natural finish or use a high-gloss paint for a polished look. For a vintage touch, try a distressed finish.
Shapes: Instead of standard rectangular shelves, experiment with hexagonal or triangular shapes.
Additional Features: Incorporate LED strip lights underneath for a modern touch. Add hooks or small baskets to the bottom of the shelves for extra storage.
Eco-Friendly Tips
Reclaimed wood makes excellent floating shelves. Look for old pallets, barn wood, or even discarded furniture. Sand and stain them for a fresh look. Bamboo is another eco-friendly option. It grows quickly, making it a sustainable choice. Recycled metal brackets can support the shelves. Check local scrap yards or online marketplaces for used brackets. Eco-friendly paint or stain can finish the shelves. Look for low-VOC or natural options. Upcycled glass jars can serve as storage on the shelves. Clean and decorate them for a personalized touch. Natural fiber baskets can also add storage while keeping the look sustainable.
Your Bathroom's New Look
You've got the know-how to create stunning floating shelves for your bathroom. With just a few tools and some materials, you can transform your space. Remember to measure twice, cut once. Secure those brackets firmly to avoid any mishaps. Sanding and staining add that professional touch, making your shelves not only functional but also stylish.
Don't forget, the right placement can make a big difference. Think about what you'll store and how often you'll need access. Whether it's towels, toiletries, or decor, your new shelves will keep things organized and within reach.
So, grab your tools, get to work, and enjoy the satisfaction of a job well done. Your bathroom will thank you for the upgrade, and you'll have a handy new skill under your belt. Happy building!
How do I install floating bathroom shelves?
First, find the studs in your wall using a stud finder. Mark the spots where you'll drill. Then, drill pilot holes into the studs. Attach the brackets to the wall using screws. Finally, slide the shelf onto the brackets and secure it.
What tools will I need?
You'll need a stud finder, drill, screws, level, measuring tape, pencil, and brackets. A screwdriver and a saw might come in handy too.
Can I install floating shelves on tile?
Yes, but it's trickier. Use a masonry bit to drill through the tile. Be careful not to crack it. Once through, switch to a regular bit for the wall behind.
How much weight can floating shelves hold?
It depends on the brackets and how well they're anchored. Generally, they can hold between 30-50 pounds. Always check the bracket's weight limit.
What materials are best for bathroom shelves?
Wood, metal, and glass are popular choices. Wood adds warmth, metal is sturdy, and glass looks sleek. Make sure the material is moisture-resistant.
How do I make sure the shelves are level?
Use a level when marking where to drill. Double-check after attaching the brackets. Adjust if needed before securing the shelf.
Can I paint or stain the shelves?
Absolutely! Paint or stain them to match your bathroom decor. Just make sure to use a finish that's water-resistant to prevent damage.